
.svg)
Classroom Storage Ideas: The Complete Teacher’s Guide to Organizing, Storing, and Reclaiming Space
by 10 Federal Storage
Published on August 7, 2026
Every teacher knows the feeling. It’s the second week of August, you’ve got four laundry baskets of materials in your trunk, a rolling cart wedged in the back seat, and a classroom with exactly one cabinet, two bookshelves, and a closet that already belongs to somebody else’s leftover science kits. You have more stuff than space, and no budget line to fix it.
This isn’t a decorating problem. It’s a logistics problem, and it’s expensive. Depending on which survey you read, the average American teacher spends somewhere between roughly $450 and $900 of their own money on classroom materials in a single school year, and a large share of that goes toward bins, carts, shelving, and organizing supplies that get bought twice because the first version didn’t fit or didn’t last. Nearly every teacher surveyed reports that their school-provided budget doesn’t cover what they need.
So this guide treats classroom storage the way it deserves to be treated: as a system you design once and maintain, not a Pinterest board you chase. It covers the audit you should run before spending a dollar, the fire code rules that quietly invalidate half the ideas circulating online, zone-by-zone storage strategies, grade-level and special-subject solutions, budget and upcycled options, the end-of-year packout protocol, and what to do when the honest answer is that your classroom simply cannot hold everything you own.
What This Guide Covers
- Why Classroom Storage Is Harder Than It Looks
- Audit Your Classroom Before You Buy a Single Bin
- Fire Code Rules That Override Every Classroom Storage Idea
- The Five-Zone Classroom Storage Framework
- Vertical Classroom Storage Ideas That Free Up Floor Space
- Small Classroom Storage Ideas When You Have No Closet
- Student Materials Storage: Cubbies, Crates, Chair Pockets, and Desks
- Classroom Library Organization and Book Storage Ideas
- Paper Management Systems That Stop the Pile
- Storing Classroom Technology: Devices, Chargers, and Headphones
- Classroom Storage Ideas by Grade Level
- Storage Solutions for Special-Subject and Traveling Teachers
- Budget and Upcycled Classroom Storage Ideas Under $25
- Labeling Systems That Survive an Entire School Year
- What to Keep, Donate, and Throw Away
- The End-of-Year Classroom Packing Protocol
- When Your Classroom Runs Out of Room: Off-Site Storage for Teachers
- What Size Storage Unit Do Teachers Actually Need?
- What Not to Store in a Storage Unit
- The Back-to-School Classroom Reset
- Frequently Asked Questions About Classroom Storage
Why Classroom Storage Is Harder Than It Looks
Most home organization advice assumes three things that are false in a classroom: that you own the space, that you control who touches your things, and that the volume of stuff is roughly stable. None of those hold.
You don’t own the walls. You can’t drill into cinder block without a facilities work order in most districts. Adhesive strips fail on textured block and painted concrete. Anything you mount may need to come down for summer waxing, and anything you leave up gets inspected.
Twenty-five to thirty-five people use your storage every day. A system that only you understand fails by October. If a seven-year-old can’t return an item to the right place without asking, the system is broken, not the child.
The volume swings wildly. A classroom is nearly empty in July, packed by September, buried under seasonal projects in December, and cleared out again in June. Storage designed for the average day fails at the peaks, and the peaks are when you need it most.
Much of what you store isn’t used this year. Curriculum you might return to. Units you teach in one quarter. Holiday materials. Manipulatives for a grade level you may or may not be assigned next fall. This is the category that eats classrooms alive, and it’s the category that most often belongs somewhere other than your room.
Recognizing which of those four pressures you’re actually facing tells you which sections of this guide matter most. A teacher drowning in daily-use materials needs a better zone system. A teacher drowning in nine years of accumulated curriculum needs a different answer entirely.
Audit Your Classroom Before You Buy a Single Bin
The most common classroom organizing mistake is buying containers first. Bins bought before an audit almost always end up the wrong size, the wrong quantity, or the wrong shape for the shelf they have to sit on. Do this instead. It takes about two hours and saves considerably more than that in wasted spending.
Step 1: Measure everything that holds things
Write down the interior dimensions of every shelf, cabinet, cubby, and closet in the room. You want three numbers for each: width, depth, and clear height between shelves. Keep this list on your phone. It is the single most useful piece of information you can carry into a store or a checkout cart, and it’s the reason most teachers stop buying bins that don’t fit.
Standard classroom shelving usually gives you somewhere in the range of 11 to 13 inches of depth on open bookcases and 15 to 18 inches inside cabinets, but this varies enormously by district and by the decade the furniture was purchased. Measure. Don’t assume.
Step 2: Sort into four piles, not three
The familiar keep / donate / toss framework misses the category that matters most for teachers. Use four:
- Daily and weekly. Anything you or your students touch at least once a week. This gets the most accessible real estate in the room, at student eye level or your arm level.
- Seasonal or unit-based. Materials for a specific unit, quarter, holiday, or testing window. These belong in the room but in the least accessible spots, high shelves, back of cabinets, under counters.
- Someday or archive. Curriculum from a grade you no longer teach, duplicate class sets, professional development binders, materials you’re keeping because you might rotate back. This is the pile that should not live in your classroom, and Section 17 addresses where it should go instead.
- Gone. Broken, dried out, incomplete, outdated, or simply not yours anymore.
Step 3: Apply the two-year test to the “someday” pile
For anything in the archive pile, ask a single question: have I used this in the last two school years? If no, it goes to donate, gone, or off-site, not back on the shelf. The two-year window matters because it covers a full curriculum cycle and one grade-level reassignment, which is long enough to be fair to yourself and short enough to be honest.
Step 4: Count before you buy
Once you know what’s staying, count how many containers each category actually needs and match them to the measurements from Step 1. Buy that number. The temptation to buy extras “just in case” is exactly how classrooms fill back up.
One caution on shopping: if you’re buying a set of bins you’ll want to expand later, choose a line that’s been on the market for several years and is carried in-store, not a seasonal color that will be discontinued by spring. Nothing breaks a labeling system faster than being unable to buy three more of the same bin in March.
Fire Code Rules That Override Every Classroom Storage Idea
This is the section almost no classroom organization article includes, and it’s the one that determines whether your work survives the first fire marshal walkthrough. Schools are inspected. Teachers get written up. Displays come down mid-year, sometimes the week after they went up.
The rules below reflect common baselines drawn from the International Fire Code and NFPA 101, which most states adopt in some form. Your district’s interpretation is what actually governs. Adoption year, state amendments, and your local authority having jurisdiction all shift the specifics, and a rule that’s enforced strictly in one district is waved through in the next county. Treat this as the questions to ask, not the final answer, then confirm with your building administrator or district safety officer before you commit to a layout.
Clearance below the ceiling
Stored materials generally cannot be stacked tight to the ceiling. The widely used baselines are 18 inches of clearance below sprinkler deflectors in a sprinklered building, and 24 inches below the ceiling in a building without sprinklers. The reason is functional rather than bureaucratic: sprinkler heads need unobstructed space for the spray pattern to form and spread, and stacked material in that zone can prevent the system from reaching a fire at all.
What this means practically: the top shelf of a tall cabinet may be off-limits for storage even though it physically exists. Measure from the sprinkler deflector down, not from the ceiling tile, and mark the line with a small piece of tape on the wall so you and any substitute can see it.
Wall coverage limits
Combustible display materials, student artwork, anchor charts, paper decorations, posters, are typically capped as a percentage of wall area. Common thresholds are 20 percent of wall area in a building without sprinklers and up to 50 percent in a fully sprinklered building, though some jurisdictions apply a stricter blanket limit. Door and window openings usually count toward the total wall area in the calculation.
This is worth knowing before you plan a wall-mounted storage system, because pocket charts, hanging organizers, and fabric wall pouches may be counted as combustible material depending on how your inspector reads it.
Exits, doors, and paths
- Exit doors typically cannot have paper, teaching materials, or decorations attached to either side.
- Glass panels in classroom doors generally must remain unobstructed except during an active lockdown or drill.
- Combustible displays are often prohibited within a set distance of a required exit door, five feet is a common figure.
- Exit paths must stay clear. A rolling cart parked in the egress path is one of the most frequently cited classroom violations, and it’s the easiest to fix.
- Larger structures, reading tents, cardboard “caves,” decorated tunnels, usually face stricter distance requirements and material restrictions than flat displays.
What you cannot hang things from
Nothing should be attached to or suspended from sprinkler heads, sprinkler piping, light fixtures, smoke detectors, fire alarm strobes, or overhead conduit. This rules out a surprising number of popular ideas: hanging baskets tied to pipes, streamers run corner to corner, and clotheslines strung across the room to display work. Spanning decorations like paper chains and streamers are commonly prohibited outright.
Ceiling-grid clips designed for the purpose are the compliant alternative for lightweight items, but check your building’s policy first, some districts prohibit anything suspended from the grid regardless of hardware.
Clearance around equipment
Keep roughly three feet of clear working space in front of electrical panels and sprinkler control valves. Fire extinguishers and pull stations must remain visible and unobstructed. It is remarkably easy to park a bookshelf in front of a panel and never notice.
Other common restrictions
- Space heaters are typically prohibited in classrooms entirely.
- Extension cords and daisy-chained power strips are frequently cited, relevant when you’re building a device charging station.
- Loosely hanging fabric such as draperies and curtains often requires flame-resistance certification under NFPA 701.
- Storage on top of cabinets is frequently limited or prohibited, even below the ceiling clearance line.
The practical takeaway: design your storage system vertically along the walls and inside furniture, not up into the ceiling zone or across the room. The ideas in the following sections are written with these constraints in mind.
The Five-Zone Classroom Storage Framework
Rather than organizing by object type, all the paper here, all the art supplies there, organize by who needs the item and how often. This is the structural difference between a classroom that stays organized and one that degrades by Thanksgiving.
Zone 1: Student self-serve
Everything students are allowed to get without asking. Pencils, paper, glue, scissors, tissues, hand sanitizer, sharpeners, library books, center materials. This zone must be at student height, visually obvious, and reachable without crossing high-traffic paths.
Design rule: if students have to interrupt instruction to access it, it’s in the wrong zone. The whole point of Zone 1 is that it removes interruptions.
Zone 2: Teacher daily
Materials you reach for during instruction, dry erase markers, timer, document camera accessories, sticky notes, current lesson materials, your clipboard. This lives within arm’s reach of wherever you teach from, which for most teachers is not the desk. Put it where you actually stand.
Zone 3: Weekly rotation
Center materials, small group sets, manipulatives for the current unit, guided reading books at current levels. These get swapped every week or two. Rolling carts and stackable drawer units are ideal here because the storage moves rather than the materials.
Zone 4: In-room deep storage
Materials you’ll definitely need this year but not this month. Seasonal decor, testing materials, unit kits for later quarters, backup supplies. High shelves, upper cabinets, under counters, back of closet. Accessibility genuinely doesn’t matter here, you’ll get it out four times a year.
Zone 5: Off-site
Everything that survived the two-year test but doesn’t belong in a room you share with thirty people. Multi-year curriculum archives, class sets you rotate between years, personal teaching library, materials for a grade level you might return to, seasonal decor volumes too large for the closet, and the entire contents of your room over summer if your building empties classrooms for cleaning.
Most teachers have a Zone 5 problem and no Zone 5. That’s what pushes materials into a garage, a spare bedroom, or a car trunk. Section 17 covers the alternative.
Vertical Classroom Storage Ideas That Free Up Floor Space
Floor space is the scarcest resource in a classroom because it competes directly with seating, traffic flow, and required egress paths. Vertical storage is how you win space back without losing room to move.
Over-the-door organizers
The clear-pocket shoe organizer remains the highest-value item in classroom storage, and it earns that reputation. Hung on a closet door or cabinet door, it turns dead vertical space into 24 labeled compartments. Common uses: individual student headphones, calculators, glue sticks, dry erase markers, small manipulative sets, incentive items, sorted flashcards.
Two notes. First, use over-the-door hooks rather than nails so the organizer comes off cleanly in June. Second, do not hang one on a required exit door, see Section 3. An interior closet door is fine; the door students exit through is not.
Pegboard panels
A pegboard mounted on a wall or the side of a cabinet gives you reconfigurable hooks, small shelves, and cup holders in a footprint of essentially zero depth. This is particularly strong for art rooms, maker spaces, and anywhere the storage needs change between units. If drilling is off-limits, some teachers mount a pegboard panel to the back of a bookshelf or free-standing cabinet instead, which keeps it entirely off district walls.
Wall-mounted file and mail systems
Vertical file pockets, stacked wall pockets, and multi-slot mail sorters get paper off horizontal surfaces, which is where paper multiplies. Mount them near the door for turn-in and pickup traffic rather than near your desk.
Magnetic surfaces
Whiteboards, filing cabinets, and the metal legs and frames of classroom furniture are all mounting surfaces you already have. Magnetic hooks, magnetic pockets, magnetic cups, and magnetic bins add storage without touching a wall or needing permission. Turning a filing cabinet sideways and using the broad side as a magnetic display and storage surface is a classic move for a reason.
The tops of things
Bookcases, cabinets, and cubby units all have unused top surfaces, but this is exactly where the ceiling clearance rule bites, and where some districts prohibit storage outright. If storage on top is permitted in your building, use closed containers rather than open piles, keep the stack well under the clearance line, and keep it visually tidy, because open clutter on top of cabinets is what draws an inspector’s attention in the first place.
Behind-the-door and side-of-furniture space
The side panel of a bookcase, the back of a cabinet that faces the room, the narrow gap between a cabinet and the wall, these are free real estate. Adhesive hooks, thin wall pockets, or a narrow rolling cart designed to slide into gaps all convert them.
Small Classroom Storage Ideas When You Have No Closet
Portables, converted spaces, shared rooms, and older buildings frequently give teachers no built-in storage at all. The strategy in that situation is different: you have to make furniture do double duty and make storage mobile.
Make the furniture store things
- Storage ottomans and cube seats in a reading corner hold materials inside and seat students on top.
- Benches with under-seat cubbies along a wall replace both seating and a shelf unit.
- A teacher desk with a rolling drawer unit underneath beats a desk with fixed drawers, because the unit can be pulled out and repositioned.
- Tables with under-table bins clipped or hung from the frame keep group materials at the group.
Go mobile
A three-tier rolling cart is the single most flexible piece of storage furniture in a small classroom because it stores materials where they’re used and then moves. One cart per instructional purpose, a small group cart, an art and supplies cart, a technology cart, is more useful than one large stationary unit, and carts can be parked against a wall or in a closet when not in use. Just make sure the parking spot isn’t in an exit path.
Use the perimeter, not the middle
Every storage item placed in the middle of a room costs you twice: once in floor space and once in traffic flow. Push storage to the walls and keep the interior for seating and movement. A narrow, tall shelf against the wall holds more than a wide, short one occupying the same floor area.
Window walls
Windows eat wall space you’d otherwise use for storage. Low shelving beneath the window line recovers some of it, and the window sill itself, if deep enough and not blocking egress windows, can hold shallow bins or a small plant and supply row. Never block a window designated as an emergency egress point.
Shared and floating classrooms
If you share a room, negotiate zones explicitly and in writing rather than by convention. A rolling cabinet that locks, plus a single agreed-upon shelf, is more workable than an informal split that erodes. If you have no assigned room at all, skip to Section 12 for the traveling teacher setup.
Student Materials Storage: Cubbies, Crates, Chair Pockets, and Desks
Student belongings generate more daily friction than any other category, because thirty people access them simultaneously at predictable pinch points, arrival, dismissal, transitions. Good design here buys back minutes every single day.
Cubbies
Individual cubbies remain the standard for elementary because they give each student a defined space and teach them to maintain it. Two details separate cubbies that work from cubbies that don’t: name labels placed at the child’s eye level rather than the adult’s, and a hard capacity limit made visible. If a backpack, a lunchbox, and a folder are what fits, say so, and periodically clear anything past that.
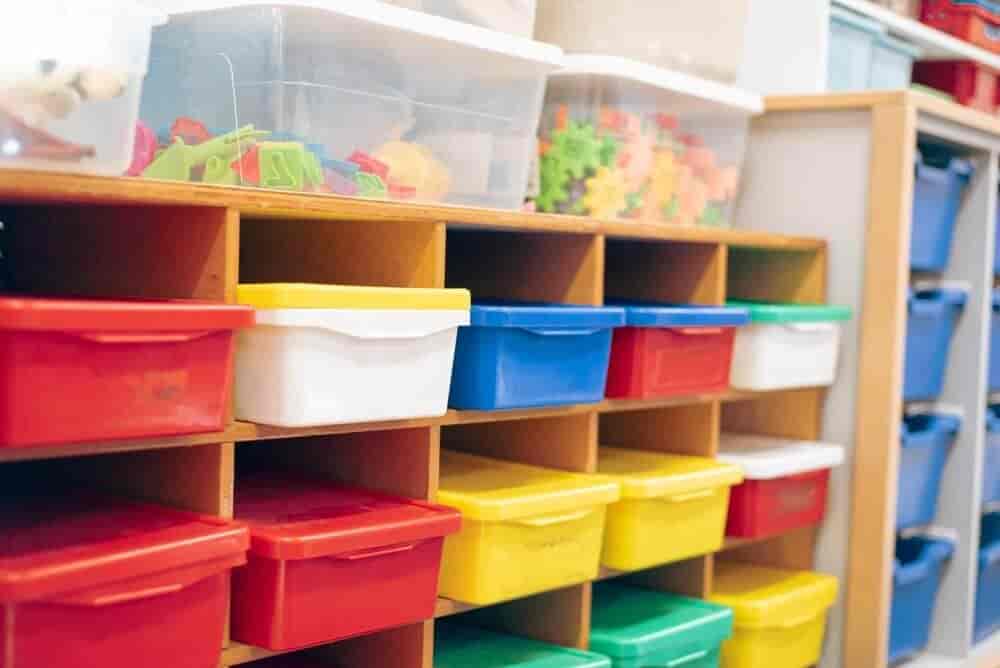
If you don’t have built-in cubbies, stacked plastic crates strapped together, a cube shelving unit with fabric bins, or a row of labeled hooks with a bin below each one all serve the same function.
Student crates and book boxes
A milk-crate-style bin per student holds notebooks, workbooks, folders, and a pencil pouch, and it can be carried to wherever the student is working. This is especially strong in flexible-seating classrooms where students don’t have an assigned desk. Store the crates on open shelving in a numbered sequence so a missing one is instantly visible.
Chair pockets
Fabric chair pockets slip over the back of a chair and hold folders, whiteboards, and books. They’re cheap, they use space that would otherwise be empty, and they keep desks clear. The trade-off is that they can sag and tear over a year of hard use, and they may count toward combustible material limits, worth confirming if your room is already display-heavy.
Desk interiors
Open desk cavities descend into chaos without internal structure. A shallow supply box or a cut-down cereal box inside the desk creates compartments and dramatically improves the odds that a pencil is findable. For older students, a simple posted expectation of what belongs in the desk, and a weekly thirty-second desk check, does more than any container.
Water bottles
Water bottles cause spills, condensation rings, and desk congestion. Options that get them off the work surface: a bottle holder attached to the chair or desk leg, a designated bottle shelf near the door with numbered spots, or a repurposed container zip-tied to the desk frame that also catches drips. Numbered spots on a shelf have the added benefit of making it obvious whose bottle got left behind.
Absent-student materials
A single labeled bin or hanging file for work missed during absences prevents the most common paper-loss scenario in any classroom. One folder per day of the week, or one folder per absent student, both work. What matters is that it’s a defined place rather than a corner of your desk.
Classroom Library Organization and Book Storage Ideas
The classroom library is usually a teacher’s largest personal investment and the hardest thing to keep organized, because books get pulled by dozens of students who reshelve imperfectly at best.
Choose one organizing principle and commit
Libraries fail when they’re half sorted by genre, half by reading level, and half by series. Pick one primary system:
- By genre or topic, best for building reader identity and browsing behavior, and the most common choice in upper elementary and middle grades.
- By reading level, best for guided reading and matching students to texts, but it can flatten book choice into a leveled chore if it’s the only system visible to students.
- By series and author, best for high-circulation collections where students hunt for the next book in a sequence.
Many teachers run genre as the visible system with level indicated by a small sticker, which gets both benefits without two competing shelf systems.
Front-facing versus spine-out
Front-facing display drives circulation dramatically, students choose what they can see. It also uses far more shelf space. The workable compromise is a small front-facing feature section that rotates weekly, with the bulk of the collection stored spine-out or in bins.
Bin storage beats shelf storage for young readers
Picture books and early chapter books survive better in labeled bins than standing on shelves, because young students can flip through a bin without toppling a row. Label the bin and label the books to match, a colored dot or a matching sticker on each book’s spine tells a student exactly which bin it returns to without reading a word.
Checkout systems that don’t consume your life
Elaborate checkout systems get abandoned by October. The lowest-friction option that still works: a library card pocket per student, or a simple photo-the-book routine, or a numbered clothespin the student clips to the bin when they take something out. Choose based on how much book loss you can genuinely tolerate.
Storing the off-season library
Most teachers own more books than shelf space and rotate seasonally, holiday titles, unit-specific text sets, books for a different grade level. Books are heavy and vulnerable to humidity, so if they’re leaving the room, they need the right conditions. Boxed books stored in a hot garage or damp basement will warp, mildew, and yellow within a season or two.
Paper Management Systems That Stop the Pile
Paper is the highest-volume, lowest-value item in most classrooms, and it is almost always the visible clutter that makes an organized room look disorganized. The fix is a defined flow with a defined endpoint for every sheet.
The four-tray inbound system
Set up four labeled trays or bins and route every incoming paper into exactly one:
- To grade, student work awaiting feedback.
- To file, work that goes into portfolios or student folders.
- To return, graded work heading back to students.
- To copy, masters that need duplicating.
The value isn’t the trays. It’s that no paper is allowed to land anywhere else. A single default surface, usually the teacher desk, is what creates the pile.
Turn-in stations by class or subject
A labeled slot per class period, or per subject, or per table group, means you never sort a mixed stack. Position it near the door so turn-in happens on the way out rather than as a class-wide interruption.
Hanging file boxes for unit masters
A portable file box with hanging folders, one per unit or per week, holds masters and handouts in teaching sequence. When the unit is over, the whole folder moves into deep storage as a single object. This is far more durable than a filing cabinet drawer where papers migrate.
Digitize the archive
The single biggest reduction in classroom paper volume comes from scanning masters and keeping the digital file rather than the physical copy. A phone scanning app and a consistent folder naming convention replaces multiple filing cabinet drawers. Keep physical copies only where you genuinely need the original, laminated cards, manipulative sets, anything you can’t reprint.
Student work you’re keeping
Portfolio work, exemplars for future years, and sentimental keepsakes need a defined container with a defined size limit, one file box, one accordion folder, one bin. When it’s full, something comes out before something goes in. Without a cap, this category grows without limit and follows you from room to room for a decade.
Storing Classroom Technology: Devices, Chargers, and Headphones
Classroom technology creates a storage problem that didn’t exist a generation ago: dozens of nearly identical items that need to be charged, distributed, tracked, and returned intact.
Number everything and match the number to a slot
Every device, charger, and headphone set gets a number, and every number gets a physical home with the same number on it. This one practice does more for device management than any cart or cabinet, because a missing item is visible at a glance rather than discovered at inventory time in May.
Headphones
Headphones tangle, break, and disappear faster than any other classroom item. Options, roughly in order of durability:
- A numbered hook per set on a pegboard or a strip of hooks, fastest access, most visible accountability.
- A hanging shoe organizer with one set per numbered pocket, protects cords from tangling and keeps sets separated.
- Numbered zip bags or reusable pouches in a bin, cheapest, but the bags degrade over a year.
- Chair pockets, only workable with older students who reliably return them.
Charging stations
Charging is where classroom tech storage and fire safety intersect, so this deserves care. Use a single properly rated power strip or a purpose-built charging cart rather than daisy-chained strips and extension cords, which are among the most commonly cited classroom violations. Keep the station away from paper storage and fabric, keep the cords managed rather than pooled, and confirm your building’s policy on overnight charging, many districts prohibit it.
Cord management
Label both ends of every cable. Cable clips along the back edge of a shelf or the underside of a table keep cords from becoming a trip hazard in an egress path. Coil and secure unused cable with reusable ties rather than tight wraps, which shorten cable life.
Storing devices over breaks
Most districts collect devices centrally over summer, but personal classroom technology, a document camera, a personal laptop, speakers, a label maker, a laminator, often stays with the teacher. Electronics are sensitive to heat and humidity, which matters a great deal if they’re spending July in a car, a garage, or an attic. Keep original boxes if you have them, remove batteries from anything battery-powered before long-term storage, and store in a controlled environment.
Classroom Storage Ideas by Grade Level
Storage needs shift substantially as students get older, and advice written for a kindergarten room actively misleads a high school teacher.
Preschool and pre-K
Everything is about visual cues and safety. Photo labels rather than word labels, because students can’t read yet. Low, open shelving so children can independently retrieve and return materials, this is a developmental goal, not just a convenience. Closed and locked storage for anything with small parts, sharp edges, or chemicals, positioned above adult reach. Bin weight matters: a child should be able to carry the bin they’re expected to return.
Elementary
The highest storage volume of any level, because one teacher covers every subject. Cubbies for personal belongings, individual book boxes, extensive manipulative storage for math, and center rotation storage. Color-coding by subject is highly effective here, the same color for the math bin, math folder, and math shelf label creates a system a seven-year-old can run without instruction.
Middle school
The pivot point. Students still need supply access, but personal storage moves largely to lockers and backpacks. Storage priorities shift toward class-period organization: a turn-in slot per period, a materials bin per period, and a system for the four to six different groups moving through the same room each day. Communal supply stations replace individual assignments. Expect higher wear on everything.
High school
The lowest volume of student-materials storage and the highest volume of teacher-materials storage, particularly for teachers with multiple preps. The dominant need is separating and archiving instructional materials by course and unit, a file box per prep, clearly labeled, is more valuable than any student-facing system. Lab, shop, and studio courses are the exception and are covered next.
Storage Solutions for Special-Subject and Traveling Teachers
Art teachers
Art rooms have the hardest storage problem in a school: wet work that needs to dry flat, dry work that needs to be stored flat, hazardous or messy materials that need containment, and materials that dry out if stored improperly.
- Drying racks are non-negotiable for volume, a vertical rack holds dozens of pieces in the footprint of one table.
- Flat file storage or large portfolio bins keep finished work from curling. A stack of large mailing boxes cut down works if a flat file isn’t in budget.
- Store paint upside down or tightly sealed so a skin forms on the bottom rather than the pour spout, and keep it from freezing, acrylics and tempera are damaged by freeze cycles, which matters for summer and winter storage in an unconditioned space.
- Clay needs sealed, airtight storage and stable temperature or it dries and cracks.
- Follow your district’s chemical storage policy for solvents, kiln materials, and anything with a safety data sheet. These generally cannot go in a personal storage space of any kind.
Science teachers
Lab equipment storage should be organized by lab, not by object type, so setup is a single retrieval. A labeled tub per lab containing everything that lab requires cuts prep time enormously. Glassware needs padded, stable storage. Chemicals are governed entirely by district policy and safety regulations, they belong in approved cabinets and never in off-site or personal storage.
Music teachers
Instruments need controlled temperature and humidity. Wood instruments crack in dry conditions and swell in humid ones, and brass and strings are affected by both. Sheet music is paper and behaves accordingly. If instruments or music leave the building, environmental control isn’t optional.
PE and athletics
Balls go in mesh bags or ball carts so they’re visible and don’t roll. Small equipment, polyspots, beanbags, pinnies, jump ropes, goes in labeled shelf totes sorted by activity. Off-season equipment is the single largest seasonal storage category in a school and is a strong candidate for space outside the gym closet.
Special education and related services
Sensory tools, adaptive equipment, and individualized materials need to be both accessible during the school day and secure. A labeled bin per student, stored in a cabinet that locks, handles both requirements while keeping confidential materials protected.
Traveling and cart teachers
If you don’t have a room, your cart is your classroom. Build it as a fixed system rather than repacking daily:
- One cart, with the top tier reserved for the current period only.
- Everything in the cart lives in a labeled pouch or bin so nothing shifts in transit.
- A duplicate mini-kit of consumables, markers, tape, sticky notes, so you never travel back for a pencil.
- A single home base bin in a shared workroom for anything the cart can’t hold.
- Everything beyond that needs a storage location outside the building, because there is no room to grow into.
Budget and Upcycled Classroom Storage Ideas Under $25
Given what teachers already spend out of pocket, the best storage idea is frequently the one that costs nothing. These hold up in real classrooms.
From the kitchen and recycling bin
- Cereal and cracker boxes cut at an angle and covered in contact paper become magazine and folder files. Free, and replaceable when they wear out.
- Wipe containers hold yarn, ribbon, or string dispensed through the lid opening, or become desk-mounted water bottle holders.
- Glass and plastic jars hold manipulatives, buttons, counters, and small sorting materials. Mounting the lids to the underside of a shelf so jars twist on and off is a genuine space saver.
- Egg cartons and ice cube trays sort small counters, beads, and game pieces.
- Shoeboxes covered in paper become uniform-looking bins for a fraction of the price of matched sets.
From the hardware aisle
- Tension rods inside a cabinet create a second level or hold spray bottles by the trigger.
- Command-style hooks and strips mount almost anything without damaging surfaces, test adhesion on cinder block before committing, since textured block is a frequent failure point.
- Buckets and pails attached to desk legs with mounting strips hold supplies at the point of use.
- Wire shelf risers double the usable height of a deep cabinet shelf.
- Zip ties secure containers to furniture frames, bundle cords, and hold stacked crates together.
Free and low-cost sourcing
- Ask your building custodian and front office about furniture from closed or reassigned classrooms, there is usually more sitting in a district warehouse than anyone advertises.
- Post in teacher trade groups at the end of the school year, when retiring teachers are giving away entire room setups.
- Check local buy-nothing groups in late spring and August, which are the two peaks for classroom furniture giveaways.
- Ask families at the start of the year for specific items rather than general donations, a request for shoeboxes or wipe containers gets filled; a request for “storage” does not.
Where spending money is actually worth it
Three exceptions where cheap costs more: a sturdy rolling cart, because flimsy ones fail mid-year under load; a good label maker, because handwritten labels degrade; and matched, in-stock bin sets for high-use categories, because being unable to buy a matching replacement mid-year unravels the system.
Labeling Systems That Survive an Entire School Year
An unlabeled system is a system only you can use, which means it’s a system that fails whenever you’re out, whenever a volunteer helps, and whenever a student tries to be helpful.
Label the container and the contents
The critical move that most classrooms skip: put a matching mark on the items themselves, not just the bin. A colored dot, a symbol, or a number on both the bin and every item inside it means anything found on the floor has an obvious home. This is what lets a classroom actually reset itself rather than requiring you to reset it.
Use pictures and words together
Picture-plus-word labels work for pre-readers, English language learners, substitutes, and anyone in a hurry. There is no grade level where adding the picture hurts.
Make labels removable on purpose
Contents change. Permanent labels guarantee that a bin gets repurposed and mislabeled rather than relabeled. Use label holders, clear pockets, clip-on tags, or a removable adhesive so relabeling takes ten seconds. Laminating the label and attaching it with a binder clip or ring is the cheapest version of this.
Color-code by category, not by aesthetics
Color-coding earns its keep when the color means something, blue is math, green is science, red is turn-in. A palette chosen purely for looks provides no functional information and costs the same effort.
Post the map
A single laminated sheet showing where things live, mounted inside a cabinet door, is invaluable for substitutes, aides, and student helpers. It takes fifteen minutes to make and saves that back the first time you’re unexpectedly out.
What to Keep, Donate, and Throw Away
No storage system fixes having too much. The decisions below are the ones teachers consistently find hardest, so here are clear defaults.
Throw away without guilt
- Dried-out markers, glue sticks, and paint, testing them one by one takes longer than replacing them.
- Incomplete game and manipulative sets with missing critical pieces.
- Broken or wobbly organizers you’ve been meaning to fix.
- Photocopied masters you can regenerate digitally in under a minute.
- Curriculum materials for a program your district no longer uses.
- Anything visibly water damaged or mildewed, mildew spreads to whatever it’s stored near.
Donate or pass along
- Materials for a grade level you have decided you won’t return to.
- Duplicate class sets beyond what you can use.
- Books that don’t match your current students’ interests or reading range.
- Furniture and organizers that don’t fit your current room, a colleague’s room may be shaped differently.
- Anything you kept because it was expensive rather than because it’s useful. Sunk cost isn’t a storage strategy.
Keep, but store off-site
- Curriculum from a grade level you genuinely might rotate back into.
- Seasonal and holiday decor beyond what fits in your closet.
- Your personal professional library and reference collection.
- Unit kits you teach once a year that consume significant volume.
- Class sets you rotate between years rather than using annually.
- Everything, if your building requires classrooms to be fully emptied for summer cleaning.
Keep in the classroom
Only what you will use this school year. That’s the whole rule. Anything else is competing for space against materials your current students actually need.
The End-of-Year Classroom Packing Protocol
Most districts require some level of classroom clear-out for summer cleaning, floor waxing, or maintenance. Done well, the packout is also your annual reset. Done badly, it’s a wall of unlabeled boxes you’ll be excavating in August.
Start six weeks out, not the last week
Begin with materials for units you’ve already finished. Packing in waves as things become obsolete spreads the work across weeks instead of compressing it into the two most exhausting days of the year.
Sort as you pack, not as you unpack
The single highest-leverage habit in classroom storage. Every item you box in June is an item you’ve implicitly decided to keep. Run the four-pile sort from Section 2 while you’re packing so nothing goes into a box by default.
Box by destination and by unpack sequence
Label every box with three things: its contents, where it goes for the summer, and when you’ll need it back. “Math manipulatives, storage unit, unpack first” tells you everything in August. Number the boxes and keep a matching list on your phone.
Pack the boxes you’ll want first in August last, so they’re at the front of whatever space they’re in.
Protect the things summer damages
- Books and paper warp and mildew in humidity and yellow in heat. Box them fully and keep them off concrete floors, which transmit moisture.
- Laminated materials can curl, and adhered lamination can separate in high heat.
- Anything adhesive, sticky notes, tape, labels, magnetic sheets, degrades badly in heat and often can’t be salvaged.
- Electronics are damaged by both heat and humidity. Remove batteries first, since leaking alkaline batteries are one of the most common causes of ruined classroom equipment over a summer.
- Art supplies such as paint, glue, and clay are damaged by freezing and by heat, both ends of the range matter.
- Photos and student keepsakes fade and stick together in heat and humidity. If you’re storing personal photos alongside classroom materials, they need the same protection as everything else fragile.
Use uniform boxes
Mismatched boxes waste space and stack poorly. A consistent box size stacks square, uses vertical space fully, and makes an inventory list meaningful. Heavy items, books above all, go in small boxes, because a large box of books becomes unliftable and blows out at the bottom.
Photograph your room before you tear it down
Ten photos of your finished room layout in May will save you hours of decision-making in August. This is the tip teachers most consistently say they wish they’d started earlier.
When Your Classroom Runs Out of Room: Off-Site Storage for Teachers
Everything above assumes the materials can fit somewhere. For a lot of teachers, they can’t, and the overflow ends up in a garage, a spare bedroom, a parent’s basement, or a car that becomes a rolling supply closet. That works until the materials get damaged, or until you need the garage back.
A small storage unit gives Zone 5 an actual address. The teachers who use one are typically solving one of five specific problems:
- The summer clear-out. Your building empties classrooms for waxing and maintenance, and there’s nowhere on campus to put your things for ten weeks.
- The multi-year archive. You’ve taught long enough to have curriculum from three grade levels, and you’re not ready to give any of it away.
- The seasonal cycle. Holiday decor, unit kits, and off-season equipment that’s used a few weeks a year and consumes space the other forty.
- The traveling teacher. You don’t have a room, so you have no baseline storage at all.
- The transition. You’re changing schools, changing grade levels, moving districts, or retiring, and you need somewhere to stage materials during the shuffle.
What to look for in a facility as a teacher
Teacher storage needs differ from household storage needs in a few concrete ways, and they should drive your choice:
- Month-to-month terms. Your need is often seasonal. A ten-week summer rental shouldn’t require an annual commitment.
- Climate control. This is the one that matters most. Books, paper, laminated materials, photos, adhesives, art supplies, and electronics, the core of what teachers store, are exactly the categories damaged by heat swings and humidity. An unconditioned unit in July is functionally the same as a garage.
- Convenient access. Between your home and your school is the ideal location, because you’ll be stopping by on the way in or out rather than making a dedicated trip.
- Access hours that match a teacher’s schedule. You’re moving materials before school, after school, and on weekends, not at 11 a.m. on a Tuesday.
- Drive-up access. You’re carrying heavy boxes of books, and often carrying them alone. Being able to park at the door matters more than it sounds like it does.
- Solid security. Gated access, cameras, and good lighting, since some of what you’re storing represents years of personal investment.
At 10 Federal Storage, units are rented month to month with no long-term commitment, and our facilities use a fully digital rental and access process, you can rent online and get into your unit without waiting on office hours, which is the difference between stopping by at 4:30 on a Friday and not being able to. Browse available units near you to see what’s open at facilities in your area.
What Size Storage Unit Do Teachers Actually Need?
Most teachers dramatically overestimate what they need, then pay for space they don’t use. Classroom materials are dense and boxy, which means they store efficiently. Here’s a realistic mapping.
5x5, the teacher’s default
Roughly the size of a large closet. Holds somewhere in the range of 20 to 30 standard boxes stacked, which covers a classroom library, several years of curriculum files, seasonal decor, and a few bins of manipulatives. For a single teacher storing materials rather than furniture, this is usually enough and is the most common starting point.
5x10, materials plus a few pieces of furniture
About the size of a walk-in closet or a small bedroom’s worth of floor. This is the right call if you’re also storing a bookshelf, a rolling cart, a rug, or a reading-corner chair, or if you have an unusually large classroom library. It’s also the sensible choice if you want walking room to retrieve one box without unstacking the whole unit, which, if you’ll be accessing it during the year, is worth the small step up.
10x10, a full classroom
Roughly the footprint of a small bedroom. This is what you want if your building fully empties classrooms each summer and you’re storing furniture along with materials, or if you’re between positions and warehousing an entire room. It’s more than most teachers need for materials alone.
10x15 and larger
Generally beyond what an individual teacher needs. This range makes sense for a school, a homeschool co-op, a tutoring business, or a department pooling storage, which is worth mentioning, because splitting a larger unit across a grade-level team is often cheaper per person than everyone renting separately.
A note on sizing accuracy
The most reliable way to size a unit is to count your boxes before you rent. Standard small moving boxes are about 1.5 cubic feet each; book boxes are similar. Multiply your box count, add the footprint of any furniture, and add about 20 percent for walking room if you’ll need access during the year. If you’re genuinely between two sizes, take the smaller one and pack vertically, classroom materials stack well, and you can always upgrade.
You can filter by size on the small unit finder if you’re storing materials only, or the medium unit finder if furniture is coming with them.
What Not to Store in a Storage Unit
Some classroom materials should never go into a self storage unit, either because facility rules prohibit them, because district policy governs them, or because they’ll be ruined.
Prohibited at essentially every facility
- Hazardous and flammable materials. Lab chemicals, solvents, kiln supplies, aerosol propellants, and fuel of any kind. Science and art teachers should route these through district-approved chemical storage exclusively.
- Anything perishable. Classroom snacks, food for cooking units, and pantry supplies attract pests and can contaminate an entire unit.
- Living things. Classroom plants and any animals or animal supplies.
- Anything with a fuel tank or fuel residue.
Governed by district policy rather than facility rules
- Student records and confidential documents. IEPs, evaluations, assessment data, and anything with student identifying information is governed by federal privacy law and district retention policy. These belong in secure school storage, not a personal unit.
- District-owned technology and equipment. Check before removing anything inventoried by the district from the building. Many districts require devices to be turned in over summer.
- Secure testing materials. These have strict chain-of-custody requirements and never leave designated storage.
Technically allowed, but a bad idea without climate control
Books, photos, laminated cards, adhesives, art supplies, electronics, and anything with a battery installed. If you’re storing any of these, climate control is the difference between materials that come back in August ready to use and materials you have to replace out of pocket. Given what a classroom library alone represents, the small monthly premium is usually the cheaper option.
The Back-to-School Classroom Reset
The August setup determines whether your storage system holds all year. Two things make the difference.
Set up zones before you unpack a single box
Walk the empty room and decide where each of the five zones lives, student self-serve, teacher daily, weekly rotation, deep storage, and what stays off-site. Then unpack into those zones. Unpacking first and organizing after is how materials end up wherever there was space, which is how systems fail.
Resist bringing everything back
If a box sat unopened all summer and you can’t immediately name what’s in it, that’s useful information. Materials that stay in deep or off-site storage aren’t lost, they’re one trip away, and your room is one box lighter.
Build the maintenance habit now
The systems that survive are the ones with a scheduled reset. Five minutes at the end of each day for students to return materials to labeled homes. Fifteen minutes on Friday for you to reset the weekly rotation zone. One thirty-minute purge at each quarter break. That’s roughly two hours across an entire semester, and it’s the difference between a system that holds and one you rebuild every January.
Frequently Asked Questions About Classroom Storage
Vertical storage and mobile storage. Over-the-door organizers, wall-mounted file pockets, pegboards, and magnetic surfaces add capacity without using floor space, while rolling carts let storage move to where materials are used instead of occupying a permanent footprint. Furniture that stores things, storage ottomans, benches with cubbies, tables with under-table bins, recovers space that seating would otherwise cost you outright.
Most teachers use a combination of in-building storage for what’s allowed to stay, home storage for a modest amount, and off-site storage for the rest. If your building empties classrooms for summer cleaning, the practical options are a garage or spare room at home or a small storage unit. A climate-controlled unit is the safer choice for books, paper, laminated materials, electronics, and art supplies, all of which are damaged by summer heat and humidity in an unconditioned space.
A 5x5 unit is enough for most teachers storing materials only, roughly 20 to 30 boxes covering a classroom library, curriculum files, seasonal decor, and manipulatives. Step up to a 5x10 if you’re also storing a bookshelf, cart, rug, or chair, or if you want walking room for access during the school year. A 10x10 makes sense only if you’re storing an entire classroom’s furniture along with materials.
Common fire code baselines require 18 inches of clearance below sprinkler deflectors in a sprinklered building and 24 inches below the ceiling in a building without sprinklers. Your district’s adopted code and your local fire marshal’s interpretation govern the actual requirement, so confirm with your building administrator before planning around a specific number. The reason for the clearance is that stored material in that zone can block a sprinkler’s spray pattern.
Typical limits are 20 percent of wall area in a building without sprinklers and up to 50 percent in a fully sprinklered building, with doors and windows counted in the total wall area. Some districts apply stricter limits. Exit doors generally cannot have anything attached, and door window panels must stay unobstructed. Check your district’s specific policy, since this is one of the most frequently cited items in school fire inspections.
Choose one primary organizing principle, genre, reading level, or series, and commit to it rather than mixing systems. Store picture books and early chapter books in labeled bins rather than upright on shelves, since young students can browse a bin without toppling a row. Put a matching colored dot or sticker on each book’s spine so students can reshelve correctly without reading the label, and rotate a small front-facing display weekly to drive circulation.
Upcycled containers and free furniture. Cereal boxes become magazine files, wipe containers become desk-mounted holders, glass jars hold manipulatives, and shoeboxes covered in paper make uniform bins. For furniture, ask your custodian and front office about surplus from reassigned classrooms, post in teacher trade groups at the end of the school year, and check local buy-nothing groups in late spring and August. Spend real money on only three things: a sturdy rolling cart, a label maker, and matched bin sets for high-use categories.
Yes, and many teachers do, particularly those with multi-year curriculum archives, large seasonal collections, or no assigned classroom. Month-to-month rental means you’re not committed beyond the time you need it, and a unit located between home and school makes mid-year access practical. Just keep district-owned equipment, student records, and any hazardous lab or art chemicals out of it, those are governed by district policy or prohibited by facility rules.
For most teachers, yes. The core of what teachers store, books, paper, laminated materials, photos, adhesives, art supplies, and electronics, is precisely the category damaged by heat swings and humidity. Adhesives fail, paper warps and mildews, lamination separates, paint is ruined by freezing, and electronics degrade. Against the replacement cost of a classroom library alone, climate control is usually the cheaper decision.
Build a scheduled reset rather than relying on tidying as you go. Five minutes at the end of each day for students to return materials to labeled homes, fifteen minutes on Friday to reset your weekly rotation zone, and one thirty-minute purge at each quarter break. The second half of it is labeling: mark the items themselves to match their bins so anything found on the floor has an obvious home, which is what lets the room reset without you doing it.
Give Your Classroom Materials a Place to Live
Good classroom storage isn’t about owning nicer bins. It’s about deciding what belongs in the room, putting it where the people who use it can reach it, and finding an honest home for everything else, instead of letting it take over a garage, a spare bedroom, or the back seat of your car.
When the honest answer is that your classroom can’t hold it all, 10 Federal Storage has month-to-month units in a range of sizes, with climate-controlled options for books, paper, electronics, and art supplies, and digital access that fits around a teacher’s schedule rather than office hours.
Find a storage unit near you and reclaim the space, at school and at home.
About the Author
10 Federal Storage
Our team at 10 Federal Storage has been in the self storage industry for decades. With knowledge gained from multiple universities and in the field, we are well-prepared and excited to assist with your storage needs. When you rent a unit with us, you can feel confident that our seasoned customer service team’s help will make your transition as seamless as possible. Customer satisfaction is our number one priority, and we strive to make your experience exceptional with our automated leasing options, diverse unit sizes, and a strong commitment to sustainability.