
.svg)
Crawl Space Storage Ideas: How to Use the Space
by 10 Federal Storage
Published on July 24, 2026
A crawl space is one of the most tempting empty spaces in any house. It’s already there, it’s out of sight, and it can run the entire footprint of your home, hundreds of square feet of “free” storage sitting right under your feet. So it’s no surprise that the first thing most homeowners want to do with it is fill it with bins.
Here’s the catch, and it’s the part most articles skip: a crawl space is not a basement. It’s a cool, dark, humid gap between the soil and your floor joists, and left unprepped it will quietly ruin the wrong things, warping cardboard, feeding mold, rusting metal, and rolling out a welcome mat for mice and insects. Used the right way, though, it’s genuinely useful for a specific slice of your belongings.
This guide covers both halves of that equation: how to prep the space so it’s actually storage-worthy, exactly what belongs down there (and what never should), storage ideas broken out by the type of crawl space you have, the gear that holds up in damp conditions, real 2026 costs for moisture control and encapsulation, and the safety steps that keep the project from turning into a headache. Let’s get into it.
What’s in This Guide
- What Counts as a Crawl Space (and What Doesn’t)
- Is It Safe to Store Things in a Crawl Space?
- How to Prep Your Crawl Space for Storage
- What’s Safe to Store in a Crawl Space
- What You Should Never Store in a Crawl Space
- Crawl Space Storage Ideas by Type
- Containers, Shelving, and Gear That Actually Hold Up
- Moisture Control: Vapor Barriers, Dehumidifiers, and Encapsulation
- Is Crawl Space Encapsulation Worth It?
- Safety and Access Tips Before You Crawl In
- When to Skip the Crawl Space and Rent a Storage Unit
- Crawl Space Storage FAQ
What Counts as a Crawl Space (and What Doesn’t)
A crawl space is the shallow gap, usually 18 inches to about 4 feet tall, between the ground and the underside of your first floor. It exists so plumbing, wiring, and ductwork can run under the house and so the structure sits above the soil. It is not finished living space, and that distinction shapes everything about how you use it.
Crawl spaces come in a few flavors, and the type you have determines how much prep you’ll need before storing anything:
- Dirt-floor (unsealed): The most common and the most demanding. Bare soil constantly releases moisture vapor upward. Requires the most prep before it’s storage-ready.
- Vented: Has foundation vents meant to let outside air circulate. Older building codes favored this; in humid climates those vents can actually pull damp air in.
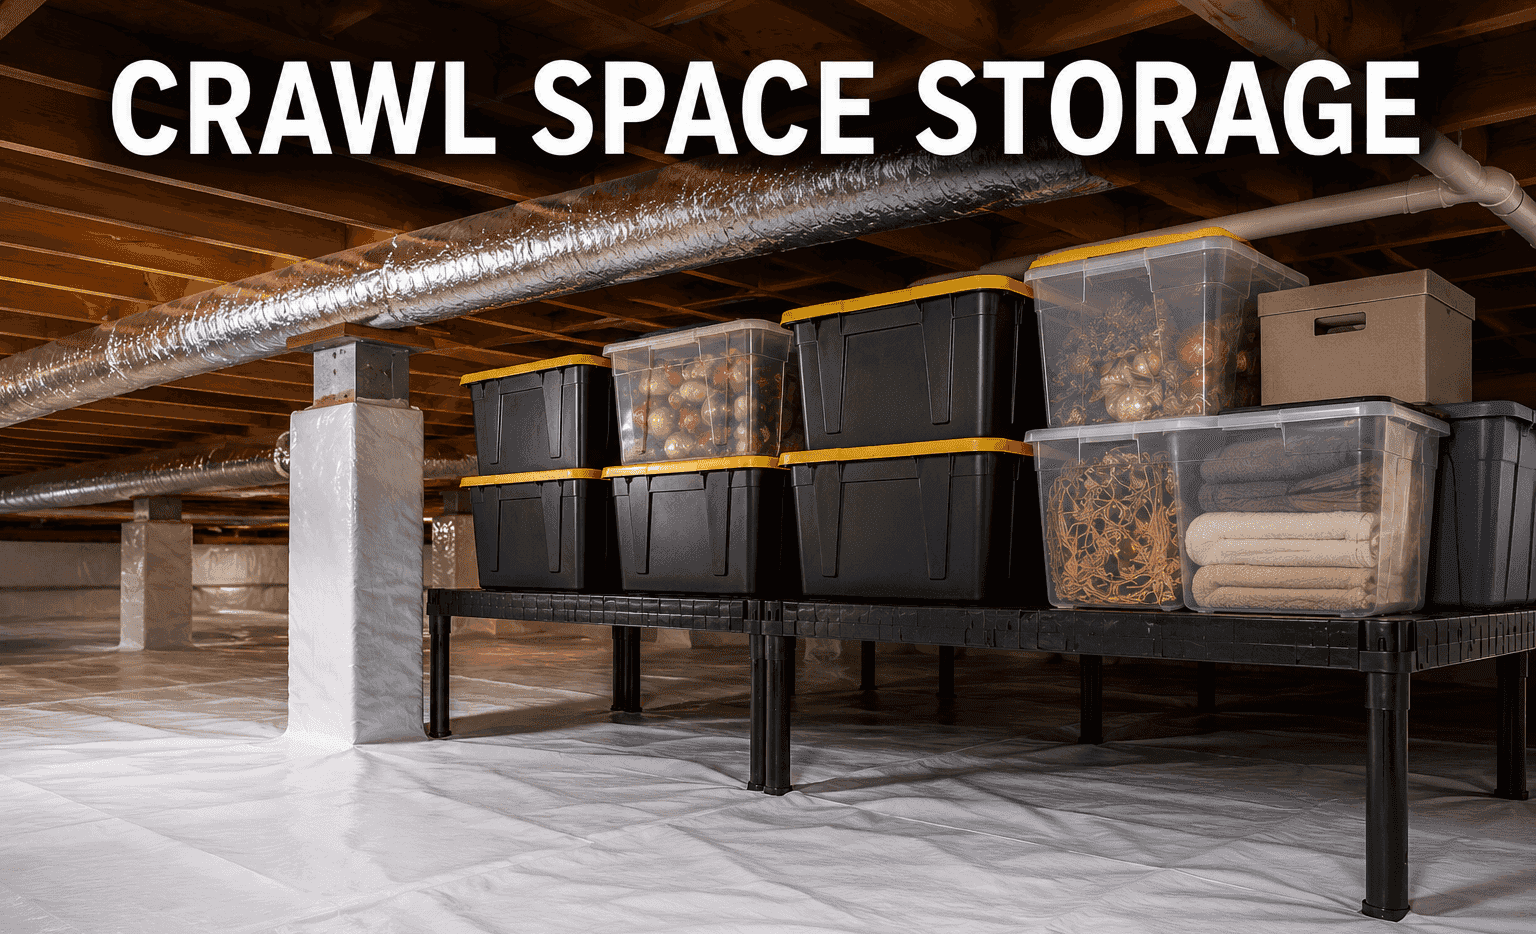
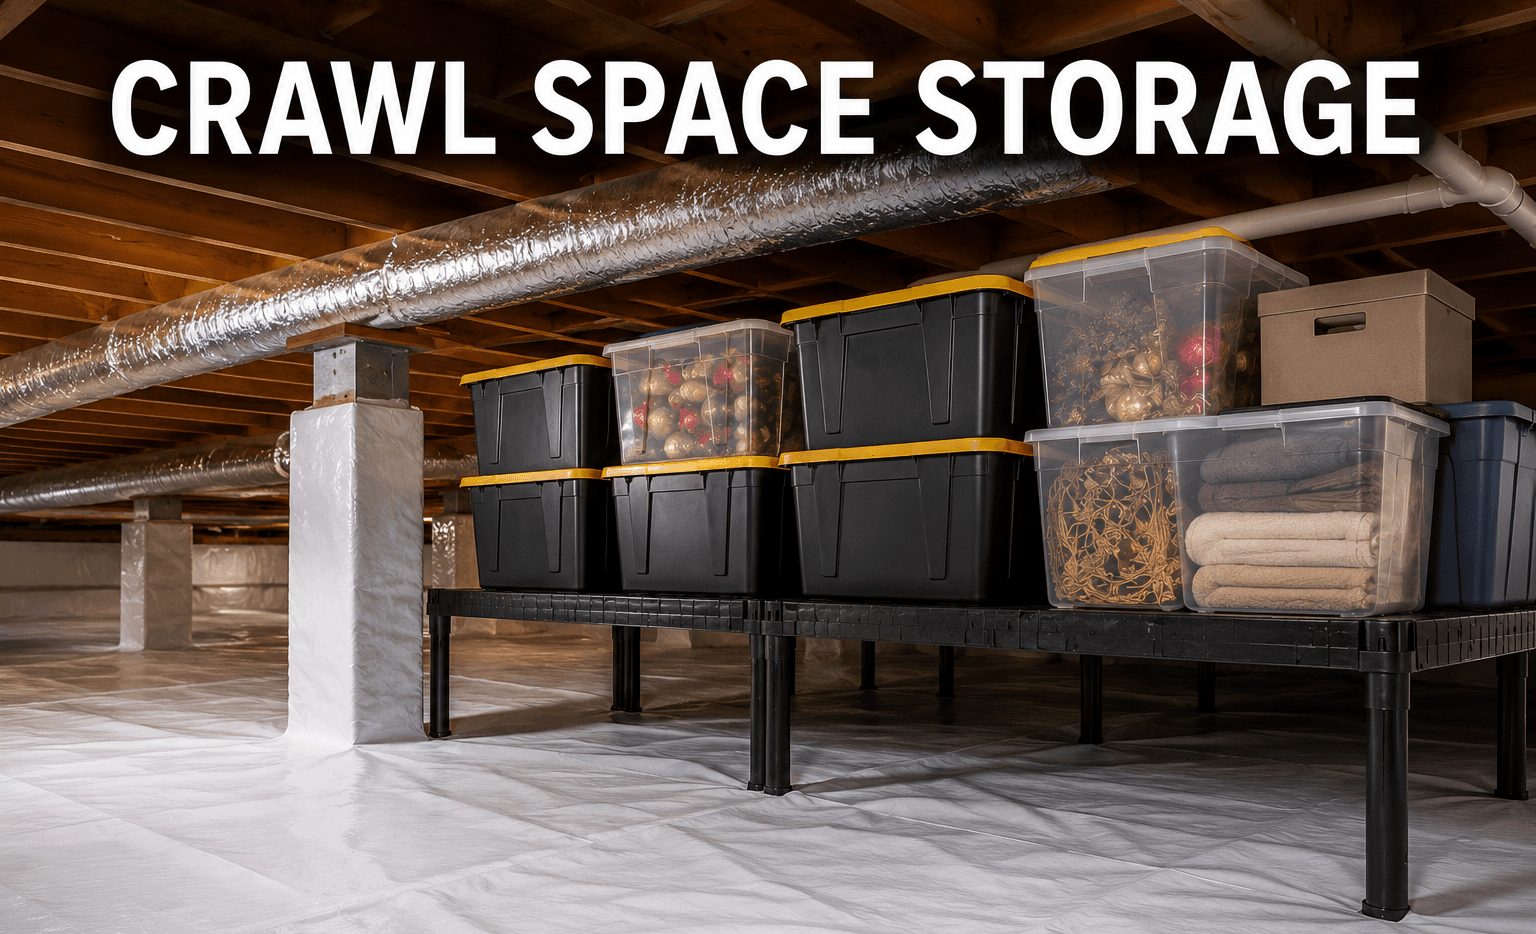
- Encapsulated (sealed): Lined floor-to-wall with a heavy vapor barrier, vents sealed, often with a dehumidifier. The gold standard for storage, dry, clean, and stable.
- Basement crawl space: A low, partially enclosed area off the edge of a full basement. Usually the easiest to work with because it shares the basement’s stability and access.
A quick note on two spaces that get lumped in with crawl spaces but really aren’t: an attic knee-wall space (the low storage pocket behind the short walls of a finished attic) and the area under a staircase. Both share the crawl space’s awkward, low-clearance geometry, so the organizing tricks carry over, but they live inside your conditioned, climate-controlled envelope, which makes them far friendlier to your belongings. We’ll cover both, but don’t confuse a dry under-stair cubby with a damp dirt-floor crawl space. They play by different rules.
Is It Safe to Store Things in a Crawl Space?
Short answer: yes, for the right items, in the right containers, after the right prep. The honest, longer answer is that an untreated crawl space is working against you in four specific ways, and understanding them is what separates smart storage from a slow disaster.
- Moisture is the number-one enemy. Soil under your home releases water vapor continuously, even in dry climates. That humidity condenses on cool surfaces, warps cardboard, and creates exactly the conditions mold needs. It’s the single biggest reason crawl space storage goes wrong.
- Temperature swings. A crawl space isn’t heated or cooled. It rides the seasons, clammy in summer, near-freezing in winter, which is punishing for anything sensitive to heat, cold, or expansion and contraction.
- Pests. Dark, quiet, and rarely disturbed, crawl spaces are prime real estate for mice, rats, insects, and termites. Cardboard and anything with a food residue is an open invitation, and rodent droppings create a genuine health hazard.
- Structure and access. Your crawl space houses plumbing shutoffs, wiring, HVAC ducts, and sometimes a sump pump. Burying that infrastructure under a wall of bins can turn a routine repair into an expensive dig-out, and blocking vents or crushing insulation can create moisture problems of its own.
None of this means “don’t store here.” It means the space needs a baseline of moisture control, everything goes in sealed containers up off the ground, and you’re selective about what earns a spot. Do those three things and a crawl space becomes a legitimately useful overflow zone. Skip them and you’re just paying storage rent in ruined belongings.
How to Prep Your Crawl Space for Storage
Prep is the part that makes everything else work. Run through these steps in order before a single bin goes down there.
- Clear it out and clean it up. Haul out construction debris, leftover lumber, fallen insulation, and any trash from previous owners. A clear floor lets you inspect the space and spot problems early.
- Inspect before you commit. Look for standing water, water stains, condensation on ducts, musty smells, sagging insulation, and any sign of pests, droppings, chewed material, or nests. If you find active water intrusion or mold, stop and fix that before you store anything.
- Lay down a vapor barrier. This is non-negotiable over a dirt floor. A heavy polyethylene sheet across the soil is the highest-impact, lowest-cost thing you can do, it delivers the majority of the moisture-control benefit on its own. (Full cost breakdown is in the moisture-control section below.)
- Address humidity. Depending on your climate, that might mean sealing foundation vents, running a crawl-space-rated dehumidifier, or both. Your target is to keep relative humidity under about 55–60 percent.
- Add light. Battery or stick-on LED puck lights, or a hardwired fixture if you have power down there, make the space safe to navigate and far more likely to actually get used and checked.
- Elevate everything. Plastic risers, pallets, cinder blocks, or low shelving keep bins off the ground so they survive a minor leak and get airflow underneath. Nothing sits directly on soil or on the vapor barrier.
- Label and map. Clear bins plus large labels turn a dark, hard-to-reach zone into something you can navigate on your belly with a headlamp. Keep the things you’ll want most near the access hatch.
- Set a reminder to inspect. Because you rarely go down there, small problems compound unseen. Check every few months for moisture, pests, and shifting, especially after heavy rain.
What’s Safe to Store in a Crawl Space
The winners are hardy, low-value, moisture-tolerant, and non-perishable, things you won’t cry over if the worst happens, packed so the worst doesn’t. In a properly prepped, moisture-controlled space, these are your best candidates:
- Holiday and seasonal decor: Artificial trees, ornaments, string lights, and wreaths, sealed in airtight bins, not their original cardboard boxes.
- Outdoor and camping gear: Tents, tarps, sleeping bags in dry sacks, coolers, folding chairs, and camp cookware. Built for the elements to begin with.
- Garden and yard tools: Hand tools, hoses, planters, and spreaders. Metal tools should get a light coat of oil to fend off rust in the humidity.
- Sports and recreation equipment: Non-electronic gear like balls, bats, helmets, and camping stoves. Keep anything with foam padding sealed to block mildew.
- Hard-sided luggage and travel cases: Suitcases and trunks that can shrug off a damp environment better than soft duffels.
- Leftover building materials: Spare tile, extra flooring planks, pipe, and hardware you’re holding for future repairs.
- Patio furniture cushions: Only if fully dry and sealed in airtight bins, fabric is a mold magnet otherwise.
The through-line: if it’s durable, replaceable, and sealed against moisture and pests, a crawl space can hold it. The second it’s sentimental, electronic, absorbent, or valuable, it belongs somewhere else, which is the next section.
What You Should Never Store in a Crawl Space
Some things simply don’t survive the combination of humidity, temperature swings, and pests, and a few are genuinely unsafe to keep down there. Keep these out, no matter how convenient the space is:
- Paper, documents, and photographs: Absorb moisture, curl, foxing, and mildew almost immediately. Photos can fuse together and are unrecoverable.
- Electronics and anything with a battery: Humidity corrodes circuitry and contacts; temperature swings kill batteries and can cause leaks. This includes cords, chargers, and power tools with lithium packs.
- Clothing, linens, and fabric: Textiles wick moisture, grow mildew, and become nesting material and a food source for pests. Even sealed, they’re a gamble.
- Wood furniture and musical instruments: Wood swells, warps, cracks, and can rot as it cycles through humidity changes. Instruments go out of tune permanently and glue joints fail.
- Leather goods: Prone to mold, cracking, and permanent staining in damp conditions.
- Food and pet supplies: The fastest way to invite rodents and insects. Even sealed pet food broadcasts a scent.
- Paint, chemicals, and cleaners: Freezing ruins paint and many liquids; heat and poor ventilation build up fumes. Flammables near a gas furnace or water heater are a real fire risk.
- Mattresses and upholstered furniture: Big absorbent sponges for humidity and prime nesting habitat.
- Artwork, collectibles, and sentimental items: Irreplaceable and highly vulnerable, the exact opposite of what a crawl space can protect.
- Wine, candles, and medications: Temperature-sensitive; candles melt and warp, wine spoils, and medications degrade.
Notice the pattern: nearly everything on this list is something you actually care about. That’s not a coincidence, it’s the whole argument for keeping your valuables and climate-sensitive belongings in a space that’s built to protect them. More on that below.
Crawl Space Storage Ideas by Type
The best setup depends on what you’re working with. Here are targeted ideas for each kind of space.
Dirt-Floor Crawl Space
The most basic and most moisture-prone type. It can absolutely be used for storage, it just demands the most respect.
- Lay a heavy-duty vapor barrier first. Cover the entire dirt floor with thick (ideally 12–20 mil) reinforced poly before anything else. This is the foundation of dirt-floor storage.
- Never set items on the ground. Use pallets, plastic risers, or cinder blocks to lift every bin several inches for airflow and flood protection.
- Go airtight, skip cardboard. Cardboard absorbs ground moisture and breaks down fast. Use sealed, moisture-resistant plastic bins only, clearly labeled.
- Keep loads light and spread out. Don’t create a single heavy stack on soft ground; distribute weight and leave a walking path.
Finished or Encapsulated Crawl Space
Sealed, insulated, and often floored, this is the crawl space at its most storage-friendly, closer to a low basement than a dirt pit.
- Add interlocking floor tiles. Over a finished floor, snap-together tiles create a clean, even, knee-friendly surface that keeps bins stable and dry.
- Install modular shelving. Humidity-resistant metal or heavy-duty plastic shelving with adjustable heights lets you fit bins of different sizes and use vertical space.
- Create zones. Divide the area into simple sections, seasonal decor here, camping gear there, tools and hardware in a third, so clutter doesn’t creep and future cleanouts stay easy.
- Add low-profile cabinets or drawers. Along the walls, these keep frequently accessed items contained and dust-free with a tidier look.
Basement Crawl Space
The low, enclosed pocket off a full basement. It shares the basement’s stability and easy access, which makes it one of the more forgiving options.
- Shelve the entry wall. Low, wide shelving just inside the opening keeps your go-to items visible and reachable, reserving the deeper recesses for rarely touched bins.
- Choose plastic or metal storage units. Even here, skip cardboard, airtight bins protect contents from residual moisture and let you see what’s inside at a glance.
- Add a vapor barrier or small dehumidifier. If you spot any condensation, these inexpensive steps make a big difference in a semi-enclosed space.
- Elevate the heavy stuff. Even in a finished basement, keep bins on risers or blocks to guard against water seepage and plumbing leaks.
Attic Knee-Wall Space (a Crawl Space Cousin)
The low pocket behind the short walls of a finished attic isn’t a true crawl space, but the geometry is the same, and because it’s inside your conditioned envelope, it’s kinder to your belongings.
- Add plywood flooring for stability. Lay panels over a level base so you can move and stack bins safely, just don’t compress insulation or block airflow at the eaves.
- Use the rafters. Pull-down shelves, hanging rods, and hooks keep luggage, decorations, and light gear off the floor.
- Stick with clear, stackable bins. Attic temperature swings still warp cardboard, so airtight plastic wins here too.
- Protect ventilation. Add vent baffles to keep air moving between insulation and roof, and seal insulation gaps, airflow up here prevents both moisture and ice-dam problems.
Under-the-Stairs Space (Bonus)
Not a crawl space at all, but it shares the low, sloped-ceiling challenge, and since it’s in your living area, it’s dry and climate-controlled, so almost anything goes.
- Build in cabinets or pull-out drawers. A sleek, permanent solution for shoes, coats, and small household items you want hidden but handy.
- Turn it into a closet. If the height allows, add a short hanging rod, stackable bins, and hooks for bags and umbrellas.
- Install open shelving or cubbies. Baskets and labeled bins keep it from becoming a dark catchall while matching your decor.
Containers, Shelving, and Gear That Actually Hold Up
The right hardware is what makes crawl space storage last. Here’s what earns its keep in a damp, low environment, and why.
- Airtight plastic bins, not totes with loose lids. Look for a gasket or clamping lid. A snap-on lid alone still lets humid air seep in. Clear plastic saves you from opening ten bins to find one thing.
- Plastic or coated-metal shelving. Bare steel rusts; choose resin, powder-coated, or galvanized shelving rated for garages and basements. Adjustable shelves flex around odd clearances.
- Risers, pallets, or blocks for elevation. Anything that lifts bins a few inches off the floor buys you a margin against leaks and improves airflow underneath.
- Desiccant packs or a small dehumidifier. Reusable moisture absorbers inside bins add cheap insurance; a crawl-space-rated dehumidifier handles the whole space.
- Rodent deterrents. Sealed containers are your best defense, but steel wool in gaps and peppermint-oil sachets add a layer. Skip anything food-scented.
- A headlamp and a creeper or moving board. Hands-free light and something to slide on make the space usable instead of dreaded, which means you’ll actually keep it organized.
One rule ties all of this together: no cardboard, ever. It absorbs moisture, collapses, and doubles as pest food and nesting material. If it’s going in the crawl space, it goes in sealed plastic.
Moisture Control: Vapor Barriers, Dehumidifiers, and Encapsulation
Because moisture is the whole ballgame, it’s worth understanding your options and what they cost in 2026. Think of it as three tiers, from budget-friendly to comprehensive.
Tier 1: Ground Vapor Barrier (the essential step)
A thick polyethylene sheet laid across the crawl space floor blocks soil moisture from rising into the space. It’s the highest-return move you can make. Industry estimates put a quality vapor barrier at delivering the large majority of the total moisture-control benefit on its own. Material for a basic 6-mil poly runs roughly $0.05–$0.15 per square foot, while recommended 12–20 mil reinforced barrier runs about $0.15–$0.50 per square foot. A DIY vapor barrier install typically lands around $500–$1,500, and a professional install of just the ground barrier commonly runs about $1,250–$3,500 for a 1,000–1,500 square foot space.
Tier 2: Vent Sealing Plus a Dehumidifier
In humid climates, open foundation vents can let damp air in rather than out. Sealing them and adding a crawl-space-rated dehumidifier actively holds humidity down. Vent covers run roughly $15–$22 each to install yourself, or about $40–$50 per cover professionally. A standalone crawl space dehumidifier unit runs about $350–$1,400, and a professionally installed dehumidifier, with condensate drainage, typically totals around $1,000–$3,000.
Tier 3: Full Encapsulation
The complete system: floor-and-wall vapor barrier, sealed vents, often added insulation, and a dehumidifier, creating a clean, dry, sealed environment. In 2026, full crawl space encapsulation typically costs $3,000–$15,000, with a national average around $5,500, or roughly $3–$10 per square foot depending on size and condition. If the space needs drainage (a French or perimeter drain adds about $800–$3,000) or mold remediation (which can add $1,500–$9,000), costs climb from there. It’s a home-health project first, but it also turns a marginal crawl space into a genuinely good storage environment.
Costs are national averages for 2026 and vary by region, crawl space size, clearance, and condition; get multiple written quotes before committing.
Is Crawl Space Encapsulation Worth It?
Encapsulation gets pitched as the answer to everything, so here’s the balanced version. It’s a real investment with real payoffs, and a few honest downsides.
The case for it:
- Moisture and mold protection. A sealed space stays dry, which protects framing, insulation, and anything you store from rot and mildew.
- Energy savings. A conditioned crawl space can trim heating and cooling costs, since you’re no longer fighting damp, unconditioned air under the floor.
- Structural protection. Preventing joist rot and mold heads off repairs that can easily run into five figures, often dwarfing the cost of the encapsulation itself.
- Better air quality. A large share of your home’s air can rise from the crawl space; sealing it keeps musty, moldy air out of your living space.
- Pest deterrence and a cleaner storage zone. Sealed and dry is far less hospitable to rodents and insects, and far friendlier to your bins.
The honest downsides:
- Upfront cost. Several thousand dollars is a real number, and it’s rarely a spur-of-the-moment purchase.
- Ongoing maintenance. A dehumidifier needs occasional attention, and the system should be checked periodically.
- Future access. A fully lined space can make some under-house repairs slightly more involved, since work happens over or under the barrier.
Bottom line: if you’re dealing with chronic moisture, planning to store meaningfully down there, or simply want to protect the house long-term, encapsulation usually pays for itself in avoided repairs and lower bills. If your crawl space is already dry and you just want a spot for a few bins of holiday decor, a good vapor barrier and some elevation may be all you need.
Safety and Access Tips Before You Crawl In
A crawl space is a confined, low, sometimes hazardous environment. A few precautions keep the project safe.
- Suit up. Wear a respirator or N95, gloves, kneepads, eye protection, and long sleeves. Insulation fibers, mold spores, and rodent droppings are all things you don’t want to breathe or touch. (Rodent droppings can carry hantavirus, ventilate and don’t sweep dust up dry.)
- Check the air and the floor first. Before crawling in, look for standing water, strong musty or gas odors, and obvious mold. If you smell gas or see standing water near wiring, stay out and call a professional.
- Respect the electrical. Don’t stack storage against junction boxes or wiring, and never let bins sit where water could reach an electrical connection.
- Keep utilities accessible. Leave clear paths to plumbing shutoffs, cleanouts, the sump pump, and HVAC equipment. Burying them guarantees a bad day during the next repair.
- Don’t block vents or crush insulation. Both invite the moisture problems you’re trying to avoid.
- Never store combustibles. No gasoline, propane, or flammable liquids, especially anywhere near a gas furnace or water heater.
- Consider a radon test. Crawl spaces can accumulate radon from the soil. If you’re spending time down there or sealing the space, testing is cheap peace of mind.
- Keep a clear path and good light. Store the things you reach for most near the hatch, and light the route so you’re never navigating blind.
When to Skip the Crawl Space and Rent a Storage Unit
A well-prepped crawl space is great for durable, replaceable, sealed items. But look back at the “never store” list, documents, electronics, clothing, wood furniture, leather, artwork, collectibles, anything sentimental. That list isn’t random. It’s essentially an inventory of the things you’d be most upset to lose, and every one of them fails in a crawl space for the same reasons: humidity, temperature swings, and pests.
That’s the clean dividing line. Ask yourself two questions about anything you’re about to stash under the house:
- Would I be genuinely upset if this got ruined? If yes, it doesn’t belong in a crawl space.
- Is it sensitive to moisture, heat, or cold? If yes, it needs a climate-controlled environment.
When the answer to either is yes, a climate-controlled storage unit is the right home. It holds steady temperature and humidity year-round, the exact protection a crawl space can’t offer, so furniture doesn’t warp, photos don’t curl, electronics don’t corrode, and fabrics don’t mildew. It’s also the smart move when you simply have more than a crawl space can safely hold, when you’re between homes, or when you’d rather not spend a Saturday on your back under the house at all.
The best setup for a lot of homeowners is a split one: hardy overflow (holiday bins, camp gear, spare building materials) goes in the prepped crawl space, and everything climate-sensitive or irreplaceable goes in a storage unit where it’s actually protected.
Crawl Space Storage FAQ
Can you store boxes in a crawl space?
You can store bins in a crawl space, sealed plastic ones, elevated off the ground. Cardboard boxes are a different story: they absorb moisture, collapse, and attract pests. Transfer anything from cardboard into airtight plastic before it goes down there.
Is it OK to store things in a crawl space?
Yes, for the right items and with the right prep. A vapor barrier over the soil, moisture control to keep humidity in check, sealed containers, and elevation off the ground make a crawl space a legitimate storage spot for durable, moisture-tolerant belongings.
What’s the best thing to store in a crawl space?
Hardy, replaceable, non-perishable items: holiday and seasonal decor, camping and outdoor gear, garden tools, sports equipment, hard-sided luggage, and leftover building materials, all sealed in airtight bins.
Can you store furniture in a crawl space?
It’s not recommended. Wood furniture warps, cracks, and can rot with humidity swings, and upholstered pieces absorb moisture and become pest habitat. Furniture belongs in a climate-controlled space.
Will my stuff get moldy in a crawl space?
It can, if you skip moisture control. Bare soil releases vapor constantly, and that humidity feeds mold. A vapor barrier, sealed vents where appropriate, and a dehumidifier keep humidity low enough to prevent it.
Do I really need a vapor barrier to store things in a crawl space?
Over a dirt floor, yes. It’s the single most important step and delivers the bulk of the moisture-control benefit on its own. Storing over bare soil without one is asking for damage.
How do I keep mice and rodents out of crawl space storage?
Seal everything in hard plastic containers (no cardboard, no food residue), stuff gaps and entry points with steel wool, and consider deterrents like peppermint-oil sachets. The sealed containers matter most, they remove both the food and the nesting material.
Can you store Christmas decorations in a crawl space?
Yes, this is one of the best uses. Artificial trees, ornaments, and lights do fine in a prepped, moisture-controlled crawl space as long as they’re in sealed bins rather than their original cardboard boxes.
Is it safe to store tools in a crawl space?
Hand tools and hardware are fine if you guard against rust, a light coat of oil on metal and storage in sealed containers. Power tools with batteries or electronics should not go down there; humidity corrodes them and temperature swings kill the batteries.
Should crawl space vents be open or closed?
It depends on your climate and setup. In humid regions, open vents often pull damp air in, so sealing them (as part of encapsulation) is common. In drier climates, some homes still use venting. If you’re unsure, a local crawl space or foundation pro can assess what’s right for your area.
Can you store paint in a crawl space?
No. Paint is ruined by freezing, and temperature swings degrade it quickly. Store paint somewhere that stays between about 50 and 80 degrees year-round, not a crawl space.
What’s the difference between a vapor barrier and encapsulation?
A vapor barrier is one component, the sheet across the floor that blocks soil moisture. Encapsulation is the full system: floor-and-wall barrier, sealed vents, often insulation, and a dehumidifier. The barrier is the essential first step; encapsulation is the comprehensive version.
The rule of thumb for crawl space storage is simple: hardy and sealed goes under the house, valuable and climate-sensitive goes somewhere it’s protected. For everything on the “never store” list, and for the overflow a crawl space just can’t hold, a climate-controlled storage unit from 10 Federal Storage keeps temperature and humidity steady year-round, so your belongings come out exactly the way they went in.
Find a unit near you and give the good stuff a better home.
About the Author
10 Federal Storage
Our team at 10 Federal Storage has been in the self storage industry for decades. With knowledge gained from multiple universities and in the field, we are well-prepared and excited to assist with your storage needs. When you rent a unit with us, you can feel confident that our seasoned customer service team’s help will make your transition as seamless as possible. Customer satisfaction is our number one priority, and we strive to make your experience exceptional with our automated leasing options, diverse unit sizes, and a strong commitment to sustainability.