

How to Wrap Furniture for Storage: A Layer-by-Layer Guide by Material and Finish
by 10 Federal Storage
Published on November 4, 2026
Most advice on wrapping furniture is really advice on moving furniture. It assumes the piece will be unwrapped tomorrow at the new house, so it optimizes for one thing: surviving a truck ride. Storage is a different problem. The wrap sits against the finish for months, through every warm afternoon and cold night the unit sees, and whatever you put in direct contact with the wood, leather, or fabric has that entire time to do damage.
That is why the same roll of stretch film can be the right call on moving day and the wrong one by Thanksgiving. It is also why so much of the wrapping advice online contradicts itself. Some guides say to keep furniture sealed in plastic for storage. Others say never let plastic near it. Both are partly right, and the difference comes down to which layer touches the finish and which layer comes off when you reach the unit.
This guide is built around that distinction. It draws on the published guidance museum conservators use for wrapping and covering furniture, from the National Park Service, the Canadian Conservation Institute, and Hagley Museum and Library, and translates it into a two-stage method you can do with ordinary moving supplies. You will find what can safely touch each type of finish, which common materials leave marks over time, how many blankets you actually need, and why the blankets you rent with a truck will not work for storage.
One more thing up front: near the end, this guide makes the case for not renting a storage unit in several common situations. If you only need to wrap a few pieces for a few weeks, you may not need one at all. And if you also need help with cleaning, disassembly, or loading a unit, our complete guide to storing furniture in a storage unit covers those steps. This post stays focused on the wrap.
Table of Contents
- Moving Wrap and Storage Wrap Are Two Different Jobs
- The Contact Layer Rule: What Is Allowed to Touch a Finish
- Wrapping Materials and Where Each One Belongs
- How to Read Your Furniture’s Finish Before You Wrap It
- The Two-Stage Wrapping Method, Step by Step
- How to Wrap Wood Furniture
- How to Wrap Upholstered and Leather Furniture
- How to Wrap Glass, Mirrors, Marble, and Stone
- How to Wrap a Mattress for Storage
- How Many Moving Blankets You Need, and Why Rented Ones Won’t Work
- Wrapping for a Climate-Controlled Unit vs a Drive-Up Unit
- When a Storage Unit Makes Sense, and When It Doesn’t
- Frequently Asked Questions
- Store It Wrapped Right
Moving Wrap and Storage Wrap Are Two Different Jobs
A wrap for moving has to handle impact, abrasion, and shifting loads for a few hours. A wrap for storage has to handle time. Those requirements pull in different directions, which is why one setup rarely does both well.
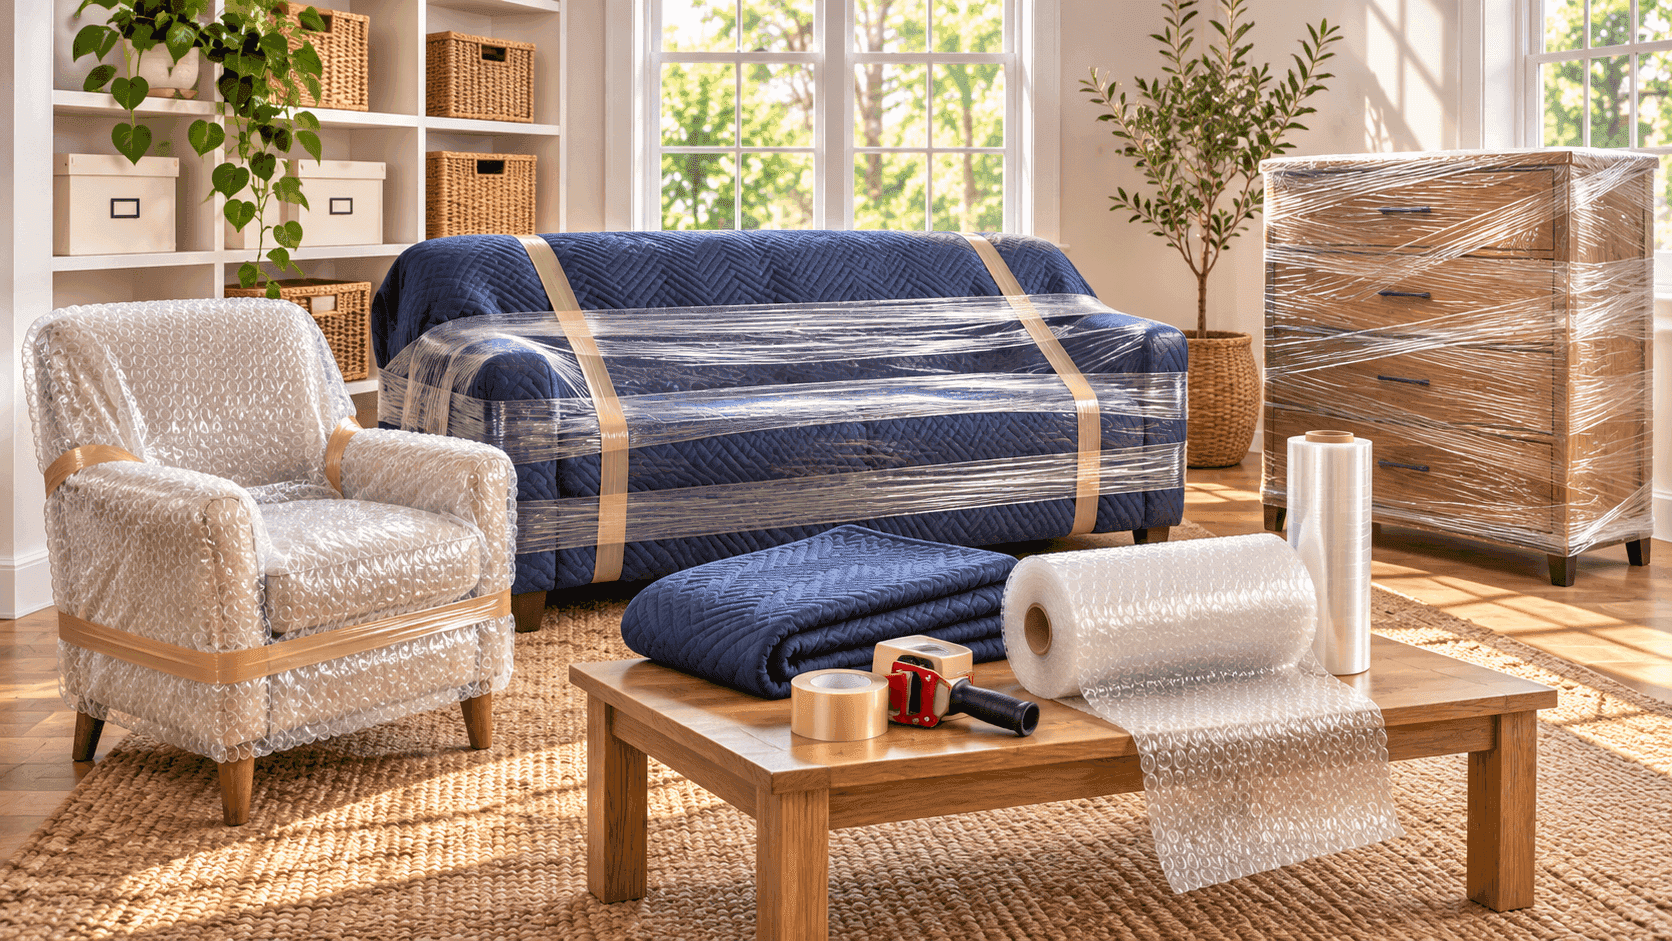
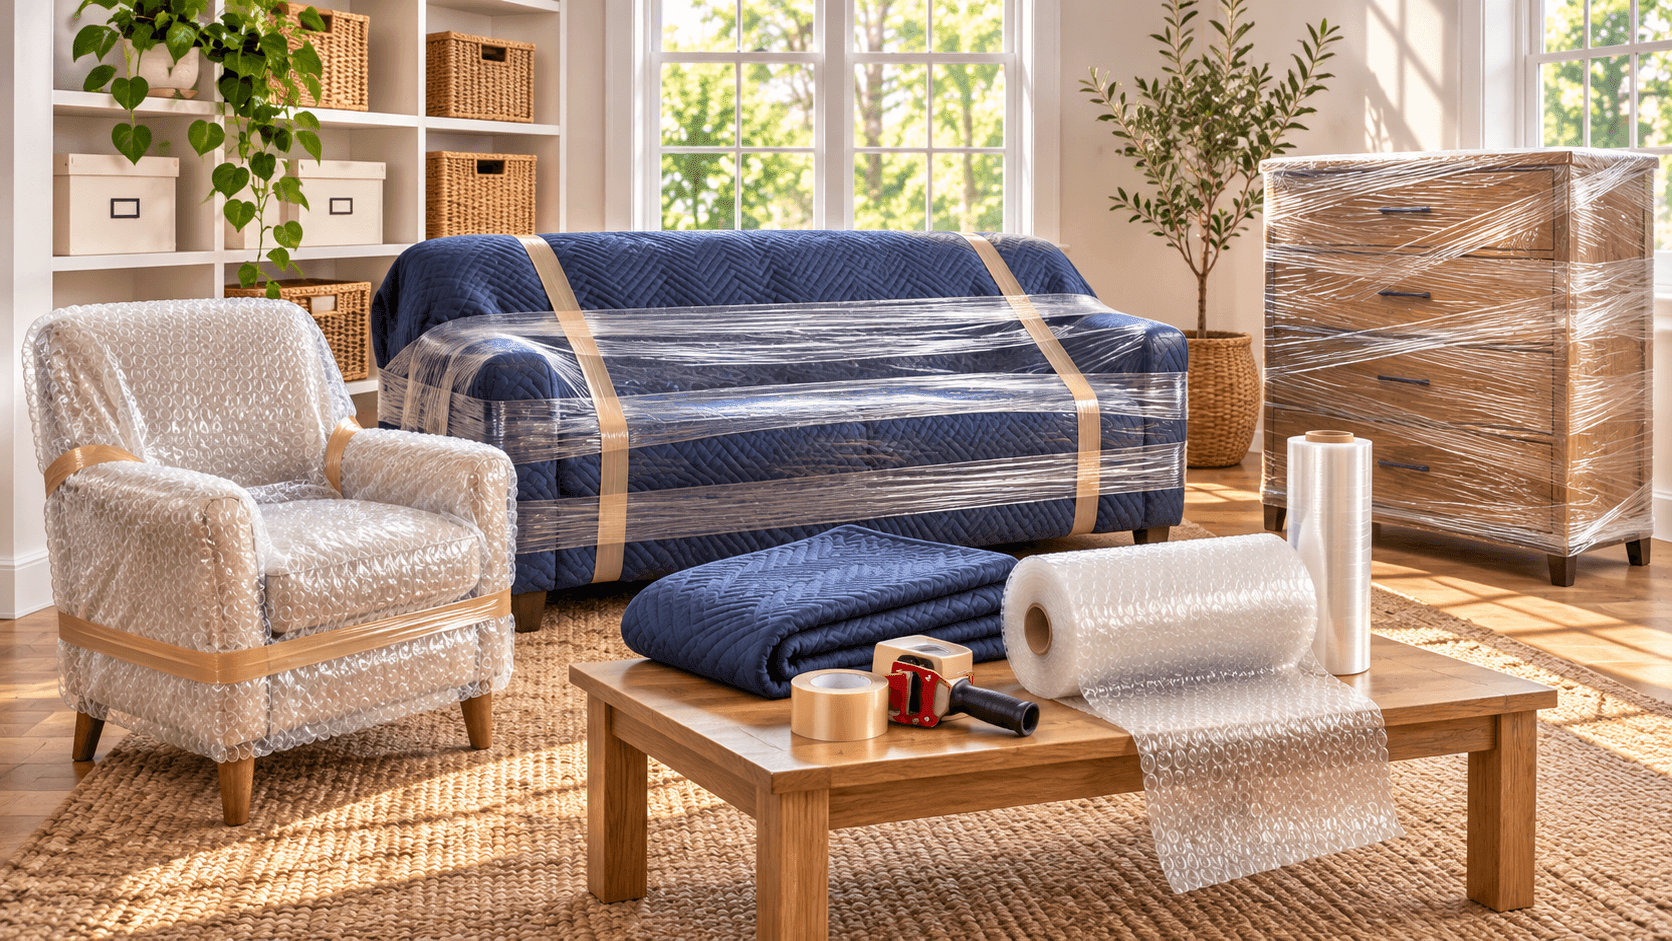
On the truck, the threats are physical. A dresser slides into a headboard on a turn. A table leg catches a doorframe. Corners take hits. The answer is padding plus something that holds the padding tight, which is exactly what a moving blanket cinched with stretch film does well. Movers have used that combination for decades because it works for the trip.
In a storage unit, the threats are slower. Dust settles and works into crevices; the National Park Service notes that dust is abrasive and also attracts moisture to a surface. Temperature changes over days and seasons. Any dampness that went in with a piece has nowhere to go if the wrap is airtight. And pressure from a tight wrap, held for months, can print the texture of whatever is touching a soft finish right into it.
So the method in this guide treats wrapping as two layers with two lifespans:
- The storage layer touches the furniture and stays on for the whole stay. It must be clean, soft, breathable, and safe against that specific finish.
- The transport layer goes over the storage layer to hold it in place and absorb impact during the move. Stretch film, straps, and extra padding live here. Most of it comes off once the piece is set in the unit.
Once you separate the two jobs, most of the conflicting advice resolves itself. Stretch film over a blanket for the drive is fine. Stretch film left on for six months, or applied directly to a lacquered tabletop, is where the trouble starts.
The Contact Layer Rule: What Is Allowed to Touch a Finish
If you remember one thing from this guide, make it this: the material in direct contact with the furniture matters more than everything stacked on top of it. Conservators build every wrap from the inside out for that reason.
A safe contact layer has four properties. It is smooth or soft, so it cannot imprint or scratch. It is breathable, so it does not trap dampness against the surface. It is chemically quiet, meaning no inks, dyes, or additives that can migrate. And it is adhesive-free, because nothing sticky should ever touch a finish.
Why plastic against a finish causes problems
The National Park Service’s guidance on safe plastics for collections is blunt: never use plastics with fillers, plasticizers, or other additives against objects, because they can release harmful byproducts over time. Polyethylene film is on its list of acceptable materials, which is useful to know, because the stretch film sold for moving is a polyethylene. Vinyl (PVC) covers are a different story; flexible vinyl gets its softness from plasticizers.
Even acceptable plastics cause a second, physical problem. Hagley Museum and Library’s conservator has documented bubble wrap leaving its dot pattern on varnished wood, gilded frames, and polished surfaces, sometimes after nothing longer than a shipment. The bubble side is usually the culprit. Golden Artist Colors, which studies how packing materials interact with paint films, describes the same effect on soft coatings and notes that with enough pressure, heat, and time, even the creases and micro-texture of polyethylene sheeting can leave a lasting change. Pressure, heat, and time are exactly what a tightly wrapped piece gets in storage.
Why tape never touches the furniture
Packing tape can lift a finish when it comes off and leave residue if it stays. Painter’s tape is gentler, but it is not a storage product. 3M rates its ScotchBlue Original painter’s tape for clean removal for up to 14 days. A storage stay is usually measured in months. Tape belongs on the outer layer only: blanket to blanket, film to film, or cardboard to cardboard.
The paper and fabric details people miss
- Printed newspaper can rub ink onto light wood, marble, and fabric. Use blank packing paper (unprinted newsprint) instead, which is what Hagley recommends as a barrier under bubble wrap for ordinary items.
- Acid-free tissue is the better contact layer for anything valuable or long-term. Hagley specifies it for long-term storage.
- Dark or colored fabric against pale upholstery or light wood is a risk if it ever gets damp and the dye is not colorfast. The National Park Service specifies washed, unbleached cotton for its storage covers: plain fabric with nothing added that could transfer.
Wrapping Materials and Where Each One Belongs
Every common wrapping material has a right position in the stack. Here is where each one goes, and where it should never go.
- Moving blankets (furniture pads): the workhorse padding layer, and an acceptable contact layer on most sealed, cured finishes. The standard size is 72 by 80 inches. Quality is sold by weight per dozen; economy pads run around 35 pounds per dozen, while heavy-duty pads run 65 to 75. Heavier pads absorb more impact. Non-woven economy pads can shed fibers, so put a sheet or tissue under them on anything delicate.
- Cotton sheets, drop cloths, or muslin: the best everyday contact layer for upholstery, leather, and anything you want to breathe. Wash them first, and choose white or undyed when the furniture is pale.
- Acid-free tissue: the contact layer for antiques, high-gloss finishes, gilding, and anything you would hate to see marked. Use it under bubble wrap or a blanket.
- Blank packing paper: a fine contact layer for ordinary finished wood, glass, and hardware. Not for valuable pieces over the long term; tissue is better there.
- Bubble wrap: padding only. It goes over a paper or tissue layer, never directly on a finish. If you must use it close to a surface, face the flat side inward.
- Stretch film (shrink wrap): a transport layer. It holds blankets, keeps drawers and doors closed, and bundles legs and rails for the drive. It does not belong against wood, leather, or fabric, and most of it should come off at the unit.
- Breathable furniture covers and mattress bags: storage layers, if they are actually breathable. Look for woven fabric or vented, non-woven material. If the package does not say breathable, assume it is not.
- Vinyl covers: avoid against furniture for storage. Flexible vinyl is plasticized, which is the category of plastic conservators keep away from collections.
- Cardboard corners and sheets: rigid protection for corners, edges, and glass. Cardboard is acidic, so it goes over a contact layer, not directly against a valuable finish.
- Foam sheet: a smooth, soft padding layer that is gentler on gloss than bubble wrap. Useful between stacked chair seats or tabletop and blanket.
- Twine, rope, and elastic mover bands: a tape-free way to keep drawers shut and blankets in place, as long as they ride on the blanket, not the bare finish.
The pattern is consistent. Soft, plain, breathable things touch the furniture. Rigid or plastic things sit on the outside. Adhesives never make contact.
How to Read Your Furniture’s Finish Before You Wrap It
You cannot match the contact layer to the finish if you do not know the finish. You do not need a lab for this; a few observations will put most pieces in the right category. The Canadian Conservation Institute’s guidance on furniture finishes sorts them into a handful of families, and each one behaves differently under a wrap.
- Modern hard finishes (factory lacquer, catalyzed finishes, polyurethane): most furniture made in the last few decades. These are durable and tolerate a moving blanket directly. Their weakness is gloss: high-shine surfaces show any imprint or rub mark, so give them tissue or foam first.
- Shellac and French polish: common on older and antique pieces, especially 19th-century mahogany. CCI classes these as evaporative finishes: they dry by solvent loss and can be re-dissolved, which leaves them more sensitive to heat, alcohol, and pressure than modern finishes. Tissue first, loose wrap, no plastic, no tape anywhere near.
- Oil and oil varnish finishes: often a low, satin sheen with visible grain texture. Generally tolerant, but an oil finish that was reapplied recently can still be tacky. Wait until it is fully dry before wrapping.
- Wax over another finish: wax can pick up the texture of whatever presses against it. A smooth cotton or tissue layer prevents fabric patterns from printing into it.
- Paint: sound paint is durable, but CCI notes that paint films crack and loosen as wood moves, and loose flakes catch on gloves and clothing. On any piece with flaking or chalky paint, use smooth tissue and avoid fuzzy blankets in direct contact.
- Unfinished or raw wood: absorbs whatever touches it, including dirt, dye, and oils. Clean cotton only.
Three quick checks
- Age and origin. A piece that predates the 1950s, or that came from a grandparent, should be treated as shellac or a historic finish until you know otherwise.
- Recent work. Anything refinished, touched up, or oiled in the last few weeks may still be curing. Check the product’s stated cure time and keep plastic and pressure off it until then.
- Gloss level. The shinier the surface, the more any imprint will show. High gloss always gets tissue or foam before anything textured.
When in doubt, treat the piece as the most sensitive category. Tissue and a loose cotton layer cost little and protect every finish on this list.
One related caution: do not reach for a spray polish right before wrapping. CCI warns that commercial furniture polishes often contain oils, waxes, or silicones that leave a sticky build-up which attracts dust. If a piece needs protection, a thin, fully buffed coat of plain paste wax is the conservative choice.
The Two-Stage Wrapping Method, Step by Step
This is the core method. It works for nearly every wooden case piece, table, and frame; the sections that follow adjust it by material.
- Start clean and completely dry. Wrapping traps whatever is on the surface, including grit that acts like sandpaper under a blanket and dampness from a recent wipe-down. If you cleaned it today, wrap it tomorrow.
- Remove what comes off. Glass shelves, mirrors, detachable legs, and hardware get wrapped separately. Bag screws and fittings, then drop the bag in a drawer or tape it to the outer blanket, never to the finish.
- Lay the contact layer. Tissue, blank paper, or a clean cotton sheet over every finished surface that matters, chosen by finish type. Tuck it, do not tape it.
- Add the padding layer. Drape moving blankets so seams overlap and every corner is covered. Fold excess under rather than bunching it on top.
- Protect the corners. Cardboard or foam corner guards go over the blanket on tables, dressers, and anything with a sharp edge. Corners take most of the hits and stretch film pulled tight over a bare corner can cut through to the finish.
- Apply the transport layer. Wrap stretch film around the blanket only, firmly enough to hold, starting low and working up. Use it to hold drawers and doors closed. If you would rather skip plastic entirely, elastic mover bands or straps do the same job.
- Load and move. The piece travels fully wrapped.
- At the unit, take off the transport layer. Cut the stretch film away from the blanket, not toward the furniture, using a safety cutter or blunt-tip scissors. A utility knife slicing through film can slice through leather, upholstery, or a mattress cover just as easily.
- Check before you re-cover. Lift the blanket and look. Any dampness, condensation on the inside of the film, or a musty smell means the piece needs air before it is covered again.
- Re-drape the storage layer loosely. The contact layer and blanket stay. They should cover the piece, not grip it. Label each piece on the blanket itself, with a strip of tape on the fabric or a tag pinned through it.
The result is a piece that rode the truck in a tight, padded wrap and sits in storage under a breathable cover that touches nothing it should not.
How to Wrap Wood Furniture
Wood case goods and tables are where the two-stage method does most of its work. A few piece-specific adjustments make the difference.
Dressers, chests, and cabinets
Empty the drawers, or at least remove anything heavy. Then decide: drawers in or out. Leaving them in means one trip, but they must be held shut for the move. Do that with stretch film over the blanket, or with twine or a mover band around the blanket, never with tape on the drawer fronts. Pull or wrap protruding knobs and handles; a bare brass pull pressed into a blanket can dent the wood around it when the piece is leaned against something.
Glass doors on hutches and china cabinets need their own layer: paper on the glass, then a piece of cardboard cut to fit the door, then the blanket. If the glass panels come out, remove them and wrap them like a tabletop.
Tables
Take the legs off if they come off, wrap them as a bundle in a blanket, and secure the bundle with film. Remove leaves and wrap each one separately; leaves rubbing against each other in a stack will scuff. The top gets a contact layer on the show face, a blanket over both faces, and corner guards on all four corners, since a tabletop is usually stored on edge and the edges carry the load. Headboards, footboards, and removed shelves are flat panels too, and wrap the same way.
Chairs
Wrap the back and seat with a blanket, and give the legs individual attention: a sheet of paper and a wrap of blanket or foam where they meet the floor and where they would meet the next chair. If you nest or stack chairs seat to seat, put foam or a folded blanket between every pair. Upholstered seats go on top of the stack, never underneath it.
How to Wrap Upholstered and Leather Furniture
Fabric and leather are where the storage layer matters most, because both hold dampness and both mark easily. The short version: breathable cotton against the material, padding for the move, and no plastic left on once the piece is in the unit.
Fabric sofas, sectionals, and armchairs
- Vacuum the piece and let it sit uncovered for a day after any spot cleaning or steaming, so the padding underneath is dry, not just the surface.
- Remove loose cushions and wrap each one in a clean cotton pillowcase, sheet, or breathable bag.
- Cover the frame in a cotton sheet or a breathable sofa cover. Use white or undyed fabric on pale upholstery.
- Blanket the arms, back, and any exposed wood legs for the move, and hold the blankets with film or straps over the blanket only.
- At the unit, remove the film and leave the sheet and blankets in place, loose. Keep cushions on top of the frame or on a shelf, never underneath heavier items.
For sectionals, separate the sections and wrap each as its own piece. Bag the connecting brackets and keep the bag with the largest section.
Leather
Leather needs the same breathable approach, with two extra cautions. First, plastic sitting directly on leather in heat can stick to it. Movers’ training material warns specifically that stretch film can adhere to leather in storage or in a summer move, and recommends keeping a cloth pad between the two. Second, any tape that touches leather can pull color or leave residue that will not come off cleanly.
Condition the leather a few days before the move rather than the morning of, so the conditioner has absorbed and is not sitting on the surface under the wrap. Then cover it with a clean cotton sheet, add blankets for the move, and keep all film and tape on the outside layers.
Vinyl and faux leather
Treat these like leather. They do not need conditioning, but a vinyl surface pressed against stretch film or bubble wrap in heat can pick up texture or stick, the same as a soft finish.
How to Wrap Glass, Mirrors, Marble, and Stone
Glass and stone fail differently from wood. They do not dent; they crack, chip, and shatter, and they are heavy for their size. The wrap has to stiffen them and protect the edges, and the piece has to be stored on edge.
Glass tabletops and shelves
- Clean and dry the glass completely.
- Wrap it in blank packing paper first, then bubble wrap with the flat side toward the paper.
- Sandwich it between two pieces of cardboard cut slightly larger than the glass, and tape the cardboard to itself around the edges.
- Add corner guards over the sandwich and wrap the whole package in a blanket.
- Mark both faces FRAGILE, GLASS, and THIS EDGE DOWN, then store it standing on edge against a padded wall or a stable piece of furniture, never flat and never with anything leaning on it.
Tempered glass is strong across its face but vulnerable at the edges; a chip on the edge can shatter the whole panel. That is why the edge protection matters more than the layers on the face.
Mirrors and framed glass
Mirrors follow the same logic: paper, padding, rigid board, on edge. A telescoping mirror box is the cleanest solution for anything that will sit for months. Our guide to packing pictures and mirrors walks through the box method step by step.
Marble and stone tops
Marble, granite, and travertine tops are porous to varying degrees and can stain from dyes, inks, and oils. Blank paper or a white cotton sheet goes against the stone, never printed newspaper. Stone tops are also heavy enough to crack under their own weight if carried flat and flexed, so they move and store on edge, supported along the full bottom edge, with a folded blanket underneath. Wrap the top separately from its base whenever the two come apart.
How to Wrap a Mattress for Storage
Mattresses are mostly fabric and foam, so they follow the upholstery rules: clean, dry, breathable. There is one mattress-specific issue that most wrapping advice skips.
Do not open the mattress cover
Many mattresses, particularly foam and bed-in-a-box models, meet federal flammability rules with a fire barrier that contains glass fibers, sitting just under the outer cover. Poison control guidance is simple: if the cover is labeled do not remove, do not unzip it. The Consumer Product Safety Commission has said that when the cover stays intact, exposure is expected to be minimal. So do not unzip the cover to wash it before storage, and be careful with blades when you take stretch film off a mattress at the unit. A cut through the cover is the scenario you want to avoid.
The wrap
- Vacuum both sides and let the mattress air out fully after any spot cleaning.
- Slide it into a breathable mattress storage bag. Many inexpensive mattress bags are sealed plastic; those are fine to keep the mattress clean on the truck, but swap or vent them for long storage.
- For the move, add blankets on the corners and edges and hold them with straps or film over the bag.
- At the unit, remove the film and any sealed plastic, leave the breathable bag on, and keep the mattress off the bare floor.
Box springs are a wooden frame wrapped in fabric. Treat them like an upholstered piece: breathable cover, padded corners, nothing sharp leaning against the fabric.
For how to position a mattress in the unit, what size unit it needs, and how to check on it over a long stay, see our guide to storing a mattress.
How Many Moving Blankets You Need, and Why Rented Ones Won’t Work
Running out of blankets halfway through is the most common reason people fall back on wrapping furniture directly in stretch film. A few minutes of arithmetic prevents it.
The math
A standard 72-by-80-inch blanket covers 40 square feet laid flat. Take a typical dresser at 60 inches wide, 34 inches tall, and 18 inches deep. Its top, front, back, and two sides add up to about 44 square feet. That is already more than one blanket before you account for overlapping seams and folding around corners, so plan on two. Most pieces work out the same way: measure the faces that need covering, divide by 40, and round up.
Typical counts for a storage wrap:
- Dresser or chest: 2
- Sofa: 3 to 4; loveseat 2 to 3
- Armchair or recliner: 1 to 2
- Dining table: 2 for the top, plus 1 for the legs and 1 per two leaves
- Dining chairs: 1 each, or 1 per pair for small side chairs
- Nightstand or end table: 1
- Bookcase: 2
- Headboard or footboard: 1 to 2 each
- Glass or stone top: 1, over the cardboard sandwich
A one-bedroom apartment’s furniture usually lands somewhere between one and two dozen. For the truck itself, Penske suggests two to three dozen pads for a 12- or 16-foot truck and three to four dozen for a 22- or 26-foot truck, because transport also needs padding between pieces and against the truck walls.
The rental blanket trap
Truck rental companies rent furniture pads cheaply, and it is tempting to use them for the whole job. The problem shows up at the unit. U-Haul’s own answers to customers are clear that rented pads go back with the rental or you are charged for them, and the two dozen pads included with a U-Box container are rentals too. That means the blankets come off your furniture the moment you unload, which is exactly when the storage layer needs to go on.
The practical answer is to buy blankets for the pieces going into storage and rent only the extras you need to pad the truck. Owned blankets stay on the furniture for the whole stay, and you will reuse them when it comes back out.
Wrapping for a Climate-Controlled Unit vs a Drive-Up Unit
The type of unit changes the details of the storage layer, but not the core rule. Breathable cotton or blankets stay against the furniture either way.
In a climate-controlled unit
A climate-controlled unit at 10 Federal Storage is temperature-regulated. It is held within a consistent temperature range year-round, which takes the large daily and seasonal swings out of the picture. That matters for wrapping because the Canadian Conservation Institute identifies a sudden drop in temperature as one of the conditions that produces condensation on and around stored objects. Steady temperature also means less expansion and contraction in wood, glue joints, and finishes.
What temperature regulation does not do is dry out a piece that went in damp, or make an airtight wrap safe. These units regulate temperature only. Dampness that goes into a sealed wrap stays there, so the storage layer still has to breathe. In practice, a climate-controlled unit lets you wrap lighter: a contact layer and a single blanket are usually enough, and you can skip extra plastic entirely.
In a drive-up unit
A standard drive-up unit tracks the outdoor temperature, and the area just inside the roll-up door collects more dust and debris than an interior hallway. Three adjustments help:
- Keep pieces off the floor and off the walls. CCI notes that condensation forms first on the inside face of exterior walls and that furniture sitting on cold floors can trap moisture, which is why it recommends raising pieces on blocks. Pallets or lengths of 2x4 and a few inches of clearance from the walls do the same job in a unit.
- Consider a loose dust sheet over the blankets near the door. Conservators do use polyethylene as an outer cover; CCI describes cotton inside polyethylene as a common furniture covering, with the cotton acting as a buffer against condensation. The key words are inside and loose. Drape the plastic over the blanket-wrapped pieces, leave the bottom open, and never let it touch the furniture.
- Put the most sensitive pieces deepest in the unit. Antiques, leather, and upholstery belong at the back, away from the door line.
Which one your furniture needs
For solid wood, veneer, leather, and upholstery stored longer than a season, temperature stability is worth paying for. For metal patio furniture, plastic pieces, or a short stay in a mild season, a drive-up unit with a good storage layer is often enough. Our climate-controlled storage page explains exactly what these units do and do not do, and which categories of belongings benefit most.
When a Storage Unit Makes Sense, and When It Doesn’t
A good wrap protects furniture almost anywhere that stays dry and reasonably stable. That means a storage unit is not always the right answer, and in several common situations it is the wrong one.
When you probably do not need a unit
- A few pieces for a few weeks, and an interior room you control. A spare bedroom or a large closet inside the conditioned part of a house is a fine short-term home for wrapped furniture. Use the storage layer from this guide and keep pieces off exterior walls. A garage, attic, or unfinished basement is not the same thing.
- Flat-pack furniture you would replace for less than a few months of rent. If the piece costs less to rebuy than to store, selling or donating it is the honest math.
- A gap of a day or two between homes. If the truck or container can hold your furniture overnight, every extra unload and reload is another chance for a ding. Fewer handlings usually beats a short-term unit.
- Pieces you have already decided to get rid of. Storing a decision you are avoiding costs the same as storing furniture you love.
When a unit is the right call
- A gap of more than a few weeks between homes, or a move with uncertain timing
- A renovation that empties rooms for a month or more
- Downsizing, when you are keeping pieces for family or a future home
- Staging a house for sale and clearing out bulky furniture
- Antiques, heirlooms, and solid wood or leather pieces that should not ride out a season in a garage or attic
If you are in the second group, size the unit to the wrapped furniture, not the bare furniture. Blankets and corner guards add a little to every dimension, and you want a walking aisle so you can lift a blanket and check on a piece without unloading the front of the unit. The storage unit size guide walks through what fits in each size, and you can check unit availability and pricing near you before moving day.
Frequently Asked Questions About Wrapping Furniture For Storage
What is the best thing to wrap furniture in for storage?
A breathable layer against the furniture and padding over it. Clean cotton sheets, acid-free tissue, or blank packing paper go against the surface, chosen by finish, and moving blankets go over that. Stretch film can hold the blankets in place for the move, but it belongs on the outside of the blanket, not against the furniture.
Should I wrap furniture in plastic for storage?
Not directly. Plastic against wood, leather, or fabric holds any dampness against the surface and can mark soft finishes under heat and pressure. Plastic is useful as an outer layer, either stretch film over blankets for the move or a loose polyethylene dust sheet draped over blanket-covered pieces, open at the bottom.
Can you leave stretch wrap on furniture in a storage unit?
It is better to remove it. Stretch film is a transport layer that keeps blankets tight and drawers closed on the truck. Once the piece is placed, cut the film off the blanket with a safety cutter and leave the blanket and contact layer loosely in place.
Is bubble wrap safe on wood furniture?
Only with a barrier underneath. Museum conservators have documented bubble wrap imprinting its pattern into varnished wood and polished surfaces. Put blank packing paper or acid-free tissue against the wood first, then bubble wrap with the flat side facing in.
How do you wrap a couch for storage?
Vacuum it, let it dry fully, and remove the cushions. Cover the frame with a clean cotton sheet or breathable sofa cover, wrap the cushions separately, then add moving blankets for the move. At the unit, remove any stretch film and leave the breathable layers on loosely, with nothing heavy stacked on top.
Do I still need to wrap furniture in a climate-controlled unit?
Yes, but you can wrap lighter. A temperature-regulated unit reduces large temperature swings, while the wrap still guards against dust, scuffs, and any dampness the piece carries in. A contact layer and a single moving blanket are usually enough.
Store It Wrapped Right
Good storage wrapping comes down to a short list. Soft, plain, breathable material touches the furniture. Padding goes over that. Plastic and tape stay on the outside, and most of the plastic comes off when the piece reaches the unit. Match the contact layer to the finish, buy the blankets that will stay on, and cut the film away from the furniture rather than toward it.
Do that, and the piece that comes out of storage looks like the piece that went in.
Find a 10 Federal Storage unit near you and reserve online in minutes.
About the Author
10 Federal Storage
Our team at 10 Federal Storage has been in the self storage industry for decades. With knowledge gained from multiple universities and in the field, we are well-prepared and excited to assist with your storage needs. When you rent a unit with us, you can feel confident that our seasoned customer service team’s help will make your transition as seamless as possible. Customer satisfaction is our number one priority, and we strive to make your experience exceptional with our automated leasing options, diverse unit sizes, and a strong commitment to sustainability.