
.svg)
RV Packing List: The Complete Guide on What To Bring
by 10 Federal Storage
Published on September 4, 2026
Nearly every RV packing list on the internet has the same shape. Thirteen or fourteen categories, a few hundred bullet points, and somewhere near the bottom, the advice to “avoid overpacking.” The largest one we reviewed runs to roughly 195 individual items and does not contain a single pound figure anywhere in the post. It tells you to bring a generator, four bikes, a portable fire pit, firewood, a cast iron skillet, a full pantry, and a full fresh water tank, and then it tells you to pack light.
Here is the problem with that. A mid-size travel trailer often has somewhere between 1,200 and 1,700 pounds of cargo capacity. A full 44 gallon fresh water tank consumes 367 pounds of it before you load one box. Two propane cylinders, a pair of batteries, and four bikes on a rear rack can take another 300. By the time you have loaded the kitchen, the bedding, and a week of clothing for four people, you are frequently within a hundred pounds of your limit, and nobody told you, because the list you were following was written as a memory aid rather than a budget.
Overloading an RV is not an abstract concern. Federal regulators identify excessive load and underinflation as a leading cause of tire failure, and tire failure on a 30 foot trailer at highway speed is a different event than a flat on a sedan. Loading cargo behind the axle is the mechanism that produces trailer sway. Neither of those is solved by a longer list of things to bring.
So this guide does the thing the others skip. It starts with your rig’s actual cargo capacity, shows you where to find that number and what it legally means, gives you real weights for the items you are about to load, and then walks the categories. It also covers the parts of RV packing that carry legal and safety weight rather than physical weight: what the federal government says about carrying firewood across state lines, why some tunnels turn RVs away, and what the Consumer Product Safety Commission has published about the generator sitting in your pass-through bay.
Along the way we will tell you what to leave home, and near the end we will tell you when renting a storage unit for your gear is a waste of your money. We would rather be useful than persuasive.
Table of Contents
- Why Most RV Packing Lists Set You Up to Fail
- Find Your Cargo Capacity Before You Pack a Single Item
- Decoding the Weight Label: GVWR, UVW, OCCC, CCC, GAWR, and GCWR
- The Water Problem: Your Fresh Tank Is Probably the Heaviest Thing You Pack
- Propane, Batteries, and the Weight That Never Makes the List
- How to Weigh Your Rig for Real
- Tongue Weight and the 60/40 Rule: Where Weight Goes in a Towable
- Where Weight Goes in a Motorhome
- A Worked Example: Where 1,400 Pounds Actually Goes
- The Hookup Kit: Water, Power, and Sewer
- Leveling, Chocking, and Stabilizing
- The Tool Kit, Reconsidered by Weight
- Safety Equipment and What NFPA 1192 Governs
- The Generator Question: What the CPSC Data Says
- Propane on the Road: Tunnels, Fuel Stops, and Travel Rules
- Firewood: Where Nearly Every RV Packing List Gets It Wrong
- The Kitchen, Built for a Vehicle in Motion
- The Pantry: Food Weight Per Person Per Day
- Bedding, Clothing, and the Laundry Math
- Bathroom Supplies and Why RV-Specific Products Matter
- Outdoor Gear, Bikes, and the Rear-Rack Problem
- Pets, Kids, Medications, and Documents
- The Departure-Day Walkaround
- What to Leave Home
- Where the Gear Lives Between Trips
- When You Should Not Rent a Storage Unit
- Frequently Asked Questions
- Your Packing List Is a Weight Budget
Why Most RV Packing Lists Set You Up to Fail
The standard RV packing list is organized by room. Kitchen items, bathroom items, bedroom items, tool kit, outdoor gear, entertainment, tech, pets. It is a reasonable way to organize a memory aid, and if the only failure mode were forgetting the can opener, it would be a fine format.
But an RV is not a house, and the constraint is not shelf space. It is a vehicle with a legally defined maximum weight, and every item on that list has mass. Organizing by room hides the only variable that actually matters, because it puts a 4 ounce spatula and a 47 pound generator in the same visual format, as two bullet points of equal apparent size.
The result is a specific and predictable failure. Owners load conscientiously, check off every item, and drive away over their gross vehicle weight rating without ever knowing it. Nothing announces the problem. There is no warning light for cargo weight. The rig drives, more or less, and the consequences show up later as heat in the tires, sag in the suspension, longer stopping distances, and instability in crosswinds.
There is a second failure hiding in the same format. A list organized by room says nothing about where in the RV each item goes. For a towable, that omission is the direct cause of trailer sway, which is not a comfort issue but a loss-of-control issue. Putting the heavy things in the rear pass-through because it is easier to reach is the single most common loading error in RVing, and no room-based list will ever catch it.
The third failure is that these lists treat every item as though it carries only physical weight. Some carry legal weight. Firewood is regulated across much of the country. Propane governs which crossings you are allowed to use. A portable generator is the consumer product the federal safety commission associates with more carbon monoxide deaths than any other. These items appear on the standard lists as three neutral bullet points among two hundred.
So this guide inverts the format. Weight first, placement second, category third. You will still get the complete inventory, and you can still use it as a checklist. But the first six sections are the part that changes how you pack, and skipping them to get to the kitchen list would be a mistake.
Find Your Cargo Capacity Before You Pack a Single Item
Every RV built for the United States market since June 2, 2008 carries a federally mandated weight label. It exists because the National Highway Traffic Safety Administration amended the Federal Motor Vehicle Safety Standards, in 49 CFR Part 571, specifically to make cargo capacity legible to owners. Before that rule, the equivalent label was a voluntary industry practice, which is why RVs from the early 2000s and before carry inconsistent information.
The label is required to be permanently affixed and visible, and the regulation specifies placement on the interior of the forward-most exterior passenger door on the right side of the vehicle. On many towables it also appears near the entry door or inside a cabinet. If you have never looked at it, go look at it now, before you read the rest of this guide. Take a photo of it with your phone. You will want the numbers.
What you are looking for
On a motorhome, the number that matters is OCCC, or Occupant and Cargo Carrying Capacity. On a towable, it is CCC, or Cargo Carrying Capacity. These two acronyms look similar and mean genuinely different things, which is a persistent source of confusion even among experienced owners.
They are the closest thing you have to a budget. Every pound you add to the rig comes out of that number, and when it reaches zero you are at your gross vehicle weight rating. Past zero, you are overloaded.
Why the two numbers work differently
- Motorhome OCCC: gross vehicle weight rating minus unloaded vehicle weight, minus a full load of propane. Because propane is subtracted out for you, it is not something you need to budget again. But occupants, fresh water, cargo, and the tongue weight of anything you tow all come out of this number. That last item surprises people: if you flat-tow a car or pull a small utility trailer, the downward force at the hitch counts against your cargo capacity.
- Towable CCC: the weight of cargo that can be added before the trailer exceeds its gross vehicle weight rating, calculated from the trailer as it left the factory with full propane containers. The critical detail here is that fresh water is treated as cargo on a towable. It is not subtracted for you. If your trailer has a 44 gallon fresh tank and you travel with it full, you have spent 367 pounds of your CCC on water alone.
There is one more wrinkle worth knowing. Before the 2008 federal rule, the industry used a different CCC formula that also subtracted a Sleeping Capacity Weight Rating, calculated as the number of designated sleeping positions multiplied by 154 pounds. That figure still appears on older units. If your label predates 2008, the number on it was computed on a different basis than everything written about RV weight in the last fifteen years, and you should treat it with suspicion and weigh the rig instead.
The number on the label is not necessarily your number
The label reflects the vehicle as the manufacturer built it. Anything the dealer added afterward comes out of your capacity: a second air conditioner, a solar package, an upgraded battery bank, a generator, a rear bumper rack, a weight distribution hitch. The federal rule requires dealers to supply an updated weight label when they add more than 100 pounds, but in practice this is inconsistently observed.
It also does not account for the previous owner. If you bought used, the rig may have accumulated a hundred pounds of permanent additions you have never inventoried. The only way to know your real starting weight is to weigh it, which we cover in Section 6.
Decoding the Weight Label: GVWR, UVW, OCCC, CCC, GAWR, and GCWR
RV weight terminology is genuinely bad. The acronyms are similar, several changed definitions in 2008, and manufacturers and dealers use them loosely. Here is what each one means and, more usefully, which ones can actually stop your trip.
- GVWR, Gross Vehicle Weight Rating. The maximum the vehicle is permitted to weigh, fully loaded, with everything and everyone aboard. This is a hard ceiling set by the manufacturer, not a suggestion, and it is the number every other calculation refers back to.
- UVW, Unloaded Vehicle Weight. What the RV weighed when it left the factory, with fluids. Note that the definition changed in 2008: the current version includes full propane containers, the pre-2008 version did not. This is also the number most often quoted loosely in sales conversations as “dry weight,” and the two are not always the same thing.
- OCCC, Occupant and Cargo Carrying Capacity. Motorhomes only. Everything you add, including people, water, gear, and trailer tongue weight, fits inside this number.
- CCC, Cargo Carrying Capacity. Towables, under the current federal definition. Fresh water counts against it.
- GAWR, Gross Axle Weight Rating. The maximum load a single axle system can carry, measured at the tire contact patch. This is the one people forget, and it is the one that quietly gets exceeded. You can be comfortably under your GVWR and still have overloaded a single axle, because weight in an RV is never evenly distributed. Two axles rated at 3,500 pounds each do not simply give you 7,000 pounds to place wherever you like.
- GCWR, Gross Combined Weight Rating. The maximum combined weight of the tow vehicle and everything it is pulling. Relevant to anyone towing a trailer or flat-towing a car behind a motorhome.
- SCWR, Sleeping Capacity Weight Rating. Sleeping positions multiplied by 154 pounds, an industry average figure. Largely historical now, but it appears on older labels and inside older CCC calculations.
The four numbers that can actually end your trip
If you remember nothing else from this section, remember that you have to satisfy four separate limits at the same time, and satisfying one does not satisfy the others:
- Total weight at or below GVWR
- Each axle at or below its GAWR
- Each individual tire within its load rating at its inflation pressure
- Combined rig at or below GCWR, if you are towing
An RV can pass the first test and fail the second and third. That is the ordinary case, not the exotic one, because RV floorplans put heavy components like water tanks, batteries, and slide-out mechanisms in fixed and asymmetric locations. The interior layout also tends to concentrate weight on one side: a kitchen with a refrigerator, oven, and sink on the same wall is a real and permanent side-to-side imbalance you are loading on top of.
The Water Problem: Your Fresh Tank Is Probably the Heaviest Thing You Pack
Fresh water weighs 8.34 pounds per gallon. That single figure does more to fix RV packing than any other piece of information in this guide, because water is invisible on a packing list and enormous on a scale.
Here is what common fresh tank sizes actually weigh when full:
- 20 gallons: roughly 167 pounds
- 30 gallons: roughly 250 pounds
- 40 gallons: roughly 334 pounds
- 50 gallons: roughly 417 pounds
- 60 gallons: roughly 500 pounds
- 80 gallons: roughly 667 pounds
- 100 gallons: roughly 834 pounds
And that is only the fresh tank. Your water heater holds another 6 to 10 gallons, adding roughly 50 to 83 pounds. If you are traveling with anything in the gray or black tanks, add that too. A 40 gallon gray tank at half capacity is another 167 pounds, and gray and black tanks are almost always mounted low and to the rear, which is exactly where you least want unplanned weight on a towable.
The decision this forces
For a mid-size travel trailer with 1,400 pounds of cargo capacity, arriving with a full 44 gallon fresh tank means 367 pounds, or roughly 26 percent of your entire cargo budget, is water. Add the water heater and you are at 30 percent before a single box goes in.
The practical response is simple and it is the highest-leverage change most RVers can make. If you are staying somewhere with a water hookup, travel with the fresh tank nearly empty and fill on arrival. Carry enough for the drive, typically 5 to 15 gallons, which covers a bathroom stop and hand washing, and fill the rest at the campground.
There are real exceptions. If you are boondocking with no water source, you need the water and there is no way around it, so the water budget has to come out of gear instead. If your destination has questionable water quality, carrying your own is reasonable. And a small number of rigs handle noticeably better with some water aboard because of where the tank sits relative to the axles. Those are legitimate reasons to carry water. “We always just fill it before we leave” is not one.
Dump before you drive
The corollary matters as much. Dump your gray and black tanks before departure, not when you get home. Driving 300 miles with 60 gallons of waste water aboard is 500 pounds of cargo capacity spent on something you are actively trying to get rid of, carried low and rearward where it does the most damage to your handling.
Propane, Batteries, and the Weight That Never Makes the List
Water is the biggest invisible load. These are the next several, and they share a characteristic: they are permanent enough that owners stop seeing them, but heavy enough to matter.
Propane
Propane weighs roughly 4.2 pounds per gallon, but the useful figure is the filled cylinder weight, because the steel counts too.
- 20 pound cylinder: roughly 37 to 38 pounds filled. The tare weight is stamped on the collar, typically 17 to 18 pounds.
- 30 pound cylinder: roughly 54 pounds filled.
- 40 pound cylinder: roughly 70 pounds filled.
- A pair of 30 pound cylinders on a travel trailer tongue: roughly 108 pounds, sitting at the very front of the trailer, which affects tongue weight directly.
On a motorhome, propane is already subtracted from your OCCC, so you do not budget it again. On a towable, full propane is inside the factory weight used to calculate CCC, so it is also accounted for. Either way, the number to watch is not the budget impact but the placement impact, because tongue-mounted cylinders sit at the maximum possible distance forward of the axles.
Do not carry spare propane cylinders inside the living space. This is worth stating plainly because it happens. Cylinders belong in their designed exterior compartment, secured and upright. If you carry a small camp stove canister, treat it as a fuel container, not a kitchen item. Our guide to storing propane tanks safely covers the same rules for the off season.
Batteries
Battery weight is the most commonly overlooked upgrade in RVing, because owners think of it as an electrical decision rather than a weight decision.
- Group 24 flooded lead-acid: roughly 43 to 50 pounds each
- Group 27: roughly 50 to 60 pounds each
- Group 31: roughly 60 to 70 pounds each
- Pair of 6 volt golf cart batteries: roughly 62 to 70 pounds each, so 125 to 140 pounds for the pair
- Comparable lithium iron phosphate: frequently 25 to 35 pounds, which is a real weight argument for the upgrade independent of its performance argument
An owner who moves from a single Group 24 to four 6 volt batteries for boondocking has added roughly 200 pounds to the rig, permanently, usually at the tongue or in a forward compartment. That is a substantial fraction of a small trailer’s cargo capacity and it will not appear on any label.
Generators, inverters, and solar
- Small inverter generator, 2,000 to 2,200 watt: roughly 40 to 55 pounds
- Conventional 3,500 watt generator: roughly 100 to 135 pounds
- Portable solar suitcase, 100 to 200 watt: roughly 25 to 45 pounds with the case and controller
- Two 5 gallon fuel cans, filled: roughly 75 pounds for gasoline
Fuel deserves the same treatment as water. Gasoline runs roughly 6.1 pounds per gallon and diesel roughly 7.1. A 100 gallon motorhome fuel tank is therefore in the neighborhood of 610 to 710 pounds, and while fuel is generally accounted for inside UVW, the auxiliary cans you strap to the bumper are not.
The permanent additions nobody re-weighs
Finally, take five minutes to inventory what has been bolted to your rig since you bought it. A weight distribution hitch runs 60 to 100 pounds. A rear bike rack is 25 to 40 pounds before any bikes. A second air conditioner is roughly 80 to 100 pounds. A full-length awning mat, a folding ladder, a satellite dish, a tire carrier: each is modest and the sum is not.
How to Weigh Your Rig for Real
Everything above is estimation. Estimation is enormously better than the nothing most packing lists give you, but the actual number is available for about fifteen dollars and an hour of your time, and there is no substitute for it.
The basic scale trip
Certified truck scales are found at most large truck stops. Weigh the rig loaded the way you actually travel, which is the part people get wrong. A scale reading of an empty trailer tells you almost nothing useful. Load it for a real trip, with the water you intend to carry, the gear you intend to bring, and the people who will be aboard.
For a motorhome, a single pass gives you total weight plus a front and rear axle split. Compare total against GVWR and each axle against its GAWR.
For a tow vehicle and trailer, the standard approach takes two passes:
- Pass one: pull the whole combination onto the scale, hitched, with the tow vehicle front axle, tow vehicle rear axle, and trailer axles each on a separate platform. This gives you the combined weight and a per-axle breakdown.
- Pass two: unhitch, leave the trailer on the scale, and weigh the tow vehicle separately. The difference between the trailer’s weight when hitched and unhitched is your tongue weight.
Why a single total number is not enough
Flat platform scales weigh by axle, not by wheel. Because RV interiors are asymmetric, with the kitchen, refrigerator, and water tanks frequently concentrated on one side, an axle can be within its rating while one tire on that axle is over its individual load limit. Individual wheel position weighing, offered at some RV rallies and by specialist services, is the only way to see this. It is not necessary for everyone, but if your rig is close to its limits or you have had unexplained tire wear on one side, it is the diagnostic that finds the problem.
What to do with the numbers
Once you have real weights, set your tire pressures from the tire manufacturer’s load and inflation table for the actual load on each axle, rather than defaulting to the maximum number on the sidewall. Federal safety guidance is consistent on this point: excessive load and underinflation cause abnormal sidewall flex, which generates heat, and heat is what destroys tires. NHTSA has also noted that RVs, as low-mileage vehicles, are particularly exposed to tire aging, and that some tire and vehicle manufacturers recommend replacement at six to ten years regardless of how much tread is left.
Write the results on a card and keep it in the rig. Re-weigh after any significant change: a battery upgrade, a new hitch, a different trip profile. It is a fifteen dollar recurring cost against a five figure asset.
Tongue Weight and the 60/40 Rule: Where Weight Goes in a Towable
If you tow, this section matters more than the total weight section, because a correctly weighted trailer that is incorrectly balanced will still try to kill you.
Tongue weight is the downward force the trailer coupler exerts on the hitch ball. For conventional bumper-pull trailers, the widely used standard, reflected in NHTSA’s trailer towing guidance and in essentially every manufacturer tow guide, is 10 to 15 percent of the gross loaded trailer weight. Fifth wheel and gooseneck setups run higher, generally 15 to 25 percent, because the connection point sits over the tow vehicle’s rear axle rather than behind it.
What happens at each end of the range
- Below 10 percent: too much of the trailer’s mass sits behind its axles. The trailer becomes a pendulum. A crosswind, a passing truck, or a small steering correction starts an oscillation, and once started it grows rather than damping. This is trailer sway, and rear-heavy loading is its most common cause.
- Above 15 percent: the tow vehicle’s rear suspension compresses, the front end lifts, and load comes off the front axle. Steering goes vague, braking balance shifts, and headlight aim rises. You have also potentially overloaded the hitch receiver and the tow vehicle’s rear axle.
Both failure modes are corrected the same way: by moving cargo, not by adding equipment. A weight distribution hitch redistributes existing tongue weight across the axles. It does not reduce the total, and it does not fix a rear-heavy load.
The 60/40 guideline
The common rule of thumb is to place roughly 60 percent of cargo weight forward of the trailer’s axles and 40 percent behind. It is a starting point rather than a measurement, and the honest version is that it gets you close enough to then verify with a scale.
The refinement that experienced towers add is to cluster the heaviest items near the axles rather than at the extreme front. Weight concentrated at the very nose raises tongue weight quickly and increases the rig’s tendency to pitch. Weight low and close to the axle centerline, slightly forward, gives the most stable result.
The practical loading order
- Heaviest items go low, centered side to side, and slightly ahead of the axles. Generator, tool bag, cast iron, canned food, water jugs.
- Medium items fill the remaining forward space and the area directly over the axles. Kitchen gear, hookup equipment, chairs.
- Light and bulky items go rearward and up high. Bedding, pillows, clothing, empty totes, sleeping bags.
- Nothing heavy goes in the rear pass-through simply because it is convenient to reach.
- Everything is secured. A load that shifts en route undoes your careful distribution somewhere around mile 40, and you will not know it happened until the rig starts moving strangely.
Side to side matters as well. Loading heavy gear on the same side as the kitchen compounds a permanent imbalance and is the usual explanation for one trailer tire wearing out ahead of the other three.
Where Weight Goes in a Motorhome
Motorhome owners sometimes assume the tongue weight discussion does not apply to them. The physics are different, but the placement problem is not, and in some ways it is worse because the consequences arrive more gradually.
The rear overhang problem
Class A and Class C motorhomes carry a significant amount of body behind the rear axle. Weight placed in that overhang acts on a lever. It loads the rear axle heavily while actually removing load from the front axle, which is where your steering is. The symptom is a coach that wanders in crosswinds, feels light in the steering, and requires constant correction on the interstate. Owners often chase this with steering stabilizers and new tires when the actual cause is a rear storage bay loaded with the heaviest gear in the rig.
The rear bays are usually the largest and the easiest to access, which is precisely why this happens. Resist it. Put the heavy items in the bays between the axles.
The front axle limit
Class C motorhomes in particular are often close to their front gross axle weight rating from the factory, because of the cab-over bunk. Loading that bunk with heavy items, or filling a forward compartment with tools, can exceed the front axle rating while the total coach weight remains comfortably legal. Weigh by axle, not just in total.
If you tow behind the coach
The federal definition is explicit that the tongue weight of a towed trailer counts as cargo against your OCCC. A flat-towed vehicle on a tow bar transfers relatively little vertical load, but a utility or cargo trailer with 400 pounds of tongue weight has just consumed 400 pounds of your motorhome’s carrying capacity. It also has to fit inside your gross combined weight rating alongside everything else.
The side-to-side reality
Motorhome floorplans concentrate mass. Slide-out mechanisms, the refrigerator, the water heater, the generator, and the fresh tank are rarely balanced left to right. This is the strongest argument for individual wheel position weighing on a larger coach, because it is entirely possible to be within GVWR and within both GAWRs while a single tire carries more than its rating.
A Worked Example: Where 1,400 Pounds Actually Goes
Abstractions do not change behavior. Arithmetic does. So here is a complete load-out for a common rig, run all the way down to the remainder.
The example is a family of four in a 26 foot travel trailer with a gross vehicle weight rating of 7,600 pounds and an unloaded vehicle weight of 6,200 pounds. Cargo capacity is therefore 1,400 pounds. Propane is already inside that unloaded weight under the current federal definition, so the two cylinders on the tongue are accounted for. Fresh water is not, so it comes out of the budget.
Every figure below is a reasonable typical weight, not a measurement of your rig. Use it as a template and substitute your own numbers.
- Fresh water, 44 gallon tank filled: 367 lb. Running total 367. Remaining 1,033.
- Water heater, 6 gallons: 50 lb. Remaining 983.
- Two Group 24 batteries added by the dealer: 92 lb. Remaining 891.
- Rear bike rack plus four bikes: 153 lb. Remaining 738.
- Inverter generator, 2,200 watt: 47 lb. Remaining 691.
- Kitchen: cookware, dishes, utensils, coffee maker: 90 lb. Remaining 601.
- Bedding, pillows, and towels: 60 lb. Remaining 541.
- Clothing, four people, one week: 120 lb. Remaining 421.
- Pantry, refrigerator contents, and a loaded cooler: 130 lb. Remaining 291.
- Hookup kit: hoses, cords, regulator, sewer kit, adapters: 55 lb. Remaining 236.
- Tools, leveling blocks, and chocks: 55 lb. Remaining 181.
- Camp chairs, folding table, grill, and outdoor mat: 95 lb. Remaining 86.
Eighty-six pounds left, and we have not yet packed a single toy, book, board game, fishing rod, kayak, cornhole set, portable fire pit, or bundle of firewood. We have not packed the dog’s crate and food. We have not added a case of bottled water, which is roughly 30 pounds for 24 bottles, in a trailer that is already carrying 367 pounds of water.
This is not a contrived scenario. It is close to the ordinary case, and it is why so many trailers on the interstate are over their rating without their owners having done anything careless. Nobody made a bad decision. They just never saw the running total.
The three highest-leverage changes
Look at where the weight actually sits, and the fixes are obvious:
- Travel with the fresh tank at 10 gallons instead of full. Recovers roughly 283 pounds. This is the single biggest lever available to most RVers and it costs nothing but a stop at the campground spigot.
- Take two bikes instead of four. Recovers roughly 64 pounds, and more importantly removes weight from a rear-mounted rack behind the axles, which is the worst possible location for tongue weight.
- Cut the clothing by a third and plan one laundry stop. Recovers roughly 40 pounds and a meaningful amount of closet space.
Those three changes together free up roughly 387 pounds, taking the remainder from 86 pounds to over 470. That is the difference between a rig at its limit and a rig with genuine margin, and none of it required leaving behind anything anyone would miss.
The same exercise on a motorhome
For a Class C with a 14,500 pound gross vehicle weight rating and 12,300 pounds unloaded, with propane subtracted for you, the OCCC works out near 2,140 pounds. That sounds generous until you subtract the occupants, because on a motorhome people are cargo:
- Four occupants: roughly 600 lb. Remaining 1,540.
- Fresh water, 40 gallons: 334 lb. Remaining 1,206.
- Tongue weight of a small towed utility trailer: 300 lb. Remaining 906.
Nine hundred pounds for everything else, in a vehicle people describe as having plenty of storage. The bays are large. The capacity is not.
The Hookup Kit: Water, Power, and Sewer
This is the category where forgetting one small item ends the usefulness of the trip. You can improvise a missing spatula. You cannot improvise a water pressure regulator, and you certainly cannot improvise a sewer hose.
Water
- Drinking water hose, 25 feet: a white or blue hose rated as potable. A garden hose is not the same product and is not intended for drinking water.
- A second drinking water hose: spigot placement at campsites is inconsistent and 25 feet is regularly not enough.
- Water pressure regulator: genuinely not optional. Campground water pressure varies enormously and RV plumbing is not built for the high end of that range. An adjustable regulator with a gauge is worth the small upgrade over a fixed one.
- Inline water filter and a spare cartridge.
- 45 degree hose elbow at the inlet, which prevents the hose from kinking against the side of the rig.
- Y-splitter so you can run a rinse hose without disconnecting the fresh line.
- Assorted washers. Weightless, and the fix for most leaks.
Electrical
- Shore power cord, usually 30 or 50 amp depending on your rig, plus a 25 foot extension in the correct amperage.
- Surge protector or electrical management system. The basic version protects against surges. The better version also detects open ground, reversed polarity, and low voltage, and disconnects before those reach your appliances. Low voltage at a crowded campground on a hot afternoon is the common threat, and it is what damages air conditioners.
- Adapters in both directions, 50 to 30 amp and 30 to 15 amp, so you can use whatever the site actually has.
- Outdoor-rated extension cord for lights and small devices.
- Non-contact voltage tester or outlet tester. Small, light, and it tells you whether the pedestal is wired correctly before you connect.
Sewer
- Sewer hose, 15 to 20 feet, plus a spare. Sewer hoses fail, and they fail at the least convenient moment.
- Clear elbow adapter, which lets you see when the tank has actually finished draining and when the rinse water runs clear.
- Sewer hose support, which maintains a downhill run.
- Threaded and bayonet fittings to match whatever the dump station uses.
- Dedicated tank rinse hose, in a color that is obviously not your drinking water hose. Keep it stored separately. This is one of the few places in RVing where a mistake has a health consequence.
- Disposable gloves, a box of them.
- Tank treatment appropriate to your system.
Total weight for a complete hookup kit generally runs 45 to 65 pounds. It is not the heaviest category, but it is the one with the least discretion in it. Almost none of this can be cut.
Leveling, Chocking, and Stabilizing
Leveling is not about comfort, or at least not only. Absorption refrigerators, which are still common in RVs, rely on gravity to circulate their coolant and can be damaged by prolonged operation out of level. That is an expensive repair caused by a cheap oversight.
- Leveling blocks, the interlocking plastic kind, roughly 10 to 15 pounds for a set of ten. Lighter and more versatile than lumber.
- Curved leveling ramps for single-axle and tandem trailers, which let you drive up to the height you need rather than stacking.
- Wheel chocks, at minimum one pair, and X-style chocks between tandem axles if you want the trailer to stop rocking when people move around inside.
- Jack pads or stabilizer pads, so the jacks do not sink into soft ground or gravel.
- Bubble levels mounted on the trailer, or a phone app, which is free and works.
- A short pry bar or crank handle for manual stabilizers.
- Cordless drill with the correct socket for powered stabilizer jacks, which saves a great deal of time and forearm.
A leveling and chocking kit typically runs 25 to 40 pounds. Because these items are dense and go in and out at every stop, they are ideal candidates for the front pass-through on a towable, where their weight helps rather than hurts.
The thing people forget
Chock before you unhitch. Every time. A trailer that rolls off its jack during unhitching damages the trailer, the tow vehicle, and occasionally a person. It takes ten seconds and there is no situation where skipping it is worth it.
The Tool Kit, Reconsidered by Weight
Tool kits are where RV packing lists get least disciplined. The most comprehensive list we reviewed includes 31 separate items in this category alone, ranging from a shovel to a full toolbox to motor oil and transmission fluid. Carried literally, it is well over 100 pounds of equipment for problems that mostly get solved by a phone call.
The useful question is not “what might break” but “what can I actually fix at a campsite, and what will I be calling roadside assistance for regardless.” The honest answer is that the fixable list is short.
The tools that earn their weight
- Socket set and adjustable wrench, sized for your lug nuts and your stabilizer jacks.
- Screwdrivers or a multi-bit driver, plus the drill you are already carrying for the jacks.
- Pliers, including channel locks, for hose fittings and sewer connections.
- Torque wrench. Lug nuts on trailer wheels loosen, and checking them at intervals is one of the few genuinely preventive maintenance tasks available to you on the road.
- Tire pressure gauge, accurate and rated well above your operating pressure, since trailer tires often run 50 to 80 psi and a car gauge tops out too low.
- Portable air compressor capable of reaching your trailer tire pressure. Many small ones are not.
- Multimeter for 12 volt problems, which are the most common electrical faults in an RV.
- Spare fuses in your rig’s sizes, plus spare 12 volt bulbs.
- Self-amalgamating tape and quality duct tape, which between them handle most temporary plumbing and covering repairs.
- Zip ties, bungee cords, and ratchet straps.
- Headlamp and a flashlight, with fresh batteries. A headlamp is materially better than a flashlight when you are hooking up sewer in the dark.
- Work gloves.
- Wheel wrench or breaker bar that actually fits your lug nuts, which the tow vehicle’s factory tool frequently does not on a trailer.
What to leave home
Motor oil and transmission fluid appear on many lists. Unless you have a known consumption issue, you are carrying 10 pounds of fluid to solve a problem that a fuel stop solves. Full quantities of spare lubricants belong in the category of things to buy when needed.
A shovel is genuinely useful in some regions and dead weight in others. A generator is a 47 to 135 pound decision that deserves its own thought, which we give it in Section 14.
One correction worth making
Cleaning supply lists on several major RV packing guides, including the most widely shared one, list bleach and vinegar adjacently as bullet points in the same category, with no handling note. Mixing bleach with an acid such as vinegar releases chlorine gas, and mixing bleach with ammonia-based cleaners produces chloramine vapors. Both are hazardous in any space, and an RV bathroom is one of the smallest and least ventilated spaces most people will ever clean.
Carry one general purpose cleaner and one disinfectant, know which is which, and never mix. In a vehicle where the bathroom, kitchen, and bedroom share a few hundred cubic feet of air, this is a more serious point than it would be in a house.
Safety Equipment and What NFPA 1192 Governs
RV safety equipment is not a matter of general camping advice. There is a specific consensus standard for it: NFPA 1192, Standard on Recreational Vehicles, which sets fire and life safety criteria written for the particular conditions of a vehicle that people sleep in. It addresses fire detection, carbon monoxide detection, means of egress, and the locations and types of fire extinguishers, along with the installation of fuel-burning, plumbing, and electrical systems.
We are deliberately not going to tell you which extinguisher rating to buy or where to mount your detectors. Those specifics belong to the current edition of the standard and to your rig’s owner manual, and getting them from a blog post is the wrong way to make that decision. What is worth knowing is that the standard exists, that RVs are treated as their own category for good reason, and that the equipment listed below is not optional gear in the way a hammock is optional gear.
The equipment
- Fire extinguishers. Most rigs ship with one, usually mounted near the entry door. One is a minimum, not a target. A second unit near the sleeping area and a third in an exterior bay is a common and sensible configuration, because an extinguisher you cannot reach is not an extinguisher. Check the gauge before every trip and note the manufacture date.
- Smoke alarm. Test it. Replace the battery at the start of every season regardless of whether it has chirped.
- Carbon monoxide alarm. Separate from the smoke alarm. These have a finite service life, typically printed on the unit, and an expired CO alarm is worse than no alarm because it produces false confidence.
- Propane leak detector. Usually mounted low, because propane is heavier than air and pools at floor level. Also has a service life.
- First aid kit. Bandages and gauze, antiseptic, antibiotic ointment, tweezers, scissors, an elastic wrap, instant cold pack, and over-the-counter medications for pain, allergies, upset stomach, and motion sickness. The American Red Cross publishes a standard kit contents list that is a reasonable baseline.
- Prescription medications in original labeled containers, with more days of supply than the trip length.
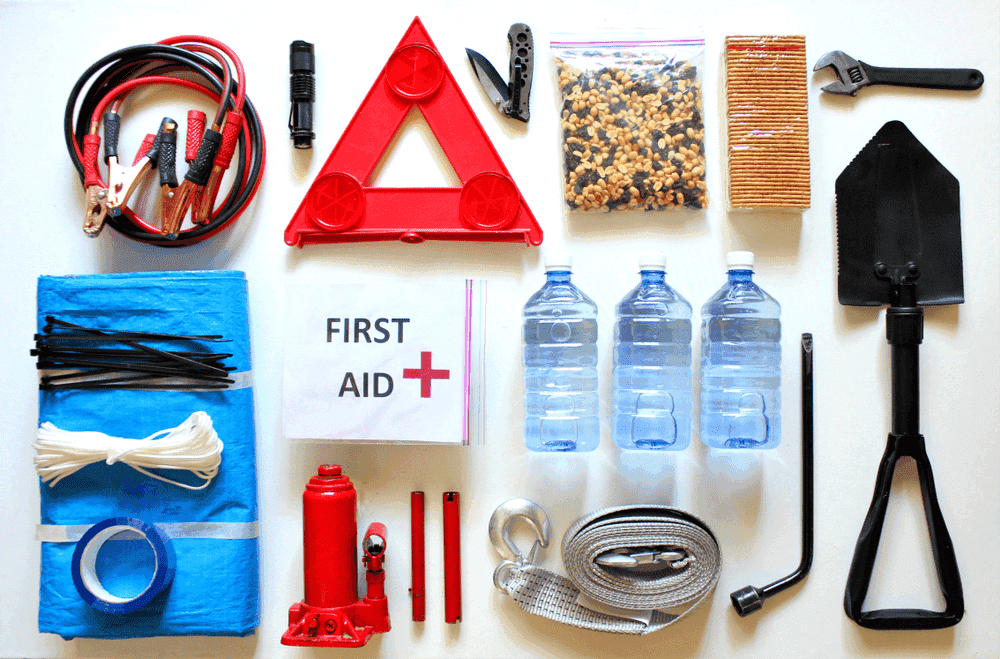
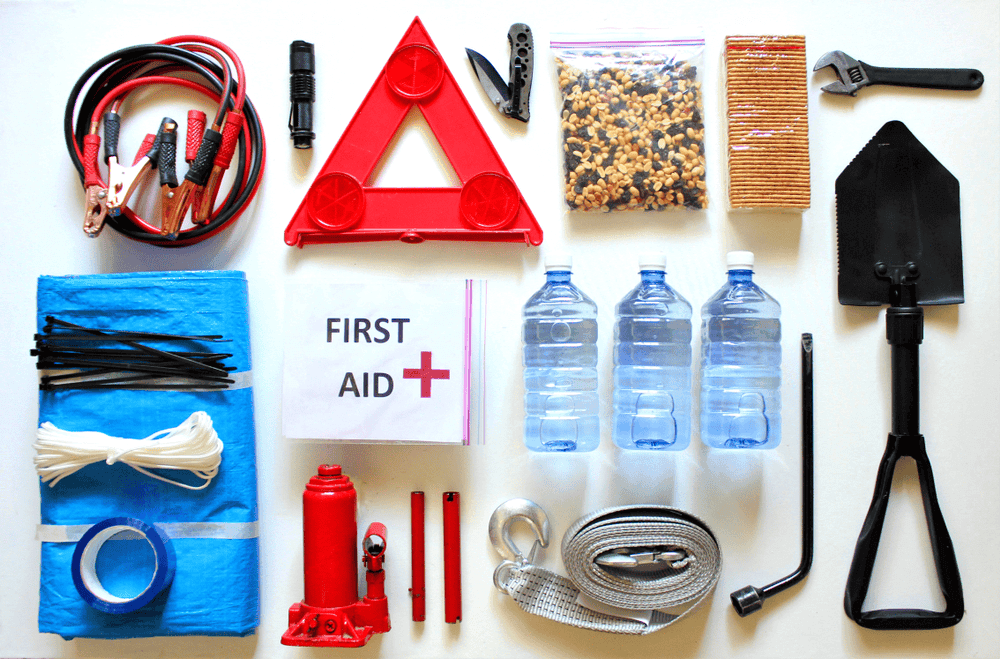
- Emergency roadside kit: reflective triangles or LED flares, a high-visibility vest, and jumper cables or a jump pack.
- Weather radio or a phone with emergency alerts enabled. Campgrounds are frequently in areas with poor cell coverage, and severe weather is the most common reason an RV trip becomes an emergency.
Egress
Find your emergency exit windows and open them once, at home, in daylight, before you need them. They have latch mechanisms most people have never operated. Show every person who sleeps in the rig, including children, how to open them. This costs five minutes and it is the single most valuable safety task in this entire guide.
The Generator Question: What the CPSC Data Says
On the packing lists that dominate this topic, “Generator” appears as one bullet point among thirty, between “Flashlight with extra batteries” and “Jump starter pack.” It deserves more than that, and the reason is in the federal data.
The U.S. Consumer Product Safety Commission estimates that roughly 85 people die each year in the United States from carbon monoxide poisoning caused by gasoline-powered portable generators. Of all consumer products under the agency’s jurisdiction, none has been associated with more carbon monoxide deaths. The CPSC has also published a figure that puts the hazard in perspective: a single portable generator can produce as much carbon monoxide as hundreds of cars.
The detail that makes this directly relevant to RVing is in the agency’s own analysis of fatal incidents. Among the top three reasons for generator use in those cases, alongside weather-related power outages and utility shutoffs, was supplying power to temporary locations, specifically including cabins, campers, and trailers. This is not a hazard that belongs only to hurricane season and residential garages.
What the guidance actually says
- Outside only. Never in an enclosed or partially enclosed space. Not in a garage, not in a shed, not in an RV bay with the door propped open, not under an awning enclosed on three sides.
- Twenty feet minimum, with the exhaust directed away from the rig and away from any door, window, or vent. The CPSC has been explicit that 20 feet is the recommendation regardless of what an individual product manual says, and it has noted that some manufacturer manuals specify as little as five feet, which the agency considers far too close.
- Carbon monoxide is odorless and colorless, and poisoning can progress to unconsciousness before the person notices symptoms. Dizziness, nausea, and weakness are the warning signs, and by the time they are recognizable the exposure is already significant.
- Your CO alarm is the backstop, not the plan. Verify it works before every trip.
- If your generator predates the newer voluntary safety standards, it likely lacks automatic CO shutoff. The CPSC has published analysis finding that generators meeting the UL 2201 standard would have prevented nearly all of the deaths in the incidents it modeled. If you are buying, that is the specification to look for.
Whether to bring one at all
This is a weight decision as much as a safety decision. A 2,200 watt inverter generator runs 40 to 55 pounds; a conventional 3,500 watt unit runs 100 to 135 pounds, plus fuel cans at roughly 37 pounds each when filled with five gallons of gasoline.
If every night of your trip is at a site with electrical hookups, you are carrying that weight and that hazard for nothing. Many RVers bring a generator on every trip out of habit established during one boondocking weekend three years ago. Match the equipment to the itinerary. Also be aware that a large number of campgrounds restrict generator hours or prohibit them entirely, and that quiet-hours rules are enforced.
For readers whose power needs are modest, a portable power station with a solar panel is worth considering. It weighs less, produces no exhaust, and can be used inside the rig, which a fuel-burning generator cannot.
Propane on the Road: Tunnels, Fuel Stops, and Travel Rules
Propane is the one item on your packing list that determines which roads you are permitted to drive. No standard RV packing list mentions this, and it is the sort of thing you find out from a sign at the last exit before a tunnel, with a trailer behind you and nowhere to turn around.
Why some tunnels restrict propane and others do not
The pattern is physics rather than bureaucracy. Propane vapor is heavier than air. In a tunnel that dips below grade, typically an underwater crossing, a leak would settle and pool at the lowest point rather than dissipating. Tunnels bored through mountains usually crest slightly in the middle for drainage, so any escaping vapor would flow outward to the portals. That is why underwater tunnels are the ones with restrictions and mountain tunnels usually are not.
Restrictions come in roughly three tiers, and knowing the tiers is more useful than memorizing a list:
- No restriction. The large majority of tunnels in the United States, at the quantities RVs typically carry.
- Valves must be closed. You may pass through with propane aboard provided the cylinder valves are shut. Some of these crossings staff an inspection point and will stop you to verify.
- Prohibited entirely, or limited to quantities smaller than any RV realistically carries. In these cases the crossing is simply not available to you and a signed detour exists.
Several major metropolitan crossings fall into the third tier, particularly underwater tunnels serving Baltimore, Boston, New York, and the Hampton Roads area of Virginia, and at least one tunnel near Houston imposes specific quantity limits. We are naming these as a pattern rather than a checklist for a deliberate reason: these rules are set by individual tunnel and turnpike authorities, they differ from one another in their details, and they change. Verify with the specific tunnel or bridge authority before you travel, and do not rely on this or any other blog post as your source.
The practical protection is routing. Most navigation apps have an RV or truck routing mode that accounts for propane restrictions along with height and weight limits. Use it, and be alert to the specific risk that a traffic reroute or a detour can push you onto a restricted crossing you never planned for.
Fuel stops
Shut your propane off before pulling into a fueling station. Many stations post this requirement, and the reasoning is straightforward: an appliance pilot or a faulty connection is an ignition source in an environment full of gasoline vapor. It costs you a few seconds and a relit water heater.
Travel with appliances running
Whether to run the refrigerator on propane while driving is a genuinely contested question among RVers, with reasonable arguments on both sides regarding cooling performance versus ignition risk. Rules also vary by jurisdiction, and some Canadian provinces restrict propane use in motion. Rather than pretend there is a settled answer, we will say this: a well-packed refrigerator holds temperature for several hours with the door closed, most driving days are shorter than that, and turning the propane off before you drive removes the question entirely.
Before every trip
- Check cylinder recertification dates. Portable cylinders require periodic recertification and an out-of-date cylinder will be refused at the fill station.
- Inspect the hose and regulator for cracking.
- Confirm cylinders are secured and upright in their designed compartment.
- Never store spare cylinders inside the living area or in a sealed compartment that vents into it.
Firewood: Where Nearly Every RV Packing List Gets It Wrong
This is the clearest factual error in the RV packing content that currently ranks, and it is worth being direct about it.
The most widely shared RV road trip packing list on the internet, published by Extra Space Storage, includes “Firewood” as an item in its outdoor recreation equipment category. Several other popular lists do the same. Following that advice can spread destructive forest pests, and in many parts of the country it can also break the law.
What the federal guidance says
The U.S. Department of Agriculture’s Animal and Plant Health Inspection Service runs an ongoing campaign on exactly this issue, and its guidance names RV owners specifically. USDA’s position is that anyone traveling from one location to another, including campers, anglers, hunters, and RV owners, should not carry firewood to their destination unless it is certified heat-treated. Doing so can spread tree-killing insects and diseases, and, in the department’s own words, may also violate state and federal laws depending on the region.
The mechanism is that invasive pests such as emerald ash borer travel as eggs and larvae under bark, or as microscopic spores in cracks in the surface. They move only short distances on their own. A load of firewood in a pass-through bay moves them hundreds of miles in an afternoon. Wood that looks perfectly clean routinely is not, because pin-head sized eggs are not something anyone can reliably inspect for.
The distance guidance
The National Park Service recommends sourcing firewood within 10 miles of where you will burn it, and treats 50 miles as generally too far. State rules vary and are often stricter, defined either as a set distance, commonly 10, 25, or 50 miles, or as a specific county or regulated area. Some states go further: Washington operates an exterior quarantine that prohibits firewood entering from out of state unless it is heat-treated and labeled as pest free.
What to actually do
- Buy it where you burn it. Most campgrounds sell firewood on site or can point you to a dealer nearby. This is the whole solution and it costs a few dollars.
- If you must transport wood, use certified heat-treated firewood carrying a USDA APHIS or state department of agriculture treatment seal. Heat treatment requires the wood to reach 140 degrees Fahrenheit internally for 60 minutes, which is what kills the pests.
- Check before you go. Park and campground websites publish firewood rules alongside fire restrictions and burn bans, both of which you need to check anyway.
- Do not bring leftover wood home. The guidance runs in both directions. Wood acquired at your destination may carry pests your home region does not have. Burn it completely or leave it for the next camper or the camp host.
- Bring an alternative. Burn bans are common in dry seasons across much of the West and South. A propane fire pit is permitted in many places where wood fires are not, which is a good reason to check before you drive.
The weight footnote
There is a packing argument here as well as a legal one. Firewood is dense. A few bundles is 40 to 60 pounds of cargo capacity spent on something sold for a few dollars at your destination, and a larger load can run into the hundreds of pounds. Of all the items on a standard RV packing list, this is the one with the worst ratio of weight carried to value delivered.
The Kitchen, Built for a Vehicle in Motion
Two things make an RV kitchen different from a home kitchen, and both are usually ignored. It is heavy, and it is subject to acceleration in three axes for hundreds of miles at a time.
A fully outfitted RV kitchen commonly runs 80 to 120 pounds. Cast iron is the single densest thing most people bring: a 12 inch skillet is roughly 8 pounds and a Dutch oven can reach 20. Cast iron cooks beautifully and it is not a mistake to bring it, but bring the piece you will actually use rather than the set.
The core kit
- Nesting pot and pan set, which is the single best weight and volume decision in an RV kitchen.
- One good chef’s knife, one paring knife, one serrated knife, stored in blade guards or a knife roll. Loose knives in a drawer that opens on a mountain descent are a genuine hazard.
- Cutting board that fits over the sink, which doubles your counter space in a galley where counter space is the actual constraint.
- Melamine or enamel plates and bowls rather than ceramic. Lighter and they do not shatter.
- Insulated tumblers rather than glassware.
- Silverware, cooking utensils, tongs, spatula, can opener, corkscrew, vegetable peeler.
- Measuring cups and spoons, nesting.
- Colander, collapsible silicone.
- Mixing bowls, collapsible or nesting.
- Food storage containers, nesting, with lids that lock.
- Dish soap, sponges, dish towels, a small drying rack.
- Foil, plastic wrap, resealable bags, paper towels.
- Trash bags and a plan for where the trash actually goes, which is a bigger daily problem in an RV than anyone expects.
- One or two small appliances at most. A coffee maker if coffee matters to you, and that is usually the whole list. Every additional appliance is weight, cabinet space, and amperage.
Securing the galley
An RV kitchen has to survive braking, cornering, and washboard road. The failures are predictable and preventable:
- Non-slip drawer and shelf liner in every cabinet. A few dollars, almost no weight, and it stops the rattling that drives people to distraction and the sliding that breaks things.
- Cabinet latches or tension rods so doors stay shut. Overhead cabinets that pop open in transit empty themselves onto the floor.
- Nest and pad anything breakable with dish towels, which you are carrying anyway.
- Refrigerator bars or tension rods inside the fridge, so that opening it after a drive is not an event.
- Nothing loose on the counter when you pull out. Not the fruit bowl, not the coffee maker, not the knife block.
Where the kitchen goes
The heavy end of the kitchen, meaning cast iron, canned goods, and small appliances, is a good candidate for the forward pass-through bay in a towable rather than the galley cabinets, when the item is not needed daily. It is dense, it belongs low and forward, and it is easy to retrieve at the campsite.
The Pantry: Food Weight Per Person Per Day
Food is the most consistently overpacked category in RVing, and the reason is psychological. It feels prudent to bring extra, food is cheap relative to the trip, and nobody wants to be the person who ran out. But food is dense, and it is the one heavy category that shrinks as the trip progresses, which means your worst weight day is day one.
The rough numbers
A useful planning figure is 2 to 3 pounds of food per person per day for real cooked meals, which for a family of four on a seven day trip is roughly 56 to 84 pounds before packaging, before beverages, and before the cooler itself. Beverages are frequently heavier than the food:
- A case of 24 half-liter water bottles: roughly 30 pounds
- A 12 pack of canned drinks: roughly 10 pounds
- A gallon of milk: roughly 8.6 pounds
- A large bag of ice: roughly 20 pounds
- A loaded 50 quart cooler: commonly 60 to 80 pounds all in
Bottled water deserves particular scrutiny. Carrying a case of bottled water in a rig that also has 44 gallons of fresh water aboard means you are paying a weight penalty twice for the same substance. Reusable bottles and a good inline filter solve this.
The staples worth carrying
- Coffee and filters, or whatever your version of the non-negotiable morning item is.
- Cooking oil, salt, pepper, and a small selection of spices decanted into small containers rather than full jars from home.
- Condiments in small bottles, not the household size.
- Shelf-stable proteins: canned beans, tuna, peanut butter.
- Pasta, rice, oats, and a batter mix.
- Snacks that survive heat and motion.
- One or two genuinely easy meals for the first night, when you will be tired, it will be later than you planned, and you will not want to cook.
The strategy that actually works
Provision for the first two or three days and buy the rest at your destination. Grocery stores exist near almost every campground in the country, prices are broadly comparable, and this single change routinely removes 40 to 60 pounds from departure weight. It also means fresher food and less waste.
The exception is genuinely remote travel, where resupply is a real problem and the calculus changes. If you are heading somewhere without a grocery store within an hour, provision fully and take the weight out of gear instead.
One more practical note: pre-portioning and freezing meals at home lets frozen food act as cooler ice, which removes the 20 pound bag of ice from your load and gives you a meal at the other end.
Bedding, Clothing, and the Laundry Math
Clothing is bulky rather than dense, which makes it feel free. It is not. Roughly 1.5 to 2 pounds per complete outfit means a family of four packing seven full changes each is carrying something in the neighborhood of 120 pounds of clothing, plus shoes, plus jackets, plus the bags it all arrived in.
The laundry math
Most campgrounds of any size have laundry facilities, and most towns have a laundromat. Packing four days of clothing and doing one load mid-trip instead of packing eight days cuts your clothing weight roughly in half and costs you about ninety minutes with a book.
For a family of four, that is on the order of 40 to 60 pounds recovered and a noticeable amount of closet space, which in most RVs is the scarcer resource. If you are traveling longer than about five days, the laundry stop is almost always the right call.
Clothing
- Layers rather than bulk. A base layer, a fleece or midlayer, and a waterproof shell handle an enormous temperature range at a fraction of the volume of a heavy coat.
- Merino or synthetic base layers, which can be worn multiple days without becoming unpleasant. This is the single most effective way to reduce clothing volume.
- Two pairs of shoes per person in most cases: something for walking or hiking and something for water or shower. A third pair only if the trip genuinely calls for it.
- Rain gear for everyone. The trip where it rains is the trip where this matters, and it is not predictable in advance.
- Hats, sunglasses, and sunscreen.
- A dedicated bag or bin for dirty laundry, which keeps the rig livable.
- A set of clothes that lives in the RV permanently, if you have the space. It means a forgotten bag is an inconvenience rather than a disaster.
Bedding
- Sheets sized to your actual RV mattress, which is frequently a nonstandard size such as an RV queen or a short king. Measure before you buy.
- A mattress topper, which is the most reliable comfort upgrade in RVing and worth its 8 to 15 pounds more than most items on any packing list.
- Pillows, which are nearly weightless and enormously bulky. They are the right thing to stuff into high rear cabinets on a towable, where light and bulky belongs.
- Sleeping bags for bunks and for anyone sleeping outside, which pack down smaller than bedding sets.
- One extra blanket per person. Nights are colder than the forecast suggests at elevation.
- Towels: one bath, one beach, one quick-dry per person. Quick-dry towels are meaningfully lighter and dry in a rig where nothing else does.
Dry everything completely before it goes into a cabinet or a bin. Damp towels and swimsuits left folded in a closed space will mildew, on the road and in storage alike, and the smell is difficult to remove once it establishes.
Bathroom Supplies and Why RV-Specific Products Matter
The RV bathroom is the smallest room most people have ever used and it is attached to a waste system with real constraints. Two things matter here: use products designed for the system, and pack small.
The RV-specific items
- RV toilet paper. This is not marketing. RV-rated paper breaks down quickly enough to avoid clogging the black tank and the dump valve. Standard household paper, particularly thick or quilted varieties, is a common cause of tank problems that then have to be solved at a dump station, by you.
- Black tank treatment appropriate to your system, which controls odor and assists breakdown.
- A small toilet brush and a dedicated cleaner that will not damage the plastic bowl. Household bleach-based bowl cleaners are not always appropriate for RV toilets.
- Nothing but waste and RV paper down the toilet. No wipes, including wipes labeled flushable. This is the most common self-inflicted RV plumbing failure there is.
Everything else
- Travel-size toiletries, refilled from home bottles into small containers rather than carried full size. Shampoo, conditioner, body wash, face wash.
- Toothbrushes, toothpaste, floss.
- Deodorant, razor, shaving supplies, nail clippers, tweezers.
- Hairbrush and any hair tools you truly need, keeping in mind that hair dryers and straighteners draw substantial current and can trip a 30 amp pedestal when the air conditioner is running.
- Feminine hygiene products.
- Hand soap, hand sanitizer, and wet wipes.
- Shower caddy or over-door hanging organizer, since RV bathrooms almost never have enough surfaces.
- Shower shoes, for campground shower houses.
- A small trash can with a lid.
The water discipline
If you are not on a sewer hookup, every shower fills your gray tank, and a full gray tank ends showers whether you are finished or not. The standard technique is to wet down, shut the water off, soap up, and rinse. A shower head with a built-in shutoff valve makes this easy and costs almost nothing. On a rig with a 40 gallon gray tank and four people, this is the difference between showering all week and driving to a dump station on day three.
Outdoor Gear, Bikes, and the Rear-Rack Problem
Outdoor gear is where the packing list meets the reason you bought an RV in the first place, and it is also where the most weight gets added with the least deliberation.
The rear rack problem
This deserves its own warning because it is the most consequential loading mistake in towing, and it hides inside an accessory that appears to solve a storage problem.
A four-bike rack mounted on the rear bumper of a travel trailer places roughly 150 pounds at the maximum possible distance behind the axles. Refer back to Section 7: weight behind the axle reduces tongue weight, and reduced tongue weight is the primary cause of trailer sway. A rig that towed perfectly last season can become unstable this season for no reason other than a new bike rack, and the owner will usually blame the wind.
There is a second issue. Many travel trailer rear bumpers are not structurally rated for a loaded bike rack. They were designed to carry a sewer hose. Bumper and frame failures from rear-mounted racks are a known problem, and the fix is to check your manufacturer’s stated rating before mounting anything to that bumper.
The better options, in order: carry bikes on the tow vehicle instead, carry fewer bikes, or use a hitch-mounted rack on the tow vehicle where the weight sits over or ahead of an axle. If a rear trailer rack is genuinely the only option, weigh the tongue afterward and confirm you are still in the 10 to 15 percent range.
The camp setup
- Camp chairs, roughly 8 to 15 pounds each depending on style. Four chairs is 40 to 60 pounds, which is a real line item.
- Folding table, 15 to 25 pounds, and worth it if you cook outside.
- Outdoor mat under the awning, which keeps a remarkable amount of dirt out of the rig.
- Portable grill, 15 to 40 pounds depending on type, plus fuel. Confirm whether your campground supplies grills before bringing one.
- String lights, light, cheap, and the thing everyone likes.
- Bug spray, citronella, and a bug zapper or fan if you are heading somewhere buggy.
- Broom and dustpan, because an RV tracks in everything.
Recreation
- Hiking gear: daypack, water bottles or bladder, trekking poles, downloaded offline maps.
- Water gear: life jackets for everyone on the water, which is a legal requirement in most jurisdictions and not merely a good idea, plus towels, dry bags, and water shoes.
- Kayaks, canoes, or paddleboards. Inflatable versions have transformed this category for RVers: a good inflatable paddleboard is 20 to 30 pounds packed versus a hardshell at 30 pounds that also needs roof space and a rack.
- Fishing gear and a license for the state you are fishing in, which is state-specific and frequently forgotten.
- Binoculars, a star chart or app, and a field guide if the destination is that kind of place.
- Lawn games, chosen selectively. A cornhole set is 25 to 40 pounds.
- Rainy day items: cards, a couple of board games, books, downloaded movies. Weather turns and an RV gets small fast.
The honest guidance for this whole category is to pick the two or three activities the trip is actually about and equip for those properly, rather than bringing a partial kit for six activities. The partial kits are what fill the bays and the bays are what fill the cargo capacity.
Pets, Kids, Medications, and Documents
Documents
Keep these together in one waterproof folder or pouch, in a place every adult in the rig knows about:
- Driver licenses and, if applicable, any special license endorsement your state requires for large motorhomes
- Vehicle registration for both the tow vehicle and the RV
- Insurance cards for both, plus your roadside assistance policy number
- Campground reservation confirmations, printed, because cell service at the check-in gate is a coin flip
- Your RV’s owner manual and appliance manuals
- A written record of your weights, tire pressures, and rig height, which is genuinely useful at low bridges
- Medical information: insurance cards, a list of medications and allergies, and emergency contacts
- Pet vaccination records, which some campgrounds require
Photograph the whole folder and store it in the cloud. It weighs nothing and it is the backup that matters.
Pets
- Food for the full trip plus a few days, in a sealed container. Pet food is dense; a 30 pound bag is a real line item.
- Collapsible bowls, plus a spill-resistant water bowl for travel days.
- Leash, collar with current tags, and a backup leash. Most campgrounds require pets leashed at all times.
- Waste bags, more than you think.
- Crate or carrier, which also gives a pet a familiar place in an unfamiliar vehicle.
- Bed or blanket from home.
- Medications, flea and tick prevention, and vaccination records.
- A temperature monitor if your pet will ever be in the rig without you. RV interiors heat extremely quickly, and a power interruption that stops the air conditioning is a serious risk to an animal left inside. Several products will alert your phone if the interior temperature rises.
- A recent photo of your pet on your phone, in case they get loose somewhere unfamiliar.
Kids
- Car seats, correctly installed in whichever vehicle the children ride in. Note that many RVs do not have seating positions suitable for car seats, and this needs to be sorted before departure rather than in the driveway.
- One comfort item each, non-negotiable, and worth every ounce.
- Activities that do not need a screen: a sketchbook, a card game, a scavenger hunt list.
- Headphones, which preserve everyone’s sanity on long drives.
- Their own flashlight or headlamp. Campgrounds are dark and this is genuinely both practical and popular.
- Extra clothes beyond your estimate. This is the one category where overpacking is correct.
The Departure-Day Walkaround
Everything above is about what goes in the rig. This is about the fifteen minutes before you pull out, which is where the expensive mistakes actually happen. Nearly every RV horror story starts with something that a walkaround would have caught.
Do this in the same order every time, out loud if you are alone, and use a written card rather than memory. Pilots do not use checklists because they have poor memories. They use them because interruption is the enemy of sequence, and departure day is nothing but interruptions.
Inside
- Refrigerator door latched and contents secured with bars or rods
- All overhead cabinets closed and latched
- Nothing loose on counters, tables, or the stovetop
- Bathroom door secured so it cannot swing
- Roof vents closed, including the bathroom fan
- Windows closed and latched
- TV and any swing-arm mounts secured
- Water pump off if you are not using it in transit
- Propane off at the cylinders, if that is your practice for the drive
- Water heater off
Outside
- Awning fully retracted and locked. This is the most common and most expensive single mistake in RVing.
- Slides fully in and any slide locks engaged
- Steps retracted
- All bay doors closed and locked
- Shore power cord unplugged and stowed
- Water hose disconnected, drained, and stowed; city water inlet capped
- Sewer hose disconnected, rinsed, capped, and stowed
- Stabilizer jacks fully up
- Antenna or satellite dish down
- Chocks removed, and confirmed removed, before you pull forward
- Tire pressures checked cold, all tires including the spare and the tow vehicle
- Lug nuts checked with a torque wrench
The hitch, for towables
- Coupler fully seated on the ball and latched, with the pin or lock inserted
- Safety chains crossed under the tongue, so they cradle the coupler if it separates
- Breakaway cable connected to the tow vehicle, and connected to the vehicle rather than to the safety chain, which is a common and dangerous error
- Weight distribution bars installed and tensioned
- Seven-pin connector plugged in
- Lights tested with a second person: running lights, brake lights, both turn signals, hazards
- Trailer brake controller powered and set
- Mirrors adjusted for the trailer’s width
The last item
Walk a full circle around the rig, looking at it. Not checking anything specific, just looking. This is how people catch the extended awning, the open bay door, the chock still under a tire, and the bicycle still leaning on the bumper. It takes thirty seconds and it has saved more RVs than any single item on the list above.
What to Leave Home
Every RV packing list tells you what to bring. Almost none tell you what to take out, which is the harder and more useful advice, because the weight problem is not solved by adding items.
Here is the honest list of things that appear on standard RV packing lists and frequently should not be in your rig.
- Firewood, for the legal and ecological reasons in Section 16, and because it is 40 to 60 pounds of something sold at your destination.
- A case of bottled water, roughly 30 pounds, in a vehicle carrying its own water supply. Reusable bottles and a filter.
- Full-size toiletries and cleaning products. Decant into small containers. This routinely saves 10 to 15 pounds and a great deal of cabinet space.
- The complete cast iron collection. Bring the one piece you will use.
- A generator on a trip that is entirely at sites with hookups. That is 47 to 135 pounds and a carbon monoxide hazard carried for nothing.
- Motor oil and transmission fluid, absent a known consumption issue.
- A week and a half of clothing for a week-long trip. Plan the laundry stop instead.
- The fourth and fifth pairs of shoes.
- Multiple small kitchen appliances. Each is weight, cabinet space, and amperage on a shared 30 amp service.
- Full-size pillows in quantity beyond one per person, which consume the cabinet space you will need for things that matter.
- A full pantry when you are camping twenty minutes from a grocery store.
- Ceramic and glass dishware. It is heavier and it breaks.
- Gear for activities you are not certain you will do. The partial kits for maybe-activities are what fill the bays.
- Anything you did not use on the last two trips. This is the most reliable filter available to you, and it requires no judgment at all. Note what you actually used and remove the rest.
The post-trip audit
The single most valuable packing habit in RVing costs ten minutes at the end of a trip. Before you unload, walk through the rig and put a piece of tape on anything you did not touch. Next trip, that item comes out. Two or three cycles of this and your load is genuinely optimized, based on how you actually camp rather than how you imagined you would camp when you bought the rig.
Most RVers discover they use perhaps 60 percent of what they carry. Finding the other 40 percent is worth several hundred pounds.
Where the Gear Lives Between Trips
There is a version of the weight problem that shows up in the off season, and it is the reason a lot of RVers end up with a garage they cannot park in.
If you have followed this guide, you now have a deliberately curated kit: a hookup bin, a leveling kit, a tool bag, camp furniture, outdoor gear, bedding, and a set of kitchen equipment that lives with the RV rather than in the house. That is genuinely useful. It also has to go somewhere for four to eight months a year, and if the RV itself is stored off site, leaving everything inside it means every item you own is at a location you visit twice a season.
What an RV gear kit actually occupies
People consistently overestimate this, so here is the arithmetic:
- A 5x5 unit, 25 square feet and roughly 200 cubic feet, holds a complete hookup and leveling kit, a tool bag, four camp chairs, a folding table, a grill, and several bins of kitchen and bedding gear. For most weekend RVers, this is the right size and it is the smallest unit most facilities rent. Compare against our storage unit size guide before deciding.
- A 5x10 unit, 50 square feet, adds room for bikes, paddleboards, a kayak on end, and a portable generator, with aisle space to actually reach the back. This is the common choice for households whose RV gear includes recreation equipment.
- A 10x10 unit, at 100 square feet and roughly 800 cubic feet, is more than an RV kit needs on its own. It makes sense when the gear shares space with household overflow, seasonal items, or a second household’s worth of outdoor equipment.
- For the RV itself, the relevant comparison is different. A 10x20 unit handles many smaller travel trailers, and a 10x30 covers a good deal more, but most full-size motorhomes and longer fifth wheels exceed both and belong in a dedicated parking space. Measure your rig including the hitch, any rear rack, and rooftop equipment, then confirm door height and clearance with the facility before you commit.
If you would rather not estimate, the storage size calculator will work it out from an inventory, and you can browse small units or medium units directly.
Preparing gear for the off season
A few things matter more than where you put it:
- Dry everything completely first. Awning mats, tents, towels, life jackets, and canvas will mildew if they go into a closed bin damp, and that happens regardless of where the bin sits. Set fabrics out until they are fully dry before packing them.
- Empty and rinse the water gear. Hoses, filters, and the fresh water system should be drained. In freezing climates, winterize properly.
- Propane cylinders do not go in an enclosed storage unit. They belong outdoors in a ventilated location. Our guide to storing propane tanks safely covers the specifics, and it is one of the few genuinely non-negotiable rules in this area.
- Drain fuel from the generator and the grill before either goes into a unit.
- Batteries need attention. Lead-acid batteries left discharged through a hard winter often do not come back. Store them charged and maintain them, and keep in mind that extreme cold is hard on batteries and extreme heat is hard on electronics. A temperature-regulated unit protects gear against those temperature extremes, which is the relevant benefit for electronics, batteries, and anything with adhesives or seals.
- Label and inventory the bins. Then photograph the inventory. In April you will not remember which bin has the sewer fittings.
10 Federal Storage offers RV and trailer storage alongside standard units, so the rig and the gear can live in the same place, and you can load directly from one to the other at the start of the season. We also offer boat storage and vehicle storage for households whose gear problem extends past the camper. Rentals are month to month and can be completed online, which matters for a seasonal need where you may only want the space from October to April.
When You Should Not Rent a Storage Unit
We rent storage for a living, so treat this section as more credible rather than less. There are common situations where renting a unit for RV gear is a poor use of your money, and we would rather tell you than have you rent something you regret.
- Your gear already lives in the RV year round, and the RV is parked at your house. This is the most common case and it needs no storage unit at all. The gear is already where it belongs. Renting a unit here means moving things out of a vehicle designed to hold them and paying monthly for the privilege.
- You have usable garage or shed space. A complete RV gear kit is genuinely compact, roughly the footprint of a 5x5. If you have a corner of a garage and some shelving, use it. Storage is worth paying for when you have run out of space, not as a first resort.
- You camp once or twice a year. If your gear is a few bins and a couple of chairs, the annual cost of a unit can approach or exceed what the contents are worth. Two camp chairs, a hose, and a leveling kit do not justify a lease. Store them in a closet and buy new when they wear out.
- You are between trips for six weeks. Short gaps rarely justify the setup, the transport, and the first month. Leave the gear in the rig, or in the garage, and revisit in the fall when the gap is actually a season.
- You are about to sell the RV. If the rig is going on the market this year, do not create a second location for its contents. Sort now, sell what goes with it, and dispose of the rest. A storage unit at this moment usually becomes a two-year holding pattern for items nobody ever revisits, which is a genuinely common and expensive pattern.
The situations where a unit does earn its cost are specific: your garage is full and you actually want to park in it, your homeowners association prohibits an RV or trailer in the driveway, you have recreation equipment that will not fit anywhere at home, or your RV is stored off site and you want the gear accessible without a trip to the storage lot. Those are real problems and a unit solves them well. The rest of the time, save your money.
Frequently Asked Questions About RV Packing
Start with the things that make the rig function rather than the things that make it comfortable: a drinking water hose, a water pressure regulator, a sewer hose and fittings, a shore power cord with the right adapters, a surge protector, leveling blocks, and wheel chocks. Without those, nothing else you brought works. After that, add bedding sized to your RV mattress, a minimal kitchen, a small tool kit, and clothing in layers. Buy food near your destination rather than hauling a full pantry from home.
It varies widely by rig, and the only reliable answer is the one on your own vehicle. Cargo capacity on a mid-size travel trailer is often somewhere between 1,200 and 1,700 pounds, but the range across RV types is enormous. Your specific figure appears on the federally required weight label, listed as OCCC on a motorhome or CCC on a towable. Anything a dealer or previous owner added after the label was printed reduces that number.
On RVs built for the U.S. market since June 2008, a weight label is required by federal regulation and is specified to be permanently affixed on the interior of the forward-most exterior passenger door on the right side of the vehicle. On many towables it also appears near the entry door or inside a cabinet. Take a photo of it and keep it on your phone.
Fresh water weighs about 8.34 pounds per gallon. A 40 gallon tank holds roughly 334 pounds of water, and a 60 gallon tank roughly 500 pounds. Your water heater adds another 50 to 83 pounds depending on its size.
Usually not, if your destination has a water hookup. Carrying 10 to 15 gallons for the drive and filling on arrival frees up several hundred pounds of cargo capacity, which for many rigs is the single largest weight reduction available. Travel with water when you are boondocking without a water source, when water quality at the destination is uncertain, or when your rig specifically handles better with some water aboard.
OCCC, or Occupant and Cargo Carrying Capacity, appears on motorhomes and covers occupants, cargo, fresh water, and the tongue weight of anything towed. CCC, or Cargo Carrying Capacity, appears on towables under the current federal definition and covers cargo, with fresh water counted as cargo. The practical difference is that propane is subtracted for you in both cases, but on a motorhome the people are part of the budget, and on a towable the water is.
For conventional bumper-pull trailers, the widely used standard is 10 to 15 percent of the gross loaded trailer weight. Fifth wheel and gooseneck configurations generally run higher, around 15 to 25 percent. Below 10 percent the trailer is prone to sway; above 15 percent the tow vehicle’s front end lightens and steering suffers.
Sway is most often caused by too little tongue weight, meaning too much cargo is loaded behind the trailer’s axles. The fix is to move heavy items forward, low, and centered side to side, then verify tongue weight is back in the 10 to 15 percent range. A weight distribution hitch with sway control helps, but it redistributes existing tongue weight rather than correcting a rear-heavy load. Rear-mounted bike racks are a frequent and overlooked cause. Reducing speed also reduces the forces involved.
Use a certified truck scale, loaded the way you actually travel. For a motorhome, one pass gives total weight and an axle split. For a tow vehicle and trailer, weigh the combination hitched, then unhitch and weigh again to derive tongue weight. Compare the total against GVWR and each axle against its GAWR.
Often you should not, and in some places you legally cannot. USDA guidance advises campers and RV owners not to carry firewood to their destination unless it is certified heat-treated, noting that moving firewood spreads tree-killing pests and may violate state and federal laws depending on the region. The National Park Service recommends sourcing firewood within 10 miles of where you will burn it and treats 50 miles as generally too far. Some states operate quarantines that restrict firewood entering from out of state. Buy it where you burn it, or use packaged wood carrying a USDA or state heat treatment seal.
It depends on the tunnel. Most tunnels in the United States have no restriction at the quantities RVs carry. Some require cylinder valves to be closed, and a smaller number, generally underwater crossings, prohibit propane entirely and post signed detour routes. The rules are set by individual tunnel and bridge authorities and change over time, so verify with the specific authority before you travel and use RV or truck routing in your navigation app.
Not if every night of your trip is at a site with electrical hookups. A generator adds 40 to 135 pounds plus fuel, and many campgrounds restrict generator hours or prohibit them. If you do use one, the Consumer Product Safety Commission advises operating portable generators outside only, at least 20 feet from the rig, with exhaust directed away from doors, windows, and vents. The agency estimates roughly 85 deaths a year from portable generator carbon monoxide poisoning. A portable power station is worth considering for modest power needs.
A useful planning figure is 2 to 3 pounds per person per day for cooked meals, before beverages and packaging. For most trips, provision two or three days and buy the rest near your destination. That commonly removes 40 to 60 pounds from departure weight and means fresher food.
Yes, and it is one of the few RV-specific products that genuinely earns the label. RV-rated paper breaks down quickly enough to avoid clogging the black tank and dump valve. Standard household paper, especially thick or quilted varieties, is a common cause of tank problems. Nothing else should go down the toilet, including wipes labeled flushable.
Among the items that actually stop a trip, the water pressure regulator and the sewer hose adapters are the usual answers, followed by the correct amperage adapter for the campground pedestal. Among comfort items, sheets sized to the RV mattress, which is frequently a nonstandard size.
Firewood transported from home, a case of bottled water in a rig with its own fresh tank, full-size toiletries, a generator on a trip with full hookups, spare motor oil absent a known issue, ceramic dishware, and gear for activities you are not certain you will do. The most reliable filter is simpler than any list: anything you did not touch on the last two trips comes out.
This is genuinely debated among RV owners, with reasonable arguments about cooling performance on one side and ignition risk on the other, and rules that vary by jurisdiction. What is not debated is that propane should be shut off before entering a fuel station, and that a well-packed refrigerator holds temperature for several hours with the door closed. Check the rules for the areas you are traveling through.
Often not. If your gear already lives in the RV and the RV is parked at your home, or if you have usable garage space, a unit is an unnecessary cost. A complete RV gear kit is roughly the footprint of a 5x5 unit. A unit makes sense when your garage is full and you want to park in it, when an association prohibits an RV in the driveway, when recreation equipment will not fit at home, or when the RV is stored off site and you want the gear accessible separately.
Your Packing List Is a Weight Budget
If this guide has one argument, it is that a packing list and a weight budget are the same document, and treating them as separate is what puts overloaded rigs on the interstate.
The sequence that works is short. Find your cargo capacity on the label. Subtract the water you will actually carry. Subtract the batteries, the generator, the bikes, and anything else bolted on since you bought the rig. Then pack the categories against what remains, putting the heavy things low and slightly ahead of the axles. Then go weigh it, because the label is a starting point and the scale is the truth.
Do that once and you will never pack the same way again. You will also stop wondering why the trailer feels the way it does at 65 miles an hour, because you will know exactly where every pound is sitting.
For the trip planning side, routes, destinations, and keeping everyone reasonably entertained across a long driving day, see our guide to planning the ultimate RV road trip. For more on keeping equipment in good condition between seasons, our storage tips library covers the fundamentals.
When the season ends and the gear needs somewhere to go, 10 Federal Storage offers RV, trailer, and vehicle storage along with month-to-month units you can rent entirely online. Find a location near you and reserve in a few minutes.
About the Author
10 Federal Storage
Our team at 10 Federal Storage has been in the self storage industry for decades. With knowledge gained from multiple universities and in the field, we are well-prepared and excited to assist with your storage needs. When you rent a unit with us, you can feel confident that our seasoned customer service team’s help will make your transition as seamless as possible. Customer satisfaction is our number one priority, and we strive to make your experience exceptional with our automated leasing options, diverse unit sizes, and a strong commitment to sustainability.