
.svg)
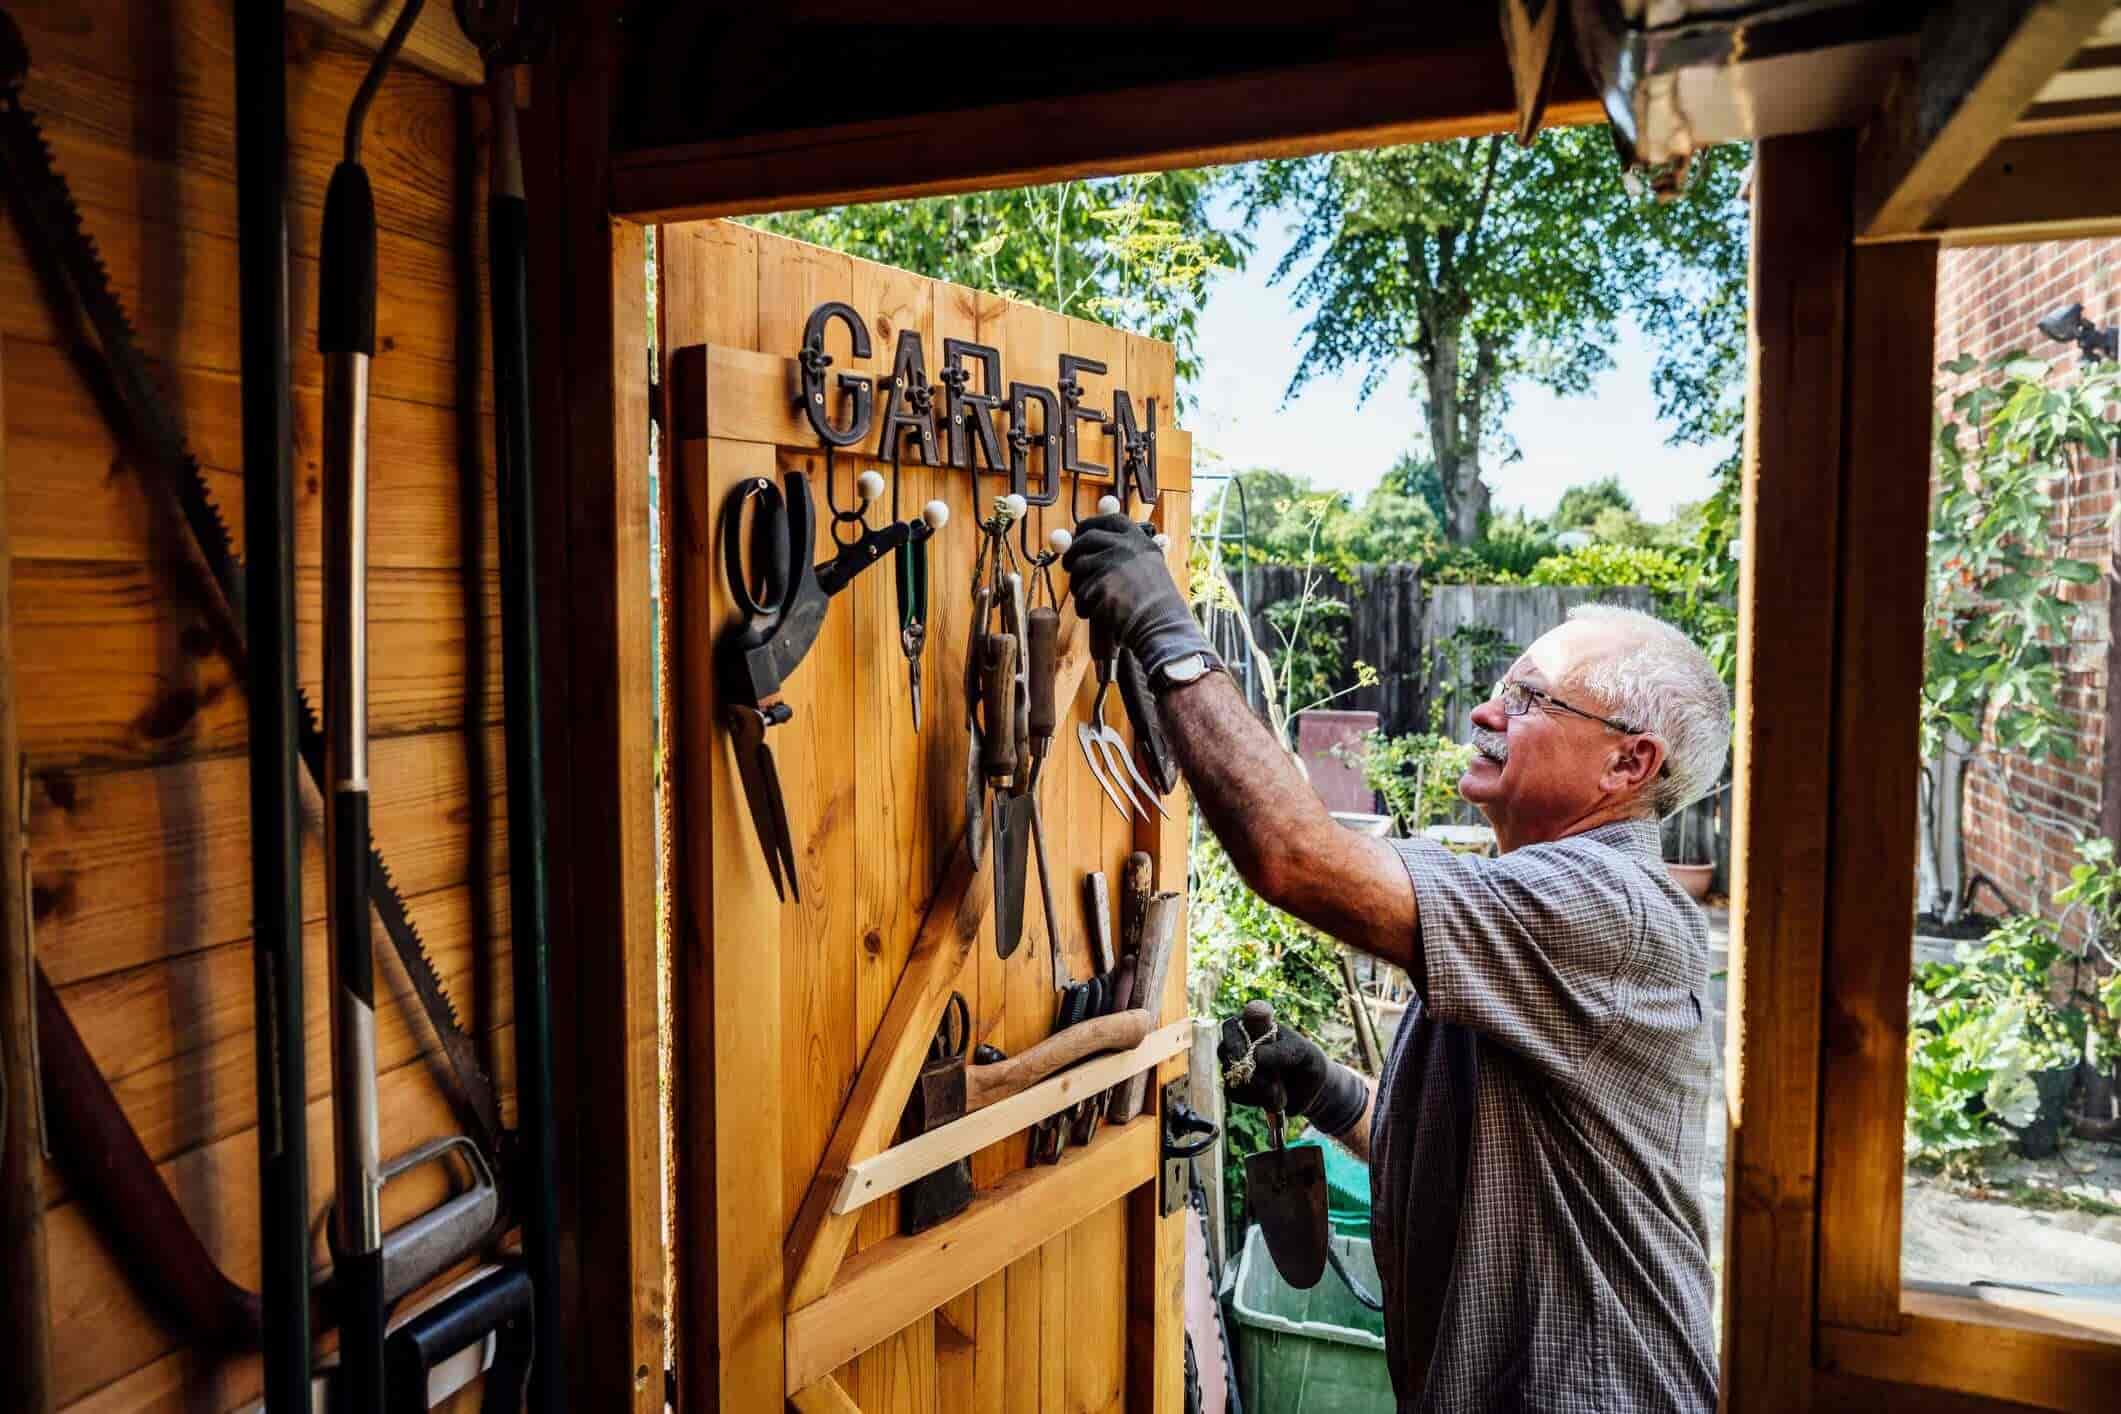
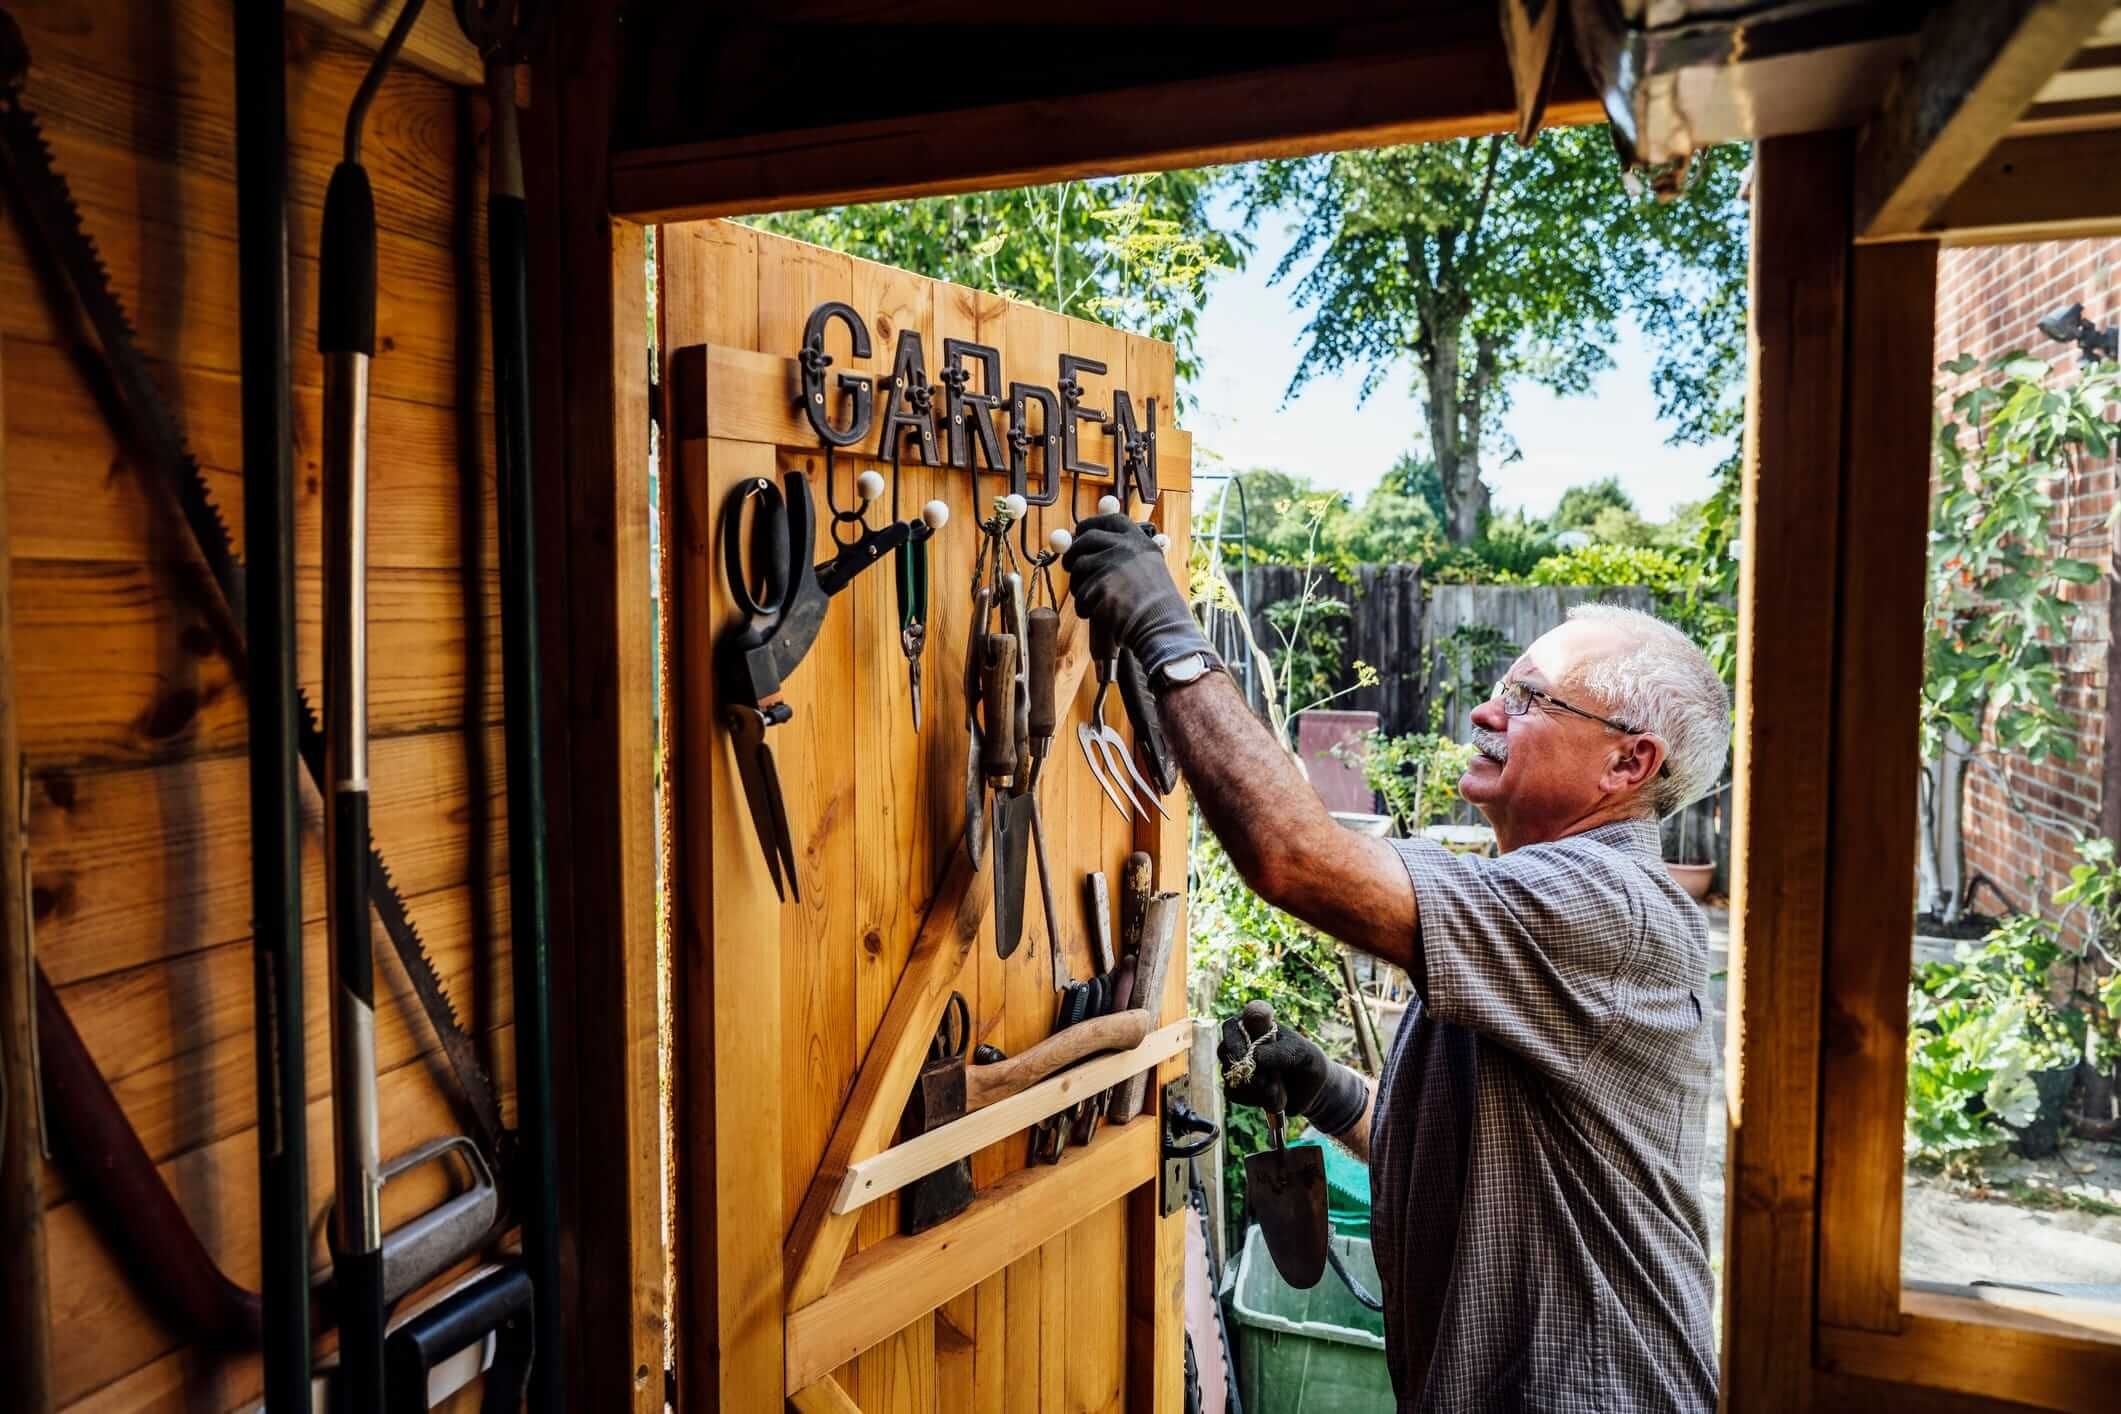
Shed Organization Ideas: What Your Shed Can Hold and What Does Not Belong in It
by 10 Federal Storage
Published on September 3, 2026
Almost every shed organization guide on the internet tells you to put up a pegboard. Most of them tell you to hang your long-handled tools on a wall rack, mount a slat wall for the hedge trimmer, install overhead shelving, and get the wheelbarrow off the floor by hanging it vertically. It is good advice, right up until you walk out to your shed with a drill and discover that the wall is a hollow sheet of blow-molded plastic about an eighth of an inch thick, and the screw you just drove into it spins freely and falls out.
That is the gap this guide exists to close. The single most useful thing to know before you organize a shed is what the shed is made of, because resin, metal and wood-framed sheds have completely different mounting rules and completely different load limits. Rubbermaid publishes a limit of 75 pounds per wall panel on its resin sheds, and that figure only applies when you use its own anchor system rather than screws. Suncast rates its vertical shed shelf kit at 30 pounds. A wheelbarrow loaded with a bag of soil is heavier than either number. None of the shed-organization listicles currently ranking mention any of this.
The second gap is bigger and it is a safety one. Sheds are where American households quietly store gasoline, propane cylinders, lawn chemicals, lithium-ion tool batteries, paint and seed. Some of those things belong in a shed under specific conditions. At least one of them does not belong in a shed under any conditions. Several of them are governed by fire codes, by pesticide label law, or by manufacturer temperature specifications that most people have never seen. An uninsulated shed in full sun routinely runs 20 to 30 degrees above the outside air, which means an ordinary 85 degree afternoon puts the inside of your shed above the storage range printed on most pesticide labels and outside the charging range DeWalt publishes for its batteries. That arithmetic changes what should be on your shelves, so it comes before the shelves.
What follows is a full working guide: how to mount storage in each shed type without ripping the wall out, how to sort and zone the space so it stays organized past March, what should never live in a shed, the permit and setback rules that catch people replacing an old shed with a bigger one, and honest sizing math for when a shed has simply run out of room. There is also a section that argues against renting a storage unit, because for a lot of shed problems the right answer is a better shelf and a hard afternoon of throwing things away.
Table of Contents
- Start With What Your Shed Is Actually Made Of
- What Shed Walls Can Actually Hold
- Mounting Storage in a Resin or Plastic Shed
- Mounting Storage in a Metal Shed
- Mounting Storage in a Wood-Framed Shed
- The Freestanding Frame: The Fix That Works in Any Shed
- Empty It First: The Sorting Pass That Makes Everything Else Easier
- What Your Shed Does in July and in January
- What Should Never Be Stored in a Shed at All
- Gasoline, Fuel Cans, and Residential Fire-Code Limits
- Propane Cylinders: The One Item With a Clear Answer
- Pesticides, Herbicides, and Lawn Fertilizer
- Power Tool Batteries and Manufacturer Temperature Ranges
- Paint, Caulk, Adhesives, and the Freeze-Thaw Problem
- Seeds, Birdseed, and Pet Food
- Long-Handled Tool Storage by Wall Type
- Overhead Storage and the Ceiling You May Not Have
- Bins, Labels, and Container Choices That Age Well
- Zoning the Shed So It Stays Organized
- Shed Security: What Gets Stolen and What Slows It Down
- Rodents, Insects, and the Shed Floor
- Permits, Setbacks, and HOA Rules Before You Build or Replace
- What Size Shed Do You Actually Need
- When the Shed Is Not the Answer, and When a Storage Unit Is Not Either
- Moving the Overflow Out: What Actually Belongs in a Storage Unit
- Frequently Asked Questions About Shed Organization
- A Shed That Stays Organized
Start With What Your Shed Is Actually Made Of
Backyard sheds in the United States come in three broad construction types, and the difference between them is not cosmetic. It determines whether you can hang anything on the walls, how much weight those walls will take, whether a screw will hold, how hot the inside gets in August, and whether the structure needed a permit in the first place. Every organization decision downstream depends on this one, which is why it belongs first rather than buried in a footnote.
Walk out and look at the inside of a wall. That is the whole diagnostic. You are looking for one of three things: a hollow plastic panel with a visible seam and some molded ribbing, a thin painted steel or aluminum panel with visible bolt heads, or exposed wood studs with a plywood or OSB skin. Here is what each one means.
- Resin or plastic sheds. Blow-molded or injection-molded polypropylene or polyethylene panels, usually double-walled with a hollow cavity between the inner and outer skins. Brand names you will recognize are Rubbermaid, Suncast, Keter, Lifetime and Craftsman. The wall is not solid. There is no framing to hit. A wood screw driven into it has nothing to bite except a thin plastic skin, and the surrounding plastic will deform, then strip, then let go. Most of these sheds are designed around a proprietary accessory system, and the manufacturer expects you to use it.
- Metal sheds. Thin-gauge galvanized steel or aluminum panels bolted to a light frame, from makers like Arrow, Duramax and Yardmaster. The panels are typically 26 to 30 gauge, which is to say very thin. They will hold a bolt through the panel with a washer far better than they will hold a screw into the panel. They also transmit heat aggressively, and cut edges are genuinely sharp.
- Wood-framed sheds. Conventional 2x3 or 2x4 stud framing with plywood, OSB, T1-11 or shiplap siding, whether site-built, a prefab barn from a lot on the highway, or a big-box kit. This is the only shed type where the mounting advice you find in a general home-improvement article actually applies without modification, because it is the only shed type built like a building.
There is a fourth category worth naming because it confuses people: the vertical storage cabinet, which looks like a very small shed but is typically a resin cabinet 2 to 4 feet wide with molded shelf tracks and a total capacity measured in cubic feet rather than square feet. These are excellent for a defined job, such as keeping pool chemicals or trash bins contained, and they are not organizable in any meaningful sense beyond deciding what goes on which of the three fixed shelves.
If you do not know which type you own, three quick checks settle it. Tap the wall: plastic sounds hollow and dull, metal rings, wood thuds. Look at the corners for exposed fasteners: molded plastic sheds usually hide them, metal sheds show rows of bolt heads, wood sheds show nails or screws. Look for a model number on a sticker inside the door or on the frame, then search it. Manufacturers publish accessory compatibility and, sometimes, load ratings.
What Shed Walls Can Actually Hold
Here is the number that reframes most shed organization advice. Rubbermaid states in the specifications for its resin sheds that each wall panel is strong enough to hold up to 75 pounds, and that figure is conditioned on using Rubbermaid wall anchors and Rubbermaid accessories, not on driving screws into the plastic. Suncast rates its vertical shed shelf kit at an additional 30 pounds of storage capacity. Those are published manufacturer figures, and they are the closest thing to a hard load limit that exists in the consumer shed market.
Now compare them to what people are told to hang. A steel wheelbarrow with a solid tray weighs 30 to 60 pounds empty. Put a single bag of topsoil or a couple of bags of concrete mix in it and the loaded weight passes 100 pounds without effort. A five-gallon bucket of water is 42 pounds. A full 20-pound propane cylinder weighs about 37 pounds gross. A modest pegboard with a dozen hand tools on it will run 25 to 40 pounds. A gas string trimmer is 10 to 15 pounds, a gas leaf blower 8 to 12, a chainsaw 10 to 14. A cordless mower with the battery in it can hit 60.
You can see the problem. A single wall panel on a resin shed will hold roughly one loaded pegboard, or one string trimmer plus a blower plus a coiled hose, and it will do that only through a purpose-built anchor. It will not hold a loaded wheelbarrow. Extra Space Storage's shed organization guide, currently one of the top-ranking pages for this topic, recommends going vertical with wheelbarrow storage on the wall and hanging bikes on utility hooks, without a word about what the wall is made of. On a wood-framed shed with the hook landed on a stud, that advice is fine. On a resin shed, following it will pull a hole in your wall.
Wood-framed sheds are the outlier in the good direction. A hook or bracket lagged into a 2x4 stud is limited by the fastener and the bracket, not the wall, and will comfortably carry well over 100 pounds in shear if the lag is the right length and actually in the stud. That is why almost all of the confident weight-bearing advice you read online was written by someone with a wood shed.
Three principles follow from all of this and they apply to every shed:
- Weight goes low, bulk goes high. Heavy items belong on the floor or on the bottom shelf regardless of shed type. The reasons are load, stability, and the fact that nobody wants a 40-pound bin at eye level.
- Spread load across as many attachment points as the system allows. A rail or a backer board spanning multiple anchors distributes weight far better than a single hook, and this matters most in exactly the sheds that can least afford a point load.
- When in doubt, do not use the wall. Section 6 covers the freestanding frame, which sidesteps the entire problem and works in any shed.
Mounting Storage in a Resin or Plastic Shed
Resin sheds are the most common shed sold at big-box retailers and the type most poorly served by generic organization advice. The good news is that they are designed to be organized. The manufacturers build slots, tracks or molded receiver points into the wall panels and sell an anchor system that engages them. The bad news is that most owners never find out, buy a pegboard and a box of screws, and end up with a wall full of stripped holes.
Use the manufacturer anchor system first
Rubbermaid's approach is representative: wall anchors attach to the back of a pegboard panel, and the anchors then slide into slots molded into the shed wall. No drilling into the wall is involved. The load path runs from the accessory into the anchor into the molded slot, which is the part of the panel engineered to carry it. Their installation guidance calls for a minimum of two anchors in the upper row, positioned within about six inches of the top edge. Suncast, Keter and Lifetime all sell comparable shelf and hook kits keyed to their own sheds.
These kits cost more than a sheet of pegboard and a bag of screws, and they are worth it. They are also the only configuration in which the published load rating means anything.
If you must fasten directly to the plastic
Sometimes the accessory line is discontinued, or you want something the system does not offer. In that case the technique matters:
- Bolt through, do not screw in. Drill a clean hole, run a machine bolt through the panel with a large fender washer on the outside face and another inside, and tighten to snug rather than to deformation. The washer spreads the load across the panel instead of concentrating it on a quarter inch of plastic.
- Seal every hole you make. A rubber or neoprene washer under the fastener head on the exterior side keeps water out of the wall cavity. Every penetration in a resin shed is a potential leak path, and water inside a double-wall panel has no way to dry.
- Drill slowly with a sharp bit. High-speed drilling melts polyethylene and polypropylene rather than cutting it, and the melted plastic re-solidifies into a weak, brittle collar around the hole. Low speed, moderate pressure, and back the bit out to clear chips.
- Use a backer board. A piece of half-inch plywood spanning several feet of wall, bolted through at four or six points, converts a plastic wall into a wood wall. You can then screw hooks, rails and pegboard into the plywood as freely as you like, provided the total load stays inside the panel rating.
- Keep individual items under roughly 10 to 15 pounds on any direct-to-plastic fastening unless you have added a backer board. That is a conservative working ceiling, not a published spec, and it exists because the failure mode is sudden.
What not to do in a resin shed
Do not mount a slat wall system directly to plastic panels. Slat wall is designed to be screwed into studs at regular intervals and it is heavy before you hang anything on it. Do not mount overhead ceiling racks in a resin shed at all; the roof panels of most molded sheds are not load-bearing and are not designed to carry anything hanging beneath them. Do not hang a bicycle, a ladder, or a wheelbarrow from a plastic wall. And do not use adhesive strips rated for indoor drywall on a shed wall, because they are not designed for the temperature swing a shed sees and they will let go on a hot afternoon, usually onto whatever is below them.
Mounting Storage in a Metal Shed
Metal sheds sit between resin and wood. The panel is stronger in tension than plastic, so a bolt through a metal panel with a washer holds well. But the panel is thin, unsupported over most of its span, and it flexes. Drive a screw into the middle of an unsupported metal panel and you will get a hook that holds a rake and a permanent oil-can dent in the outside of your shed.
Find the frame
Nearly every metal shed has a light structural frame behind the skin: corner posts, door frame members, roof beams, and often horizontal or vertical channel at intervals. That frame is where load should go. Find it by looking for the rows of existing bolts, which are almost always located where the panel meets a frame member. Tapping along the wall also works, since the sound changes from a loose ring to a dull thud over a frame member.
- Bolt through the panel into or alongside a frame member using a machine bolt, a fender washer on both sides, and a nylon-insert lock nut so vibration does not back it off.
- Self-tapping sheet metal screws work into the frame channel where the frame is thick enough to take threads. They do not work reliably into the skin alone.
- Add a plywood backer board across several frame members and you have solved the problem permanently. This is the single best upgrade for a metal shed and it usually costs less than one accessory kit.
- Seal every penetration. Neoprene-backed washers, the kind sold for metal roofing screws, are exactly right here. Unsealed holes in a metal panel will rust from the inside out.
The two problems specific to metal
First, cut and drilled edges. Metal shed panels are sharp when new and sharper when drilled. Deburr every hole, wear gloves during any modification, and file or tape any edge that sits at hand height near a doorway. This is the most common shed injury and it is entirely preventable.
Second, heat. Metal sheds absorb and re-radiate solar heat faster than any other type, and interior temperatures commonly run 20 to 30 degrees above the outside air on a sunny day, with reports of 120 degrees or more in direct sun. Section 8 covers what that does to the contents. For mounting purposes, it means anything adhesive is a bad bet, and it means the metal itself will be hot enough to burn a hand in midsummer.
Condensation is the third issue worth flagging. A metal panel cools rapidly overnight, and when the surface temperature drops below the dew point of the air inside, water forms on the inside of the wall and runs down onto whatever is stacked against it. The practical fixes are ventilation, a gap between stored items and the wall, and never storing cardboard or fabric directly against a metal panel. Insulating the panel also works but is a bigger project than most shed owners want.
Mounting Storage in a Wood-Framed Shed
If you have a wood-framed shed, almost every organization idea you have read is available to you. The constraint is not the wall, it is knowing where the studs are and choosing fasteners that match the load.
Find the studs and mark them permanently
Wood sheds are typically framed at 16 or 24 inches on center, and unlike a finished interior wall the framing is often exposed, which makes the whole exercise trivial. If the walls are sheathed on the inside, a magnetic stud finder will locate the nails holding the sheathing to the studs. Once you have found them, take five minutes and draw a vertical pencil line down each stud from top to bottom. You will use those lines for years, and the alternative is re-finding the same studs every time you want to hang something.
Fastener choices by load
- Light items under about 10 pounds (hand tools, gloves, small hooks) can go anywhere, including into the sheathing alone with a coarse-thread screw.
- Medium items, 10 to 40 pounds (loaded pegboard, hand tools, a coiled hose, a string trimmer) should hit a stud with a 2.5 inch to 3 inch construction screw, or attach to a rail or backer board that spans two or more studs.
- Heavy items over 40 pounds (bicycles, ladders, a wheelbarrow, a loaded shelf) need a lag screw or structural screw into a stud with at least 1.5 inches of thread engagement in solid wood, and ideally a bracket that spreads load across two studs.
- Anything you will hang and unhang frequently deserves a rail system rather than individual hooks, because a French cleat or a slotted rail lets you move a hook without making a new hole.
The systems worth the money in a wood shed
A French cleat wall is the highest-value upgrade in a wood-framed shed and it is the cheapest of the modular systems. Two strips of plywood ripped at 45 degrees, one screwed to the studs and one on the back of every holder you build, and you have a wall where any tool holder can be moved anywhere in seconds. It carries serious weight because the load path runs into the studs at multiple points.
Slat wall panels are the commercial version of the same idea, with the advantage of being pre-made and the disadvantage of costing five to ten times as much. They are a legitimate choice in a wood shed where they can be screwed into studs at the manufacturer's specified intervals. Pegboard is fine for hand tools and small items and poor for anything heavy, and it needs furring strips behind it so the hooks have room to seat. Standard-and-bracket shelving, the kind with vertical slotted uprights, is the most flexible shelving in a wood shed, because you can change shelf heights as the contents change.
The one thing worth doing before any of it: check whether the studs are actually structural or whether you are looking at a prefab shed with a light frame and thin skin. Some economy wood sheds use 2x3 framing at 24 inches on center with quarter-inch siding, and while that will hold hooks and pegboard, it will not take a 3-inch lag screw without splitting the stud.
The Freestanding Frame: The Fix That Works in Any Shed
There is one solution that works identically in a resin shed, a metal shed and a wood shed, requires no manufacturer accessory kit, makes no holes in any wall, adds no leak paths, and carries more weight than any of them: build a freestanding wooden frame inside the shed and hang everything on that.
The concept is simple. A frame of 2x4s or 2x3s built as an L along two adjoining walls, or as a single wall unit, standing on the shed floor and carrying its own load down to the ground. It leans against the shed walls for lateral stability but does not depend on them for anything. Then you screw hooks, rails, pegboard, French cleats and shelf brackets into the frame with total freedom, because it is real lumber.
Why this is the answer more often than people expect:
- It removes the load question entirely. A 2x4 frame bearing on the floor will hold hundreds of pounds. The shed wall is carrying nothing but the frame's tendency to tip.
- It is fully reversible. If you sell the shed, replace it, or move, the frame unscrews and comes out. Nothing has been drilled into the structure.
- It works around the shed's weak points. Molded ribbing, seams, door frames and bolt rows all become irrelevant. You build the frame where you want storage, not where the shed permits it.
- It costs very little. A basic wall-length frame runs the price of four to six studs plus screws, which is generally less than a single branded shelf kit.
Practical construction notes. Use pressure-treated lumber for any member touching the floor, since shed floors get wet whether you plan for it or not. Fasten the frame to the floor if the floor is wood, or use a horizontal foot plate wide enough to resist tipping if the floor is a resin pan or a concrete pad. Add a single small bracket or strap connecting the top of the frame to the shed wall for tipping resistance only, sized to hold nothing but the frame itself, and seal that one penetration properly. Keep the frame an inch or two off the walls so air can move behind it and so condensation on a metal or plastic wall does not wick into the wood.
A variation worth knowing: a freestanding metal or resin utility shelf unit, the kind sold at any hardware store for $40 to $120, accomplishes most of the same thing with zero construction. It cannot carry hanging long-handled tools the way a frame can, but for bins, cans, buckets and boxes it is an entirely reasonable substitute, and the wire and grated designs let dirt fall through rather than collect. If the choice is between a store-bought freestanding shelf and drilling into a resin wall, take the shelf.
Empty It First: The Sorting Pass That Makes Everything Else Easier
No shelving system fixes a shed with too much in it. The sorting pass is the least glamorous part of shed organization and the part that determines whether the result lasts. Every organized-shed photo you have ever admired is mostly a photograph of a decision to get rid of things.
Take everything out. Not most things. Everything, onto a tarp or the driveway, on a day with no rain in the forecast. A typical 8x10 shed takes about ninety minutes to empty and you will find things you forgot you owned, which is the point. Sheds accumulate silently because nothing in them is visible from inside the house.
Sort into six piles, not three
The standard keep, donate, trash split does not fit a shed, because sheds hold categories a bedroom closet does not.
- Keep and use regularly. Things touched at least a few times a season. These get the most accessible positions.
- Keep but seasonal. Snow shovels in July, pool equipment in December, holiday decorations. These go high, deep, or in sealed bins.
- Keep but belongs somewhere else. The pile that matters most, and the one most people skip. Anything on the list in Section 9 goes here, along with anything that is being ruined by living in a shed.
- Broken and worth fixing. Be honest. If it has been broken for two seasons, it is not in this pile, it is in the next one.
- Dispose, ordinary trash or recycling. Rusted-through tools, cracked pots, split hoses, the box the mower came in.
- Dispose, household hazardous waste. Old pesticides, unknown chemicals, half-used paint, stale gasoline, dead batteries, fluorescent tubes. This pile does not go in your bin. Most counties run a household hazardous waste collection site or periodic collection events, and this is exactly what they exist for.
The questions that break a stalemate
People stall on the same items every time. A few prompts that reliably resolve them:
- Do I own the thing this goes with? Half-empty bags of fertilizer for a lawn you replaced, a trimmer head for a trimmer you no longer have, replacement parts for the previous mower.
- Would I buy this again today, at the price it costs, to use it as often as I actually use it? This is the honest version of "might need it someday."
- Is it still what it was? Bagged concrete that has set into a rock, seeds several years past their date, glue that has skinned over, spray paint with a rusted rim. Chemistry stops waiting eventually.
- Can I borrow this instead? Pressure washers, tile saws, post-hole diggers, aerators. Tools used once a year and rented in ten minutes rarely earn a permanent square foot.
- How many do I have? Sheds breed duplicates because nobody can see the inventory. Three hammers, five extension cords and a dozen partial bags of mulch are the normal outcome, not an unusual one.
Measure the shed while it is empty and write the numbers down: interior length, width, wall height at the eave, height at the peak, door opening width and height, and the position of any framing or ribbing. Those six numbers determine what shelving fits, whether a mower can turn around inside, and whether the thing you are about to order will physically go through the door. Doing it now takes four minutes. Doing it later means unloading the shed again.
What Your Shed Does in July and in January
A shed is not a room. It is an uninsulated, unventilated or barely ventilated box sitting in the open, and its interior temperature is a function of the outdoor temperature plus solar gain minus whatever airflow it manages. In practice, sheds in direct sun commonly run 20 to 30 degrees above the outside air, and shed owners and manufacturers routinely report interior readings of 120 degrees or higher on hot summer days. One frequently cited homeowner measurement had an 80 degree day producing 103 degrees inside a light-colored wood shed with gable vents.
Run the arithmetic for your own climate, because this single number governs half of what should be on your shelves:
- An 85 degree afternoon puts a typical shed somewhere between 105 and 115 degrees inside.
- A 95 degree afternoon puts it between 115 and 125.
- A dark metal shed in full sun sits at the top of those ranges and can exceed them.
- A 20 degree winter night puts the shed at roughly 20 degrees, because there is no heat source and thermal mass is negligible. Sheds track cold much more faithfully than they track heat.
Those numbers matter because several common shed contents have published limits that sit right inside those ranges. Most pesticide labels call for storage between roughly 40 and 90 degrees. DeWalt publishes a 40 to 105 degree range for charging its lithium-ion batteries. Propane cylinder guidance commonly warns against exposure above 120 degrees. Latex paint is ruined by freezing. In other words, an ordinary summer afternoon in Texas, Georgia or Arizona takes a typical shed past the manufacturer's stated limit for several things that are almost certainly sitting in it right now.
What you can actually do about it
You are not going to condition a shed, and you should not try unless it is a workshop you occupy. But the temperature swing is reducible:
- Ventilation is the highest-value change. Gable vents, ridge vents, or a soffit-plus-gable combination let hot air escape rather than stratify. Airflow that enters low and exits high moves far more heat than two vents at the same height.
- Shade beats everything else per dollar. A shed under a tree or on the north side of the house runs dramatically cooler than the same shed in the open. If you are still deciding where to put a shed, this is the decision.
- Color matters more than people think. Light roof and light walls reflect meaningfully more solar energy than dark ones.
- Insulation helps but is a project. Rigid foam board between wood framing, or reflective radiant barrier under a metal roof panel, will cut peak interior temperature. It also cuts winter cold slightly, though without a heat source the shed will still reach outdoor lows.
- A solar-powered gable fan is a middle option that runs exactly when you need it, since it is drawing power from the same sun causing the problem.
The honest conclusion is that a shed is fine for anything that does not care about temperature, and unsuitable for a specific list of things that do. Sorting by that criterion is more useful than any shelving decision, which is why the next several sections work through the list item by item.
What Should Never Be Stored in a Shed at All
This is the section no shed organization listicle includes, and it is the one that prevents the most damage. Some of these are safety issues, some are property-loss issues, and one of them is a genuine explosion risk. The detailed reasoning for the big four follows in Sections 10 through 15; this is the overview.
Never, under any conditions
- Propane cylinders. Fire safety guidance is close to unanimous that cylinders should not be stored inside any enclosed structure, and sheds are named explicitly. Section 11 covers why and what to do instead.
- Anything running an engine or a generator inside the shed. Obvious in principle and violated constantly in practice during power outages. Carbon monoxide accumulates in exactly the enclosed low-airflow space a shed provides.
Not in a shed, in almost every case
- Lithium-ion tool and equipment batteries. Outside the published temperature ranges most of the year in most of the country. Bring them inside. Section 13.
- Anything with a screen or a circuit board. Old laptops, tablets, TVs, stereo equipment, smart-home gear. Heat, cold cycling, and condensation are all bad for electronics, and the failure is silent until you plug it in two years later.
- Photographs, documents, books and artwork. Paper and photographic emulsion do not survive repeated temperature cycling and the moisture that comes with it. These belong indoors, full stop.
- Fabric, upholstery, mattresses and clothing. Sheds get damp, and textiles hold moisture and feed mildew. They are also rodent nesting material of the highest order.
- Musical instruments, especially anything wooden. Wood expands and contracts with the seasons, and glue joints fail.
- Canned or dry food, and anything edible. Heat degrades canned goods, and food of any kind is the single most reliable way to attract rodents into a shed. Section 21.
- Medications, including pet medications and veterinary supplies.
- Anything of significant value that is easily carried. Sheds are the least secure structure on most properties. Section 20.
In a shed, only with real conditions attached
- Gasoline and other fuels. Quantity limits, container requirements and separation distances apply, and they come from fire code rather than from preference. Section 10.
- Pesticides, herbicides and fertilizers. The label carries the legally binding storage instructions, and a summer shed frequently violates them. Section 12.
- Paint, stain, caulk and adhesives. Fine in a mild climate, ruined by a single hard freeze in a cold one. Section 14.
- Seeds, birdseed and pet food. Two separate problems, viability and rodents. Section 15.
- Lead-acid batteries from mowers and tractors, which do better in cold than lithium-ion but should be disconnected and kept charged, and should never be stored on a concrete floor in a way that lets a leak spread.
Working through your own shed against this list will typically produce a small pile of things headed indoors, a smaller pile headed to household hazardous waste, and a noticeable amount of freed shelf space. That is usually enough to change what the organization problem even is.
Gasoline, Fuel Cans, and Residential Fire-Code Limits
Most households with a lawn keep gasoline somewhere, and the shed is a common answer. It is often the right answer, in the sense that a detached outbuilding is generally preferred over an attached garage or a basement. But there are rules, they come from fire code rather than from a blogger's opinion, and most people have never seen them.
Gasoline is classified under NFPA 30, the Flammable and Combustible Liquids Code, as a Class IA flammable liquid, meaning it has a very low flash point and produces ignitable vapor at ordinary temperatures. That classification is what drives the restrictions.
The limits that municipalities commonly adopt
Fire codes are adopted and amended locally, so the specifics vary and your jurisdiction is the authority. That said, a set of figures recurs across a large number of municipal fire-safety publications:
- A total residential limit on flammable liquids in the range of 25 gallons is the most commonly published figure, with a much lower allowance for an attached garage and no allowance at all for a basement.
- A maximum individual container size of 5 gallons for portable containers in a residential setting.
- Approved containers only. Containers meeting DOT, ASTM or NFPA specifications, which in practice means a purpose-made fuel can, not a repurposed jug of any kind.
- Empty containers count as full when calculating your total. This surprises people, and the reasoning is that an empty gas can is full of vapor, which is the part that burns.
- Separation from other hazards. Common guidance calls for meaningful separation between fuel storage and propane storage, and for keeping fuel away from ignition sources including water heaters, mowers, grills and electrical equipment.
- Higher allowances sometimes apply to detached structures than to a dwelling or attached garage, which is one reason a shed is often the preferred location. Some jurisdictions are stricter, not more permissive. Check yours.
Two practical notes that sit on top of the code. First, homeowners insurance is a real consideration; carriers reference fire-code compliance, and a large unapproved fuel stockpile discovered after any fire is a problem regardless of whether the fuel started it. Second, gasoline vapor is significantly heavier than air, which means it sinks, pools at floor level, and can travel along the ground to find an ignition source at a distance. Any fuel stored in a shed should be at floor level in a sealed approved container, in the most ventilated part of the shed, away from anything that sparks or holds a pilot flame.
Storing fuel well in practice
- Keep the smallest quantity that actually serves your equipment. Two 5-gallon cans covers most suburban lawns; a large stockpile mostly creates risk and stale fuel.
- Store cans upright, on the floor, never on a shelf where a leak drips onto everything below and never on a wall hook.
- Ethanol-blended pump gasoline degrades over months. Label cans with the fill date, use fuel stabilizer if it will sit, and cycle old fuel through equipment rather than letting it age out.
- Keep a fire extinguisher rated for flammable liquids near the shed door rather than deep inside it, so you are never walking toward a fire to reach the extinguisher.
- Take unusable fuel to a household hazardous waste facility. It does not go in a storm drain, on the ground, or in a trash can.
Note that self-storage facilities, including ours, do not permit gasoline, fuel or other flammable liquids in units. That is standard across the industry and it is a lease term, not a preference. If you are moving equipment into storage, drain the fuel first.
Propane Cylinders: The One Item With a Clear Answer
Most storage questions have nuance. This one mostly does not. Fire safety guidance and propane industry guidance converge on the same instruction: propane cylinders should be stored outdoors, upright, in a well-ventilated location, and not inside an enclosed structure. Sheds are frequently named by name in that guidance, alongside garages, basements and crawl spaces.
The reasoning is mechanical rather than abstract. A propane cylinder holds liquefied gas under pressure, and pressure rises with temperature. Cylinders are fitted with a pressure relief valve designed to vent gas rather than allow the tank to rupture. In the open air, a venting cylinder disperses. Inside a shed, the vented propane has nowhere to go, and because propane vapor is heavier than air it settles and pools at floor level, in a small enclosed space that also frequently contains a mower, a battery charger, an extension cord, or a can of gasoline. That is the entire hazard, and it is why a shed is one of the specific places named.
The temperature problem compounds it. Common guidance warns against exposing cylinders to temperatures above 120 degrees. Section 8 established that a shed in full summer sun regularly reaches exactly that range. So the enclosed space that would trap a leak is also the space most likely to cause one.
Where to note a genuine disagreement
You will find sources, including some retailer and manufacturer pages, that describe a detached shed or detached garage as an acceptable location, on the reasoning that detachment from the dwelling is the main safety concern. That is not the mainstream fire-safety position, which distinguishes enclosed from unenclosed rather than attached from detached, and holds that ventilation is the point rather than distance from the house. Where a source says a detached shed is fine and another says no enclosed structure at all, the more conservative reading is the one to follow, and it is also the one that matches the reasoning above.
What to do instead
- Store cylinders outdoors and upright, so the relief valve is in contact with vapor rather than liquid, on a flat non-combustible surface such as concrete or gravel rather than on grass, dirt or wood decking.
- Keep them out of direct sun and away from south-facing masonry that radiates heat.
- Maintain separation from the building, from ignition sources, and from any other stored fuel. Specific clearance distances come from NFPA 58 and from local code, and they vary with cylinder size.
- Close the valve fully and, for cylinders with the appropriate valve type, fit a plug.
- Use a ventilated cage or enclosure if you want them secured or out of sight. Ventilated is the operative word, since the point is that a leak can disperse.
- Never leave a cylinder in a closed vehicle, which is the same trapped-vapor problem in a smaller box.
- The small one-pound camping cylinders are treated more permissively than 20-pound grill tanks in most guidance, but they are still pressurized fuel and still do not belong on a hot shed shelf.
If your grill tank currently lives in the shed, moving it outside is probably the single highest-value change in this entire guide, and it takes about thirty seconds.
Pesticides, Herbicides, and Lawn Fertilizer
Almost every shed in America has a shelf of lawn and garden chemicals on it. Very few owners have read the storage instructions on any of them, which is unfortunate, because for pesticides the label is not advice. Under federal pesticide law the label is legally enforceable, and EPA requires registered products to carry storage instructions developed by the registrant for that specific product.
That means there is no universal rule, and any guide that gives you one is oversimplifying. What there is, is a general range that agricultural extension services and stewardship programs repeat: most pesticides should be kept between roughly 40 and 90 degrees, with some sources citing an upper bound closer to 100. Penn State Extension states the 40 to 90 range explicitly and adds the instruction that matters most, which is to read the label and the safety data sheet for the specific product.
Why the range matters in a shed
Set the range against Section 8. A shed at 110 to 120 degrees on a July afternoon is well outside the commonly cited upper bound, and a shed at 20 degrees in January is well below the lower one. Extension guidance describes what happens at both ends. In cold, some liquid formulations separate, crystallize or coagulate, and containers can crack and leak; product-specific minimums vary widely, with University of Florida extension noting labels that specify limits anywhere from 40 degrees down to 10 degrees depending on the active ingredient. In heat, plastic containers become brittle or deform, pressure builds inside sealed containers, some products volatilize, and glass containers can break. Dry formulations are generally more tolerant of temperature and more vulnerable to getting damp.
The practical consequence is that the herbicide you bought last spring and left on the shed shelf through a Texas summer and a January cold snap may simply not work, and you will not find out until you have sprayed a lawn with it.
Storing lawn and garden chemicals responsibly
- Read the Storage and Disposal section of each label and sort your products by what they actually require. This takes one afternoon and is the only way to know which of your products are the temperature-sensitive ones.
- Keep everything in original containers with legible labels. Never decant into a beverage container, a bucket, or an unlabeled jug. This is both a poisoning-prevention rule and a practical one, since the label is the instructions.
- Store in a locked cabinet out of reach of children and pets. A basic metal cabinet or a lockable file cabinet inside the shed is a common and effective approach.
- Keep them off the floor and away from anything that can absorb a spill, and never near food, pet food, animal feed or seed.
- Separate flammable products from ignition sources and from mowers, grills and heaters.
- Store on a shelf with a lip or in a shallow tray so a leaking container is contained rather than running across the shed floor.
- Move the temperature-sensitive products to a cooler, more stable indoor location where the label calls for it, keeping them locked and away from living spaces.
- Do not stockpile. Buy what you will use in a season. Products that outlive their usefulness become a disposal problem rather than an asset.
- Dispose through household hazardous waste collection. Never pour lawn chemicals down a drain, into a storm sewer, or onto the ground.
Two notes on fertilizer specifically. Bagged fertilizer is hygroscopic and will clump into a solid mass if it takes on any dampness, at which point it will not pass through a spreader. Opened bags do better inside a sealed bin or a heavy resealable bag. And some fertilizer formulations, particularly those with high ammonium nitrate content, carry their own storage cautions around heat and contamination, so the label matters there too.
Power Tool Batteries and Manufacturer Temperature Ranges
Cordless tools changed what lives in a shed. A homeowner who once had a corded drill and a gas trimmer now has a drill, an impact driver, a trimmer, a blower, a hedge trimmer, a chainsaw and a mower, all running on lithium-ion packs that cost between $80 and $250 each. Those packs frequently represent more value than every hand tool in the shed combined, and they are the item in the shed most sensitive to the temperatures Section 8 described.
The published ranges
Manufacturers publish this information, and it is more specific than the general advice to keep batteries cool and dry.
- DeWalt recommends charging its batteries within a 40 to 105 degree range and states that temperatures below 40 degrees can result in permanent loss of runtime. Its general guidance calls for storage that is cool, dry, and free of temperature extremes, with the battery disconnected from the tool for extended storage.
- Milwaukee guidance cites an optimal storage range for its lithium-ion packs of roughly 60 to 75 degrees, and warns that storing below freezing can cause a permanent form of internal damage.
- Across brands, the recurring instruction is not to charge a pack that is below freezing, because charging a cold lithium-ion cell causes a plating process on the anode that permanently reduces capacity and, in the worst case, creates an internal short.
Compare those ranges to the shed math. A shed at 110 to 120 degrees in July is outside DeWalt's charging range and far outside Milwaukee's optimal storage range. A shed at 20 degrees in January is below freezing, which is the condition that causes the permanent damage. In most of the country, an unconditioned shed is outside the published range for a large part of the year, in both directions.
What to do
- Bring the batteries inside and leave the tools in the shed. This is the whole answer, and it is easier than it sounds. A small bin or a shallow drawer in a utility room, a mudroom or a closet holds a household's worth of packs. The tools themselves are far less temperature-sensitive than the batteries.
- Detach packs from tools for anything beyond short-term storage. Manufacturers specifically call for this, and it also prevents the slow parasitic drain some tools produce.
- Store at a partial state of charge for long periods. Guidance varies by brand, with some recommending a middle charge level for extended storage and DeWalt specifically calling for a full charge before storage longer than six months. Follow the instruction that came with your tool rather than a generic rule.
- Never charge a pack that has been sitting in a cold shed. Bring it inside, let it come up to room temperature for an hour or two, then charge.
- Inspect before use after any long storage. Swelling, cracking or leaking means the pack is done. Manufacturers and many retailers run free take-back programs for battery recycling, and lithium-ion packs should never go in household trash or curbside recycling.
- Keep the charger indoors too. There is no reason for a charger to be in an unconditioned shed, and there is a real reason not to leave one plugged in there unattended.
The same logic applies with less urgency to lead-acid batteries from riding mowers and tractors. They tolerate cold better than lithium-ion, but a discharged lead-acid battery can freeze and split, so the standard advice is to keep them charged over winter, disconnected, and off a bare concrete floor.
Paint, Caulk, Adhesives, and the Freeze-Thaw Problem
Leftover paint is one of the most universal shed contents and one of the least suited to a shed in a cold climate. Latex and acrylic paints are water-based emulsions, and freezing disrupts the emulsion. A can that has frozen may look normal until you stir it and find lumps, grit or a curdled texture that no amount of mixing resolves. Depending on how hard and how many times it froze, the paint may be recoverable after slow thawing and thorough mixing, or it may be permanently ruined. There is no way to tell without opening it, which usually happens on the day you need it.
Oil-based and alkyd products handle cold better and heat worse. Extremes in either direction shorten shelf life across the category.
The wider freeze-sensitive list
Paint gets the attention, but the same problem runs through a whole shelf of common shed items:
- Latex and acrylic paint, primer and stain. Ruined by hard freezing, often after a single event.
- Water-based caulks and sealants, including most acrylic latex caulk. Freezing separates them and they will not tool properly afterward.
- Water-based wood glue. Most PVA glues have a limited freeze-thaw tolerance and become stringy or clumpy.
- Joint compound, grout, thinset and patching compounds in premixed form.
- Aerosol cans of any kind, which have a stated temperature range on the label and are hazardous well above it. A shed in August is squarely in the range that label warns about.
- Garden hoses with water left in them, which split from the inside when the water freezes and expands. Drain and coil them before the first freeze.
- Pressure washers, pumps and irrigation manifolds with water in the head. This is the most expensive item on this list to replace and the easiest to prevent, with a few dollars of pump antifreeze or a thorough blow-out.
- Sealed liquids in glass of any kind, which can crack.
Handling it
- Keep a single small indoor bin for freeze-sensitive products and move that bin in each fall. A shelf in a basement, a utility closet or a conditioned garage is enough. This is a two-minute seasonal task that saves the entire shelf.
- Store paint cans upside down once the rim is clean, which forms a seal at the lid and slows skinning. Do this only with cans in good condition and never with cans that are already leaking.
- Decant small leftover quantities into sealed glass or plastic jars filled nearly to the top, which reduces the air in contact with the paint and takes far less shelf space than a mostly-empty gallon can.
- Label everything with the room, the color and the date, because unlabeled paint becomes disposal within about eighteen months regardless of its condition.
- Be realistic about how much you keep. A quart per color for touch-ups is useful. Four gallons of a color you painted over in 2019 is not.
- Dispose properly. Latex paint can often be dried out with an absorbent and discarded with regular trash in many jurisdictions, while oil-based paint is household hazardous waste almost everywhere. Rules vary, so check locally, and note that some retailers and manufacturers run paint take-back programs.
Seeds, Birdseed, and Pet Food
This section corrects a specific piece of advice that circulates widely. Extra Space Storage's shed organization guide recommends storing seed packets in a photo album in the shed. As a filing system that is genuinely clever. As a storage location it is close to the worst available option, and the reason comes from the agronomy of seed viability.
What actually kills seed
Seed longevity is governed primarily by two variables, temperature and the moisture content of the seed, and both work against seed in a shed. The Tallgrass Prairie Center at the University of Northern Iowa states the relationship plainly: for each 10 degree increase in storage temperature, seed longevity is halved, and for each one percent increase in the moisture content of the seed, longevity is halved again. Colorado State University Extension puts good seed storage at below 40 degrees with seed moisture below 8 percent, and notes that the conditions for good seed storage are the opposite of the conditions for good germination.
There is also a long-standing rule of thumb, attributed to seed physiologist James Harrington and repeated by seed companies and extension programs alike, that the sum of the storage temperature in degrees Fahrenheit and the percent relative humidity should stay below 100.
Now apply the temperature half-life to a shed. Seed stored at 50 degrees that would last a given number of years loses half that lifespan at 60, half again at 70, half again at 80. A shed that spends its summer between 100 and 120 degrees is running several halvings past the reference condition, and it does that every year. This is why a seed packet that sat in a shed through one summer frequently germinates poorly the following spring, and why seed savers keep collections in a refrigerator rather than an outbuilding.
The fix is trivial: seeds go indoors, in a sealed jar, ideally in a refrigerator, with a desiccant packet. A shoebox on a closet shelf is a large improvement over a shed. Keep the photo-album filing idea if you like it, and keep the album inside.
Birdseed and pet food are a different problem
Birdseed, grass seed in bulk, pet food and livestock feed are not primarily viability problems. They are rodent problems, and they are the single most effective way to establish a permanent mouse population in a shed. A paper or woven-poly bag of birdseed is not a container as far as a mouse is concerned; it is a doorway with a meal behind it.
- Everything edible goes in a hard-sided container with a locking or gasketed lid. Galvanized steel cans with tight lids are the traditional answer and are still the best, because rodents will eventually chew through thin plastic. Heavy-duty plastic bins with latching lids are acceptable and should be checked periodically for gnaw marks.
- Do not store the original bag inside the bin unopened and unsealed. Empty the bag into the container, and either recycle the bag or keep the label portion inside for reference.
- Sweep spilled seed immediately. A quarter cup of spilled seed under a shelf sustains a mouse indefinitely.
- Keep containers off the floor on a shelf or pallet, which makes access harder and makes spills visible.
- Buy in quantities you will use in a season. Birdseed also goes rancid and can develop mold in heat, which is a genuine health issue for the birds it is meant to feed.
- Consider keeping pet food entirely out of the shed. The rodent risk it creates outweighs the shelf space it saves in nearly every case.
Long-Handled Tool Storage by Wall Type
Rakes, shovels, hoes, brooms, edgers, post-hole diggers and leaf rakes are the reason sheds feel full when they are not. Standing in a corner they occupy a two-foot triangle of floor, they fall over constantly, they tangle, and reaching the one you want means moving five others. Getting them off the floor is the single most visible improvement most sheds can make.
The question is how, and the answer depends entirely on what you established in Section 1.
The options, ranked by what they demand of the wall
- A floor-standing tool rack or corner organizer. Zero wall load, works in every shed type, holds 8 to 20 long-handled tools upright in a defined footprint. Not as space-efficient as a wall system and can tip if loaded unevenly, which is fixable with a single strap to the wall or the freestanding frame. This is the right first choice in a resin shed.
- A rail on a freestanding frame. A single horizontal 2x4 across the frame at about chest height with spring clips, screw hooks or simple pairs of dowels. Effectively unlimited capacity, no wall load, fully adjustable, and it costs almost nothing. This is the best overall answer for a resin or metal shed.
- Manufacturer accessory hooks on a resin shed. Rated, engineered for the panel, and adequate for a handful of light tools. Stay well inside the panel rating and remember that the rating is per panel, not per hook.
- Bolt-through hooks on a metal shed frame member, with washers both sides and sealed penetrations. Good capacity when landed on the frame, poor when landed on unsupported skin.
- Screw hooks or a rail lagged into studs in a wood shed. The strongest option and the one general advice assumes. A horizontal rail across two or more studs beats individual hooks because you can slide and add hooks without new holes.
- A DIY pallet or PVC tool holder. Widely recommended and genuinely fine, with one caveat: a wooden pallet leaned against a plastic or metal wall is heavy and tips. Fasten it to a frame or a stud wall, not to a resin panel.
Getting the arrangement right
A few details separate a rack that works from one that annoys you daily:
- Hang tools head-up or head-down consistently, and pick head-down for anything with tines or a blade so you are not reaching past a sharp edge at eye level. A rake hung tines-out at face height is a genuine hazard in a dim shed.
- Leave the handles clear of the door swing. Measure the door arc before you set rail height.
- Group by task, not by size. The shovel, the rake and the wheelbarrow get used together. Putting them together beats a tidy row sorted by handle length.
- Give the most-used three tools the easiest positions, immediately inside the door and at hand height. Everything else can be harder to reach.
- Leave a gap between tools. Packed too tightly, they will not come off the hook one-handed, which is how they end up back in the corner.
- Store cutting tools with edge protection. A slit section of old garden hose over a blade or a pair of loppers costs nothing.
Hoses deserve their own mention because they are the awkward middle case. A full 100-foot hose weighs 15 to 25 pounds wet, which is more than a plastic wall should carry on a single hook. A hose reel on the ground outside, a freestanding hose pot, or a hose hanger mounted to a freestanding frame all beat hanging one on a shed wall. And a hose stored full of water will split when it freezes, so drain before winter regardless of where it hangs.
Overhead Storage and the Ceiling You May Not Have
Every organization guide says to use vertical space, and every one of them means overhead racks. The advice is sound in a garage. In a shed it depends on something nobody mentions: whether your shed has a structural ceiling at all.
- Wood-framed sheds with collar ties or ceiling joists have real structure overhead and can carry meaningful load. This is where overhead storage genuinely works.
- Wood-framed sheds with open rafters and no ties can usually carry light, distributed load laid across the bottom chords, but the rafters are sized for roof loads pushing down from outside, not point loads pulling down from inside. Light and spread out is the rule: extension cords, pool noodles, empty bins, seasonal decorations.
- Metal sheds typically have a light roof frame with limited capacity. Very light items only, and only attached to a frame member.
- Resin and plastic sheds generally have no structural ceiling. The roof panels are weather enclosure, not structure. Do not hang overhead storage in a resin shed.
Using the height you do have
Even without a ceiling you can use vertical space, and often better than an overhead rack would:
- Build the freestanding frame tall. A frame that runs from floor to eave gives you shelving at every height with no ceiling involvement at all, and the load goes to the floor where it belongs.
- Put a shelf across the top of the door opening. That band of wall above the door is dead space in almost every shed and it is exactly the right depth for narrow bins.
- Use the gable ends. The triangle above the eave line in a peaked shed is usually unused and works well for long, light items like a folding table, spare lumber or a rolled tarp, provided the shed has structure there to support it.
- Store flat things flat and high. Extension ladders, sheet goods and folding chairs can go on a pair of high brackets or across joists, and they are among the few items where the awkward reach is worth it because you use them rarely.
The safety points that matter overhead
Anything overhead is above someone's head, which changes the tolerance for error. Keep overhead loads light and biased toward soft, low-density items. Use closed bins rather than open boxes, since anything overhead sheds dust onto everything below. Never hang anything heavy over the primary walkway or over a workbench where someone stands. And check overhead attachments once a season, because wood shrinks, screws back out, and roof structures move with temperature more than people expect.
Bins, Labels, and Container Choices That Age Well
Containers are where shed organization either becomes durable or quietly falls apart in eighteen months. The failure modes are specific and predictable, so they are avoidable.
What survives a shed and what does not
- Cardboard boxes do not survive a shed. They absorb moisture, soften, collapse under stacking, and are prime rodent nesting material. They also give no indication they have failed until you pick one up and the bottom stays behind. Nothing should be in cardboard in a shed.
- Opaque plastic bins with latching lids are the workhorse. Latching matters, because a friction-fit lid pops off when the bin is stacked or bumped and lets moisture and pests in.
- Clear bins let you see contents without labels, which is genuinely useful, at the cost of sunlight degrading the contents if the shed has a window. Clear also shows dust and looks messier faster.
- Galvanized steel cans with tight lids are the only real answer for anything edible or attractive to rodents, and they are also excellent for cords, rags and bulk items.
- Five-gallon buckets with gamma-seal lids are underrated in a shed. They are cheap, stackable, waterproof, rodent-resistant, and the screw-on lids open one-handed.
- Wooden crates look wonderful in photographs and are a poor structural choice for a shed, because they wick moisture, hold it against contents, and eventually rot. Use them for dry, robust items or not at all.
- Glass jars for hardware are a classic for a reason and are fine on a stable shelf. They are a bad choice above head height, on an unstable shelf, or anywhere temperature swings might stress a sealed jar.
Labels that last
Ordinary paper labels and standard label-maker tape fail in a shed. Heat softens the adhesive, moisture lifts the edges, and by the second summer you have a bin with a curled fragment of tape on it. What works:
- Write directly on the bin with a paint marker or an oil-based marker. It will not come off, which is a feature until you need to change it, at which point a magic eraser or acetone handles it.
- Label the end that faces out and the lid, because you will approach bins from both directions over time.
- Use categories, not inventories. "Irrigation parts" ages better than a list of what was in the bin in April.
- Consider color-coding by season or by zone, which is faster to read across a dim shed than any text.
- Laminated index cards or clear packing tape over a printed label is the cheap durable option if you want printed text.
Sizing and stacking
Standardize on one or two bin sizes rather than a collection of whatever was on sale. Uniform bins stack squarely, use shelf depth fully, and let you move things without a puzzle. Keep individual bins under about 30 to 40 pounds so they can be lifted one-handed off a shelf, since a bin too heavy to lift comfortably will be opened in place and never reorganized. Stack no more than two or three high without a shelf between, and put the heavy bins at waist height rather than at the floor, because the real cost of a low bin is the number of times you decline to open it.
Zoning the Shed So It Stays Organized
The difference between a shed that stays organized and one that reverts within a season is almost never the shelving. It is whether every item has an obvious place that is easy to return it to. People put things away when putting them away is easier than setting them down. Zoning is how you engineer that.
Zone by frequency first, category second
The instinct is to group by category, so all the garden things live together and all the tools live together. That produces a photogenic shed and a frustrating one, because the mower is used weekly and the seed-starting trays are used for two weeks a year, and putting them in the same zone means moving one to reach the other.
Zone by how often you touch something first:
- Zone 1, immediately inside the door, hand height. The three to six things used weekly in season. Typically the mower path, the primary rake or shovel, work gloves, the trimmer.
- Zone 2, along the side walls at hand and eye height. Monthly items. Hand tools, the hose, fasteners, the sprayer, the pruners.
- Zone 3, low shelves, high shelves, and the back wall. Seasonal and occasional. Snow tools in summer, pool equipment in winter, the spreader, the aerator.
- Zone 4, the least accessible corner and the highest shelf. Once a year or less. Holiday decorations, the extension ladder, spare lumber.
Then group by category inside each zone, which gets you the tidiness without paying for it in daily friction.
Protect the walkway and the machine path
The most common shed layout mistake is filling the floor evenly and leaving no clear path. Every shed needs a clear route from the door to the back wall wide enough to walk, and any shed containing a mower, a wheelbarrow or a bike needs a path wide enough to roll it in and out without moving anything else. Measure the widest thing that comes and goes, add a comfortable margin, and treat that lane as unavailable for storage no matter how tempting it becomes. Painting or taping a line on the floor sounds excessive and works remarkably well.
The habits that make zoning stick
- One in, one out for tools. A new leaf blower means the old one leaves, either sold, donated or disposed of. Otherwise the shed only fills.
- A landing zone for incoming items, a single bin or a marked square of floor where things go when you have not decided yet. The rule is that it gets emptied at every season change and never grows.
- A seasonal swap on the calendar. Twice a year, in spring and fall, move Zone 3 and Zone 1 contents to match the season. It takes twenty minutes and it is the single strongest reason organized sheds stay organized.
- Do not let the shed become the overflow answer for the house. The moment household items with no shed purpose start appearing, the zoning is finished. That is the point at which the honest question in Section 24 needs asking.
- Sweep it out once a season. Grass clippings, spilled soil and leaf debris hold moisture, hide spills, and provide bedding material for rodents.
Two small additions punch above their weight. A battery-powered motion light or a solar light inside the shed changes the whole experience, because a dark shed is a shed you do not put things away in properly. And a hook by the door for gloves and a small whiteboard or clipboard for a running list of what you have run out of will save more trips than any shelving system.
Shed Security: What Gets Stolen and What Slows It Down
A shed is the least secure structure on most properties. It sits away from the house, often out of sight from the street and sometimes from the house itself, it is frequently unlit, and its contents skew toward exactly what is easy to resell: cordless tools, bicycles, generators, pressure washers, chainsaws and mowers. On many properties the shed holds several thousand dollars of equipment behind a hasp screwed into a hollow panel.
Organization and security overlap more than people expect, because knowing what is in the shed is the prerequisite for both.
The realistic goal
You are not going to make a shed burglar-proof. A resin shed wall can be cut with a utility knife and a metal panel with tin snips. What you can do is make the shed slower, louder and less attractive than the alternatives, which is what actually deflects opportunistic theft.
- Upgrade the hasp before the lock. Most shed thefts defeat the hasp, not the padlock, because the hasp is often a light stamped-steel piece attached with short screws. A heavy hasp with concealed fasteners, bolted through with carriage bolts and lock nuts, is a bigger improvement than an expensive padlock on a weak hasp.
- Use a closed-shackle padlock. A conventional padlock's exposed shackle is the easiest point to cut or lever. Closed-shackle or shrouded designs remove that.
- Deal with the hinges. Exposed external hinge pins can be driven out in seconds. Security hinges, hinge bolts, or simply replacing the screws with carriage bolts fixes this cheaply.
- Light the approach. A motion-sensor light covering the shed door is one of the highest-value, lowest-cost deterrents available.
- Obscure the contents. Frosted film or a simple curtain on a shed window removes the shopping list. If nobody can see the pressure washer, nobody comes for the pressure washer.
- Anchor the highest-value items inside. A ground anchor or a heavy eye bolt through the floor frame, plus a chain and a good lock, secures bikes and generators independently of whether the shed door holds.
- Photograph and record. Serial numbers for tools, mowers, generators and bikes, photographed and stored somewhere other than the shed. This is what makes a police report and an insurance claim actionable rather than theoretical.
- Check your homeowners policy. Coverage for detached structures and their contents varies, sublimits are common, and some categories carry their own caps. Worth a five-minute call before you assume the shed contents are covered at replacement value.
The blunt version: if something in your shed would be genuinely painful to lose, the shed may be the wrong place for it. That is a legitimate reason to move a category of items somewhere with real access control, and it is one of the honest cases discussed later in this guide.
Rodents, Insects, and the Shed Floor
A shed is a dry, undisturbed, sheltered box with food nearby and soft materials to nest in. From a mouse's point of view it is close to ideal, which is why sheds get mice, and why anyone organizing a shed should design against them rather than react to them.
The four things that invite them
- Food. Birdseed, grass seed, pet food, fertilizer with organic content, bulbs, and anything edible. Section 15 covers containment.
- Nesting material. Cardboard, paper, fabric, upholstery, insulation, rope, and the stuffing in outdoor cushions. All of it belongs in sealed hard-sided containers or out of the shed entirely.
- Undisturbed clutter. A pile nobody moves for a year is a habitat. Zoning and the seasonal swap in Section 19 solve much of this incidentally, because things that get moved twice a year do not become nests.
- An easy entrance. A mouse fits through a gap the width of a pencil, and gaps that size exist under almost every shed door.
Closing the shed up
- Seal the gap under the door with a threshold strip, a weather seal, or a piece of aluminum angle. This is the single most effective exclusion measure and it also keeps out blowing leaves and water.
- Screen every vent with hardware cloth of quarter-inch mesh or finer. Vents are necessary, and they are also open doors.
- Fill gaps around utility penetrations and at corners with copper mesh or stainless wool packed in and sealed. Expanding foam alone does not stop rodents, which chew through it readily.
- Elevate the shed floor if you are building or replacing. A shed on a raised, ventilated base is drier and less attractive to burrowing animals than one sitting directly on soil, and the gap underneath should be either fully open and inspectable or fully closed, never a half-blocked cavity.
- Keep vegetation cut back at least a couple of feet on all sides. Overgrowth against a shed wall provides cover for approach and holds moisture against the structure.
- Do not stack anything against the exterior walls, particularly firewood, which is both a rodent habitat and an insect one.
Insects and the moisture connection
Wasps and hornets build in shed eaves and under overhangs with great enthusiasm, and the standard control is inspection in early spring before nests are established, when removal is trivial. Carpenter ants and termites are a wood-shed issue and they are fundamentally a moisture issue: they are attracted to wood that is damp, and shed framing gets damp where it touches soil, where water splashes up from the ground, or where a leak has gone unnoticed. Keeping the base of a wood shed off the ground, keeping the perimeter drained, and fixing roof leaks promptly prevents nearly all of it.
Spiders in a shed are mostly harmless and genuinely useful, though it is worth knowing which venomous species are common in your region and taking the standard precautions: gloves when reaching into dark corners, a light before reaching anywhere you cannot see, and a shake-out before putting on boots or gloves that have been sitting.
Permits, Setbacks, and HOA Rules Before You Build or Replace
Sooner or later, organizing a shed turns into replacing a shed. That is where a whole regulatory layer appears that nobody mentions in a shed-organization article, and it catches people who assumed a backyard shed was nobody's business but theirs.
This section is general orientation, not legal or code advice. Requirements vary substantially by jurisdiction and the only authoritative answer is your local building department. Call them before you buy anything. The call is free, it takes ten minutes, and it is dramatically cheaper than the alternative.
The permit threshold and why it varies
The International Residential Code, which most states adopt as the basis for residential construction, exempts one-story detached accessory structures from building permits when the floor area does not exceed 200 square feet under the 2021 and 2024 editions. That is the model-code baseline and it is where the widely repeated "under 200 square feet does not need a permit" claim comes from.
The problem is that the model code is a starting point that jurisdictions amend freely, and this particular provision is amended constantly:
- California's Residential Code sets the exemption at 120 square feet, not 200, so the model-code figure is simply wrong for an entire state.
- The District of Columbia's building code has used a considerably lower threshold, in the neighborhood of 50 square feet, along with a height limit and a restriction to one exempt shed per lot.
- Some jurisdictions attach conditions to the exemption, such as Pierce County, Washington, which pairs the 200 square foot allowance with a requirement that the structure sit at least three feet from a property line.
- Historically the IRC exemption was 120 square feet and was raised to 200 in a later cycle, so older adopted codes still in force in some places use the lower figure.
The practical consequence: a 10x12 shed is exactly 120 square feet, which is precisely the line in a large number of jurisdictions. That is not a coincidence, and it is why that size sits at the boundary between "buy it and put it up" and "file an application."
The exemptions that are not exemptions
Three things trip people up repeatedly:
- A permit exemption is not an exemption from the code. The IRC states this directly. A shed under the threshold still has to comply with applicable code requirements; you simply are not required to pull a permit to build it.
- A building permit and a zoning permit are different things. Zoning governs where the shed can go, how tall it can be, how close to a property line, how much of the lot can be covered, and sometimes how many accessory structures are allowed. Those rules typically apply regardless of size, and a shed that needs no building permit may still violate a setback.
- Utilities change everything. Running electrical service to a shed, adding plumbing, or installing mechanical equipment generally triggers a permit requirement no matter how small the structure is. If you are planning lighting, an outlet, or a mini-split for a workshop, assume permits are required.
The other rules that apply
- Setbacks. Minimum distances from side and rear property lines, and often from the house, from a septic field, or from an easement. These are the most commonly violated shed rule.
- Lot coverage limits. Many jurisdictions cap the total impervious or built area on a lot, and a shed counts toward it.
- Height limits for accessory structures, frequently in the 10 to 15 foot range.
- Fire-resistance requirements for structures close to a lot line.
- Overlay districts. Historic districts, flood zones and wildland-urban interface areas frequently have their own rules and sometimes eliminate the small-shed exemption entirely.
- Anchoring and wind requirements, which in high-wind and coastal regions can be specific and enforced.
- HOA approval, which is a completely separate process from anything the municipality requires. HOAs commonly regulate shed size, siting, materials, roof pitch, color and visibility from the street, and approval must generally be obtained in advance. A municipal permit does not satisfy an HOA and an HOA approval does not satisfy the municipality.
One last practical note. If your shed is being replaced during a larger project, coordinate the timing. A shed that comes down in March and goes back up in June leaves a full season of contents with nowhere to live, and that gap is a much more common reason people rent short-term storage than the shed itself ever is. Our guide to backyard remodel ideas and what they cost covers how shed replacement fits into a wider yard project and where it typically lands in the budget.
What Size Shed Do You Actually Need
Sooner or later the organization question becomes a capacity question. Here is arithmetic that no shed-organization guide publishes and that you need in order to answer honestly whether the problem is arrangement or volume.
Start from footprints, not from square feet
Shed capacity is not really about area, because the big items are floor-hogging and cannot be stacked. Work from the footprint of the largest items:
- Push mower: roughly 2 by 5 feet with the handle down, and you need clearance to turn it or to back it out straight.
- Self-propelled or wide-deck walk-behind: roughly 2.5 by 5.5 feet.
- Riding mower or lawn tractor: roughly 4 by 6 feet with a wider swing radius, and a door opening of at least 5 feet is usually required to get it in and out comfortably.
- Wheelbarrow: roughly 2.5 by 5 feet flat, or about 2.5 by 2 feet stood on end against a wall.
- Adult bicycle: roughly 2 by 6 feet flat, considerably less if hung or stood vertically.
- Freestanding shelf unit: typically 1.5 to 2 feet deep by 3 to 4 feet wide.
- Long-handled tool rack: about 2 by 2 feet of floor, or zero if wall or frame mounted.
- Walkway: 2 feet minimum, 3 feet if you move equipment through it.
Common shed sizes and what they realistically hold
- 4x6 or 6x4 (24 square feet). Long-handled tools, a small mower, hand tools and a few bins. No workspace and no room to stand comfortably with the mower inside.
- 6x8 (48 square feet). A mower, a wheelbarrow, tools on the walls, and one shelf unit. This is the practical minimum for a household that does its own yard work.
- 8x10 (80 square feet). The most common useful size. A mower, a wheelbarrow, two bikes, wall storage on two walls, a shelf unit, and enough floor left to stand and work.
- 10x12 (120 square feet). Everything above, plus a small workbench, seasonal bins, and room for a second machine. Also the size at which permit thresholds start to matter in many places.
- 10x16 or 12x16 (160 to 192 square feet). A riding mower, a real workbench, substantial seasonal storage, and space to work on a project. Approaching the model-code exemption ceiling.
- Anything larger is generally a permitted structure and starts to overlap with what a detached garage or a rented unit does, at a cost worth comparing directly.
The test that tells you which problem you have
After the sorting pass in Section 7, lay everything you decided to keep on the driveway in the arrangement it would take in the shed: big footprints first with their real clearances, then shelving, then a two-foot walkway drawn in chalk. If it fits with room to move, your problem was arrangement and this guide solved it. If it does not fit with the walkway included, you have a volume problem, and there are exactly three honest answers: keep less, get a bigger shed, or move a category of items somewhere else.
The third option is worth pricing rather than assuming. A prefab shed kit commonly runs $1,500 to $5,000, and a site-built shed $5,000 to $15,000, before any permit, site prep or foundation cost, and before the possibility that a bigger shed does not fit your setbacks or your HOA rules. Against that, a small rented unit is a monthly cost with no construction, no permit and no permanence. Which is better depends entirely on what you are storing and for how long, which is exactly the question the next section takes on.
When the Shed Is Not the Answer, and When a Storage Unit Is Not Either
We rent storage units for a living, so it would be easy to end this guide by suggesting that the solution to a full shed is a unit. For a lot of people it is not, and saying so is more useful than pretending otherwise.
Do not rent a unit for these
- Things you have not used in several years and cannot name a future use for. Paying monthly to postpone a decision is the most common way storage becomes a bad deal. If the honest answer is that you will never use it, disposal costs less than any unit ever will.
- Broken equipment you intend to fix. If it has been broken through two seasons in the shed, it will be broken through two years in a unit. Fix it now or let it go.
- A shed that is merely disorganized. If the driveway test in Section 23 showed everything fitting, the problem was arrangement. A freestanding frame, a tool rail and an afternoon will fix it for well under the cost of a few months of rent.
- Items you need on short notice, weekly, in season. The mower, the trimmer, the everyday shovel and the hose belong twenty feet from the lawn, not across town. Convenience is most of the value of a shed and a unit does not replicate it.
- Gasoline, propane, fuel, fireworks, fertilizer in bulk, or anything else flammable, explosive or hazardous. These are prohibited in self-storage units as a matter of standard lease terms across the industry, ours included. A unit is not a workaround for the fuel and propane limits earlier in this guide.
- Anything living, including plants and bulbs you meant to overwinter. Also prohibited, and it would not survive anyway.
- A single small overflow you could solve with a deck box. A weatherproof deck box costs a fraction of a year of rent and holds cushions, pool toys and hoses perfectly well.
Cases where a shed genuinely beats a unit
Frequency of access decides this more than anything else. If you touch something weekly during a season, it should be on your property. A shed also wins on cumulative cost for long-horizon storage of low-value bulky items, since a shed is a one-time expense that eventually pays for itself against rent, and it adds usable structure to a property in a way rent does not. And a shed keeps yard equipment adjacent to the yard, which is the entire point of yard equipment.
Cases where the unit is the better answer
There are real ones, and they tend to be specific rather than general:
- The shed is coming down or going up. Replacement, a yard renovation, a fence project, a drainage job. The contents need somewhere to live for six to sixteen weeks and a tarp in the driveway is not a plan.
- Items that a shed will actively damage. Everything in Section 9 that needs to leave the shed and does not fit in the house: furniture, textiles, boxed household goods, anything with a circuit board, anything sentimental.
- Seasonal equipment with a genuine off-season, particularly bulky items used for a defined window each year. Patio furniture in a northern winter, a boat or a trailer, holiday decorations that consume a quarter of the shed.
- High-value equipment where shed security is the limiting factor. Section 20 was honest about what a shed door protects against, which is not much.
- You cannot legally build a bigger shed. Setbacks, lot coverage, height limits and HOA rules are hard constraints, and a unit is often the only way past them.
- The math favors it. When a larger shed plus a foundation plus a permit costs several thousand dollars, and you need the space for eighteen months rather than eighteen years, rent is the cheaper answer.
If you got to this section and none of those cases describe you, the right outcome is a better-organized shed and no monthly bill. That is a completely legitimate place to stop reading.
Moving the Overflow Out: What Actually Belongs in a Storage Unit
If one of the cases above does describe you, the practical question is how much space you actually need, which is easier to answer than most people expect once the shed is already sorted.
Sizing from what came out of the shed
Work from the same footprint arithmetic used in Section 23, applied to the pile you decided to move out rather than to everything you own.
- A 5x5 unit, 25 square feet. Roughly the footprint of a small closet. Holds seasonal bins, holiday decorations, patio cushions, small tools, sports equipment, and a bicycle or two. This is the right size for the overflow category and it is what most shed problems actually need.
- A 5x10 unit, 50 square feet. Everything above plus patio furniture for a small set, a push mower with fuel drained, a workbench, and a substantial number of bins. Comfortable for the contents of a small shed during a rebuild.
- A 10x10 unit, 100 square feet. The full contents of a typical 8x10 or 10x12 shed, with room to walk in and reach the back. This is the size to look at when an entire shed is coming down for a season.
- A 10x20 unit, 200 square feet. Shed contents plus large yard equipment, a trailer, or the overlap during a whole-yard renovation.
If you would rather not do the arithmetic, our storage size calculator works from an item list, and the storage unit size guide walks through each size with dimensions and typical contents. For general packing and stacking technique once the unit is rented, our guide to organizing a storage unit covers inventory, labeling and access planning, and the same zoning logic from Section 19 applies inside a unit as well as inside a shed.
Practical notes for shed contents specifically
- Drain all fuel before anything with an engine goes in. Mowers, trimmers, blowers, pressure washers, generators. Run them dry rather than pouring the fuel out, and remember that fuel cannot come with them.
- Clean and dry everything. Soil on tools holds moisture against metal, and organic debris attracts pests. A hose-down and a full dry day before the move prevents most storage damage to garden equipment.
- Take batteries out of everything and keep them at home, for exactly the reasons in Section 13.
- Sharpen and oil blades before storage, not after. Mower blades, pruners, loppers and shovels all come out of storage in the condition they went in.
- Repack out of any cardboard that came from the shed, since it may already be carrying moisture or pests.
- Choose a unit type that matches the contents. Our climate-controlled units are temperature-regulated, which is the relevant difference from a shed for anything sensitive to heat and cold cycling. For trailers, boats and larger equipment, vehicle storage is the right category rather than a standard unit.
- Match the term to the project. Month-to-month is the point for a shed rebuild or a seasonal swap. There is no reason to commit past the end of the project.
10 Federal Storage runs fully automated facilities across 16 states, which means you can reserve, sign and get access codes online without an office visit and without waiting on business hours. That matters more than it sounds for a project like this, because shed work happens on weekends and the point at which you realize you need space is rarely a Tuesday at 10 a.m.
Find a 10 Federal Storage location near you and reserve a unit online if the shed sorting produced a pile with nowhere to go. If it did not, skip it. A well-built shelf and a hard afternoon is the cheaper answer and it is the one most sheds need.
Frequently Asked Questions About Shed Organization
The highest-value moves cost very little. Sort ruthlessly and remove what you do not use, which frees more space than any product. Build a freestanding 2x4 frame inside the shed for the price of a few studs, and hang everything from that instead of buying a branded accessory kit. Get long-handled tools off the floor. Use five-gallon buckets and secondhand plastic bins rather than new ones, and write labels directly on them with a paint marker. Q; Can you hang things on the walls of a plastic shed? Yes, but not with ordinary screws. Resin and plastic sheds have hollow walls with no framing, and a screw driven into the panel will strip and pull out. Use the manufacturer's anchor system, which engages molded slots in the panel, or bolt through the panel with large washers on both sides. Rubbermaid publishes a limit of up to 75 pounds per wall panel when its own anchors and accessories are used. Do not hang bikes, ladders or loaded wheelbarrows from a plastic shed wall.
It depends entirely on construction. Rubbermaid states that each wall panel on its resin sheds holds up to 75 pounds using Rubbermaid anchors and accessories, and Suncast rates its vertical shed shelf kit at 30 pounds. Metal shed panels should carry load only where a bolt lands on or near a frame member. A wood-framed shed with a hook or bracket lagged into a stud carries far more, limited by the fastener and bracket rather than the wall. If you are not sure, build a freestanding frame and put the load on the floor instead.
In most places yes, within limits, and a detached shed is generally preferred over an attached garage or a basement. Fire codes commonly published by municipalities limit total residential flammable liquid storage to around 25 gallons, cap individual portable containers at 5 gallons, require approved containers, and count empty containers as full. Requirements vary by jurisdiction, so check with your local fire department or building department for the rules that apply where you live. Store cans upright at floor level, in the most ventilated part of the shed, away from ignition sources.
No. Fire safety and propane industry guidance consistently advises storing propane cylinders outdoors in a well-ventilated area, and specifically warns against enclosed structures including sheds, garages, basements and crawl spaces. Propane vapor is heavier than air, so a leak inside a shed pools at floor level with nowhere to disperse. Store cylinders outside, upright, on a flat non-combustible surface, out of direct sun, and away from ignition sources.
It depends on the product and on your climate. Pesticide labels carry legally enforceable storage instructions, and extension services commonly cite a general storage range of roughly 40 to 90 degrees for most products. An uninsulated shed in summer regularly exceeds that, and in winter falls below it. Read the Storage and Disposal section of each label, keep products in original containers in a locked cabinet away from children and pets, and move anything the label identifies as temperature-sensitive to a cooler, more stable indoor location.
Generally no. DeWalt publishes a charging range of 40 to 105 degrees for its lithium-ion batteries and warns that below 40 degrees can cause permanent runtime loss, and Milwaukee guidance cites an optimal storage range of roughly 60 to 75 degrees. An unconditioned shed falls outside those ranges for much of the year in most of the country. Leave the tools in the shed and bring the battery packs indoors, detached from the tools, and never charge a pack that has been sitting in the cold without letting it warm up first.
Sheds in direct sun commonly run 20 to 30 degrees above the outside air, and interior readings of 120 degrees or more are frequently reported on hot days, with dark metal sheds at the high end. That means an ordinary 90 degree afternoon can put a shed interior above 115 degrees. Shade, light-colored roofing, and ventilation that draws in low and exhausts high are the most effective ways to reduce it without insulating.
Remove the food and the nesting material first: birdseed, grass seed, pet food and fertilizer go into hard-sided containers with sealing lids, and cardboard, fabric and paper come out of the shed entirely. Then close the entrances. Seal the gap under the door with a threshold strip, screen all vents with quarter-inch hardware cloth, and pack gaps around penetrations with copper mesh rather than foam alone. Keep vegetation cut back from the walls and sweep the floor each season.
Propane cylinders should never be stored in an enclosed shed. Lithium-ion tool batteries, electronics, photographs, documents, books, artwork, textiles, mattresses, musical instruments, food of any kind and medications all belong indoors. Gasoline, lawn chemicals, paint and seed can go in a shed only under specific conditions covered earlier in this guide. Anything valuable and easily carried is a poor fit given how little security a typical shed door provides.
It depends on your jurisdiction. The International Residential Code exempts one-story detached accessory structures under 200 square feet from building permits in its 2021 and 2024 editions, but that baseline is amended constantly. California's Residential Code uses 120 square feet, and some jurisdictions use lower figures still or attach conditions such as a minimum distance from the property line. A permit exemption also does not exempt you from the code itself, from zoning rules and setbacks, or from HOA approval, and adding electrical or plumbing generally triggers a permit regardless of size. Call your local building department before you buy.
That is a zoning question and it varies by municipality and sometimes by zoning district within a municipality. Setback minimums of three, five or ten feet are all common, and some places also set minimum distances from the house, from a septic field, or from an easement. Setbacks generally apply regardless of shed size, including to sheds too small to need a building permit. Your local planning or zoning office has the specific figure for your lot.
Off the floor, grouped by task, with the most-used ones nearest the door. In a wood shed, a horizontal rail lagged across two or more studs with hooks or spring clips is the best option because you can add and move hooks without new holes. In a resin or metal shed, a rail on a freestanding frame or a floor-standing tool rack avoids the wall load problem entirely. Hang anything with tines or a blade head-down so you are not reaching past a sharp edge.
Not if you want them to germinate. Seed longevity is halved for every 10 degree increase in storage temperature according to guidance from the Tallgrass Prairie Center, and Colorado State University Extension puts good seed storage below 40 degrees. A shed spends its summer far above that. Store seed packets indoors in a sealed jar with a desiccant, ideally in a refrigerator. The same applies to bulbs.
Work from footprints rather than square feet, because the large items cannot be stacked. A 6x8 shed is the practical minimum for a household that does its own yard work. An 8x10 handles a mower, a wheelbarrow, two bikes, wall storage and a shelf unit with room to stand. A 10x12 adds a small workbench and seasonal storage, and is also where permit thresholds start to matter in many jurisdictions. Lay everything out on the driveway with a two-foot walkway included before you decide.
It depends on how long you need the space and whether you can legally build. A prefab shed kit commonly runs $1,500 to $5,000 and a site-built shed $5,000 to $15,000, before site prep, foundation and any permit cost. Over many years a shed can cost less than rent and it adds structure to the property. For a defined period, such as a yard renovation or a shed rebuild, renting is usually cheaper and involves no permit, no construction and no permanence. Setbacks, lot coverage limits and HOA rules can also make a bigger shed impossible regardless of cost.
A Shed That Stays Organized
Most shed organization advice starts with a product and works backward. The better sequence starts with three questions that cost nothing to answer: what is this shed made of, what does it get to in July and January, and what is in here that should not be. Answer those and the shelving decisions become obvious, because you know what the walls can carry and you know what is left to put on them.
If you do nothing else from this guide, do four things. Move the propane cylinder outside. Bring the tool batteries indoors. Get the long-handled tools off the floor, using a freestanding frame if the walls will not take the load. And run the sorting pass, because the shed that stays organized is almost always the shed with less in it, not the shed with more shelves.
Then put the seasonal swap on the calendar twice a year. Twenty minutes each spring and fall, moving the current season's tools to the front and last season's to the back, is what keeps a shed from reverting. It is a smaller commitment than the afternoon you just spent, and it is the part that makes the afternoon last.
For more on preparing tools and equipment for longer-term storage, our storage tips cover packing, protecting and stacking. And if the sorting produced a category of items that genuinely needs somewhere else to live, a small unit is usually all a shed overflow requires. If it did not, you already have what you needed. Go build the frame.
About the Author
10 Federal Storage
Our team at 10 Federal Storage has been in the self storage industry for decades. With knowledge gained from multiple universities and in the field, we are well-prepared and excited to assist with your storage needs. When you rent a unit with us, you can feel confident that our seasoned customer service team’s help will make your transition as seamless as possible. Customer satisfaction is our number one priority, and we strive to make your experience exceptional with our automated leasing options, diverse unit sizes, and a strong commitment to sustainability.