
.svg)
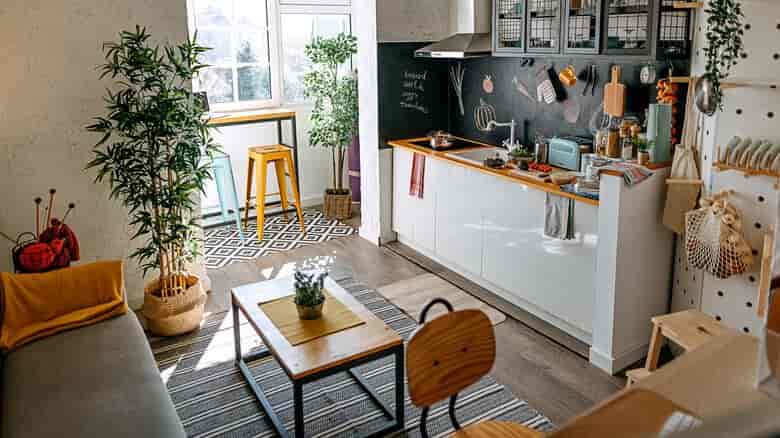
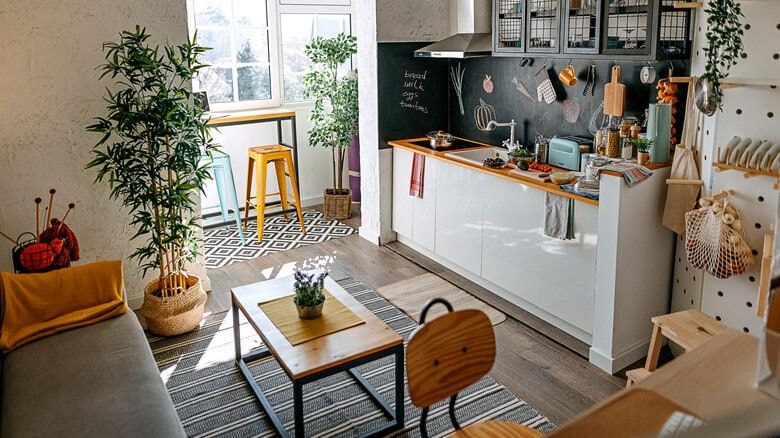
Small Apartment Storage Ideas: The Complete Guide to Making a Tiny Space Work
by 10 Federal Storage
Published on August 7, 2026
There is a specific moment every small-apartment dweller knows. You’re standing in the middle of your place holding something perfectly reasonable, a vacuum, a suitcase, a folding chair, a winter coat, and there is genuinely nowhere for it to go. Not “nowhere convenient.” Nowhere.
Most small-apartment storage advice responds to that moment with a shopping list. Buy baskets. Buy a shelf. Buy an ottoman. And some of that helps, but it skips the two things that actually determine whether a small space works: whether you’ve matched your belongings to your square footage, and whether the solutions you choose are ones you’re actually allowed to install in a place you don’t own.
That second point is the one almost nobody writes about. If you rent, and if you live in a small apartment, you almost certainly do, half the advice out there will quietly cost you part of your security deposit. Drilling into walls, mounting heavy shelving, hanging things on wallpaper, adhesive strips applied to the wrong surface: these are real charges on real move-out statements.
So this guide covers both. Room by room, with actual measurements and actual costs, plus a clear section on what you can and can’t do as a renter. And at the end, an honest treatment of the point where storage ideas stop being enough and you need space that isn’t inside your apartment.
Table of Contents
- What Counts as a Small Apartment?
- Start With an Audit, Not a Shopping Trip
- The Renter’s Rules: What You Can Do Without Losing Your Deposit
- Think Vertical: The Biggest Win in Any Small Apartment
- Entryway Storage Ideas
- Living Room Storage Ideas
- Bedroom Storage Ideas
- Under-Bed Storage Done Right
- Closet Storage Ideas for Tiny Closets
- Small Kitchen Storage Ideas
- Bathroom Storage Ideas
- Carving Out a Work Space Without Losing a Room
- Studio Apartment Storage: Zoning Without Walls
- Multi-Purpose Furniture That Earns Its Footprint
- Doors: The Most Wasted Surface in Your Apartment
- Awkward Spaces Most People Ignore
- Build a Seasonal Rotation System
- Vacuum Bags: What to Compress and What Never To
- Safety in a Small Apartment
- What Small Apartment Storage Actually Costs
- Small Apartment Storage Mistakes to Avoid
- Storage Ideas for Roommates and Shared Small Spaces
- When You’ve Genuinely Run Out of Room
- What to Store Off-Site and What to Keep at Home
- Choosing a Storage Unit Size for an Apartment
- Packing a Unit So You Can Actually Use It
- Frequently Asked Questions About Small Apartment Storage
What Counts as a Small Apartment?
“Small” is relative, but it helps to know roughly where you sit, because the strategy genuinely changes at different sizes.
National averages vary depending on which dataset you look at, Census survey data, developer data, and rental listing data all measure slightly different things, but the general picture is consistent:
- Studios typically land somewhere in the range of roughly 400 to 600 square feet, with urban studios in dense markets frequently coming in well under that.
- One-bedrooms generally run from about 700 to 800 square feet on average, though older buildings and city-center units are often much smaller.
- Two-bedrooms average around 1,000 square feet and up.
What matters more than the raw number is the shape of the problem:
- Under about 500 square feet, every single piece of furniture must do at least two jobs. There is no room for anything decorative that doesn’t also store, seat, or serve. Zoning becomes the central design problem.
- 500 to 750 square feet, you can afford one or two single-purpose pieces, but closets are almost always the bottleneck. Vertical storage delivers the biggest returns here.
- 750 to 1,000 square feet, usually enough room; usually not enough closet. The problem shifts from floor space to enclosed storage, and the fix is usually better systems rather than more furniture.
One more useful framing: in a small apartment you are paying a premium per square foot. Studios frequently carry the highest cost per square foot of any unit type, because the fixed costs of a kitchen and bathroom get spread over far less space. That means every square foot occupied by something you don’t use is costing you real money every month, which is exactly why the audit in the next section matters more than any product you could buy.
Start With an Audit, Not a Shopping Trip
The single most common small-apartment mistake is buying storage before deciding what needs storing. Bins bought early become clutter with a lid on it. Do this first, it takes an afternoon and it will change what you buy.
Step 1: Empty one category completely
Not one room, one category. Every coat. Every pair of shoes. Every mug. Category-based sorting works better than room-based sorting in small spaces because your belongings are already scattered across multiple rooms out of necessity, and you can’t judge how many black sweaters you own until all of them are in the same place.
Step 2: Sort into four piles, not three
- Keep and use weekly, this earns prime, reachable, eye-level space.
- Keep but use seasonally or rarely, this belongs in deep storage: high shelves, under the bed, or off-site.
- Donate or sell, be decisive. In a small apartment, storing an item costs you space you’re paying rent on.
- Undecided, the pile most guides skip. Box it, date it, put it out of sight. If you haven’t opened the box in six months, you have your answer without ever having to make the decision emotionally.
Step 3: Measure before you buy anything
Write down, in a note on your phone:
- Ceiling height (this determines how far up you can go, and whether over-door and top-of-closet storage is viable).
- Clearance under your bed, floor to frame.
- Closet interior width, depth, and the height from the rod to the ceiling.
- The gap between your refrigerator and the adjacent cabinet or wall.
- The width of any wall you’re considering shelving.
- Door thickness, if you plan to use over-the-door organizers.
Those six numbers prevent nearly every returned purchase. The refrigerator gap in particular is worth knowing, slim rolling carts are sized in specific increments, and a 9-inch cart in a 7-inch gap is a very common and very annoying error.
Step 4: Identify your actual bottleneck
Before you solve anything, name the problem precisely. “My apartment is too small” is not actionable. These are:
- “I have nowhere to put things when I walk in the door, so they end up on the counter.”
- “My closet holds four months of clothing and I own twelve months of clothing.”
- “I have no counter space because appliances live on it permanently.”
- “Bulky items, luggage, sports gear, holiday decorations, consume a third of my closet year-round.”
Each of those has a different solution, and only the last one usually points toward off-site storage. Diagnose before you treat.
The Renter’s Rules: What You Can Do Without Losing Your Deposit
Almost every small-apartment storage article on the internet will cheerfully tell you to install floating shelves, mount a pegboard, and anchor a bookcase to the wall. Very few will mention that you are probably a renter and that some of those things may be deducted from your deposit at move-out.
Read your lease before you do any of this. Language varies enormously, some leases permit a set number of small nail holes per wall, some prohibit adhesive products explicitly, and some require walls to be returned in original condition regardless of method. What counts as “normal wear and tear” versus chargeable damage also varies by state law, so your lease and your local rules are the authority here, not a blog post.
That said, here’s the practical hierarchy, from safest to riskiest.
Zero-risk: nothing touches the wall
- Freestanding shelving units placed against a wall rather than mounted to it.
- Tension rods in doorways, closets, under sinks, and inside cabinets. They hold by pressure alone and leave nothing behind. Most adjustable rods span a specific range, measure the opening and buy for the middle of the range, not the extreme end, where holding power drops off.
- Over-the-door organizers that hook over the top edge. Check door thickness first; standard interior doors are usually around 1 3/8 inches, and most over-door hardware is built for that. Solid-core or fire-rated doors can be thicker.
- Under-bed and under-furniture containers.
- Furniture with built-in storage, ottomans, storage beds, bench seating.
- Rolling carts and freestanding racks.
Low-risk, with technique: adhesive hooks and strips
Adhesive hooks are the renter’s workhorse, but they fail in predictable ways, and a failed strip can pull paint, which is worse than the nail hole you were avoiding. A few things worth knowing:
- Respect the weight rating, then cut it. Published ratings run from roughly 1 pound for the smallest hooks up to around 15 to 20 pounds for the largest heavyweight hooks and picture strips. Those are laboratory ratings on ideal surfaces. In practice, load them to about half of rated capacity and split heavy items across multiple hooks.
- Surface matters more than weight. These products are designed for smooth, clean, painted drywall, finished wood, tile, glass, and metal. They perform poorly on textured or knock-down walls, brick, unfinished concrete, and dusty surfaces.
- Do not use them on wallpaper. The manufacturer advises against it, and the failure mode isn’t the hook coming loose, it’s the wallpaper tearing off the wall with the hook still attached. That is unambiguously chargeable damage.
- Clean with rubbing alcohol first, not household cleaner. Cleaning sprays leave a residue that defeats the adhesive.
- Wait an hour before loading. The adhesive needs time to bond. This is the single most-ignored instruction and the single most common cause of failure.
- Remove by pulling the tab straight down, slowly, parallel to the wall, never outward. If a tab snaps, warming the strip with a hairdryer for about thirty seconds softens the adhesive enough to work it free. Do not scrape.
Moderate risk: small-hole hardware
Picture hangers, monkey hooks, and small finishing nails leave holes measured in millimeters, and spackle plus touch-up paint makes them disappear. Many leases tolerate a limited number of these. Take a photo of each wall before you start so you have a record of pre-existing condition, and keep a small container of matching paint if your landlord will provide the color.
High risk: anything requiring anchors
Drywall anchors, toggle bolts, and lag screws into studs leave holes that require patching, sanding, and repainting to hide. This is the category that generates move-out charges. If a storage solution requires anchors, either get written permission, or choose a freestanding alternative that accomplishes the same thing.
The important exception: if you have small children or pets and you own tall furniture, anti-tip anchoring is a safety requirement that outweighs deposit concerns. More on that in the safety section below. Talk to your landlord, most will approve furniture anchoring without hesitation, and getting that approval in writing costs you one email.
Document everything on day one
Before you hang a single thing, photograph every wall, every closet interior, every cabinet, and every existing scuff, with timestamps. This is the cheapest insurance in renting, and it takes ten minutes. It also tells you where the pre-existing holes are, which are often the best places to hang things, since they’re already there.
Think Vertical: The Biggest Win in Any Small Apartment
Here’s the arithmetic that reframes a small apartment. A 500-square-foot studio with 9-foot ceilings contains 4,500 cubic feet of space. The average person actively uses maybe the bottom five feet of it. Everything above eye level is, in most apartments, completely empty.
You are renting the volume. You are only using the floor.
The frequency-of-use hierarchy
Vertical storage only works if you assign height by how often you need something. The rule:
- Waist to shoulder height, daily items. This is the most valuable real estate in your apartment and it should never hold anything seasonal.
- Knee to waist, weekly items, and anything heavy. Weight belongs low, both for stability and for your back.
- Shoulder to ceiling, monthly, seasonal, and archival. Luggage, holiday decorations, off-season bedding, sentimental boxes.
- Floor level, heavy, bulky, infrequently moved. Bins that slide rather than lift.
Go taller and narrower than feels natural
A bookcase that’s 30 inches wide and 7 feet tall holds substantially more than one that’s 48 inches wide and 4 feet tall, while consuming less than two-thirds of the floor area. In a small apartment, always trade width for height. Two narrow tall units flanking a window or doorway read as architectural rather than cluttered, and they leave the visual center of the wall open, which keeps the room from feeling closed in.
Use the last twelve inches
The band between the top of your tallest furniture and the ceiling is almost universally wasted. Options that don’t require mounting:
- Matched baskets or lidded boxes lined up on top of a wardrobe, bookcase, or kitchen cabinets. Matching matters here, mismatched containers at that height read as clutter, identical ones read as intentional.
- A high shelf above a doorway. Doorways are dead zones and the wall above them is structurally the same as any other wall.
- Suitcases stacked largest to smallest, packed with off-season clothing inside. Your luggage is storage that already exists and is usually sitting empty.
Vertical inside enclosed spaces, too
Cabinets and closets have the same problem as rooms, a shelf 14 inches below the next shelf wastes eight inches of air above whatever you set on it. Shelf risers, stacking bins, and under-shelf baskets that clip onto an existing shelf recover that space for a few dollars each and no installation at all.
Entryway Storage Ideas
Most small apartments have no entryway at all, the front door opens directly into the living space. That’s exactly why this matters: without a designated landing spot, keys, mail, bags, and shoes migrate onto whatever horizontal surface is nearest, which is usually the surface you need most.
Build a drop zone in under three feet
You need remarkably little. A functional entry zone consists of four things:
- Somewhere to put keys, a small dish, a wall-mounted tray, or a couple of hooks. This one item prevents more daily friction than anything else on this list.
- Somewhere to hang a coat and bag, a row of hooks, a freestanding coat rack, or an over-the-door hook rail on the back of the front door itself.
- Somewhere to put shoes, a narrow rack, a tray, or a bench with cubbies underneath.
- Somewhere for mail, a single small basket, emptied weekly. Mail is the most reliable clutter generator in any home.
The bench is the highest-leverage piece
A storage bench roughly 30 to 36 inches wide gives you a place to sit while taking shoes off, closed storage inside for gloves, umbrellas, and dog supplies, and a surface on top for a tray or basket. It occupies about three square feet and does three jobs. If your entry is too narrow for a bench, a shoe cabinet with tilt-out drawers is typically only 8 to 10 inches deep and does the same work standing up.
Use the back of the front door
In a studio without a coat closet, the back of the front door is often your only unused vertical surface, and it’s a good one. An over-the-door hook rail or a pocket organizer turns it into real storage. Two cautions: make sure whatever you hang doesn’t prevent the door from closing fully or interfere with a deadbolt, and secure it well enough that it doesn’t swing and bang every time the door moves.
A mirror does double duty
A mirror near the entry gives you a last-look-before-leaving spot and bounces light back into the room, which makes a small space read as larger. A leaning full-length mirror needs no mounting at all, though if you have kids or pets, secure the top edge, because a leaning mirror is a genuine tip hazard.
Living Room Storage Ideas
The living room in a small apartment is usually also the dining room, the office, the guest room, and the gym. Storage here has to be invisible enough that the room still feels like a place to relax.
Every horizontal surface should open
In a small living room, refuse to buy furniture that doesn’t store something:
- Storage ottoman instead of a coffee table, holds blankets, throw pillows, remotes, and game controllers, doubles as extra seating when people come over, and has no sharp corners.
- Lift-top coffee table, the top rises and slides toward you, creating a work or dining surface at couch height, with a deep compartment underneath.
- Nesting tables, one footprint, two or three surfaces that pull apart when you have guests and tuck away when you don’t.
- Sofa with under-seat storage, or at minimum, one you can fit bins beneath.
- Console table behind the sofa if the sofa floats away from the wall, typically 12 to 14 inches deep, and it gives you surface and often shelving in space that was pure air.
Contain the electronics
Cables, chargers, controllers, and remotes generate visual clutter far out of proportion to their size. One lidded box or drawer, designated for cables and nothing else, cleans up a small living room more than any other single change. Adhesive cable clips run power cords along the back edge of furniture and out of sight.
Shelve the wall behind or beside the sofa
The wall above a sofa is dead space that most people fill with a single picture. A pair of shelves at least 10 to 12 inches above the back of the couch, high enough that nobody hits their head sitting down, adds real storage. If mounting isn’t an option, a tall narrow bookcase at one end of the sofa achieves something similar with no hardware.
Use baskets as drawers
Open shelving looks great empty and chaotic full. Matched baskets on the lower two shelves of any open unit turn the messy zone into closed storage while keeping the upper shelves visually light. Cheap, requires nothing, and it’s the difference between a bookcase that looks styled and one that looks like a storage unit.
Bedroom Storage Ideas
The bed is the largest object you own and the biggest single storage opportunity in the apartment. Most people use none of it.
Choose the bed frame for storage, not looks
- Platform beds with built-in drawers typically provide four to six large drawers, roughly equivalent to a full dresser, in space you were already occupying.
- Storage headboards with shelves or a cubby replace a nightstand entirely, which is worth a square foot or more on each side of the bed.
- Loft beds aren’t just for dorms. Raising the bed to shoulder height opens the entire footprint underneath for a desk, a wardrobe rack, or a seating area. In a studio with 9-foot ceilings this can effectively add a room.
- Murphy beds fold flat to the wall and return the whole floor area during the day. They’re a significant investment and usually require wall mounting, so they’re best for long leases or owned units, freestanding Murphy cabinets exist and avoid the mounting issue.
Replace the nightstand
A traditional nightstand consumes floor space to give you one small surface. Alternatives that don’t:
- A wall-mounted floating shelf beside the bed.
- A caddy that slides between the mattress and box spring, holding a phone, book, and glasses.
- A slim rolling cart, which can be pulled away entirely when you need the floor.
- A tall stool or stack of sturdy books, less storage, but almost no footprint.
Double-hang and go vertical in the wardrobe
If your bedroom has a freestanding wardrobe or armoire, the same rules apply as in a closet: the space between the bottom of hanging shirts and the floor is usually 30 or more inches of pure waste. A second rod, a hanging shelf tower, or a stack of bins recovers it. See the closet section below for the full treatment.
The back of the bedroom door
Over-the-door organizers in a bedroom work well for shoes, accessories, scarves, belts, and jewelry. Clear pocket organizers are useful for small items you’d otherwise lose in a drawer. The door is one of the last genuinely free surfaces in a small bedroom.
Under-Bed Storage Done Right
Under-bed storage gets recommended constantly and executed badly almost as often. The difference comes down to measurement and access.
Measure your clearance first
The number that matters is the distance from the floor to the underside of the bed frame or the bottom of the box spring, whichever is lower. Typical situations:
- Under 6 inches, you’re limited to slim, low-profile boxes, garment bags, and gift wrap. Look for containers marketed as “low profile,” commonly around 5 to 6 inches tall.
- 6 to 9 inches, standard under-bed territory. Most purpose-built rolling under-bed bins fall in this range and hold folded clothing, shoes, and bedding comfortably.
- 10 inches or more, you can use standard storage totes, which are cheaper per cubic foot and more durable than dedicated under-bed containers.
Measure the height of the container you’re considering including its wheels and lid, and leave at least half an inch of clearance so it doesn’t bind.
Add height if you need it
Bed risers lift a frame by a set amount, commonly available in 3, 5, and 8-inch heights, with some adjustable models stacking higher. Points worth knowing:
- Check the load rating and confirm it covers the bed, the mattress, and the people in it. Reputable risers are rated well above that, but the cheap ones aren’t always.
- Make sure the riser cup actually fits your leg. Square legs, round legs, and caster wheels all need different cups.
- Raising the bed raises the mattress surface. Adding 8 inches to a bed that already sits at 25 inches makes for an awkward climb, and it changes how the room reads. Five inches is often the sweet spot.
- Risers make the bed less stable. Don’t use them on beds that already wobble.
Choose wheels and handles over bare boxes
The reason under-bed storage fails is access. A heavy lidded tote wedged under a low frame requires dragging it out on carpet, which is unpleasant enough that you stop doing it, and then it becomes a place where things go to be forgotten. Rolling containers with a handle on the short end solve this entirely. If you already own bins without wheels, adhesive furniture sliders on the bottom accomplish the same thing for a couple of dollars.
What belongs under the bed
- Off-season clothing and footwear.
- Spare bedding and towels.
- Gift wrap, ribbon, and seasonal decorations (long flat items fit here better than anywhere else).
- Shoes in a purpose-built shoe organizer.
- Documents in a sealed, labeled container.
What doesn’t
- Anything you need weekly, retrieval friction is too high.
- Anything that shouldn’t collect dust without a sealed lid.
- Food of any kind, which is an invitation to pests.
- Loose, unboxed items, which is how under-bed space becomes a junk drawer the size of a bed.
One practical note: leave a few inches of airflow gap where you can, and don’t pack the entire underside solid wall to wall. Some air movement under a mattress helps with moisture, particularly in humid climates and on ground floors.
Closet Storage Ideas for Tiny Closets
A standard apartment closet ships with one rod and one shelf. That configuration wastes an enormous amount of the space inside it. Fixing the closet is usually the highest-return project in a small apartment, and most of it requires no installation.
Double your hanging space
A single rod hung at standard height leaves roughly 30 to 40 inches of empty air between the bottom of your shirts and the closet floor. For shorter garments, shirts, blouses, folded trousers, skirts, you don’t need that.
- A hanging double rod suspends from the existing rod on adjustable straps and creates a second hanging level below. No tools, no mounting, and it roughly doubles hanging capacity for short garments.
- Reserve one section for long items, dresses, coats, full-length garments, and double-hang everything else.
- A tension rod can create a second level in closets where the geometry allows, though a hanging rod is generally more reliable under load.
Switch to slim hangers
This is the least glamorous tip here and one of the most effective. Bulky plastic or wooden hangers occupy roughly half an inch to three-quarters of an inch each on the rod. Slim velvet hangers occupy about a quarter inch. Across a rod holding forty garments, that’s often a foot or more of recovered rod length, and the non-slip surface means fewer things end up on the closet floor.
Use the floor and the ceiling
- Closet floor: a small dresser, a stack of drawers, a shoe rack, or labeled bins. This space is almost always occupied by a pile of shoes and nothing else.
- Above the top shelf: most closets have 12 to 24 inches of unused space above the factory shelf. Lidded boxes or a shelf riser recover it. This is ideal for genuinely seasonal items you touch twice a year.
- Hanging shelf towers clip onto the rod and turn a section of hanging space into five or six fabric cubbies for folded items, bags, or sweaters, which shouldn’t hang anyway, since hanging stretches the shoulders.
The back of the closet door
Over-the-door shoe organizers are the obvious use, but the clear-pocket versions are arguably more valuable holding small items that otherwise disappear: accessories, socks, cleaning supplies, toiletry backstock, craft materials, chargers.
Consider removing the door entirely
Taking a closet door off its hinges and replacing it with a curtain on a tension rod frees up the door swing, often 6 to 9 square feet of floor that has to stay clear for the door to open. In a small bedroom that can mean the difference between fitting a desk and not. Store the door and its hardware safely (a closet, under the bed, or against a wall behind furniture) so you can rehang it before move-out. Confirm your lease allows it; most do, but leaving the door in a dumpster is a chargeable event.
The reverse hanger trick
Turn every hanger in your closet backward. When you wear something and rehang it, turn that hanger the right way around. In six months, everything still facing backward is something you didn’t wear, and in a small apartment, that’s the clearest possible signal about what should go.
Small Kitchen Storage Ideas
Small apartment kitchens are typically short on three things at once: counter space, cabinet space, and pantry space. Each has a different fix.
Get appliances off the counter
Counter space is the scarcest resource in a small kitchen, and it’s usually occupied by appliances used once a week or less. Be ruthless: if you use it less than every other day, it lives in a cabinet, on a high shelf, or in a closet. A coffee maker earns its counter spot. A stand mixer, air fryer, blender, and toaster oven all simultaneously do not.
Double your cabinet capacity with risers and under-shelf baskets
- Shelf risers create a second tier inside a cabinet, so plates and bowls stack in two shorter stacks rather than one precarious one.
- Under-shelf baskets clip onto an existing shelf and hang beneath it, recovering the dead air between shelf levels. Ideal for mugs, wraps, and small packets.
- Stepped spice organizers let you see the back row instead of excavating for the cumin.
- Vertical dividers stand baking sheets, cutting boards, and pan lids on edge instead of stacking them, which is both more compact and far more accessible.
Use the inside of cabinet doors
The inside face of every cabinet door is unused space roughly the size of the door. Adhesive hooks hold measuring cups and pot lids. Small stick-on bins hold sponges and scrub brushes under the sink. A slim wire rack mounted or hung inside a door holds foil and wrap boxes.
Go vertical on the walls
- A magnetic knife strip frees the counter space a knife block occupies and keeps blades in better condition.
- A wall-mounted pegboard holds pots, pans, utensils, and cutting boards, and is genuinely the highest-density kitchen storage per square foot, though it requires mounting, so check your lease.
- A tension rod across the inside of the sink cabinet becomes a hanging rail for spray bottles, freeing the floor of the cabinet for bins.
- Magnetic containers on the side of the refrigerator hold spices, foil, and small tools. The refrigerator’s side panel is a large steel surface doing nothing.
Fill the gap beside the refrigerator
Nearly every apartment kitchen has a narrow gap, typically 6 to 12 inches, between the refrigerator and the adjacent cabinet or wall. Slim rolling pantry carts are made in exactly these widths. Measure the gap and the depth before buying, and check that the cart clears the refrigerator door handle when the door opens.
Add a rolling cart or island
If there’s three square feet of floor to spare, a rolling cart adds counter surface, storage shelves, and mobility. Roll it to the sink for prep, roll it out of the way when you’re done, roll it into the living room when you’re serving people. In studios especially, a cart that changes rooms is worth more than a fixed piece of furniture.
Rethink the pantry
Many small apartments have no pantry whatsoever. Substitutes that work:
- A narrow bookcase in the kitchen or dining area, with baskets on the lower shelves.
- An over-the-door pantry organizer on the kitchen or hall closet door.
- Decanting dry goods into uniform square or rectangular containers. Round containers and original packaging waste enormous shelf space; square containers with flat tops stack.
- A top-of-cabinet zone for bulk backstock and rarely used serving pieces.
Bathroom Storage Ideas
Apartment bathrooms are often the smallest room in the unit, with a pedestal sink or a single vanity and a medicine cabinet if you’re fortunate. Almost every fix here is renter-friendly, because the bathroom is full of fixtures you can hang things from without touching a wall.
Build over the toilet
The wall above a toilet is roughly six square feet of prime storage that comes empty by default. An over-the-toilet shelving unit straddles the tank and stands on the floor, requiring no mounting at all. This single piece often solves an entire small bathroom.
Use the shower properly
- A tension-mounted corner caddy runs floor to ceiling in the shower corner and holds far more than a hanging caddy, with no hardware.
- A second tension rod inside the shower, parallel to and behind the curtain rod, holds hanging baskets or extra bottles.
- Suction or adhesive shower shelves work on tile and glass, though on textured surfaces or grout lines they fail. Adhesive versions generally outperform suction long-term.
Handle a pedestal sink
Pedestal sinks look good and provide zero storage. Options:
- A slim rolling cart or narrow shelf unit beside the sink.
- A fabric skirt on a tension wire around the pedestal, hiding bins underneath.
- A wall-mounted or freestanding shelf tower in the nearest corner.
- Adhesive-mounted cups and organizers on the side of the mirror or the wall beside it for toothbrushes and daily items.
Organize under the vanity if you have one
Under-sink cabinets are awkward because of the plumbing. Two-tier expandable organizers are built to fit around a P-trap. A tension rod across the cabinet holds spray bottles by their trigger handles, clearing the floor. Stacking drawers work better than deep bins, because deep bins mean unloading three things to reach the fourth.
Towels and laundry
- A ladder rack leaning against the wall holds several towels in almost no footprint.
- Rolled towels in a basket take less room than folded stacks and look intentional.
- Over-the-door hooks add hanging points without a single hole.
- A slim rolling hamper that fits beside the toilet or in the closet keeps laundry off the floor. In very small bathrooms, a collapsible pop-up hamper that folds flat when empty is worth considering.
Be careful what you keep in there
Bathrooms are humid, and humidity degrades things. Medications, supplements, and paper products all fare poorly in a room that hits high humidity twice a day. Store backstock elsewhere, a hall closet or bedroom shelf, and keep only current-use items in the bathroom. This also frees up a surprising amount of space.
Carving Out a Work Space Without Losing a Room
Working from home in a small apartment is now the norm rather than the exception, and a desk is a large single-purpose object, exactly what a small space can least afford. The goal is a workspace that disappears when you’re not using it.
Wall-mounted fold-down desks
A drop-leaf or fold-down desk mounts flat against the wall, occupying two or three inches of depth, and folds out to a full work surface when needed. Many include a shallow cabinet behind the fold-down face for supplies. This is the single best solution for small-space work areas, with the caveat that it requires wall mounting, and a desk you’ll lean on needs to be anchored into studs, not just drywall. Get landlord approval.
Convert a closet into an office
If you have a closet you can spare, removing the rod and adding a shelf at desk height (roughly 29 to 30 inches) creates a compact workstation. Add a shelf above for supplies, run a power strip in, and close the door or curtain at the end of the day. The psychological benefit of being able to physically shut the workday away in a small apartment is substantial.
Make the dining table work harder
If your table is the desk, the friction is setup and teardown. Solve it with a single portable container, a shallow bin, a caddy, or a lap desk, that holds everything you need and lives on a shelf between sessions. One trip out, one trip back.
Vertical is the answer for supplies
- A wall grid or pegboard above the desk for notes, headphones, cables, and small tools.
- Floating shelves above the work surface rather than a bulky bookcase beside it.
- A rolling three-tier cart tucked under or beside the desk, rolled away when the space becomes a dining area again.
- A monitor riser that creates storage underneath the screen for a keyboard and notebooks.
Go paperless with intention
Paper is the sneakiest space consumer in a small apartment because it accumulates without ever seeming large. Scan and shred what you can, keep original documents that genuinely must stay physical, birth certificates, Social Security cards, titles, wills, immigration documents, in one small fireproof box, and archive tax records in a labeled container. That’s usually a single box replacing a filing cabinet.
Studio Apartment Storage: Zoning Without Walls
Studios have a distinct problem: without walls, everything is visible from everywhere, so clutter has nowhere to hide and the space reads as chaotic even when it isn’t. The fix is defining zones, and the best zone dividers are also storage.
Use storage as architecture
- An open-back bookcase placed perpendicular to the wall divides sleeping from living, stores from both sides, and lets light pass through so neither half feels boxed in. This is the highest-value move in most studios.
- A tall wardrobe or shelving unit positioned as a partial wall behind the bed creates a headboard, a divider, and a closet in a single object.
- A console or sofa table behind a floating couch marks the boundary of the living zone at low height.
Curtains for visual separation
A ceiling-track or tension-rod curtain closes off a sleeping alcove or a work corner for almost nothing. Ceiling tracks require mounting; a tension rod between two walls in a narrow spot doesn’t. Sheer fabric divides the space without killing the light, opaque fabric gives real privacy. A curtain is also the fastest way to hide an open closet or a shelving unit that’s doing more function than beauty.
Define zones with rugs and light
Storage isn’t the only zoning tool. A rug under the bed and a different rug under the seating area tells your eye there are two rooms. A floor lamp in each zone rather than a single ceiling light reinforces it. This costs no square footage at all and it materially changes how large the space feels.
Keep sight lines open
In a studio, resist the urge to line every wall with tall furniture. Keep at least one long sight line clear, usually from the entry to the window, and concentrate tall storage on the walls perpendicular to it. Grouping height in one area and keeping the rest low reads as designed. Distributing it evenly reads as crowded.
One in, one out
This matters more in a studio than anywhere else. There is no garage, no spare room, and no basement absorbing overflow. Adopting a strict rule that nothing enters without something leaving is the only sustainable approach under about 500 square feet.
Multi-Purpose Furniture That Earns Its Footprint
In a small apartment, every piece of furniture should be evaluated on a simple test: how many jobs does it do, and how much floor does it consume? Anything scoring one job for a large footprint should be replaced.
The high performers
- Storage ottoman, seating, footrest, table (with a tray), and closed storage. Best value-per-square-foot item in small-space furniture.
- Storage bed, sleeping plus roughly a dresser’s worth of drawers in the same footprint.
- Lift-top coffee table, surface, desk, dining table, and storage.
- Storage bench, seating at an entry, at a dining table, or at the foot of a bed, with a compartment inside.
- Drop-leaf or gateleg table, a console against the wall most of the time, a table for four when unfolded.
- Nesting tables, multiple surfaces, one footprint.
- Sofa bed or daybed with a trundle, seating plus guest accommodation, so you don’t need a spare room you don’t have.
- Rolling cart, storage that relocates to wherever it’s needed.
- Storage headboard, eliminates one or two nightstands.
- Folding or stacking chairs, seating for guests that hangs on a wall hook or slides behind a door the rest of the time.
Buy for the doorway, not the room
The most expensive small-apartment furniture mistake is buying something that fits the space but not the path to it. Before ordering, measure the building entry, the elevator (including diagonal depth and ceiling height), stairwell turns, hallway width, and the apartment door frame. A sofa that fits your living room and not your stairwell is a return-shipping bill and a wasted weekend. Modular sofas that ship in sections exist largely to solve this problem, and in older buildings they’re often the only realistic option.
Prefer legs to skirts
Furniture raised on visible legs lets you see the floor underneath, which makes a room feel larger, and it gives you usable space beneath. Skirted or floor-to-ground pieces block both. This is a small choice that compounds across a whole apartment.
Scale down, but not too far
Apartment-scale furniture, narrower sofas, shallower dressers, smaller-diameter tables, genuinely helps. But a room full of undersized furniture reads as a dollhouse and gives you nowhere comfortable to sit. Pick one or two properly sized anchor pieces and scale down around them.
Doors: The Most Wasted Surface in Your Apartment
A typical apartment has five to eight doors: front door, bedroom, bathroom, closets, pantry, laundry. Each has roughly 17 to 20 square feet of surface on the back, and in most apartments every one of them is completely empty.
What works on the back of a door
- Over-the-door hook rails, coats, robes, bags, towels. The simplest and most useful.
- Pocket organizers, shoes, obviously, but the clear-pocket versions are better used for the small items that clutter drawers: cleaning supplies, toiletries, craft materials, socks, chargers, snacks.
- Wire or plastic shelf racks, pantry goods, bathroom supplies, cleaning products.
- Ironing board and drying rack mounts.
- Full-length mirrors designed to hang over a door.
Fit and function checks
- Measure door thickness. Most over-door hardware is designed for standard interior doors around 1 3/8 inches. Solid-core, fire-rated, and exterior doors run thicker and may not fit.
- Check clearance at the top. Some door frames have very little gap above the door, and thick over-door hooks won’t seat properly or will scrape the frame, which leaves marks that count as damage.
- Check the swing. A loaded organizer adds several inches of depth. Make sure the door still opens fully and doesn’t collide with a wall, a toilet, or a piece of furniture.
- Watch the weight. Heavy loads on a door stress the hinges over time. Distribute weight low on the organizer, and don’t load a hollow-core door like a bookshelf.
- Add felt pads where the hardware contacts the door edge. Prevents the rubbing that shows up on a move-out inspection.
The wall above the door
The band of wall between a door frame and the ceiling is typically 12 to 18 inches tall and completely unused. A single shelf there holds books, baskets, or seasonal items. It requires mounting, so it’s a landlord-permission item, but it’s genuinely free space in a place where nothing else can go.
Awkward Spaces Most People Ignore
Once the obvious surfaces are handled, small apartments still contain pockets of unused volume. These are the ones people walk past every day.
- Corners. Corner shelving units, corner desks, and tall corner racks convert the least useful floor area in a room into vertical storage. Ninety-degree corners are where small apartments waste the most space.
- The gap beside the refrigerator, washer, or dryer. Slim rolling carts are built for exactly this.
- Above the washer and dryer, if you have in-unit laundry. A shelf or a tension rod for hanging clothes turns a machine alcove into a laundry room.
- Inside the stairwell, if you have a two-level unit. Under-stair space is often accessible and almost always unused.
- Deep window sills. In older buildings these can be 6 to 10 inches deep, enough for books, plants, or a row of small containers.
- The space beneath a wall-mounted sink or console. A basket or slim cabinet fits under most.
- Behind the door when it’s open. A narrow shelf unit 6 to 8 inches deep fits in the pocket a door swings against, in a spot that’s permanently invisible when the door is open.
- Inside furniture you already own. Hollow ottomans, storage benches you use as seating without ever opening, suitcases, and duffel bags are all containers sitting empty.
- Balconies and patios, with a weatherproof deck box. Good for outdoor gear, gardening supplies, and folding chairs, but check your lease, since many buildings restrict what can be visible on a balcony, and don’t store anything that can’t handle temperature swings and moisture.
One space to be careful with: many buildings prohibit storing anything in shared hallways, stairwells, or utility closets, and for good reason, blocked egress is a serious fire-safety issue and a fast way to get a violation notice. Storage bins in a common corridor are not a solution, however tempting.
Build a Seasonal Rotation System
Here’s a fact worth sitting with: if you live somewhere with four real seasons, at any given moment roughly half your wardrobe is unusable. Winter coats, boots, and heavy sweaters occupy prime closet space through July for no reason at all.
Seasonal rotation is the single highest-impact habit in small-apartment living, and most people never do it because nobody explains the system.
The twice-yearly swap
Twice a year, typically once in spring and once in fall, you move the off-season half of your belongings out of prime storage and bring the in-season half in. In practice:
- Clean everything before storing it. This is non-negotiable. Body oils, food residue, and perspiration invisible to you are exactly what attracts moths and insects, and stains set permanently over months in storage.
- Make sure it’s completely dry. Anything even slightly damp will mildew in a sealed container, and mildew spreads to everything stored near it.
- Sort as you go. The swap is a natural decision point. Anything you didn’t wear at all last season goes to the donate pile rather than back into a box.
- Store by category in labeled containers. “Winter, coats and outerwear” beats “winter stuff.” Photograph the contents and keep the photo in a phone album so you don’t open four boxes looking for one hat.
- Put the in-season items in prime space, and the off-season items in deep storage, high shelves, under the bed, or off-site.
What rotates well
- Clothing and footwear, obviously.
- Bedding, heavy comforters and flannel sheets in summer, lightweight bedding in winter.
- Sports and recreation gear, skis, snowboards, camping equipment, beach gear, bikes.
- Holiday decorations, which for most households is the single bulkiest seasonal category.
- Small appliances used seasonally, fans, space heaters, humidifiers.
Set a calendar reminder
The system fails through inertia, not disagreement. Put two recurring reminders in your calendar, one in spring, one in fall, and block two hours. It’s the highest return on two hours available in a small apartment.
Vacuum Bags: What to Compress and What Never To
Vacuum compression bags get recommended in every small-space article ever written, always without caveats. They can reduce the volume of soft goods dramatically. They can also permanently ruin things, and nobody tells you which is which.
Compress freely
- Cotton and linen clothing, these wrinkle badly but recover fully with washing or steaming.
- Synthetic and synthetic-blend fabrics.
- Towels and standard bed linens.
- Synthetic-fill blankets and comforters.
- Inexpensive items you’re not precious about.
Compress only briefly, if at all
- Wool, cashmere, and silk. Natural animal fibers need airflow to keep their loft and shape. Short-term compression, weeks, for a move, is usually recoverable with laundering. Months of compression flattens fibers in ways that don’t fully bounce back. Wool also holds moisture, which can affect whatever is bagged alongside it.
- Down and feather items. Down comforters, feather pillows, puffer jackets, and sleeping bags work because they trap air. Compressing them removes exactly the thing that makes them function, and the fill can clump and fail to re-loft. Fine for a weekend trip; bad for a season.
- Structured garments, tailored coats, blazers, anything with shoulder construction. They come out with the structure crushed.
Never compress
- Leather and suede. Compression cracks the material and it doesn’t come back. This is permanent, irreversible damage.
- Memory foam, pillows, mattress toppers, cushions. The cell structure can fail to recover its shape.
- Anything beaded, sequined, or heavily embroidered, which snags and breaks under pressure.
- Anything even slightly damp. A sealed bag with moisture inside is a mildew incubator.
- Fur and delicate vintage textiles.
Practical rules
- Six months is the rough ceiling for anything you care about. Beyond that, creases set and fibers stay flat.
- Don’t overfill. Even compression is gentler than jamming a bag to bursting, and overfilled bags are far more likely to lose their seal.
- Fold before sealing, rather than stuffing. Random compression creates random creases.
- Expect some re-inflation. Most bags slowly admit air over months. Plan for the stack to grow.
- For genuine long-term storage of good items, use breathable containers, cotton garment bags, fabric bins, or cardboard boxes, rather than airtight plastic. Air circulation is what protects natural fibers.
Safety in a Small Apartment
Maximizing storage in a small space introduces risks that don’t exist in a larger home, mostly because you’re stacking tall and filling gaps. Worth ten minutes of attention.
Furniture tip-over
Tall, narrow furniture, exactly what this guide has been recommending, is inherently less stable than short, wide furniture. Bookcases, dressers, and shelving units can tip, and tip-overs are a well-documented cause of serious injury and death, overwhelmingly involving young children.
- Anchor tall furniture to the wall if you have children or pets, full stop. Anti-tip kits are inexpensive and included with most new furniture. This is the one place where the deposit conversation is worth having with your landlord rather than skipping the hardware.
- Load heavy items on the lowest shelves. A tall unit with books on top and pillows on the bottom is a tipping hazard by design.
- Don’t put anything tempting on top of tall furniture, televisions, toys, remote controls. Climbing is how most tip-overs start.
- Check stability on uneven floors, common in older buildings. Shim the base rather than leaving a unit rocking.
Keep exits clear
In a small apartment it’s tempting to store things in the one clear path you have. Don’t. Keep the route to your front door unobstructed, don’t block windows that serve as secondary egress, and never store anything in shared hallways or stairwells. Fire codes exist because smoke reduces visibility to nothing, and you navigate by memory and feel.
Respect weight limits
- Adhesive hooks: use half the rated capacity, and never above a bed, a crib, or a seating area where a failure lands on someone.
- Over-door organizers: heavy loads stress hinges and can cause a hollow-core door to sag.
- Tension rods: fine for clothing and light goods, not for anything heavy. A tension rod that lets go under a loaded closet rod is a mess and possibly an injury.
- Bed risers: confirm the rating covers bed, mattress, and occupants.
- Wall shelves: a shelf is only as strong as its attachment. Drywall alone holds very little; anchors or studs are required for real weight.
Don’t block ventilation or heat sources
Storage crammed against radiators, baseboard heaters, HVAC vents, or the space around a water heater is both a fire risk and a fast way to run up a utility bill. Keep clearance around anything that produces heat, and don’t store flammable items, paper, fabric, cleaning products, aerosols, near them.
Store hazardous items sensibly
Cleaning chemicals, aerosols, batteries, and anything flammable should be stored low, in ventilated spaces, away from heat, and out of reach of children and pets. Small apartments encourage cramming these under a sink with everything else, a bin that keeps them contained and separate is worth the few dollars.
What Small Apartment Storage Actually Costs
Nobody publishes numbers on this, which makes it hard to plan. Prices vary by retailer, region, and quality, so treat these as planning ranges rather than quotes, but they’re realistic enough to budget against.
The under-$100 tier, do this first
This is the highest return-per-dollar in the entire guide, and it’s where most people should start:
- Slim velvet hangers, in a bulk pack, the single best value item on this list.
- A hanging double closet rod.
- A pack of adhesive hooks in mixed sizes.
- Two or three tension rods.
- An over-the-door hook rail and an over-the-door pocket organizer.
- Cabinet shelf risers and a few under-shelf baskets.
- A set of under-bed rolling containers.
- A handful of matched fabric bins.
That collection typically lands somewhere around $75 to $150 total and will meaningfully change how a small apartment functions.
The $100–$400 tier
- A storage ottoman or storage bench.
- An over-the-toilet shelving unit.
- A rolling kitchen cart.
- A tall narrow bookcase or two.
- A garment rack or freestanding wardrobe.
- A set of bed risers plus purpose-built under-bed bins.
The $400+ tier
- A storage platform bed.
- A lift-top coffee table.
- A loft bed or Murphy bed system.
- A modular sofa with under-seat storage.
- A custom closet system.
The off-site option
A small storage unit is a recurring cost rather than a one-time purchase, and it should be evaluated that way. The relevant comparison isn’t “unit cost versus zero”, it’s “unit cost versus the cost of the apartment you’d need in order to store this at home.”
That comparison is often lopsided. Small apartments carry the highest cost per square foot of any rental type, because the fixed cost of a kitchen and bathroom is spread across very little space. Moving up to the next apartment size to gain storage means paying that premium on every additional square foot, every month, indefinitely. A small storage unit typically costs a fraction of the monthly difference between apartment tiers, and unlike a lease upgrade, you can end it when you no longer need it.
The mistake that wastes the most money
Buying containers before decluttering. Every organizer bought to hold things you were going to get rid of anyway is money spent to store your own future donations. Do Section 2 first. Buy second.
Small Apartment Storage Mistakes to Avoid
- Buying storage before decluttering. The most expensive and most common mistake. Organizing clutter is not the same as removing it.
- Mismatched containers. Ten different bins in ten different colors read as chaos even when perfectly organized. Uniform containers on visible shelving are the cheapest possible upgrade to how a small space feels.
- Storing frequently used items in hard-to-reach places. Any system that requires moving three things to reach a fourth will be abandoned within a month. Access frequency determines placement, always.
- Filling every wall. A small apartment with storage on every surface feels smaller, not larger. Leave some wall empty. Visual breathing room is worth the storage you give up.
- Deep bins for small items. A deep bin becomes a pit. Shallow drawers and dividers keep small things findable.
- Ignoring the vertical dimension. The most common oversight. Most apartments are half empty above five feet.
- Skipping labels. In deep or high storage, unlabeled containers become mystery boxes you never open, which means the contents are functionally gone while still costing you space.
- Using the floor as storage. Items on the floor make a room read as cluttered more than the same items on a shelf, and they collect dust and block cleaning.
- Not measuring before buying. Returns cost time, shipping, and momentum.
- Storing anything damp or dirty. Guarantees mildew, odor, and pests, and one contaminated item affects everything stored near it.
- Keeping the “someday” pile. Broken things you’ll fix, clothes you’ll fit into, hobbies you’ll return to. In a small apartment these are the most expensive items you own, measured in rent per square foot.
- Ignoring your lease. Covered above, but worth repeating: a deposit deduction can cost more than every organizer in this guide combined.
Storage Ideas for Roommates and Shared Small Spaces
Sharing a small apartment doubles the belongings without doubling the square footage. Most roommate friction is really storage friction.
Assign space explicitly
Ambiguity about who owns which shelf is the root of most shared-space conflict. Divide it up out loud and early: which cabinet is whose, which shelf in the refrigerator, which section of the hall closet, which side of the bathroom vanity. Written down, if that’s the sort of household you have. It feels overly formal for about a week and then prevents six months of low-grade irritation.
Personal storage should be personal and portable
- Each person gets labeled bins in shared closets rather than loose items mixed together.
- A caddy per person in shared bathrooms, carried in, carried out, no permanent territory required.
- Under-bed storage is naturally private and should hold each person’s overflow.
- A lockable box or drawer for genuinely private items is reasonable and not rude.
Consolidate the duplicates
Two roommates in a small apartment routinely arrive with two vacuums, two toasters, two sets of dishes, two ironing boards, and two drying racks. Decide which one stays, and get the other out of the apartment, sold, donated, or stored elsewhere. This alone often recovers an entire closet.
Shared off-site storage
If both people have bulky items, seasonal gear, furniture from previous apartments, equipment for hobbies that don’t fit, splitting one storage unit is dramatically cheaper per person than two, and usually cheaper than the friction of a permanently crowded apartment. Agree in advance on who’s on the rental agreement, how the cost splits, and what happens if one person moves out. Ten minutes of conversation prevents a genuinely awkward situation later.
When You’ve Genuinely Run Out of Room
Everything above assumes the answer is inside your apartment. Usually it is. But sometimes you’ve decluttered honestly, gone vertical, used every door, rotated seasonally, and the space still doesn’t work, because the arithmetic doesn’t work.
Here’s how to know you’ve reached that point rather than just avoiding a hard decluttering session.
Signs a storage unit is the right call
- Bulky seasonal items are consuming year-round space. Skis, a bike, camping gear, and holiday decorations can easily occupy a third of an apartment closet for ten months a year to be used for two.
- You’re between housing situations. Downsizing temporarily, in a lease gap, relocating for a job, deployed, or studying abroad, storing furniture beats selling it and rebuying later at full price.
- You have items with real value you don’t want to part with. Furniture from a previous larger home, inherited pieces, equipment for a serious hobby. Selling these to solve a temporary space problem is a decision you can’t reverse.
- You’re considering moving primarily for storage. If the next apartment up would solve your problem, run the monthly cost comparison. It usually favors keeping the smaller unit and renting storage.
- You run a business from home. Inventory, equipment, samples, and records in a small apartment is unworkable fast, and business storage is one of the clearest cases for going off-site.
- Your hobby doesn’t fit. Woodworking, motorcycle restoration, seasonal sports, large-format art. The apartment isn’t the constraint on the hobby; the storage is.
Signs it isn’t
In fairness, a storage unit is the wrong answer if you’re using it to defer decisions. If the items headed for storage are things you’d struggle to name a use for, you’re paying monthly to postpone a donation run. Run through Section 2 honestly first. Storage should hold things you will demonstrably use again, not things you can’t face sorting.
Applied well, off-site storage functions as the closet, attic, garage, and basement that your apartment doesn’t have, which is exactly the amenity gap between a small apartment and a house.
Browse small storage units near you to see what’s available in your area.
What to Store Off-Site and What to Keep at Home
The decision rule is simple: frequency of use beats sentiment, and size beats both. Store what is large and rarely needed. Keep what is small or frequently needed, no matter how much space it seems to take.
Good candidates for a storage unit
- Seasonal sports and recreation gear, skis, snowboards, surfboards, kayaks, golf clubs, camping equipment, bicycles.
- Holiday decorations, the bulkiest annual category in most households.
- Off-season clothing in volume, especially heavy winter outerwear.
- Furniture you’re not currently using but expect to use in a future home. Worth reviewing how to store furniture properly first, since preparation determines whether it survives.
- Business inventory, equipment, and records.
- Hobby equipment that doesn’t fit the apartment.
- Archived documents, old tax records and business files that must be retained but never consulted.
- Inherited or sentimental items you’re not ready to decide about, provided you set an actual review date.
- Luggage, if you travel rarely. A large suitcase set eats a shocking amount of closet.
Keep at home
- Anything used monthly or more.
- Important documents you might need on short notice, passports, birth certificates, Social Security cards, titles, insurance policies, medical records.
- Medications and anything requiring specific temperature control.
- Emergency supplies, first aid, flashlights, batteries, a few days of water.
- Irreplaceable small valuables, jewelry, heirlooms, unless a unit offers appropriate protection and you’ve confirmed insurance coverage.
Never put in storage
- Food of any kind, including sealed and canned goods. It attracts pests, and pests damage everything else in the unit.
- Live plants or animals.
- Flammable, combustible, or hazardous materials, gasoline, propane, paint thinner, fireworks, ammunition, chemicals. This is prohibited by essentially every facility and by fire code.
- Anything wet, damp, or unwashed.
- Perishables of any kind.
Choosing a Storage Unit Size for an Apartment
Apartment dwellers almost always need less space than they expect. Most people picture the unit they’d need for a whole house and price themselves out of an option that would have cost very little.
The sizes that matter for small apartments
- 5x5 (25 sq ft), roughly a small closet. Holds seasonal clothing, holiday decorations, sports gear, a bike, several boxes, and small items. For the classic small-apartment overflow problem, seasonal and bulky items crowding a closet, this is frequently all you need.
- 5x10 (50 sq ft), roughly a walk-in closet. Holds the contents of a studio or the overflow of a one-bedroom: a mattress set, a small sofa or chair, a dresser, boxes, and seasonal gear. The most common apartment-dweller size.
- 10x10 (100 sq ft), roughly half a one-car garage, and enough for the contents of a one- to two-bedroom apartment. This is the size for storing an entire apartment during a move or lease gap, rather than for overflow. Our full 10x10 breakdown covers exactly what fits.
- 10x15 (150 sq ft), two to three rooms of furnishings. More than most apartment dwellers need unless you’re storing a larger household’s worth of belongings. See the 10x15 guide if you’re on the fence.
Two ways to estimate
By moving truck: if everything you want to store would fit in a 10-foot truck, a 5x10 will generally handle it. A 15-foot truck load generally points to a 10x10.
By box count: count your boxes and add furniture separately. A 5x5 holds roughly 15 to 20 standard boxes stacked. A 5x10 holds roughly 20 to 25 boxes plus a few furniture pieces. Stacking height matters enormously here, most units allow stacking to near ceiling height, which roughly doubles what the floor area suggests.
Don’t forget vertical, again
The same principle that governs your apartment governs your unit. A 5x10 unit with 8-foot ceilings is 400 cubic feet, and most people use about half of it. Inexpensive freestanding shelving inside a unit can cut the size you need by a meaningful margin and makes everything reachable instead of buried.
If you’re unsure, our storage unit size guide walks through the dimensions with visual comparisons.
Find a small unit near you, or compare medium sizes if you’re storing an entire apartment.
Packing a Unit So You Can Actually Use It
A storage unit only solves your apartment problem if you can retrieve things from it without an ordeal. For apartment dwellers rotating seasonal items in and out a few times a year, access is everything.
Plan for access, not just capacity
- Leave a center aisle. Load along both sides and keep a walkable path to the back. It costs you some capacity and returns it in usability many times over.
- Seasonal items go near the front. The things you’ll rotate twice a year should never be behind the things you won’t touch for three years.
- Label on multiple sides, including the side facing the aisle. A label on top is invisible once a box is stacked.
- Keep an inventory list, in a note on your phone or a photo of each box’s contents. This is the difference between a five-minute trip and an hour of opening boxes.
Protect what you store
- Elevate off the floor with pallets, boards, or a layer of shelving. Concrete can transfer moisture.
- Cover furniture with breathable fabric, not plastic sheeting. Plastic traps condensation against surfaces and causes exactly the mildew you’re trying to prevent.
- Disassemble what you can, bed frames, table legs, shelving. Bag the hardware and tape it to the piece it belongs to.
- Uniform box sizes stack better and use vertical space more efficiently than mixed sizes.
- Heavy on the bottom, light on top. Books and dishes at floor level, linens and lampshades up high.
- Fill boxes completely. Partially filled boxes collapse under stacking; overfilled boxes split. Fill voids with packing paper or soft goods.
Our guides on how to pack a storage unit and organizing your unit go deeper on both.
Consider climate control for the right items
Climate-controlled units maintain a moderated temperature and humidity range, which matters for a specific list of things apartment dwellers commonly store:
- Wood furniture, which cracks and warps with humidity swings.
- Leather goods, which dry, crack, and grow mildew.
- Upholstered furniture and mattresses, which absorb moisture and hold odor.
- Electronics, which are damaged by condensation.
- Photographs, documents, books, and artwork.
- Musical instruments, especially anything wooden or stringed.
- Clothing you care about, particularly natural fibers.
For a bike, plastic bins of holiday decorations, and camping gear, standard storage is usually fine. For anything on the list above, particularly in a humid climate, the difference in monthly cost is generally much smaller than the cost of replacing what you damaged.
Frequently Asked Questions About Small Apartment Storage
Start with vertical space you already have. Add a hanging double rod to your closet, switch to slim hangers, put over-the-door organizers on every door, use shelf risers and under-shelf baskets inside existing cabinets, and add under-bed containers. These changes typically cost under $100 combined, require no installation, and often recover more usable space than a new piece of furniture would.
An open-back bookcase placed perpendicular to a wall. It divides the studio into zones, stores from both sides, and lets light pass through so neither half feels closed in. It solves the two core studio problems, lack of separation and lack of storage, with one object and no installation.
It depends entirely on your lease. Some leases permit a limited number of small nail holes per wall, some prohibit wall attachments outright, and some require walls returned in original condition. Anything requiring drywall anchors or lag bolts is the most likely to generate a move-out charge. Read your lease first, ask for written permission if you want to mount something substantial, and default to freestanding shelving or tension-mounted solutions when you’re unsure.
They can, though usually only when misused. They’re designed to remove cleanly from smooth, clean, painted surfaces if you pull the tab slowly straight down rather than outward. They fail, and pull paint, on textured walls, dusty surfaces, and especially wallpaper, which the manufacturer explicitly advises against. Clean the surface with rubbing alcohol first, wait a full hour before loading, and stay well under the rated weight.
Published ratings range from about 1 pound for the smallest hooks up to roughly 15 to 20 pounds for heavyweight hooks and picture-hanging strips. Those figures assume ideal surfaces and correct application. In practice, load them to about half the rated capacity, split heavy items across multiple hooks, and never hang anything above a bed or seating area where a failure would land on someone.
Most standard bed frames provide somewhere between 6 and 12 inches of clearance. Measure from the floor to the underside of the frame or box spring, whichever is lower. Under 6 inches limits you to low-profile containers around 5 to 6 inches tall. Bed risers, commonly sold in 3, 5, and 8-inch heights, can add clearance, though 5 inches is usually the sweet spot before the mattress sits awkwardly high.
For some materials, yes. Cotton, linen, synthetics, towels, and standard bedding compress safely. Wool, cashmere, and silk lose loft under long compression and need airflow. Down and feather items lose the trapped air that makes them insulate, and the fill can clump permanently. Leather and suede crack, and memory foam may not recover its shape. As a rule, keep compression under six months for anything you care about, and use breathable containers for long-term storage of good pieces.
Four changes, in order of impact: add a hanging double rod to create a second level for short garments; switch to slim velvet hangers, which can recover a foot or more of rod length across a full closet; use the floor with a small dresser or bins instead of a shoe pile; and add lidded boxes above the top shelf, where most closets waste 12 to 24 inches. Then hang an over-the-door organizer for small items. None of this requires tools.
Usually the storage unit, and often by a wide margin. Small apartments carry the highest cost per square foot of any rental type, so upgrading a size to gain storage means paying a premium on every added square foot every month. A small unit typically costs a fraction of the monthly difference between apartment tiers, and you can end it whenever you no longer need it, unlike a lease.
For seasonal overflow, holiday decorations, sports gear, off-season clothing, a bike, a 5x5 is usually enough. For a studio’s full contents or a one-bedroom’s overflow including furniture, a 5x10 is the common choice. To store an entire one- to two-bedroom apartment during a move or lease gap, a 10x10. A quick check: if everything fits in a 10-foot moving truck, a 5x10 will generally hold it.
Food of any kind, including sealed and canned goods, because it attracts pests that damage everything else stored nearby. Also: live plants and animals, anything flammable or hazardous (gasoline, propane, paint thinner, fireworks, ammunition), perishables, and anything damp or unwashed, which will mildew and spread to adjacent items.
Choose furniture on visible legs so you can see the floor beneath it. Go tall and narrow rather than short and wide. Use matching containers on any open shelving, since mismatched bins read as clutter. Leave at least one wall relatively empty and keep one long sight line clear. Add a mirror to bounce light. And keep the floor clear, items on the floor make a room read as smaller more than the same items on a shelf.
Pick one category, not one room, every coat, or every pair of shoes, or every mug, and gather all of it in one place. You cannot judge how many you own until they’re together. Sort into keep-and-use-weekly, keep-but-seasonal, donate, and undecided. Box the undecided pile, date it, and put it out of sight; if you haven’t opened it in six months, the decision makes itself. Then measure your space and buy storage for what actually remains.
Making a Small Space Work
Small apartments don’t have a storage problem so much as a matching problem, between what you own and where you live. Almost every fix falls into one of three categories: own less, use the vertical space you’re already paying for, or move the bulky and seasonal things somewhere that costs less per square foot than your apartment does.
Start with the audit. Do the free and cheap things first, hangers, rods, door organizers, under-bed containers. Go up before you go out. And when the arithmetic genuinely doesn’t work, treat off-site storage as the closet your apartment was built without, rather than a defeat.
10 Federal Storage offers month-to-month units in a range of sizes, with online rental and no long-term commitment, which is the right structure for apartment living, where your space needs change with every lease.
Find a storage unit near you and see what’s available.
About the Author
10 Federal Storage
Our team at 10 Federal Storage has been in the self storage industry for decades. With knowledge gained from multiple universities and in the field, we are well-prepared and excited to assist with your storage needs. When you rent a unit with us, you can feel confident that our seasoned customer service team’s help will make your transition as seamless as possible. Customer satisfaction is our number one priority, and we strive to make your experience exceptional with our automated leasing options, diverse unit sizes, and a strong commitment to sustainability.