

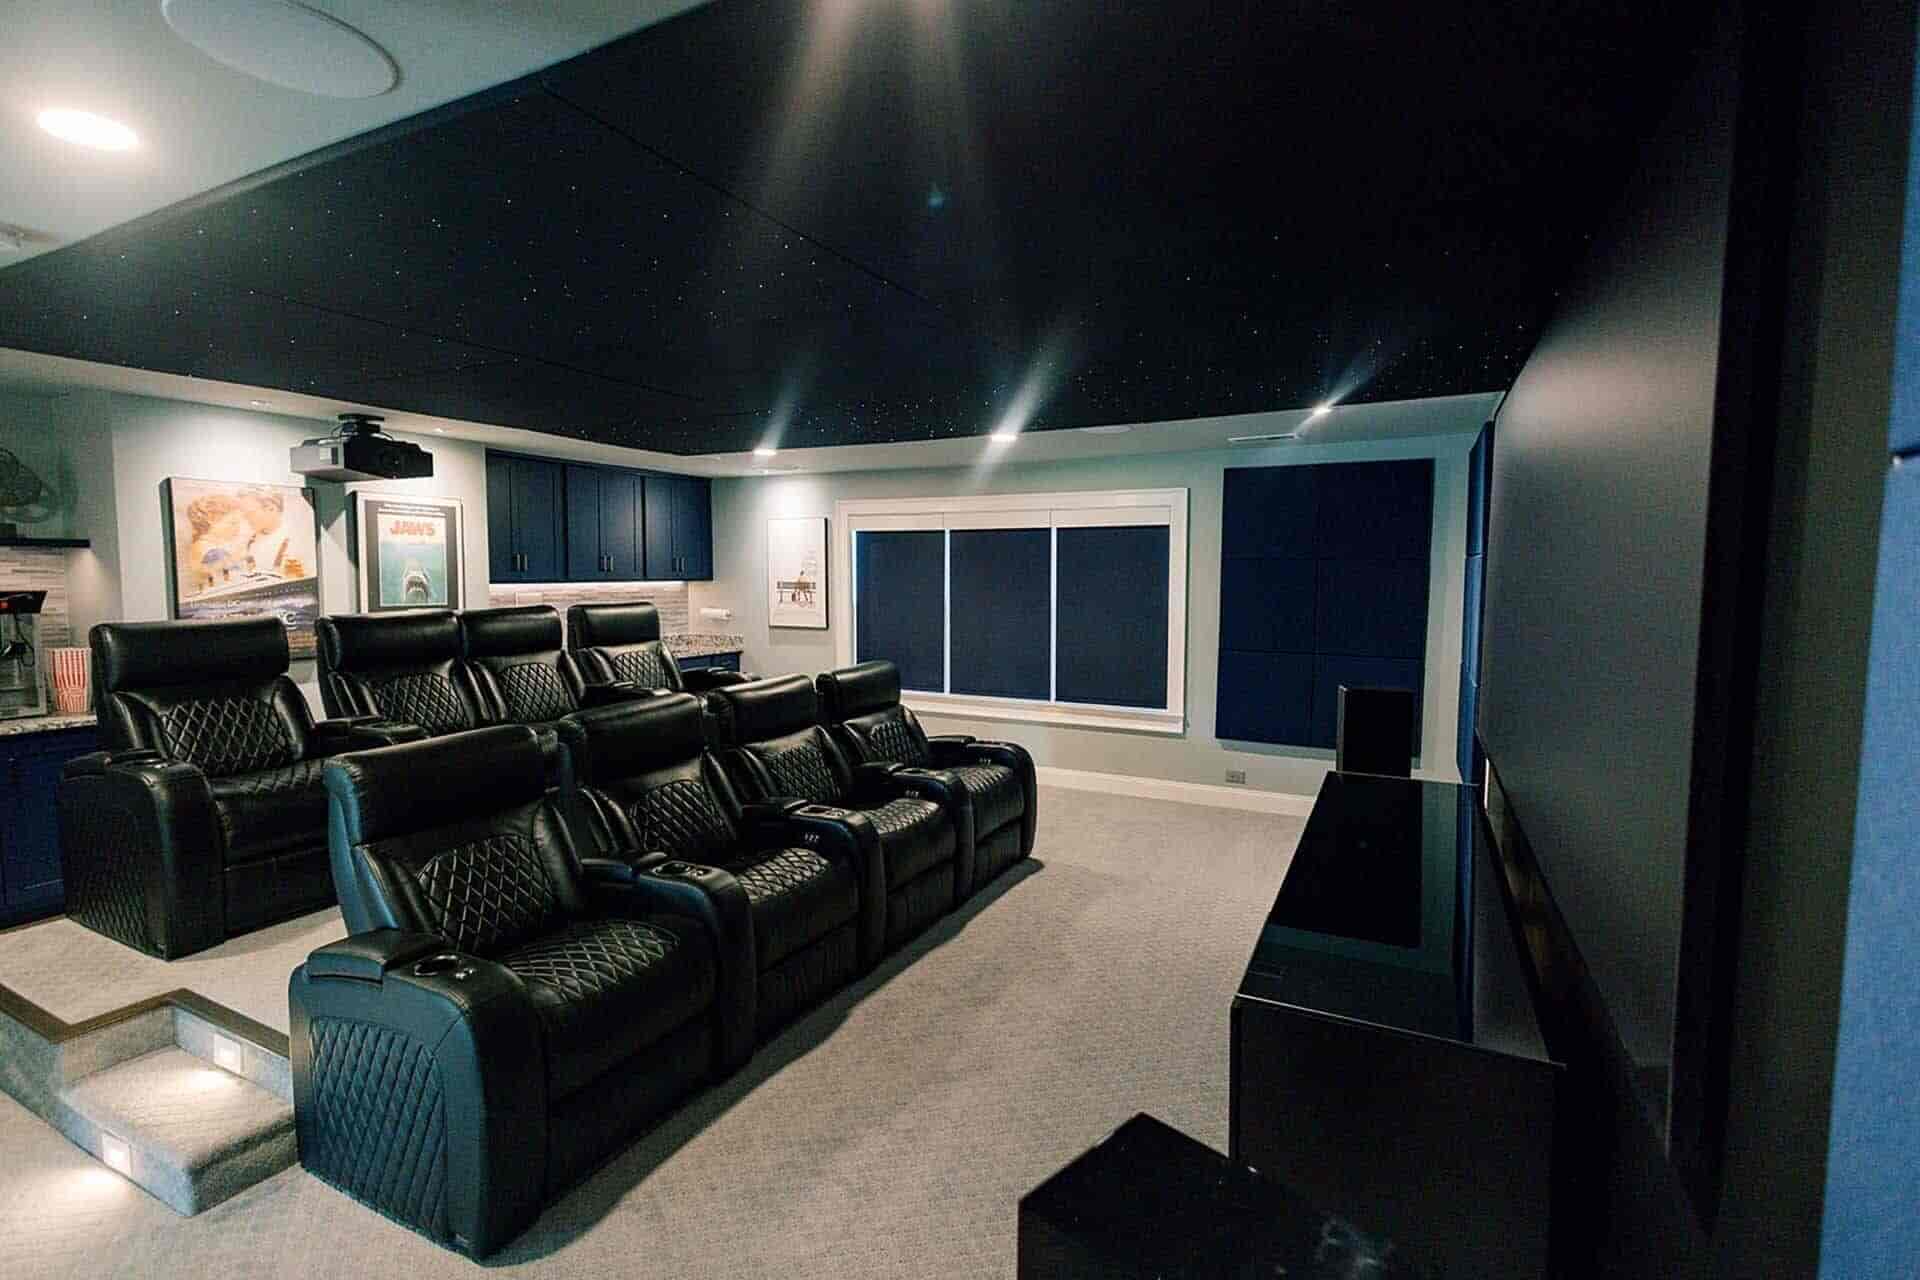
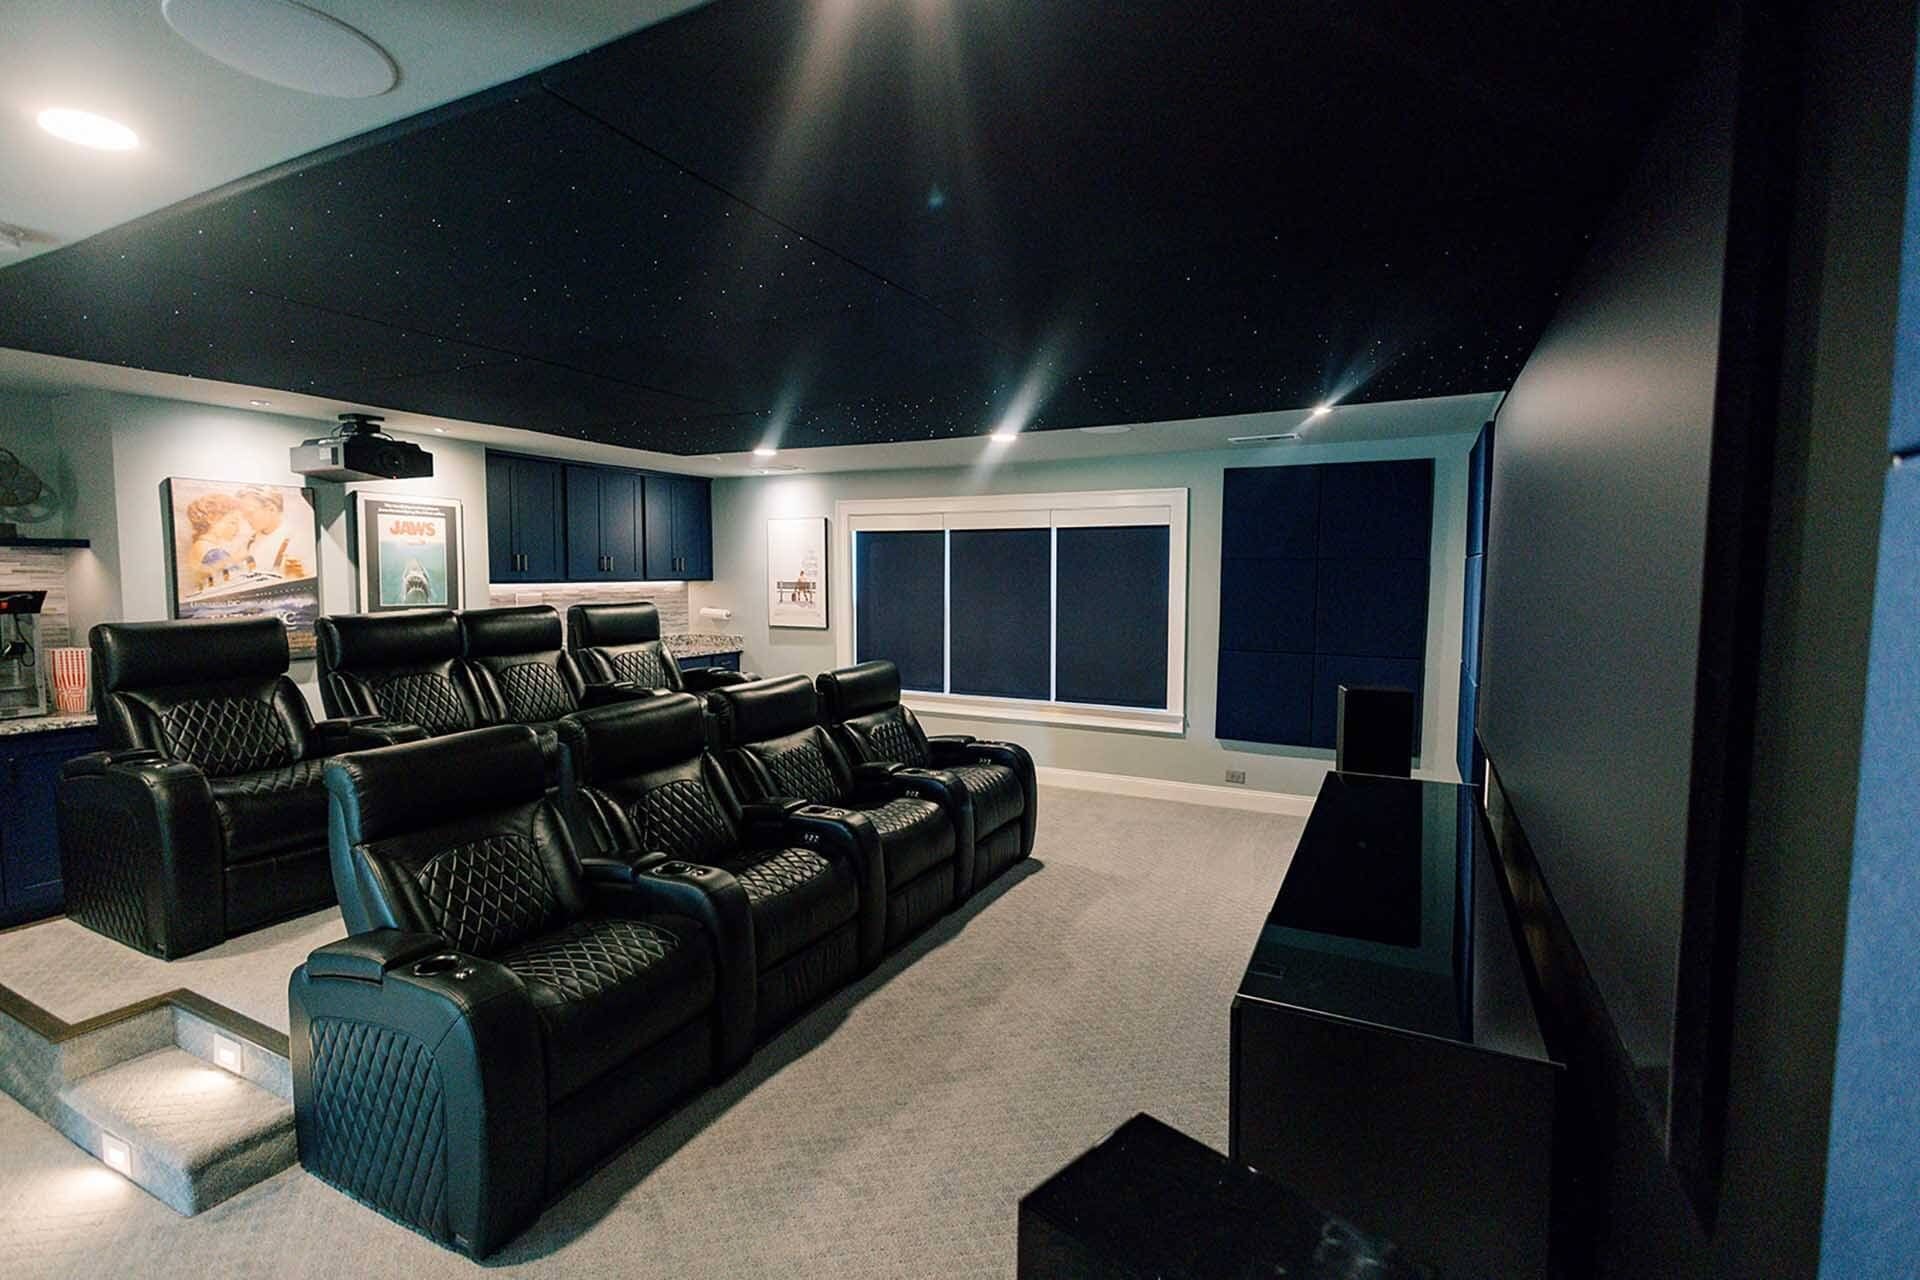
Home Theater Room Ideas: Design, Layout, and What Each Version Costs
by 10 Federal Storage
Published on September 3, 2026
Almost every home theater guide on the internet is a decorating article. It tells you to paint the walls dark, hang blackout curtains, buy recliners with cupholders, and put up movie posters. All of that is fine advice. None of it answers the four questions that actually decide whether the room works: how big the screen should be, how far away the seats go, whether the sound will stay in the room, and whether the space you picked is even deep enough to hold the thing you are imagining.
Those questions have published answers. The Society of Motion Picture and Television Engineers set a minimum viewing angle in its EG-18 engineering guideline. THX publishes its own targets. Dolby and the ITU publish exact speaker placement angles that soundtracks are mixed against. The International Residential Code sets a ceiling height floor for habitable rooms and requires an emergency escape and rescue opening in basements. ASTM defines how sound isolation is measured and, just as importantly, how it is not the same thing as sound absorption. Those numbers exist, they are not secret, and they are almost never printed in the articles ranking for this topic.
This guide runs the arithmetic. You will get the screen diagonal for your actual seating distance, the room depth a given screen size demands before you buy it, the speaker angles for 5.1 and 7.1 and Atmos, the riser height calculation, the circuit load math, and the heat load nobody plans for. You will also get the design ideas, because a theater that measures correctly and feels like a garage is not a win either.
Two more things you will find here that you will not find on the pages currently ranking. First, a correction: acoustic panels do not soundproof a room. They are an absorption product, rated by a different standard than isolation products, and hanging them on a wall will not stop bass from reaching the bedroom above. Several widely read guides blur this, and the blur costs homeowners real money. Second, a plain accounting of when this is the wrong project. A dedicated single-purpose theater is one of the least flexible rooms you can build, and there are specific situations where the honest recommendation is a good TV on a good wall and nothing else.
And there is a logistics problem no one writes about at all: the room you are converting is currently full. Whatever is in there has to go somewhere during construction, and in a dedicated theater it never comes back. That gets a section of its own near the end, with the sizing math.
Table of Contents
- Start With the Room, Not the Gear
- Choosing the Right Room: Basement, Attic, Spare Bedroom, or Bonus Room
- Screen Size and Seating Distance: The Math the Standards Bodies Publish
- Ceiling Height Is the Constraint That Quietly Kills Projects
- Projector or TV: The Honest Comparison
- Screens, Gain, and Ambient Light Rejection
- Speaker Layout by the Numbers: 5.1, 7.1, and Atmos
- Subwoofers, Room Modes, and the Sub Crawl
- Soundproofing and Acoustic Treatment Are Not the Same Thing
- What Actually Blocks Sound: Mass, Decoupling, Damping, and Sealing
- Acoustic Treatment That Earns Its Place
- Seating Layout, Row Spacing, and the Riser Height Calculation
- Lighting Design That Works in the Dark
- Paint, Surfaces, and the Reflection Problem
- Electrical: Circuit Math and Outlet Placement
- HVAC and Heat Load: The Part Nobody Plans For
- Code, Permits, and Egress: What a Theater Room Legally Is
- Rough-In Decisions You Cannot Redo Later
- Design Ideas Worth Stealing
- What a Home Theater Actually Costs: Four Budget Tiers
- Resale Value: What the Data Actually Says
- The Displacement Problem: Where Everything in That Room Goes
- When a Home Theater Room Is the Wrong Project
- Frequently Asked Questions
- Building a Room You Will Actually Use
Start With the Room, Not the Gear
The most common way a home theater project goes wrong is that someone buys the screen first. A 120-inch screen goes on sale, it seems like an obvious upgrade over the 65-inch TV, and it arrives at a house whose only available room is twelve feet deep. The screen gets hung anyway. Everyone sits eight feet back, spends the first movie moving their heads to follow the action, and quietly stops using the room within a year.
Rooms have four properties that constrain every decision downstream, and all four are fixed before you spend a dollar on equipment.
Depth sets your maximum screen size, because seating distance and screen diagonal are locked together by geometry. Width sets how many seats fit in a row and whether the side surround speakers can sit where the standards say they belong. Ceiling height sets whether you can put a second row on a riser, where a projector can hang, and in a basement, whether the room legally counts as habitable space at all. Shared surfaces (the walls, floor, and ceiling you share with the rest of the house) set how hard and expensive it will be to keep the sound where you want it.
Measure all four before you shop. Specifically, write down:
- Interior length, wall to wall, at the finished dimension. If you are framing new walls or building a false wall in front of the screen, subtract that thickness now.
- Interior width, again finished, and note anything that intrudes: a chimney chase, a stair bulkhead, a support column, a mechanical closet.
- Finished ceiling height at the lowest point, not the highest. Ductwork, beams, and plumbing runs decide this number, and in a basement they usually decide it lower than you want.
- What is above, below, and beside the room. A theater under a primary bedroom is a different and more expensive project than a theater under a garage.
- Where the electrical panel is and how far the run would be. This is a cost line, and it is a real one.
Those five numbers will eliminate most of the ideas you have been saving on Pinterest, and that is the point. Eliminating them now costs nothing. Eliminating them after the drywall is up costs thousands.
There is a version of this advice that sounds discouraging and is not meant to be. Constraints are what make a room good. A twelve-foot-deep space with an eighty-inch screen, one row of comfortable seating, correct speaker placement, and a properly sealed door will beat a twenty-foot room with an oversized screen and a hollow-core door every single time. The goal is a room that measures right for what it is, not a room that measures like someone else’s.
Choosing the Right Room: Basement, Attic, Spare Bedroom, or Bonus Room
Four candidate spaces come up in nearly every home theater conversation. They are not equivalent, and the standard advice to pick whichever one is least used skips the differences that matter.
The basement
The basement earns its reputation. It usually has no windows or very few, which solves ambient light for free. It is surrounded on three or four sides by earth and concrete, which is a genuinely good starting point for sound isolation on the horizontal axis. It is naturally cooler, which offsets the heat load a theater generates. And in most homes it is the largest contiguous unfinished area available.
The two problems are ceiling height and what is directly overhead. Basement ceilings are frequently interrupted by ductwork, drain lines, and beams, and the finished height after you build the ceiling can land uncomfortably close to the code minimum. And the floor above a basement theater is almost always a living room, kitchen, or bedroom, which means the ceiling assembly is the isolation problem you will spend the most money on. Bass travels through structure, and a basement ceiling is a structural connection to the rest of the house.
Basements also come with a water question that has to be settled before anything else happens. If the space takes on water at any point during the year, that gets solved first, full stop. Our basement remodel guide covers the waterproofing, framing, ceiling, and flooring decisions in detail, along with the cost ranges for each. Treat that as the prerequisite reading for a basement theater; this guide picks up where the finish work ends.
The attic or bonus room over the garage
An attic conversion or a finished bonus room above the garage is the sleeper option, and it is often better than people expect. If the room sits over a garage, the space below it is unoccupied and unheated, which removes most of the isolation problem in one direction. Attic and bonus rooms also tend to be long and narrow, which is a workable shape for a theater as long as the width still allows correct side surround placement.
The tradeoffs are heat and structure. An attic space runs hot, and a theater adds several thousand BTU per hour of its own, so the HVAC plan matters more here than anywhere else. Sloped ceilings complicate both projector mounting and speaker placement, and knee walls eat usable floor area. Floor framing in a bonus room may not be sized for a heavy riser plus six loaded recliners plus a rack of equipment, which is worth a structural opinion rather than a guess.
The spare bedroom
A spare bedroom is the fastest path to a media room and the most consequential one to get wrong, for a reason that almost no design article mentions.
If you keep the closet and the window and simply darken the room, add a TV or short-throw projector, and put in seating, you have a media room and you have changed nothing about the house. That is a genuinely good, low-risk project.
If you build a false wall over the window, remove the closet to make room for an equipment rack or a riser, or otherwise eliminate the features that make the room a bedroom, you may have reduced your home’s bedroom count. What counts as a bedroom is determined locally and by appraisal practice rather than by a single national rule, but a room without a closet or without a compliant escape opening is frequently not counted. Going from a four-bedroom to a three-bedroom listing is usually a larger financial event than the theater is worth. If you are considering permanent changes to a bedroom, ask a local appraiser or agent what it does to the listing before you frame anything.
The open-concept great room or living room
The honest read: this is a media room, not a theater, and that is fine. An open space cannot be made dark, cannot be isolated, and cannot be treated acoustically in any meaningful way without turning it into a different room. Build for the space you have. A large TV with strong ambient-light performance, a well-placed soundbar or a compact 5.1 system, and blackout treatment on the worst window will outperform a projector in the same space every time. Skip the projector here. It is the single most common expensive mistake in an open room.
Screen Size and Seating Distance: The Math the Standards Bodies Publish
This is the single most useful section in this guide, and it is missing from essentially every home theater ideas article currently ranking. Screen size is not a taste question. It is a geometry question with published answers, and the answer depends entirely on how far away you sit.
The measurement that matters is horizontal viewing angle: the angle formed at your eyes by lines drawn to each side edge of the screen. A bigger screen or a closer seat both widen that angle. Two bodies have published targets:
- SMPTE (the Society of Motion Picture and Television Engineers) recommends a minimum of roughly 30 degrees in its EG-18 engineering guideline. This is widely treated as the conservative reference for a room that does more than one job.
- THX recommends approximately 36 degrees for a recommended seat, treats about 40 degrees as the fully immersive target, and sets roughly 26 degrees as the furthest acceptable seat in a certified room.
Those angles convert cleanly into distance multipliers for a 16:9 screen. Run the trigonometry once and you get:
- 26 degrees (furthest acceptable seat): sit about 1.89 times the screen diagonal away
- 30 degrees (SMPTE minimum): sit about 1.63 times the diagonal away
- 36 degrees (THX recommended): sit about 1.34 times the diagonal away
- 40 degrees (THX immersive): sit about 1.20 times the diagonal away
Most people are shopping in the other direction, though: they know where the couch goes and want to know what screen to buy. Divide instead. Take the seating distance in inches and divide by the multiplier above. Here is what that produces at the distances real rooms actually offer, rounded to the nearest inch.
Screen diagonal by seating distance, 16:9
- 8 feet (96 inches) from the screen: 59-inch diagonal at SMPTE 30 degrees, 72 inches at THX 36, 80 inches at THX 40
- 10 feet (120 inches): 74 inches at 30 degrees, 89 inches at 36, 100 inches at 40
- 12 feet (144 inches): 89 inches at 30 degrees, 107 inches at 36, 120 inches at 40
- 14 feet (168 inches): 103 inches at 30 degrees, 125 inches at 36, 140 inches at 40
- 16 feet (192 inches): 118 inches at 30 degrees, 143 inches at 36, 160 inches at 40
- 18 feet (216 inches): 133 inches at 30 degrees, 161 inches at 36, 180 inches at 40
Two things fall out of this table immediately. The first is that most living rooms are badly undersized on screen. A household sitting eleven feet from a 65-inch TV is at roughly a 24-degree viewing angle. That is below the SMPTE minimum, and below even the furthest acceptable seat in a THX-certified cinema. If your media room feels underwhelming and you cannot say why, this is usually why.
The second is that a 120-inch screen is a bigger commitment than it looks. At the THX recommended 36 degrees, a 120-inch diagonal wants a seat about 13 feet 5 inches back. Add roughly two feet of walkway and surround speaker clearance behind the seats, plus a foot for the screen wall assembly, and you need close to 16 and a half feet of room depth for a single row. A second row adds another eight to nine feet. That is why the 120-inch screen in the twelve-foot room never works, and it is a calculation you can do before you order anything.
The vertical angle, which almost nobody checks
The horizontal angle gets all the attention, but the vertical one causes more neck pain. The general guidance derived from SMPTE practice, and reflected in CEDIA design recommendations, is that no viewer should have to look up or down more than about 15 degrees to reach the top or bottom edge of the screen. Practically, that puts seated eye height somewhere between one-sixth and one-third of the way up the screen from its bottom edge.
This is the rule that a screen mounted above a fireplace violates by a wide margin, and it is the reason a fireplace wall is a poor location for a primary viewing screen no matter how good it looks in a photograph.
Resolution changes what you can get away with
Sitting closer means the pixel structure of the image becomes more visible. A 4K display or projector tolerates the aggressive end of the range comfortably. A 1080p display, or heavily compressed streaming content on any display, looks better toward the SMPTE end. If you are building around a 4K projector, size for 36 degrees. If you are working with 1080p or your primary content is bit-starved streaming, size for 30.
Ceiling Height Is the Constraint That Quietly Kills Projects
Ceiling height is the constraint people measure last and should measure first, because it interacts with four separate decisions and there is no cheap way to add more of it.
It sets the legal floor. The International Residential Code, in section R305.1, requires habitable space, hallways, and the portions of basements containing habitable space to have a ceiling height of not less than seven feet. Adoption and local amendments vary, and beams and ducts get specific treatment, so your building department is the authority for your address. But seven feet is the number nearly every jurisdiction is working from, and a finished basement ceiling that lands below it creates a space that may not count as habitable square footage.
It sets your ceiling assembly options. This is where basements get tight. A drywall ceiling costs you roughly half an inch. A suspended drop ceiling, which is what many homeowners want for permanent access to the plumbing and ductwork above, costs three to six inches. Add a resilient channel or a sound isolation clip system for isolation and you lose another inch or two. If your joists are at seven feet four inches, you can have a drywall ceiling or you can have a drop ceiling, but you probably cannot have a drop ceiling and legal habitable height.
It sets whether a second row on a riser is possible. A riser is typically eight to twelve inches. Someone standing on a twelve-inch riser needs twelve fewer inches of clearance. In an eight-foot room that is fine. In a seven-foot-four room, a person of average height on a twelve-inch riser is close enough to the ceiling to notice, and a ceiling-mounted projector in that zone becomes a head injury waiting to happen.
It sets projector mounting geometry. A ceiling-mounted projector needs to sit high enough that nobody walks into it and low enough that its lens still lines up with the screen within the range its lens shift can correct. In a low room, this collapses into a very narrow window, and it is a common reason people end up switching to a short-throw projector or a large flat panel partway through a project.
What to do with a low ceiling
Low ceilings are workable. They just narrow the design.
- Choose a drywall ceiling over a drop ceiling and accept that future access means cutting and patching. Build access panels at the specific locations you know you will need (cleanouts, valves, junction boxes) rather than making the whole ceiling accessible.
- Go with a single row and skip the riser. One row of good seating at the correct distance beats two rows where the back row is compromised.
- Consider a flat panel instead of a projector. A large TV eliminates the mounting geometry problem, the throw distance problem, and the head clearance problem all at once. At 85 inches and below, this is frequently the better engineering answer even when a projector is the more romantic one.
- If you do want a projector, look at ultra short throw. A UST projector sits in a cabinet directly below the screen, which removes ceiling mounting from the equation entirely.
- Relocate ductwork if the numbers are close. Rerouting a duct run to recover four inches of height is not cheap, but it is far cheaper than lowering a slab, and it is occasionally the difference between a room that works and one that does not.
What is generally not worth it: underpinning or lowering a basement floor to gain height for a theater. It is a structural project with a price tag that competes with a home addition, and a theater is rarely the use case that justifies it.
Projector or TV: The Honest Comparison
The usual framing is that projectors are cheaper per inch and TVs are more convenient. That is true and it is not the deciding factor. The deciding factor is light.
A television produces its own light. A projector reflects light off a screen, which means every stray photon in the room lands on the same surface and washes out the image. This is not a small effect. A projector in a room with two uncovered windows at 2pm produces a washed, grey, low-contrast picture that a mid-range TV will comprehensively beat. The same projector in a fully darkened room produces an image the TV cannot match at that size.
So the honest decision tree starts with a question about the room, not the budget.
Choose a projector when
- The room can go genuinely dark, meaning no windows or full blackout treatment, and dark surfaces on the walls and ceiling around the screen
- You want more than about 90 inches of diagonal. Above that size the cost curve on flat panels climbs steeply while projector plus screen stays comparatively flat
- You have the depth to support the screen size, per the viewing distance math in the previous section
- The room is single purpose. Projectors reward dedicated rooms and punish shared ones
Choose a television when
- The room has meaningful ambient light at the times you will actually use it, and blackout treatment is not realistic
- Your target size is 85 inches or less, where flat panel pricing is competitive and the image quality advantage in a lit room is decisive
- The room does other jobs. A media room that is also the playroom, the guest room, or the workout room should have a TV
- Ceiling height or mounting geometry is constrained, as covered above
- You watch a lot of daytime sports. Sports viewing happens in lit rooms with people talking, which is the exact scenario projectors handle worst
The lumens conversation, simplified
Projector brightness is quoted in lumens, and the specification is only meaningful when you know how it was measured. ANSI lumens is a standardized measurement; a bare lumen figure from an unfamiliar brand may not be. Treat unusually high brightness claims at unusually low prices with suspicion.
The practical guidance: brightness requirements scale with screen area and with ambient light. A modest screen in a fully dark room needs far less light output than a large screen in a room with some spill. Rather than chasing a number, work backward from your screen size and your realistic light conditions, and ask a dealer to model the foot-lambert result for your specific screen and throw distance. This is a calculation dealers do routinely and it is worth asking for.
Two costs people forget
Projectors have consumable light sources. Lamp-based projectors need replacement lamps periodically, which is a real recurring cost over the life of the room. Laser and LED light engines have largely eliminated this on newer models and are worth the premium in a room you plan to use frequently.
Projectors also have fans, and fans make noise. A projector mounted directly above the seating puts a small, constant source of mechanical noise a few feet from your head, in a room you have specifically engineered to be quiet. Check the noise specification, mount as far from the seats as the geometry allows, and consider a hush box or an equipment closet if the room layout supports it.
Screens, Gain, and Ambient Light Rejection
If you go the projector route, the screen is not an accessory. It is roughly half of the picture, and choosing it badly will undo an expensive projector.
Gain
Screen gain describes how much light the screen reflects back toward the viewer compared to a standardized reference surface. A gain of 1.0 reflects light roughly evenly in all directions. A gain of 1.3 concentrates more of it back toward the seats, producing a brighter image straight on.
Higher gain is not automatically better. Concentrating light narrows the viewing cone, so seats toward the edges of a wide row see a dimmer image than the center seat. High gain screens can also produce hot-spotting, a visible bright patch in the center of the image. For a dark room with a reasonably bright projector, a gain near 1.0 to 1.3 is the safe zone and produces the most uniform image across a row.
Ambient light rejecting screens
An ambient light rejecting screen uses an optical structure that preferentially accepts light arriving from the projector’s direction and rejects light arriving from elsewhere, typically from above. In a room with some unavoidable light, this is a meaningful improvement, and for ultra short throw projectors, a matched ALR screen is close to mandatory.
The tradeoffs are cost, a narrower optimal viewing cone, and directionality: an ALR screen designed for a ceiling-mounted projector behaves differently from one designed for a UST projector sitting below the screen. Match the screen type to the projector type. A mismatch produces worse results than a plain matte white surface.
Acoustically transparent screens and the false wall
In a purpose-built theater, the center channel speaker belongs directly behind the center of the screen, at the height of the on-screen dialogue. That is only possible with an acoustically transparent screen: a woven or perforated surface that passes sound through with minimal loss.
Building for this means constructing a false wall in front of the actual wall, deep enough to hold the left, center, and right speakers plus any behind-screen subwoofers. Budget twelve to twenty-four inches of room depth for that wall, and subtract it from your available length before you run the viewing distance math. This is the single most common way people accidentally lose two feet of room.
An acoustically transparent screen is a genuine upgrade in a dedicated theater and unnecessary in a media room. If your center channel will sit below the screen on a shelf or in a cabinet, a standard screen is correct and you keep the two feet.
Fixed frame versus retractable
A fixed frame screen is flat, stays flat, and has a velvet-wrapped border that absorbs overshoot light and visually sharpens the image edge. It is the right choice for a dedicated room. A retractable screen, motorized or manual, is the right choice when the wall has another job. Retractable screens can develop waves over time, which shows up as visible distortion in bright scenes. Tab-tensioned models resist this and cost more.
One practical note: paint the wall behind and around the screen a dark, matte color regardless of which type you choose. Light bouncing off the screen and returning from a bright surrounding wall lowers perceived contrast measurably, and this is a fifty dollar fix.
Speaker Layout by the Numbers: 5.1, 7.1, and Atmos
Soundtracks are mixed in rooms built to published layout specifications. The ITU recommendation BS.775 defines the reference geometry for multichannel stereophonic sound, Dolby publishes placement guidelines for its own formats, and CTA and CEDIA jointly publish home theater audio recommended practices. When people say a surround system sounds vague, the cause is usually that the speakers are not where the mixing engineer assumed they were.
All angles below are measured at your main listening position, with zero degrees directly ahead at the screen and angles increasing to either side.
The front stage, common to every layout
- Center channel: 0 degrees, directly below or above the screen center, ideally behind an acoustically transparent screen. This speaker carries the majority of dialogue and it is the one most often compromised by furniture. Do not bury it in a cabinet.
- Front left and right: 22 to 30 degrees off center. Tweeters at seated ear height. Toe them in toward the listening position if they are floorstanding models.
- The equal distance rule: left, center, and right should be roughly equidistant from the main seat, which means arranging them along an arc rather than a straight line if the room allows it.
5.1
Five main speakers plus a subwoofer. The surrounds sit beside and slightly behind you, not behind you.
- Surround left and right: the ITU reference places these at 110 degrees. Dolby’s guidance for 5.1 runs 110 to 120 degrees; THX has historically preferred 90 to 110. Anywhere in the 100 to 120 range works, and the two should be symmetrical and equidistant from the seat.
- Height: roughly two feet above seated ear level, angled down toward the listening area. Firing directly at the back of someone’s head is the most common surround mistake.
7.1
Adds a rear surround pair. This only pays off in a room with meaningful depth behind the seats; in a short room, a well-executed 5.1 beats a cramped 7.1.
- Side surrounds: move forward to 90 to 110 degrees, directly to the sides of the seating
- Rear surrounds: 135 to 150 degrees, behind the seating, spaced roughly three to six feet apart and at the same height as the sides
- The room test: if you cannot get the rear pair a meaningful distance behind the seats, do not add them
Atmos and height channels
Object-based formats add overhead channels, written as a third number: 5.1.2, 7.1.4, and so on. Dolby’s placement guidance puts height speakers in an elevation band of roughly 30 to 55 degrees above the listening position, measured from horizontal.
- In-ceiling speakers are the cleanest implementation. Front height pair roughly in line with or slightly ahead of the front row, rear height pair behind, both sets aimed toward the seats.
- Upfiring modules that bounce sound off the ceiling are a compromise. They require a flat, hard, reflective ceiling at a reasonable height. They do not work under a sloped ceiling, a heavily absorptive ceiling, or a very high one.
- Two versus four: four height channels produce a noticeably more stable overhead image than two. If you are opening the ceiling anyway, run wire for four.
The room width check
Here is the constraint that decides whether these angles are even available to you. Side surrounds at 90 to 110 degrees need to be on the side walls, beside the seats, with enough distance that they are not firing into an ear from eighteen inches away. A three-seat row of theater recliners runs roughly seven and a half to nine feet wide. Add at least two feet of clearance on each side and you need approximately twelve feet of interior width minimum for a three-seat row with correct surround placement. Under that, plan on two seats per row or accept compromised surround geometry.
Subwoofers, Room Modes, and the Sub Crawl
Bass behaves differently from everything else in the room, and it is the reason two people in the same theater can have completely different experiences of the same scene.
Low frequencies have long wavelengths. A 40 Hz tone has a wavelength of roughly 28 feet, which is comparable to the dimensions of the room itself. At those frequencies the room stops behaving like an open space and starts behaving like a resonant chamber. Sound waves reflect off the boundaries and interfere with themselves, producing room modes: standing wave patterns with predictable peaks and nulls at fixed locations.
The practical consequence is that at some seats a given bass note will be loud, and a few feet away the same note will be nearly absent. This is not a speaker problem. It is a geometry problem, and no amount of subwoofer quality fixes it. Placement and quantity fix it.
The sub crawl
The most reliable low-cost method for finding subwoofer placement in a real room, and the one professionals still use:
- Put the subwoofer on your main listening seat, at roughly seated ear height if you can manage it safely.
- Play something with sustained, repetitive low-frequency content. A test tone sweep works; so does a bass-heavy track on loop.
- Crawl the perimeter of the room on hands and knees, ear at floor level, listening at every candidate location.
- The spot where the bass sounds most even and most extended is where the subwoofer goes. Acoustic reciprocity means the response measured there will be approximately the response you get at the seat when the two swap places.
It looks ridiculous. It works, and it costs nothing.
Why two subwoofers beat one
A single subwoofer produces one modal pattern with fixed peaks and nulls. Two subwoofers in appropriate positions produce overlapping patterns whose peaks and nulls partially cancel, which smooths response across a wider area. In a room with two rows of seating this is not a luxury; it is the difference between the back row getting bass and the back row not getting bass.
Two well-chosen mid-range subwoofers will usually outperform one expensive one in a multi-seat room. Common placements that work: opposing side walls at the midpoints, or diagonally opposite corners. Run the crawl for the first and then position the second and measure again.
Bass traps
Modal energy accumulates in corners, which is where a room’s boundaries meet and where pressure is highest. Broadband absorbers placed in the vertical corners, floor to ceiling, are the most effective acoustic treatment per dollar in most rooms, and they target exactly the frequency range where problems are most audible.
Thin foam panels do essentially nothing at these frequencies. Effective low-frequency absorption requires depth: several inches of dense mineral wool or fiberglass, ideally with an air gap behind it. If you buy one category of acoustic treatment, buy corner traps rather than wall panels.
Room correction, and its limits
Modern receivers and processors include automated room correction that measures the response at your seats and applies corrective filtering. It is genuinely useful and you should run it. It is also frequently oversold. Correction can reduce a modal peak, because a peak is excess energy that can be turned down. It cannot meaningfully fill a modal null, because a null is cancellation and adding power to a cancelling frequency mostly produces distortion and heat. Fix the placement physically first, then let correction handle what remains.
Soundproofing and Acoustic Treatment Are Not the Same Thing
This is the most consequential misunderstanding in consumer home theater content, and it appears in most of the guides currently ranking for home theater ideas. It is worth stating plainly, because it routinely costs people several hundred dollars and a weekend before they discover it did not work.
Acoustic panels do not soundproof a room. They are absorption products. They improve how sound behaves inside the room. They do very little to stop sound from leaving it.
These are two different physical problems measured by two different standards.
- Sound isolation is a partition’s ability to block airborne sound from passing through it. It is rated as Sound Transmission Class, classified under ASTM E413 from laboratory transmission loss measurements made per ASTM E90. It is a property of an assembly: a wall, a floor, a door, a window.
- Sound absorption is a material’s ability to convert incident sound energy into heat rather than reflecting it. It is commonly summarized as Noise Reduction Coefficient, measured per ASTM C423. It is a property of a surface treatment.
The two numbers are produced by different tests and are not interchangeable. A panel with an excellent absorption coefficient can have a negligible effect on transmission, because absorption works by being porous and open, and blocking works by being massive and sealed. Those are opposite requirements. You cannot get one product to do both jobs well.
The carpet claim, specifically
Several popular home theater guides state that thick carpet keeps noise from disturbing neighbors or adjacent rooms. That is not what carpet does. Carpet is an absorptive surface. It reduces reflections and reverberation within the room, which is genuinely useful and is a good reason to install it. It has minimal effect on airborne transmission through a wall, and its effect on structure-borne bass transmission through a floor assembly is small. If footfall noise between floors is the concern, that is a separate rating called Impact Insulation Class, and it is addressed by the floor assembly and underlayment, not by the carpet pile.
Install carpet in your theater. Do it for the reflection control and the comfort. Do not expect it to keep the movie out of the bedroom upstairs.
The bass problem that STC hides
There is a second issue that matters specifically for theaters and almost never comes up in general construction. The STC rating is calculated from measurements at sixteen frequencies, and the lowest of those is 125 Hz. Below 125 Hz, STC says nothing at all.
A home theater’s most disruptive output lives almost entirely below 125 Hz. The explosion that rattles the upstairs bedroom is not a speech-frequency event. This means two wall assemblies with identical STC ratings can perform very differently for a theater, and it means an STC number alone is an incomplete way to specify a theater wall. When comparing assemblies, ask for the full transmission loss curve rather than the single-number summary, or work with someone who will.
The order of operations
Isolation is structural and has to happen during construction. Absorption is a finish-stage item you can add, subtract, and tune forever. So the sequence is fixed: build the isolation first, then treat the room. Deciding to isolate a wall after the drywall and the screen and the speakers are in means tearing all of it back out.
If your budget only covers one, and the room shares a wall or ceiling with a bedroom, spend it on isolation. If the room is over a garage or fully below grade with unoccupied space around it, spend it on absorption instead. The room dictates the answer.
What Actually Blocks Sound: Mass, Decoupling, Damping, and Sealing
Isolation is built from four mechanisms. Most real assemblies use several. They are worth understanding individually because each has a different cost, a different amount of disruption, and a different point in the schedule where it has to happen.
Mass
Heavier partitions transmit less sound. This is the simplest mechanism and the easiest to add: a second layer of drywall roughly doubles the mass of the surface. For reference, a single layer of half-inch drywall on its own is in the high twenties for STC, and a conventional wood-stud wall with drywall on both faces and no cavity insulation lands around the low thirties. Those are apartment-wall numbers, and they are what most existing interior walls in a house actually are.
Mass alone has diminishing returns, and it does nothing about sound traveling through the framing itself. It is the cheapest first move and rarely sufficient on its own for a theater.
Decoupling
If the drywall on one side of a wall is physically connected to the drywall on the other side through shared studs, vibration travels straight across. Decoupling breaks that path. Options, roughly in order of cost and effectiveness: resilient channel, sound isolation clips with hat channel, staggered studs, and a fully independent double-stud wall.
Decoupling is the most effective single mechanism at low frequencies, which is exactly where a theater needs help. It is also structural, invasive, and must happen during framing. Resilient channel in particular is easy to install incorrectly, and an incorrectly installed resilient channel can perform worse than no channel at all. If you use it, get the screw length and pattern right.
Damping
A viscoelastic damping compound applied between two layers of drywall converts vibrational energy into a small amount of heat as the two layers shear against each other. Green Glue is the common product name. It is inexpensive, it is easy to apply, and it is one of the best returns available in a retrofit because it works within a normal double-drywall installation.
This is the single best value upgrade in a mid-budget theater: two layers of drywall with damping compound between them on shared walls and ceilings. A few hundred dollars of material and one extra day of drywall labor.
Sealing
Sound is airborne. Any air path is a sound path, and a small one matters more than intuition suggests. The most rigorously constructed wall in the world is defeated by an undercut door, an unsealed electrical box, a recessed light housing, a duct penetration, or a gap at the top plate.
The specific items that leak in almost every home theater:
- The door. A hollow-core interior door with a one-inch gap underneath is effectively an open window acoustically. A solid-core door with full perimeter gasketing and a bottom seal or automatic door bottom is the highest-impact single upgrade in most rooms, and it typically costs a few hundred dollars.
- Electrical boxes, especially back-to-back boxes in a shared wall. Offset them to different stud bays and seal them with putty pads.
- Recessed can lights, which are holes in the ceiling assembly by design. Use sealed, rated housings or switch to surface-mounted fixtures.
- HVAC ducts, which connect the theater directly to every other room on the same trunk. Lined flex duct, longer duct runs, and offset register placement all help.
- The perimeter at floor and ceiling. Acoustical sealant at every drywall edge, before the trim goes on.
Sealing is cheap relative to everything else on this list and it is where the largest share of unexpected leakage lives. Do it thoroughly even on a modest budget.
A realistic expectation
Total silence is not achievable in a residential retrofit at a sane cost, and any contractor promising it should be treated carefully. A realistic and satisfying goal for a home theater is that a movie at reference-adjacent volume is audible as a low rumble in the adjacent room rather than as recognizable dialogue and effects. That is achievable with mass, damping, a good door, and careful sealing. Going beyond it means room-within-a-room construction, and the cost curve turns sharply upward.
Acoustic Treatment That Earns Its Place
Once the isolation is built, treatment is what makes the room sound good from the inside. The goal is not a dead room. An over-treated theater sounds airless and fatiguing. The goal is controlling the specific reflections that smear dialogue and blur imaging, while leaving enough liveliness that the room does not feel like a padded cell.
First reflection points, in priority order
A reflection arriving at your ears shortly after the direct sound from the speaker interferes with it, which degrades clarity and pulls the apparent location of the sound away from where it should be. The reflections that matter most come from the surfaces between you and the front speakers.
Find them with the mirror trick. Sit in the main seat. Have someone slide a hand mirror flat along each wall. Anywhere you can see a front speaker in the mirror from your seat is a first reflection point. Treat those spots.
- Side walls, at the front reflection points. The highest-value treatment in most rooms after bass traps. Two panels, one per side.
- The ceiling, at the equivalent point between the screen and the seats. A ceiling cloud here does noticeably more than most people expect, especially in rooms with hard ceilings.
- The front wall, between and around the front speakers. Absorb here rather than diffuse; you do not want energy bouncing back toward the seats from behind the screen.
- The rear wall, which is the surface behind your head and a common source of a distinct slap echo. In a shallow room, absorb. In a deep room, diffusion is often the better choice because it preserves a sense of space.
- Corners, covered in the previous section. Broadband, floor to ceiling, as deep as you can accommodate.
Thickness matters more than coverage
The single most common treatment mistake is buying thin panels and covering a lot of wall with them. An inch of foam absorbs the top couple of octaves efficiently and does almost nothing below a few hundred hertz. Cover a room in it and you get a bright, thin, over-damped-on-top sound that is worse than the untreated room.
Two to four inches of dense mineral wool or fiberglass in a fabric-wrapped frame, with an air gap behind it where possible, absorbs across a far wider range. Fewer, thicker panels in the right places consistently beat more, thinner panels everywhere. If you are building your own, a two-inch panel with a two-inch air gap behaves roughly like a thicker panel and costs the same as the thin one.
Absorption versus diffusion
Absorption removes energy. Diffusion scatters it in many directions so it arrives later and less coherently. A well-designed room uses both: absorption at the first reflection points and in the corners, diffusion on the rear wall and sometimes on the upper side walls.
Diffusion is generally the wrong tool in a small room, because effective diffusers need distance to work. If your rear wall is within about six or seven feet of your head, absorb it rather than diffusing it.
What you already own that counts
Before buying anything, note that a fully furnished theater is already partially treated. Carpet over pad is significant broadband absorption on the largest surface in the room. Upholstered seating absorbs. Heavy drapery on a wall absorbs. A row of fabric recliners plus wall-to-wall carpet plus a fabric-wrapped screen wall is a meaningfully damped room before a single panel goes up.
This is a real argument for finishing the room, living with it for a few weeks, and then deciding what treatment it actually needs. Buying a full treatment package before you have heard the finished room is how people end up with a dead-sounding theater and a box of unused panels.
Seating Layout, Row Spacing, and the Riser Height Calculation
Seating articles talk about materials and cupholders. The decisions that determine whether the room works are dimensional, and they get made before you choose a fabric.
Start with the depth a recliner actually needs
A theater recliner in its upright position occupies roughly three feet of depth. Fully reclined, with the footrest extended, it commonly needs five and a half to six and a half feet. Wall-hugger designs recline forward into the room rather than tilting back, which is what makes them viable against a rear wall, but they still need the forward travel.
So a row of recliners plus circulation space behind it needs roughly seven to eight feet of depth. If you are building a riser, that is your minimum riser depth. A riser built at five feet because it looked proportional on a drawing will not let the back row recline, which defeats the purpose of buying recliners.
Row spacing
Measure row spacing from front-row eye position to back-row eye position. In a home theater with reclining seats, that distance typically lands between eight and ten feet once you account for the front row’s recline travel and the back riser depth.
This is why the two-row question is really a room-depth question. Take your front-row viewing distance from the screen size math, add eight to ten feet for the second row, add two to three feet behind the back row for walkway and surround clearance, and add one to two feet at the front for the screen wall. A two-row theater with a 120-inch screen at THX distances needs somewhere in the range of twenty-five to twenty-eight feet of room length. Most houses do not have that room, and that is the honest reason most home theaters are single row.
The riser height calculation
A riser exists so the back row can see over the front row. The calculation is a sightline problem, and it depends on four inputs you can measure in an afternoon:
- Front-row seated head height above the floor. Measure it with someone actually sitting in the chair you plan to buy, or in the closest thing you own. In a theater recliner this commonly lands in the mid forties of inches; recliners sit lower than dining chairs.
- Back-row seated eye height, measured the same way, above whatever the back row will be standing on.
- The horizontal distance from the back-row eye to the front-row head, and from the back-row eye to the bottom of the screen.
- The height of the bottom of the screen above the floor.
Draw the line from the back-row eye to the bottom edge of the screen. If that line passes above the front-row head with a couple of inches to spare, your riser is tall enough. If it clips the head, raise the riser or lower the screen.
In practice this lands at eight to twelve inches for the great majority of home theaters, with twelve being the common default. Going above twelve inches in a single step starts to become a genuine trip hazard in a dark room and raises questions about step and guard requirements that are worth putting to your building department. Two smaller steps are safer than one tall one, and they cost more floor depth.
Riser construction details that prevent problems
- Fill the cavity. An empty riser is a drum. Fill it with insulation batts, which kills the resonance for the price of a bag of insulation.
- Frame it stiff. Joists at sixteen inches on center with a solid sheathing layer, not a springy platform. A riser that flexes under a loaded recliner will develop squeaks.
- Run power up into it before you close it. Powered recliners need outlets, and floor boxes in the riser deck are far better than cords running across a walkway. This is not something you can add later without cutting the deck open.
- Light the step edge. Low-level LED strip or recessed step lights along the riser nose. This is a safety item in a dark room, not a decorative one.
- Carry the carpet up and over the riser face and nose. It looks finished and it eliminates the hard edge that scuffs.
Lighting Design That Works in the Dark
A theater needs to do four different lighting jobs, and a single set of recessed cans on one switch does none of them well. Design the lighting in layers, each on its own dimmed circuit.
The four layers
- Cleaning and setup light. Bright, even, unflattering. This is the light you use to vacuum, find a dropped remote, or work on the equipment rack. Recessed cans are correct here. You will use this layer for ten minutes at a time and it needs to actually illuminate.
- Pre-show and conversation light. Warm, moderate, comfortable. This is the room at forty percent while people find seats and argue about what to watch. Wall sconces and cove lighting live here.
- During-movie safety light. Very low, aimed down, positioned so it never reaches the screen. Step lights on the riser, aisle lights near the floor, a single very dim path light at the door. Enough to walk out without falling, not enough to register in your peripheral vision.
- Accent and effect light. Optional and entirely aesthetic. Cove lighting behind a soffit, a backlit screen wall, a fiber optic or LED star ceiling, color-changing strips. Off during viewing, and worth having on a scene control so it goes off automatically.
Dimming, and the flicker problem
Every layer except the safety lights should dim, and the dimming needs to be smooth all the way to the bottom. Cheap LED fixtures paired with mismatched dimmers produce visible flicker, buzzing, or a hard cutoff at twenty percent where the light simply switches off. In a room that is specifically designed to be dark and quiet, both of those failures are far more noticeable than they would be anywhere else in the house.
The fix is unglamorous: buy fixtures and dimmers that the manufacturer lists as compatible, and buy them together. Ask specifically about low-end dimming performance. This is worth an extra ten or fifteen dollars per fixture and it is very annoying to retrofit.
Fixture placement rules
- Nothing that puts light on the screen. No fixture, no reflection off a glossy surface, no light spilling from the hallway when the door opens. If you have recessed cans, keep the row nearest the screen off a separate switch so it can be killed independently.
- Sconces on side walls, mounted low enough to be below eye level when seated, so you are not looking into a light source during a dark scene. Shielded fixtures that throw light up and down rather than out are the standard choice.
- Nothing in the ceiling directly above the seats that will reflect in glasses or in the screen surface.
- Remember the isolation. Every recessed can is a hole in the ceiling assembly. If the ceiling is a shared surface with a bedroom above, use sealed rated housings or use surface-mounted and wall-mounted fixtures instead and skip cans entirely.
Control
Four dimmed layers means four controls, and a wall of four dimmers is not a good user experience in a dark room. A scene-based keypad, where one button labeled Movie takes the room to the correct state, is a genuine quality-of-life upgrade and is one of the few smart-home features in a theater that people use every single time.
Whether you integrate that with the AV system or keep it as a standalone lighting scene controller is a budget decision. Standalone keypads are considerably cheaper and nearly as good.
Paint, Surfaces, and the Reflection Problem
The advice to paint a theater dark is correct, but the reasoning usually given for it is incomplete, and the incomplete version leads people to paint the wrong things.
Here is the actual mechanism. A projector throws light at a screen. The screen reflects most of it toward the seats, but not all of it goes there, and not all of the light that reaches the seats stops there. Some bounces off the walls, ceiling, and floor and returns to the screen. That returned light lands on dark parts of the image and raises their brightness, which reduces contrast. The black levels get greyer, and the whole image loses depth.
This effect is strongest for surfaces closest to the screen and within the projection cone. Which means the priority order is specific:
- The screen wall and the area immediately surrounding the screen. Highest priority by a wide margin. Dark and matte.
- The ceiling in the forward third of the room, between the screen and the seats. The second biggest offender, and the one people most often paint white by default.
- The side walls in the forward half of the room.
- The floor in front of the screen, which is why theater carpet is dark.
- Everything behind the seats, which matters least and can be lighter if you want the room to feel less oppressive.
Sheen matters more than color
A dark color in a satin or semi-gloss finish will produce a visible specular reflection of the screen, which is worse than a mid-tone color in a flat finish. Use a flat or matte sheen on every surface in the projection cone, with no exceptions. Flat paint is harder to clean, and in a room where nobody is touching the walls, that tradeoff is easy.
For the color itself, dark neutrals are the standard: deep charcoal, dark chocolate, near-black grey, deep navy in a room that wants some character. Avoid strongly saturated colors near the screen, because reflected light carries the color and can tint the image.
The other surfaces that cause trouble
- Glass. Framed movie posters under glass, glass-front cabinet doors, and mirrors are all specular reflectors. Posters directly beside the screen will visibly reflect it. Hang them on the rear wall or use non-reflective glazing.
- Glossy trim and doors. Semi-gloss trim is the residential default. In a theater, run the trim in the same flat finish as the walls, or in a satin at most, and only behind the seats.
- Light-colored ceilings. Painting a theater ceiling white and the walls dark is the most common half-measure and it leaves the second-largest reflector in the room untreated.
- Chrome and polished metal on speaker grilles, equipment faceplates, and hardware. Small, but visible in a dark room during a bright scene.
If you cannot go dark
In a shared room where a charcoal ceiling is not acceptable to everyone in the household, there are workable compromises. Dark paint on the screen wall only, extending a few feet onto the adjacent side walls and the ceiling directly in front of the screen, captures most of the benefit with a fraction of the visual commitment. Heavy dark drapery on a track across the screen wall accomplishes the same thing and can be opened when the room is doing something else. A fixed-frame screen with a wide velvet border also absorbs a meaningful amount of the overshoot light on its own.
Electrical: Circuit Math and Outlet Placement
A home theater is an unusual residential electrical load: several hundred to a couple thousand watts, drawn continuously for hours, with large momentary peaks when the amplifiers work hard. It also happens to be the room where a tripping breaker is most disruptive.
The National Electrical Code does not contain a section titled home theater, and it does not mandate dedicated circuits for entertainment equipment. Article 640 addresses audio signal processing and amplification equipment and how those circuits are handled. What drives the practical decision is the continuous load rule in Article 210, which limits a circuit’s continuous load to eighty percent of its rating.
That gives you two numbers to work with:
- A 15-amp, 120-volt circuit supports roughly 1,440 watts of continuous load
- A 20-amp, 120-volt circuit supports roughly 1,920 watts of continuous load
Doing the load math
Add up the actual continuous draw of what you plan to run, using the nameplate ratings on the equipment rather than estimates. A representative mid-range system:
- AV receiver or processor, in normal listening use: roughly 150 to 500 watts
- Multichannel power amplifier, if separate: several hundred watts continuous, considerably more on peaks
- Projector: roughly 250 to 400 watts for most home models
- Each powered subwoofer: roughly 150 to 500 watts continuous, with large transient peaks
- Sources, network gear, and control: typically under 100 watts combined
- Powered recliners: negligible except during the few seconds they are moving
A system like that lands in the range where a single 15-amp circuit is uncomfortably close to its continuous limit before you have plugged in a single light. That is the argument for dedicated circuits, and it is a practical argument rather than a code requirement.
The common professional approach is two dedicated 20-amp circuits for a serious room: one for the equipment rack and amplification, one for the display or projector and sources. Lighting goes on a separate circuit from the AV equipment, which also keeps dimmer noise off the audio circuits. A third circuit for general room outlets means someone can run a vacuum without interrupting anything. Larger systems with multiple amplifiers may want more.
Whether your existing panel has capacity for that is a question for a licensed electrician, and panel capacity is a real cost line that surprises people. Have that conversation before you finalize the budget, not after.
Where the outlets go
Outlet placement is a rough-in decision and it is expensive to change later. Plan for:
- Behind the screen or display, for the display, and for behind-screen speakers or subwoofers if you are building a false wall
- At the ceiling projector location, in a recessed box so the plug does not hold the mount off the ceiling
- At the equipment rack, four to eight receptacles depending on component count, so nothing is daisy-chained through power strips
- In the riser deck, as floor boxes, for powered seating
- At each subwoofer position, including the second position you may not use yet
- At each surround and rear surround location if any of those speakers are powered
- General room outlets on the side and rear walls for vacuums, lamps, and future changes
Surge protection and grounding
A theater concentrates a lot of expensive, sensitive electronics in one room, often connected to each other by signal cables. Point-of-use surge protection or a power conditioner at the rack is standard practice. Recent NEC editions include provisions requiring surge protection at the service equipment for many new and upgraded dwelling services, and a whole-house device at the panel plus point-of-use protection at the rack is the layered approach most electricians recommend.
One more item worth raising with your electrician: keep the AV circuits fed from the same phase where practical, and keep low-voltage signal runs physically separated from line-voltage runs. Parallel runs of speaker wire and romex in the same stud bay are a classic source of audible hum that is miserable to diagnose after the drywall is up.
Everything in this section is directional. Circuit design, panel capacity, and permitting are the electrician’s call and your jurisdiction’s call, and the specifics vary by code edition and local amendment. Use this to have a better conversation, not to skip one.
HVAC and Heat Load: The Part Nobody Plans For
Here is a scenario that plays out in a large share of finished home theaters. The room is beautiful. The first movie night, six people file in, the door closes, and ninety minutes later the room is noticeably, uncomfortably warm. Somebody props the door open, which defeats the isolation everyone paid for.
This happens because a home theater is, thermally, a small sealed room containing a space heater and several people, and it is usually served by whatever single supply register the original floor plan happened to put there.
The arithmetic
Two heat sources, both easy to quantify approximately.
Equipment. Essentially all electrical power drawn by AV equipment ends up as heat in the room. The conversion is about 3.41 BTU per hour per watt. So 800 watts of continuously drawn equipment is roughly 2,700 BTU per hour of heat, all of it released into a room you have deliberately sealed.
People. A seated adult at rest gives off on the order of 400 BTU per hour of total heat. Six people is roughly 2,400 BTU per hour.
Add those and a modest full house in a mid-range theater is generating in the neighborhood of 5,000 BTU per hour. For scale, a ton of air conditioning is 12,000 BTU per hour. That is a substantial fraction of a ton being added to one small room that likely has one six-inch supply duct sized for a bedroom.
These are rough figures meant to show the shape of the problem rather than to size a system. Actual heat gain depends on your equipment, your usage, insulation, and whether the room is below grade. A load calculation is the HVAC contractor’s job, and this is a case where the calculation is worth paying for.
The options, in order of cost
- Add and balance supply and return. The cheapest fix and the most commonly skipped one. A sealed room with supply air and no return path pressurizes and stops accepting air. If the theater has a supply register and no return, adding one is often the entire solution. Undercutting the door is the usual builder answer, and it is exactly the wrong answer here because it destroys the sound seal. Use a transfer duct or a jump duct with an offset and lining instead.
- Increase the supply with a second register, ideally at low velocity. Airflow noise is its own problem in a quiet room, so more, larger, slower registers beat one small fast one.
- Zone the room if the existing system has capacity, so the theater can call for cooling independently of the rest of the floor.
- Add a dedicated mini-split. The most effective answer for a room with a real load, and it gives the theater independent temperature control. The indoor head has a fan, so check the noise specification and locate it away from the seating.
Duct noise and duct leakage
Two competing requirements meet in the ductwork. You want enough air movement to handle the load, and you want the room silent. And the same duct that delivers air is a direct acoustic path between the theater and every other room on that trunk.
The standard measures: oversize the duct and slow the air down, use lined flex duct rather than bare sheet metal for the last run, add length and bends between the theater and the trunk rather than a short straight shot, and position the register away from the seating. Where the isolation matters a great deal, an acoustic duct silencer is available and is worth pricing.
The equipment closet
If the rack lives in a closet, that closet has its own thermal problem, concentrated. A closed door and 800 watts is an oven, and heat is the leading cause of premature failure in AV electronics. Louvered doors, a passive vent low and another high, or a small thermostatically controlled fan will all work. What does not work is a sealed closet with a solid door, which is what most people build.
Code, Permits, and Egress: What a Theater Room Legally Is
Home theater articles almost never mention code, which is unfortunate, because the code questions are the ones that can turn a finished room into a problem at resale.
The framework below comes from the International Residential Code, which is the model code most United States jurisdictions build from. Adoption varies, editions vary, and local amendments are common. Your building department is the authority for your address, and nothing here substitutes for asking them.
Ceiling height
IRC section R305.1 requires habitable space, hallways, and the portions of basements containing habitable space to have a ceiling height of not less than seven feet, with a lower allowance for bathrooms, toilet rooms, and laundry rooms. Beams, girders, and ducts get specific treatment in the code and in local amendments. If your finished basement ceiling is going to land near seven feet, resolve that with the building department before framing.
Emergency escape and rescue openings
This is the requirement most homeowners have not heard of, and it applies to a basement theater directly.
IRC section R310.1 requires that basements, habitable attics, and every sleeping room have at least one operable emergency escape and rescue opening. Note the wording carefully: the requirement attaches to the basement, not only to bedrooms in it. A basement finished into a theater is a basement containing habitable space, and the escape opening requirement is generally triggered by the finish, not by whether anyone sleeps down there. Exceptions exist, including one for basements used only to house mechanical equipment below a specified floor area, and sprinklered dwellings receive different treatment in recent editions.
Where an escape opening is required, the code specifies minimums for net clear opening area, net clear opening height and width, and the maximum sill height above the finished floor, plus requirements for window wells where the opening sits below grade. Retrofitting an egress window into an existing foundation is a real project: cutting the foundation, excavating and installing the well, drainage, and waterproofing the opening.
Two things follow from this. First, budget for it if your basement does not already have compliant egress and you are finishing space down there. Second, and this is the part that catches people: a false wall built to hold speakers, or a wall of acoustic treatment, or a heavy blackout drape can obstruct an existing escape opening. If your basement already has an egress window, the theater design has to keep it operable and accessible from the inside without tools or special knowledge.
Permits
Framing, electrical, and mechanical work generally require permits, often as separate trade permits. Requirements, fees, and inspection schedules vary widely by jurisdiction.
The argument for pulling them is not primarily about safety, though that is the real reason they exist. It is about what happens at resale. Unpermitted finished space is routinely flagged by a buyer’s inspector, may be excluded by an appraiser from the home’s finished square footage, and can create financing complications that surface late in a transaction. Retroactive permitting is more expensive and more disruptive than permitting on the front end, and sometimes it requires opening finished walls to inspect what is behind them.
The bedroom conversion question, again
Worth repeating because it is the most expensive mistake available in this project. If you are converting a room that currently counts as a bedroom, and your design removes the closet, covers the window, or otherwise eliminates what makes it count, you may be changing the home’s bedroom count on paper. What qualifies is determined locally and by appraisal practice.
Ask a local real estate agent or appraiser what that does to your specific home before you frame a false wall over a window. It is a free conversation and it occasionally changes the whole plan.
Rough-In Decisions You Cannot Redo Later
Some decisions in this project are reversible for the price of an afternoon. Others are locked the moment the drywall goes on. Knowing which are which is what separates a project that can absorb a change of mind from one that cannot.
Here is the list of things to get right before the walls close, roughly in the order a contractor will encounter them.
Wire everything you might ever want
Wire is cheap. Opening a finished wall is not. Pull cable to every location you are seriously considering, terminate it, label both ends, and cap the ones you are not using yet behind a blank plate. Specifically:
- Speaker wire to every position in the largest layout you might build. If you are installing 5.1 but might go to 7.1.4 later, pull for 7.1.4 now. The incremental cost is a few hundred feet of wire and an hour of labor.
- Two runs to the projector location, not one, plus a pull string. Video interface standards change, and the second run is your migration path.
- Conduit from the rack to the projector and to the screen wall. This is the single most valuable thing on this list. A piece of smooth-wall conduit with a pull string means every future cable change is a ten-minute job instead of a drywall repair.
- Network cable to the rack, the projector, and the display, at least two runs to each. Streaming devices, control processors, and projectors all want wired network, and wireless in a room surrounded by mass and metal is not reliable.
- Low-voltage control wiring to the door, the keypad location, and any motorized screen or drapery.
- Trigger wire to the screen and to any powered device you want a control system to operate.
Blocking
Solid blocking between studs at every location that will eventually hold weight: the display or screen, wall-mounted speakers, sconces, the projector mount, any shelving, and the acoustic panel locations if you know them. Two-by lumber in the stud bay costs almost nothing during framing and eliminates the entire category of problems around finding something to anchor into later.
The decisions that are genuinely permanent
- Room dimensions and the false wall depth. Once framed, your screen size ceiling is set.
- The isolation assembly. Decoupling, damping, and mass all live inside the wall. Adding them later means demolition.
- Riser location, depth, and height, along with anything routed inside it.
- Ceiling assembly and every penetration through it. Recessed can locations, in-ceiling speaker locations, the projector box.
- Circuit runs and panel work.
- Duct routing and register locations.
- Door location, swing, and size. A door that swings into the room takes floor area out of your seating plan, and a door on the screen wall is a light leak in exactly the wrong place.
What stays flexible
Almost everything else, which is worth knowing so you do not over-plan. Acoustic panels, paint, seating, the display or projector itself, the receiver and amplification, the screen, the lighting fixtures if the boxes are in the right places, and all of the decorative treatment can be changed later without touching the structure. Spend your planning energy on the permanent list and let the rest be decisions you get to revisit.
The practical version of this advice: walk the framed room with your installer or with a printed layout before insulation goes in, and physically mark every speaker, outlet, light, and mount location on the studs. An hour spent there prevents most of the regret in this project.
Design Ideas Worth Stealing
Everything above is engineering. This section is the fun part, with a note on each about what it actually costs in effort or in performance, because most idea lists skip that.
Ideas that also improve the room technically
- A fabric-wrapped front wall. Stretch acoustically transparent fabric over a light frame across the entire screen wall, with absorption behind it. It hides the speakers, hides the screen frame edges, absorbs overshoot light, and treats the front wall, all at once. It is the single best-looking upgrade that is also correct acoustically.
- Fabric-wrapped acoustic panels as a design element. Rather than hanging obvious grey rectangles, build panels in a repeating pattern with a fabric that matches the room, and place them at the reflection points. The room reads as intentionally designed rather than as treated.
- A soffit around the perimeter with cove lighting. Hides the ductwork and the wiring runs you had to drop below the ceiling anyway, gives you a place to conceal indirect lighting, and creates a visual frame. In a basement with obstructions, this turns a constraint into a feature.
- Column details on the side walls. Shallow built-out columns between panels give the room the shape of a real cinema, and the cavities behind them are useful for hiding wire and for adding depth to absorption.
- Riser-integrated step lighting. Covered earlier as a safety item. It also looks excellent.
Ideas that are purely aesthetic and worth it anyway
- A star ceiling. Fiber optic or fine LED points in a dark ceiling. Available as kits priced by area, and a legitimate weekend project if you are comfortable working overhead. Best installed before the ceiling is finished. Run the fibers to a single illuminator location so there is one thing to service.
- A marquee or backlit sign at the entry. Sets the tone before anyone opens the door and takes almost no space.
- Movie posters, hung correctly. On the rear wall or in the entry hallway, not beside the screen, and with non-reflective glazing. A lightbox frame gives them the theater-lobby look.
- A themed room. If you are going to commit to a specific film or franchise aesthetic, commit to it in the removable layer: fabric, art, seating color, lighting scenes. Keep the permanent construction neutral so the theme can change in ten years without a renovation.
- Heavy drapery on the side walls. Pleated velvet or velour panels on a track. Genuinely absorptive, adjustable, and it looks like a cinema. This is one of the oldest tricks in the room and it still works.
Concessions, bars, and the snack question
- A counter or ledge behind the back row. The most useful and least expensive version. A twelve to sixteen inch deep shelf at bar height along the rear wall holds drinks and plates, gives standing viewers somewhere to lean, and does not consume seating depth.
- A concession cabinet rather than a concession stand. A run of base cabinets with a counter, a beverage refrigerator, and a popcorn machine on top delivers most of the experience. A full built-out stand with a service window is a much larger project for a marginal gain.
- Position it outside the theater if the room is tight. A snack station in the adjacent hallway or landing keeps the food traffic, the light, and the refrigerator compressor noise out of the room you spent money making quiet. This is the version most people should build.
- A note on the refrigerator. Any compressor inside the theater will cycle on during a quiet scene. If a beverage fridge goes in the room, get one rated for low noise, or put it in the equipment closet, or put it outside.
Seating ideas beyond the recliner row
- A sectional in the front row, recliners in the back. Better for families with young kids who will not sit still in individual seats, and it costs less than a full row of powered recliners.
- Floor cushions and beanbags in front of the front row, in a room deep enough to allow it. Cheap, flexible, and popular with the audience that does not care about the viewing angle.
- Loveseats and two-seat recliners where the audience is usually two people. Consumes less width per person than two separate chairs with arms between them.
- Skip the built-in seating. Custom built-in benches and platforms look great and lock the room into one layout permanently. Freestanding seating can be rearranged, replaced, and taken with you.
What a Home Theater Actually Costs: Four Budget Tiers
Almost every home theater ideas article avoids numbers entirely. That is a disservice, because the range on this project is enormous and the difference between tiers is mostly about scope rather than taste. Here are four honest tiers with what separates them.
These figures assume the room already exists as finished, conditioned space. If you are starting from an unfinished basement, add the finish cost on top; our basement remodel cost breakdown has the framing, drywall, ceiling, flooring, and mechanical numbers for that stage.
Tier one: the finished-room upgrade, roughly $1,500 to $5,000
You have a room. You are making it better without construction.
Blackout treatment on the windows, dark matte paint on the screen wall and the ceiling in front of it, a solid-core door with perimeter gasketing, a decent soundbar or a compact 5.1 system with a subwoofer, dimmable lighting on the existing circuits, an area rug, and a few thick acoustic panels at the first reflection points. No permits, no trades, mostly weekends.
This tier is dramatically undervalued. A room with the light controlled, the door sealed, the first reflections treated, and a correctly sized display will outperform a far more expensive room that skipped those four things.
Tier two: the big-screen media room, roughly $8,000 to $15,000
A large flat panel in the 75 to 85 inch range on a properly blocked wall, a real 5.1 system with a quality center channel, theater-style recliners or a good sectional, blackout treatment, dimmable recessed lighting on multiple circuits, cable management done properly in the wall, and a modest acoustic treatment package.
Minimal construction. Possibly an added circuit and some in-wall cable routing. This is the tier most households should build, and it is the one that stays useful if the room later becomes a playroom or a guest space.
Tier three: the mid-range dedicated theater, roughly $15,000 to $30,000
Now it is a project. A ceiling-mounted or short-throw projector with a 100 to 120 inch fixed-frame screen, a full 5.1 or 7.1 system with in-wall or in-ceiling speakers, a riser for a second row, two rows of powered recliners, doubled drywall with damping compound on shared surfaces, a real acoustic treatment package including corner traps, layered lighting on a scene controller, dedicated circuits, and an HVAC fix.
This tier involves an electrician, likely an HVAC contractor, and either a general contractor or a very capable homeowner. It is where permits usually enter the picture. It is also the tier with the best ratio of experience to money, because it includes everything structural that cannot be added later.
Tier four: the purpose-built theater, roughly $30,000 to $60,000 and up
Acoustically transparent screen on a false wall with the front stage behind it, multiple subwoofers, decoupled construction with isolation clips, full acoustic design, tiered risers, integrated lighting and AV control, and an equipment closet with dedicated cooling.
The upper bound on this tier is effectively unlimited. It is worth saying plainly that the jump from tier three to tier four buys real improvement, and that the improvement is smaller than the price difference suggests to most viewers. If you are not the person who will notice a decoupled wall, you will get the great majority of the experience at tier three.
Where the money goes disproportionately
- Seating, which surprises everyone. Quality powered theater recliners commonly run over a thousand dollars per seat. Two rows of four is a five-figure line item on its own.
- Isolation, because it is labor and it is buried. Doubled drywall with damping across a ceiling is inexpensive in material and meaningful in labor.
- Trades and permits, which scale with how many separate contractors touch the room.
- The projector, where the useful range spans an order of magnitude and the top end is genuinely better in a genuinely dark room and largely wasted otherwise.
All of these ranges are national and general. Regional labor rates move them substantially, and a bid in a high-cost metro can run well above these figures for identical scope. Get three itemized bids on anything you are hiring out; spreads of thirty to fifty percent on identical scopes are common in this category.
Resale Value: What the Data Actually Says
A widely repeated line in home theater content is that a finished basement or a media room adds resale value. It is not wrong, but it is stated in a way that omits the parts that matter, and homeowners make decisions on the abbreviated version.
Here is the fuller picture.
Cost recovery is partial and highly local
The Cost vs. Value Report published by Zonda with the Journal of Light Construction tracks the average cost of remodeling projects against the value they retain at resale across a large number of United States markets. Recent editions have placed the basement remodel around the low seventies as a percentage of cost recovered nationally, which puts it in the middle of the pack for interior projects.
The national average is the least useful number in that report. The market-by-market spread on basement projects is wide, with some markets recovering a small fraction of cost and others approaching the mid eighties. Regional norms drive this: in areas where finished basements are expected by buyers, the return is steady, and in areas where they are unusual or where below-grade space is discounted, it is not.
The other half of the picture is how appraisers treat below-grade space. Finished basement square footage is generally valued at a lower rate per square foot than above-grade living area, which means a thousand finished square feet in the basement does not move the appraisal the way a thousand square feet of addition would.
A dedicated theater is a narrower proposition than a finished room
This is the part that home theater articles do not say.
The Cost vs. Value figures describe a basement remodel, meaning finished, flexible living space. A dedicated, single-purpose, windowless theater with a fixed riser, built-in seating platforms, and a false wall is a narrower asset. It appeals strongly to a subset of buyers and is a renovation project for everyone else. Fixed built-in elements are the specific risk: a buyer who does not want a theater sees demolition, not opportunity.
The practical implication is not that you should skip the theater. It is that if resale is a meaningful part of your reasoning, build toward the flexible version. A finished room with a large display, good lighting, freestanding seating, and correct wiring reads to a buyer as a bonus room, a rec room, a playroom, or a theater, whichever they need. A room with a permanent riser and a false wall reads as one thing.
What actually helps at resale
- Permitted work, so the finished square footage counts and nothing gets flagged in inspection
- Compliant egress in a finished basement, which is a code item and an appraisal item
- Flexible, freestanding furnishing rather than built-ins
- Quality of finish, which matters more to buyers than the equipment, since the equipment usually leaves with you
- Preserving the bedroom count, per the earlier warning about converting a bedroom
The honest framing
Build a home theater because you want to watch movies in it. That is a sound reason and it is the reason nearly everyone who is happy with theirs actually had. Treat any resale recovery as a partial offset rather than a return, and if you are planning to sell within a couple of years, understand that recent renovations tend to be discounted and that the Cost vs. Value ratios assume a period of ownership.
None of the above is appraisal advice for your specific home. Local market norms drive this more than any national figure, and a conversation with an agent who sells in your neighborhood will tell you more than any published report.
The Displacement Problem: Where Everything in That Room Goes
Every guide to this project describes the finished room. None of them describe the room as it exists right now, which in almost every house is not empty.
The spaces people convert into home theaters are, by definition, the spaces that were not doing anything important. That is exactly why they accumulate things. The unfinished basement zone holds the holiday decorations, the camping gear, the boxes from the last move, the outgrown baby equipment, the tool chest, the spare furniture, and the artificial tree. The bonus room over the garage holds the exercise equipment and the seasonal storage. The spare bedroom holds the guest bed, a dresser, and a closet full of everything that had nowhere else to go.
A theater build displaces all of it, and the displacement has two distinct phases that need separate plans.
Phase one: during construction
A tier three or tier four theater is a construction site for six weeks to three months. Framing, drywall hanging, and drywall sanding generate fine dust that travels well beyond the plastic sheeting, and it settles into fabric, upholstery, paper, and anything soft-sided. Concrete cutting for an egress window is worse.
The usual improvised answers do not hold up. The garage is already full, and it is the staging area the contractor wants for materials. Spare bedrooms work for about a week, after which you are living in a maze. And the far corner of the same basement is inside the dust envelope, which is how people discover that boxes of photographs and a stored mattress do not survive a drywall sanding.
Phase two: after it is finished, which is the one people miss
This is the part that separates a theater from a kitchen remodel. When a kitchen is done, everything goes back in the cabinets. When a theater is done, the storage capacity that room represented is gone permanently.
That eight hundred square feet of open basement that quietly absorbed two decades of household overflow is now a room with a screen, a riser, and eight recliners in it. Every item that lived there still exists. It still needs a home. It does not have one.
The common outcome: the project finishes, everything comes back from wherever it was parked, none of it fits, and the household ends up with overstuffed closets, a garage nobody can park in, and stacks of bins in the laundry room. The theater is beautiful and the rest of the house got worse.
The better outcome is to decide in advance that a portion of what was in that room is going to live somewhere else permanently, and to make that a line in the project plan rather than a surprise on the last day.
Sizing it: what actually comes out of a converted room
Here is the arithmetic, using the rooms people actually convert.
- A spare bedroom conversion: a queen bed and frame, a dresser, a nightstand, and a full closet of boxed items. That is generally a 5x10, which is the footprint of a small walk-in closet and holds the contents of a furnished bedroom with room to walk in.
- A bonus room over the garage: exercise equipment, seasonal decorations, and twenty to thirty boxes. Usually a 5x10, or a 10x10 if a treadmill or a large piece of equipment is in the mix.
- A partial basement conversion, where the theater takes half the space and the rest stays available for storage: typically a 5x10 for the overflow that no longer fits.
- A full basement conversion: the contents of the single largest storage area in the house. Plan on a 10x10 at minimum and frequently a 10x15, which holds roughly the contents of a two to three bedroom home.
- During construction only, for the dust-sensitive items: photographs, documents, artwork, textiles, electronics, and anything upholstered. A 5x5 handles this for most households and is the smallest and least expensive option.
If you are between two sizes, the storage unit size guide walks through what fits in each footprint, and the storage size calculator will size it from an item list in a couple of minutes.
What to store where
One category deserves specific attention in this project, because a theater build displaces it directly: the electronics and media that come out of the old setup. Retired receivers, disc players, game consoles, speakers you are replacing, and physical media collections all end up in a box during the build.
Heat is the relevant risk for that category. Electronics and optical media both degrade faster with sustained exposure to high temperatures, which is what an unconditioned garage or attic delivers for several months a year across most of the country. A climate-controlled unit is temperature-regulated, which protects stored items from the extreme heat and cold that an uninsulated garage does not. That is the right destination for anything electronic, and it costs modestly more than a standard unit.
For the rest, the boxes, the seasonal decorations, the camping gear, the furniture, a standard drive-up unit is usually the sensible choice, and the drive-up access makes loading a truckload of basement contents considerably faster.
How the timing works
The logistics of this line up well with a construction schedule if you set it up in the right order:
- Reserve the unit the week before demolition starts, not the day of. Every 10 Federal Storage location rents online with contactless move-in, so there is no office visit and no appointment to schedule around the contractor.
- Move the room out over a weekend or two before the trades arrive, so the contractor starts on schedule in a clear space.
- Use the access during the build. Twenty-four hour access means grabbing something out of the unit is not a planned errand.
- Keep the unit for a month after the room is done and sort from there. Deciding what comes back and what goes is a much better decision made calmly than made on the last day of a project with a truck idling outside.
- Downsize or close the unit once the sorting is done. Month-to-month leases mean nothing forces you to keep a unit longer than the project needs, and nothing stops you from keeping a smaller one if the permanent overflow turns out to be real.
Find a 10 Federal Storage location near you and check sizes and availability. Every facility is fully automated with online rental, contactless move-in, and month-to-month terms.
When a Home Theater Room Is the Wrong Project
A dedicated home theater is one of the least flexible rooms in a house. It has one job, it usually cannot be reconfigured without demolition, and it consumes a meaningful share of a renovation budget. There are specific situations where the honest recommendation is to build something else or nothing at all.
Do not build a dedicated theater when
- The room is under twelve feet in either dimension. Under twelve feet of width, correct side surround placement is not available and a three-seat row does not fit with clearance. Under roughly fourteen feet of depth, your screen size ceiling is low enough that a large flat panel is the better tool. Build a media room and enjoy it.
- The finished ceiling is going to be below seven feet. Beyond the code question, that height forecloses a riser, complicates projector mounting, and makes the room feel oppressive when it is dark. This is the constraint that should send you looking for a different room.
- It is the only remaining flexible space in the house. A household that may need a home office, a nursery, a guest room, or an aging-parent bedroom within five years should not permanently commit its last convertible room to a single purpose. Build the flexible version instead: good display, good sound, freestanding seating, correct wiring, nothing built in.
- The basement has an unresolved water issue. This one is not negotiable. Water gets solved completely before anything is finished, and a theater is the worst possible room to build over an active problem because of what is in it.
- You are selling within two years. Recent renovations tend to be discounted by buyers, cost recovery on this category is partial, and a single-purpose theater narrows your buyer pool. If a room needs to be made presentable before a sale, paint, lighting, and flooring return far more per dollar.
- The budget only covers the equipment. A $12,000 projector and speaker package in an untreated, unsealed, brightly painted room with a hollow-core door will underperform a $3,000 package in a room that got the fundamentals right. If the money only stretches to one, spend it on the room.
- Nobody in the household actually watches movies this way. Worth saying out loud. If viewing is mostly phones, tablets, and background television, a dedicated dark room with a fixed seating orientation will get used a few times and then become storage again. That is a real and common outcome.
And do not rent a storage unit when
We rent storage for a living, and it is still the wrong answer in several of these situations. Being clear about which ones is more useful than pretending otherwise.
- The project is a tier one or tier two upgrade. Painting a wall, hanging a display, and adding seating displaces almost nothing and takes a weekend. Move the furniture to the middle of the room and cover it. You do not need a unit for this and you should not rent one.
- What is coming out of the room should be donated or discarded. If the honest inventory is broken exercise equipment, a mattress nobody will sleep on again, boxes unopened since a move two houses ago, and a television from 2009, paying monthly rent to keep it is worse than dealing with it. A renovation is a good forcing function for that decision. Take it.
- You have genuinely unused space elsewhere. An empty half of a garage, a dry attic with a real floor, or a spare room that is actually spare will handle a short project for free. The reason a unit usually wins is that those spaces are typically not as available as people think, but if yours is, use it.
- The displacement is genuinely temporary and small. Two weeks and eight boxes is not a storage unit. It is a corner of a room and a tarp.
- You have not measured what actually needs to go. Renting the largest unit available because the basement looks full is how people pay for two years of half-empty space. Inventory first, size second. The size guide and the calculator linked earlier exist for exactly this, and it takes fifteen minutes.
The situations where a unit genuinely earns its cost are narrower and more specific: a multi-month build with real dust, a permanent loss of storage capacity that the house cannot absorb, and dust-sensitive or heat-sensitive belongings that have nowhere safe to go. If your project is one of those, a unit is worth every dollar. If it is not, keep the money in the room.
Frequently Asked Questions About Home Movie Theater Rooms
The workable minimum for a dedicated theater with correct speaker placement is roughly twelve feet wide by fourteen feet deep, with a finished ceiling of at least seven feet. Twelve feet of width allows a three-seat row with clearance for side surround speakers at the standard placement angles. Fourteen feet of depth supports a screen in the 90 to 100 inch range at recommended viewing distances. Rooms smaller than that make excellent media rooms with a large flat panel. They are difficult to build as projector-based theaters.
Measure the distance from the screen wall to where your eyes will be when seated, in inches. Divide that number by 1.63 for the conservative SMPTE 30-degree target, or by 1.34 for the THX 36-degree target. The result is your screen diagonal in inches for a 16:9 screen. At ten feet, that is roughly a 74-inch screen at the SMPTE target and an 89-inch screen at the THX target. At fourteen feet, roughly 103 inches and 125 inches respectively.
Between about 12 feet and 16 feet for a 16:9 screen, depending on how immersive you want the image. The THX recommended 36-degree viewing angle puts the seat at approximately 13 feet 5 inches. The SMPTE 30-degree minimum puts it at approximately 16 feet 3 inches. Closer than about 12 feet exceeds even the most immersive published target and typically requires head movement to take in the whole frame.
It depends on light, not budget. A projector is better in a room that can be made genuinely dark and when you want a screen larger than about 90 inches. A television is better in any room with meaningful ambient light, at sizes of 85 inches and under, and in rooms that serve more than one purpose. A projector in a bright room will be outperformed by a mid-range TV.
Seven feet is the ceiling height the International Residential Code sets as the minimum for habitable space, including the portions of basements containing it, though adoption and local amendments vary and your building department is the authority for your address. For a theater specifically, eight feet or more is what allows a second row on a riser plus safe projector mounting clearance. Between seven and eight feet, plan on a single row.
No. Acoustic panels are absorption products. They improve how sound behaves inside a room by reducing reflections and echo, and they are rated by a different standard than isolation products. Blocking sound from leaving a room requires mass, decoupling, damping, and airtight sealing, all of which are built into the wall, floor, and ceiling assemblies during construction. Both are worth doing. They solve different problems and one does not substitute for the other.
Roughly $1,500 to $5,000 to upgrade a room you already have, $8,000 to $15,000 for a large-screen media room, $15,000 to $30,000 for a mid-range dedicated theater with a projector and a riser, and $30,000 to $60,000 or more for a purpose-built theater with acoustic construction. These assume the room already exists as finished space. Finishing an unfinished basement is a separate cost on top. Regional labor rates move all of these figures substantially.
Partially, and less predictably than most articles suggest. Cost vs. Value Report data has placed basement remodels in the low seventies as a percentage of cost recovered nationally, with a wide spread between markets, and finished below-grade square footage is generally appraised at a lower rate per square foot than above-grade space. A dedicated single-purpose theater with fixed built-ins appeals to a narrower group of buyers than a flexible finished room. Local market norms matter more than any national figure, and an agent who sells in your neighborhood is the better source for your specific home.
Five plus a subwoofer is the practical baseline, and it is the layout most film soundtracks were mixed to work with. Adding a rear pair for 7.1 is worthwhile only if there is meaningful depth behind the seating; in a short room, a well-placed 5.1 outperforms a cramped 7.1. Overhead channels for object-based formats are an additional layer on top of either.
The National Electrical Code does not require dedicated circuits for entertainment equipment specifically, but a full system can approach the continuous load limit of a standard circuit, which is roughly 1,440 watts on a 15-amp circuit and 1,920 watts on a 20-amp circuit. Two dedicated 20-amp circuits, one for amplification and one for the display and sources, with lighting on a separate circuit, is the common approach for a serious room. Panel capacity and circuit design are questions for a licensed electrician.
Yes, and it is one of the easiest versions of this project. The caution is about permanent changes. Darkening the room, adding a display and seating, and keeping the closet and window intact changes nothing about the house. Building a false wall over the window or removing the closet may change whether the room still counts as a bedroom, which is determined locally and by appraisal practice. Ask a local agent or appraiser before making changes of that kind.
Possibly, and this is worth confirming early. The International Residential Code requires an emergency escape and rescue opening in basements, not only in basement bedrooms, with certain exceptions. Finishing a basement into habitable space can trigger that requirement even though nobody sleeps there. Adoption and amendments vary by jurisdiction, so confirm with your building department before framing. If your basement already has a compliant opening, make sure the theater design keeps it operable and unobstructed.
Usually yes for the framing, electrical, and mechanical work, often as separate trade permits, though requirements vary by jurisdiction. Beyond the safety reason permits exist, unpermitted finished space is commonly flagged during a buyer’s inspection, may be excluded by an appraiser from the home’s finished square footage, and can complicate financing at sale. Retroactive permitting costs more than permitting up front.
Eight to twelve inches covers the great majority of home theaters, with twelve inches as the common default. The correct height is whatever allows a seated viewer in the back row to see the bottom of the screen over the heads of the front row with a few inches to spare. Heights above twelve inches in a single step raise safety questions in a dark room that are worth putting to your building department. Make the riser at least seven feet deep so back-row recliners can fully extend.
A dark neutral in a flat or matte finish: deep charcoal, dark brown, near-black grey, or a deep navy. Sheen matters more than the specific color, because any satin or gloss surface will reflect the screen. Prioritize the screen wall, the area around the screen, and the ceiling in the front third of the room. Surfaces behind the seating matter least and can be lighter.
Plan for two separate problems. During construction, dust-sensitive belongings need to be somewhere outside the work zone for the duration of the build. After construction, a dedicated theater permanently eliminates whatever storage capacity that room provided, so a portion of its former contents will need a new home for good. For most conversions, the volume displaced is between a 5x10 and a 10x15 storage footprint depending on the size of the room. Inventory what is actually in there before choosing a size.
Building a Room You Will Actually Use
The rooms people are happiest with are not the most expensive ones. They are the ones where the fundamentals were right: a screen sized correctly for the seating distance, speakers at the angles the soundtrack was mixed for, a room dark enough that the projector could do its job, a door that sealed, and enough air moving through it that six people could sit in the dark for two hours without opening it.
None of those five things are expensive relative to the equipment. All of them are hard to add afterward. That is the argument for spending planning time on geometry, isolation, electrical, and airflow before spending money on gear, and it is the argument this guide has been making from the first section.
A short sequence that tends to work:
- Measure the room first. Length, width, finished ceiling height at the lowest point, and what sits above, below, and beside it.
- Run the screen and seating math from those dimensions before shopping for anything. Let the room tell you the screen size.
- Decide honestly whether this is a theater or a media room. Both are good outcomes. Only one of them requires a projector, a riser, and a construction schedule.
- Settle water, ceiling height, and egress with your building department before framing, especially in a basement.
- Spend on the room before the gear. Isolation, sealing, dark matte surfaces, a solid-core door, layered dimmable lighting, and the HVAC fix. Equipment can be upgraded any time. The room cannot.
- Wire for more than you are building, and put conduit between the rack, the projector, and the screen wall.
- Plan where the room’s current contents are going before demolition, and be realistic that some of it is not coming back.
That last item is the one most people leave until the week the contractor arrives, and it is the one that determines whether the finished theater improves the house or just relocates the clutter into it.
Find a 10 Federal Storage location near you and reserve a unit online before demolition starts. Contactless move-in, 24/7 access, and month-to-month terms, so the unit lasts exactly as long as the project does.
About the Author
10 Federal Storage
Our team at 10 Federal Storage has been in the self storage industry for decades. With knowledge gained from multiple universities and in the field, we are well-prepared and excited to assist with your storage needs. When you rent a unit with us, you can feel confident that our seasoned customer service team’s help will make your transition as seamless as possible. Customer satisfaction is our number one priority, and we strive to make your experience exceptional with our automated leasing options, diverse unit sizes, and a strong commitment to sustainability.