
.svg)
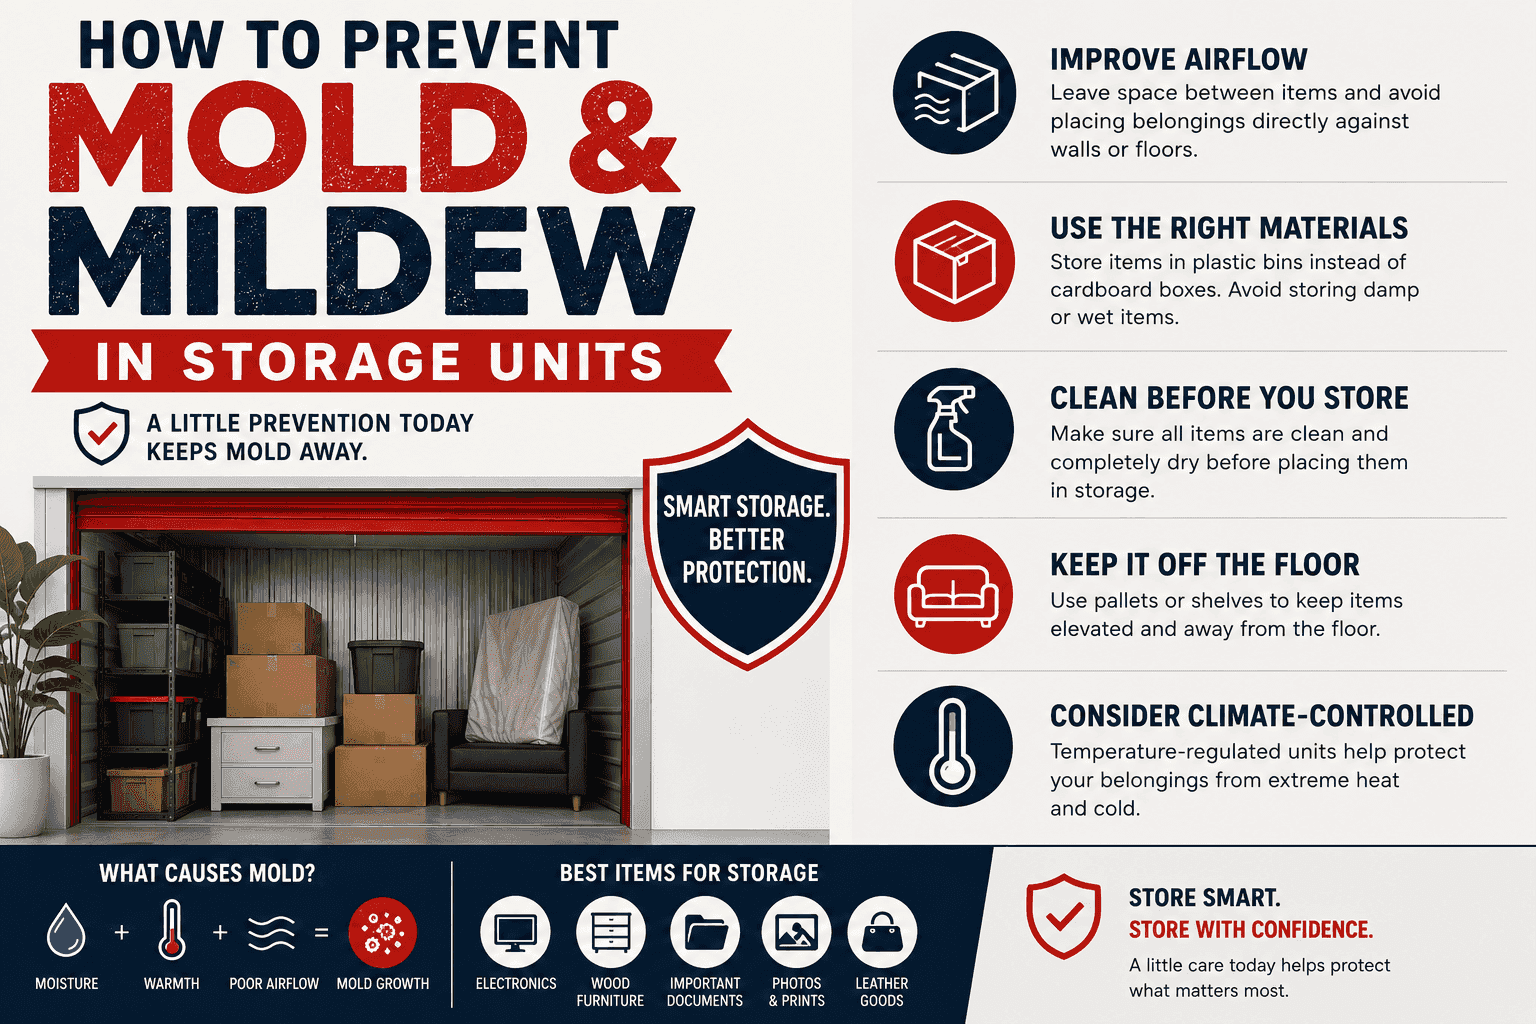
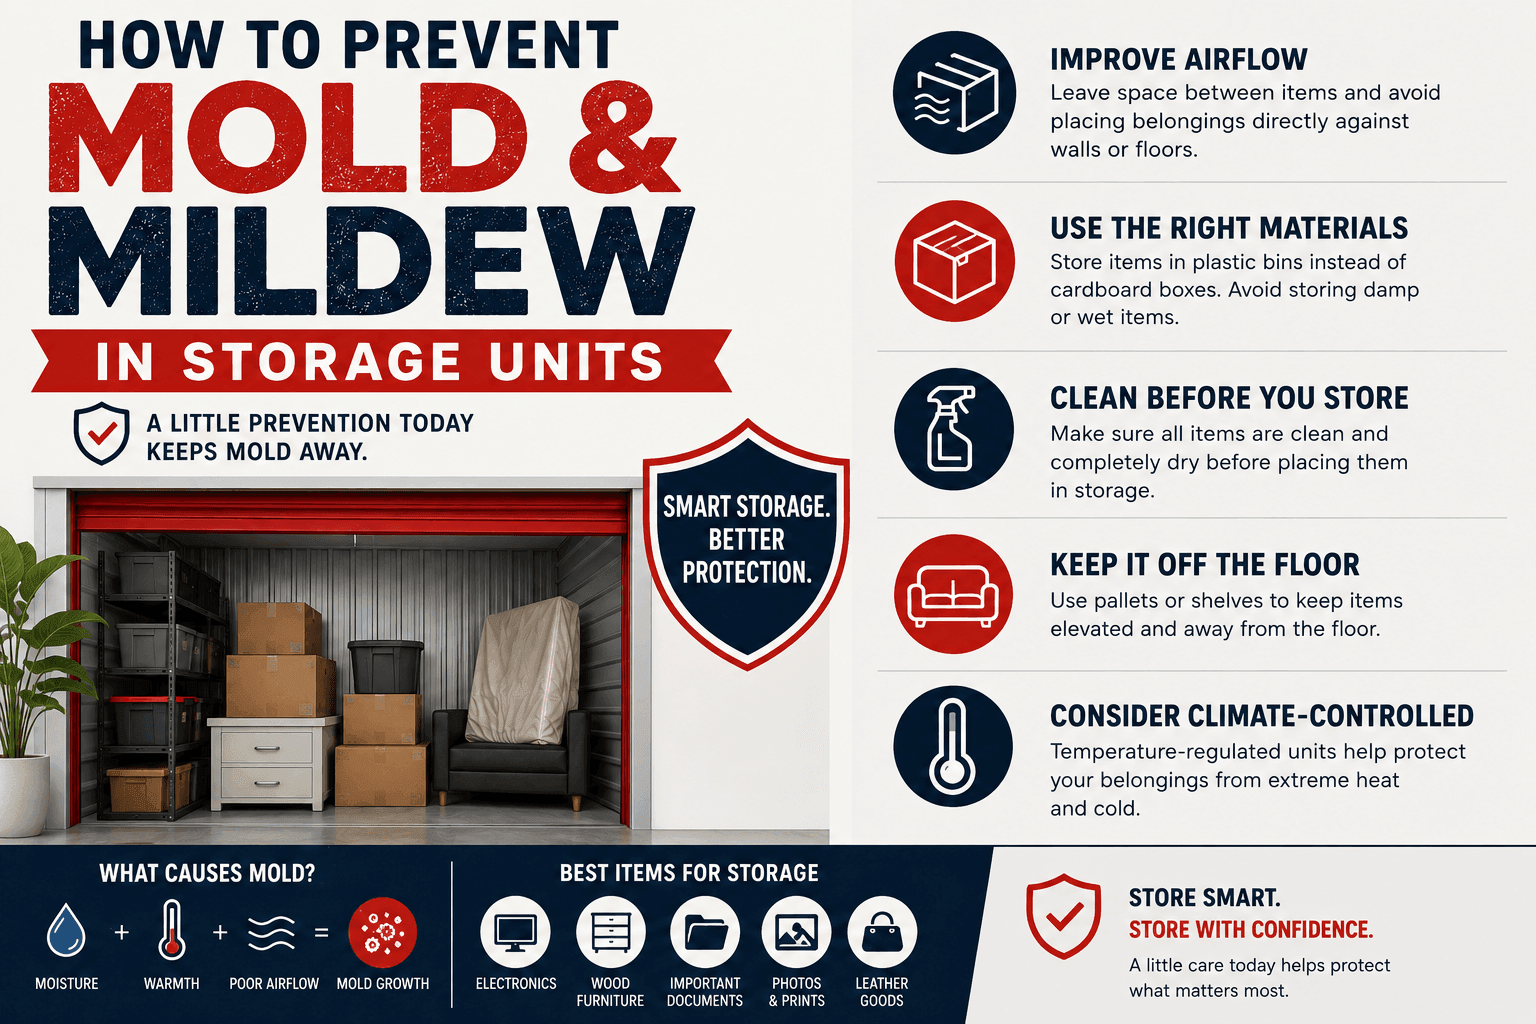
How to Prevent Mold and Mildew in Storage Units
by 10 Federal Storage
Published on August 12, 2026
Mold is the single most common complaint in self–storage, and it is also the most preventable. Almost every case traces back to the same short list of causes: something went into the unit damp, moisture found a way in, air stopped moving, or nobody checked for months. None of those require bad luck. All of them respond to a plan.
This guide covers what mold actually needs in order to grow, the specific temperature and humidity numbers that matter, how to prepare belongings before they ever reach the unit, how to load a space so air can move through it, what to do if you open the door and find a problem, and, the question almost nobody answers straight, who is generally considered responsible when stored items are damaged by mold.
What’s in This Guide
- 1. Why Mold Is the Most Common Storage Problem
- 2. Mold vs. Mildew: What You’re Actually Dealing With
- 3. The Four Conditions Mold Needs to Grow
- 4. The Numbers That Matter: Temperature and Humidity Thresholds
- 5. Where the Moisture in a Storage Unit Actually Comes From
- 6. The 24–to–48–Hour Rule
- 7. How to Prepare Items Before They Go Into Storage
- 8. How to Inspect a Unit Before You Sign
- 9. Climate–Controlled vs. Temperature–Controlled vs. Standard Units
- 10. Choosing Containers: What Works and What Fails
- 11. The Cardboard Box Problem
- 12. Desiccants and Moisture Absorbers: A Practical Guide
- 13. Elevation, Air Gaps, and Unit Layout
- 14. A Mold–Resistant Loading Plan
- 15. Material–by–Material Prevention Guide
- 16. How to Store Prints, Photographs, and Works on Paper
- 17. Monitoring Your Unit: Hygrometers and Check–Ins
- 18. The Seasonal Risk Calendar
- 19. Regional and Climate Considerations
- 20. Early Warning Signs of a Moisture Problem
- 21. What to Do If You Find Mold in Your Storage Unit
- 22. What Can Be Saved and What Should Be Discarded
- 23. Are Storage Units Responsible for Mold?
- 24. Insurance, Protection Plans, and What They Typically Cover
- 25. Documenting Your Unit Before a Problem Happens
- 26. Common Mold Prevention Mistakes
- 27. What to Look For in a Storage Facility
- 28. Store With 10 Federal Storage
- 29. Frequently Asked Questions
1. Why Mold Is the Most Common Storage Problem
Theft gets the headlines. Pests get the shudders. But if you ask anyone who has worked the counter at a storage facility what tenants actually call about, mold and mildew come up more than anything else combined.
There is a structural reason for that. A storage unit is a dark, sealed, largely undisturbed box that people fill with exactly the materials mold prefers to eat, paper, cardboard, cotton, wool, leather, wood, upholstery foam, and then leave alone for months at a time. Every condition that a homeowner naturally disrupts by living in a space, opening windows, running HVAC, and moving things around is absent in a storage unit by design.
The good news is that this cuts both ways. Because storage mold is almost always a moisture problem rather than a mysterious one, it responds extremely well to a handful of deliberate decisions made before the door closes. The difference between a unit that opens clean after two years and one that opens with a musty wall of ruined boxes is rarely luck. It is usually four or five choices made on move–in day.
What Mold Actually Costs You
The financial damage is real, but the pattern of it surprises people. Mold rarely destroys everything evenly. Instead it tends to take out the items you were least willing to lose:
- Irreplaceable paper. Photographs, letters, certificates, children’s artwork, and family documents are among the most vulnerable materials and the least replaceable.
- Upholstered furniture. Foam and batting hold moisture deep inside, where surface cleaning cannot reach.
- Textiles with sentimental value. Wedding dresses, quilts, uniforms, and heirloom linens are natural–fiber magnets for mildew staining.
- Anything porous that got damp early. Mattresses, books, and cardboard often cannot be salvaged in a way that satisfies anyone.
Meanwhile the plastic bins, the metal shelving, and the dishes come out fine. That asymmetry is why prevention is worth real effort even for a modestly valued unit.
A Note on Health
Mold exposure affects people differently, and reactions range from nothing at all to meaningful respiratory irritation, particularly for people with asthma, allergies, or compromised immune systems. This guide is about protecting property, not about diagnosing anyone. If you believe mold exposure is affecting your health, that is a conversation for a healthcare provider rather than a storage blog. What this guide will do is tell you how to handle a moldy unit in a way that limits your exposure while you deal with it.
2. Mold vs. Mildew: What You’re Actually Dealing With
People use these words interchangeably, and for practical storage purposes that is mostly fine, the prevention strategy is identical. But knowing the difference helps you read what you are looking at when you open the door.
Mildew
Mildew is a surface–dwelling growth. It typically appears as a flat, powdery, or downy patch in white, gray, or pale yellow, and it tends to sit on a material rather than penetrating into it. On fabric it often looks like a dusting of powder. On a shower curtain or a leather jacket it can look like a fine gray bloom.
Because mildew stays near the surface, it is the more recoverable of the two. Caught early on a non–porous or tightly woven material, it can often be brushed off outdoors and cleaned without permanent loss, though staining is common on light–colored fabrics.
Mold
Mold is the broader category, and the varieties that cause storage damage tend to be fuzzy or slimy rather than powdery, and they come in a wider range of colors, green, black, blue, and orange are all common. Critically, mold sends structures down into porous materials. By the time you see a spot on the outside of a cardboard box, the growth has usually gone through it.
That penetration is why the recovery advice diverges. Surface mildew on a plastic bin is a wipe–down. Mold in the foam core of a couch cushion is a decision about whether the couch is worth keeping.
The Practical Takeaway
Do not spend energy trying to identify which one you have. Both mean the same thing operationally: there is more moisture in this unit than there should be, and the source has not been dealt with. Treat any growth as a signal to find the water, not just to clean the spot.
3. The Four Conditions Mold Needs to Grow
Mold needs four things at once. Remove any one of them and growth stops. Understanding which of the four you can actually influence in a storage unit is the entire strategy.
1. Spores
Mold spores are everywhere. They are in outdoor air, they ride in on your clothes, they are in the boxes you pack, and they are present in every building on earth. There is no such thing as a spore–free storage unit, and any facility that suggests otherwise is overselling.
Can you control this? No. Stop trying. Every ounce of effort spent on this variable is wasted.
2. A Food Source
Mold consumes organic material. In a storage unit, that means cardboard, paper, cotton, linen, wool, silk, leather, wood, natural–fiber upholstery, foam, drywall paper facing, and even the dust and skin cells that settle on plastic and metal surfaces.
Can you control this? Partially. You can reduce cardboard, clean items before storing them so there is no residue to feed on, and favor plastic, glass, and metal where you have the choice. But you cannot eliminate organic material from a storage unit, that is generally what people are storing.
3. Moderate Temperature
Most molds are comfortable in roughly the same range people are. Growth accelerates as temperature climbs, and warm conditions combined with dampness are considerably worse than either alone. Cold slows mold significantly, but a cold unit is not a safe unit if it is also damp, growth can occur at surprisingly low temperatures.
Can you control this? Yes, with the right unit type. This is one of the two real levers.
4. Moisture
This is the one that matters. Mold cannot grow without water, not in any form, not under any conditions. Moisture is the limiting factor in essentially every storage mold case, and it is the variable that responds most directly to what you do.
Can you control this? Yes, and this is where nearly all of your effort should go.
The Strategy in One Sentence
Because spores are unavoidable and food sources are mostly what you are storing, preventing mold in a storage unit is almost entirely an exercise in moisture management, with temperature control as a strong supporting player. Every recommendation in the rest of this guide is a variation on that theme.
4. The Numbers That Matter: Temperature and Humidity Thresholds
Most storage advice tells you to “keep humidity low” and stops there, which is not actionable. Here are the actual thresholds, drawn from federal environmental guidance and from the conservation bodies that manage archives and museum collections.
Relative Humidity: The Master Number
Relative humidity, or RH, measures how much water vapor the air is holding compared to the maximum it could hold at that temperature. It is the number to watch.
- Above roughly 60% RH: Conditions favor mold growth. Federal indoor–air guidance identifies 60% as the line to stay under, and conservation guidance often treats the 60–65% range as the point where risk climbs sharply.
- 30–50% RH: The generally recommended target range for indoor environments, and the range most often cited for storing sensitive materials.
- Below about 30% RH: Now you have the opposite problem. Very dry air can cause wood to crack, adhesives to fail, paper to become brittle, leather to stiffen, and photographic emulsions to curl or flake. Drier is not infinitely better.
If you remember one number from this entire guide, make it 60%. Staying below it is the single most protective thing you can do.
Temperature
Conservation guidance for mixed collections of paper, books, and photographs generally points toward keeping temperature at or below roughly 70°F, with the note that cooler and drier is usually better for longevity. Mold activity tends to become a serious concern when high humidity coincides with temperatures in the upper 70s and above.
For general household storage, most climate–controlled units in the industry are maintained somewhere in the 55–80°F band. That range is comfortable for the large majority of belongings, though genuinely archival materials benefit from the cooler end of it.
The Number Nobody Mentions: Fluctuation
This is where standard storage advice falls short, and it matters more than most people realize.
It is not only the average conditions that damage things, it is the swing. When temperature and humidity cycle up and down repeatedly, materials absorb and release moisture over and over. Paper, wood, leather, and textiles are hygroscopic, meaning they equilibrate with the surrounding air. Each cycle expands and contracts them slightly. Over months, that repeated movement causes cockled paper, warped covers, cracked photographic emulsions, split wood joints, and lifted veneer.
Conservation guidance for photographic collections suggests holding a set point somewhere between 30% and 50% RH without letting it cycle more than about five percentage points in a day. That is a demanding standard that no ordinary storage unit will meet perfectly, but it explains why a stable unit outperforms an unstable one even when both average out to the same number.
A drive–up unit in a humid climate might average an acceptable RH over a month while swinging thirty points between a rainy night and a hot afternoon. A climate–controlled interior unit averaging the same number with far less movement is meaningfully better for your belongings, and the difference will not show up in a monthly average.
Condensation and Dew Point
There is one more mechanism worth understanding, because it explains the most confusing mold cases, the ones where the unit seems dry and nothing leaked.
When warm, moist air contacts a surface that is cooler than the air’s dew point, water condenses on that surface. In a storage unit, the cold surfaces are typically the concrete slab, exterior metal walls, and the underside of a metal roll–up door. On a humid morning after a cool night, moisture can bead on those surfaces even though no water entered from outside.
This is the entire reason for two rules you will see repeated throughout this guide: keep belongings off the floor, and keep them away from exterior walls. Those are not superstitions. They are dew point management.
5. Where the Moisture in a Storage Unit Actually Comes From
To manage moisture, you have to know where it enters. There are six realistic pathways, and they are not equally likely.
1. You Brought It In (Most Common by Far)
This is the leading cause and the one nobody wants to hear. A comforter that was folded while slightly damp. A tent packed after morning dew. Patio cushions stored at the end of a rainy week. A refrigerator with a little water in the drip pan. Towels from a bathroom that never fully dried. A carpet cleaned two days before the move.
Each of these introduces a self–contained moisture source directly into a sealed space, wrapped in exactly the material mold wants to eat. Nothing has to leak. Nothing has to go wrong with the building. The unit does what it is supposed to do and the item still molds.
2. Condensation on Cold Surfaces
Covered in detail above. Concrete slabs are the biggest offender, because concrete stays cool, holds moisture, and can wick groundwater up through the slab even when it looks bone dry.
3. Humid Air Exchange
Every time a door opens, outside air comes in. In a humid climate, a five–minute visit on an August afternoon replaces the air in the unit with air that may be well above 70% RH. Materials inside absorb that moisture, and in a non–conditioned unit, it does not necessarily leave again.
4. Water Intrusion
Roof leaks, failed door seals, wall seams, cracked slabs, and drainage that pushes water toward a building rather than away from it. This is the category most people assume is responsible, and it does happen, but it accounts for fewer cases than tenant–introduced moisture.
5. Flooding and Severe Weather
Distinct from routine leaks. Ground–level units in flood–prone areas carry real risk during major storm events, and the aftermath is typically a total–loss situation for porous goods rather than a cleanup.
6. Trapped Moisture in Sealed Packaging
This one is counterintuitive and it catches careful people. Wrapping something in plastic sheeting or sealing it in an airtight bag does not remove the moisture that is already inside it. It traps it. A slightly damp item sealed in plastic creates a small, humid microclimate that is close to ideal for mold. Sealing is only protective when the item going in is genuinely dry.
6. The 24–to–48–Hour Rule
Here is the most useful single fact in mold prevention, and it comes straight from federal indoor–air guidance:
If wet or damp materials are dried within 24 to 48 hours, mold will usually not grow. After that window, colonization typically begins, and the situation shifts from a drying job to a remediation job.
That window is short, and it has three practical consequences for anyone using storage.
Consequence 1: The Pre–Storage Drying Window Is Real
If you wash a comforter and box it the same afternoon, you have not given it time to reach genuinely dry. “Dry to the touch” and “dry throughout” are different states, especially for thick textiles, upholstery foam, and anything with a dense core. Build in a two–to–three day buffer between cleaning and packing.
Consequence 2: Discovery Speed Determines Outcome
A leak that starts the day after your last visit and is discovered six months later has had six months to work. The same leak found in week one is a mopping job and a phone call. This is the entire argument for scheduled check–ins, covered in Section 17.
Consequence 3: After a Weather Event, Move Fast
If a significant storm passes through your area, checking your unit within a day or two is worth the trip. Finding water on the slab on day one is a completely different situation from finding it on day sixty, and the difference is measured in whether your belongings survive.
7. How to Prepare Items Before They Go Into Storage
Everything that goes into a unit should be clean and genuinely dry. Clean matters because residues, food, body oils, perfume, lotion, dirt, pet dander, are food sources that give spores a head start. Dry matters for the reasons already covered.
Textiles, Clothing, and Linens
Launder everything, including items that look clean. Invisible body oils and food residue feed mold and attract pests. Dry completely, then give it another day. Thick items like comforters, coats, and quilts hold moisture in their cores long after the surface feels dry.
Skip starch and fabric softener on anything going into long–term storage; both leave residues that can attract pests and can yellow over time. For genuinely valuable textiles, launder or dry clean, then let items breathe for several days before packing, and remove dry–cleaning plastic entirely, that plastic traps solvent vapor and moisture.
Upholstered Furniture
Vacuum thoroughly, including under cushions and along seams. Spot–clean stains with a fabric–appropriate cleaner and allow a minimum of 48 hours of drying in a well–ventilated room, longer if you used any wet–extraction method. Steam cleaning a sofa the week of a move is one of the more common ways people accidentally ruin a sofa.
Wood Furniture
Dust and clean with an appropriate wood cleaner, then dry fully. A coat of paste wax on solid wood adds a modest moisture barrier and is worth the effort on pieces you care about. Open drawers and doors to air out interiors before packing, and remove any drawer liners that might hold moisture.
Our full walkthrough on packing furniture for climate–controlled storage covers the material–specific prep in more depth.
Leather
Clean with a leather–specific cleaner and apply a conditioner. Leather is both organic and hygroscopic, which makes it one of the more mold–prone materials in a typical unit. Never seal leather in airtight plastic, it needs to breathe. Cotton sheets or breathable garment bags are the correct covering.
Appliances
Appliances are a leading source of self–inflicted mold, because they hold water in places you do not see.
- Refrigerators and freezers: Defrost completely, empty and dry the drip pan, clean the interior, and store with the door propped slightly open. A sealed refrigerator door is a guaranteed mold chamber.
- Washing machines: Drain fully, including the hoses and the pump filter. Leave the lid or door open.
- Dishwashers: Drain the sump, wipe the interior and the door gasket, and prop the door.
- Small appliances: Coffee makers, kettles, humidifiers, and steamers all hold residual water in reservoirs and lines. Empty and dry each one.
Outdoor and Recreational Gear
Tents, tarps, sleeping bags, camp chairs, coolers, patio cushions, pool equipment, and kayaks are among the most reliable sources of storage mold, because they are frequently packed while damp at the end of a season.
Set every piece up or lay it out at home and let it dry for at least a full day before packing. Store sleeping bags loosely rather than compressed. Empty and dry coolers and store them with the lid propped.
Kitchenware and Dishes
Dry thoroughly, including the underside of ceramic mugs and bowls where a ring of water hides in the unglazed foot. Do not wrap dishes in newspaper, the ink transfers and the paper holds moisture. Unprinted packing paper or bubble wrap is the right call.
The Universal Rule
If you are not certain something is dry, it is not dry. Give it another day. There is no packing mistake more expensive and less necessary than sealing a damp item into a box you will not open for a year.
8. How to Inspect a Unit Before You Sign
Before you move a single box in, spend five minutes actually inspecting the space. This is the cheapest insurance in the entire process, and almost nobody does it.
The Walkthrough
- Smell first. Step in and breathe before you look at anything. A musty, earthy odor means there is active or recent moisture, even if you cannot see it. Trust your nose over your eyes.
- Look up. Check the ceiling and the joint where the ceiling meets the walls. Water stains, rust streaks, discoloration, or chalky mineral deposits indicate past intrusion.
- Check the walls. Look at the lower two feet especially. Staining, bubbling, rust at panel seams, or a visible tide line means water has stood there.
- Examine the floor. Run your hand across the slab. Look for dark patches that suggest ongoing dampness, efflorescence (the white powdery mineral bloom that appears when water moves through concrete), and cracks.
- Test the door seal. Close the door and look for daylight around the edges and along the bottom. Light means air, and air means humidity, dust, and sometimes water.
- Look at the corners. Corners are where air stagnates and where growth appears first. Check all four.
- Step outside and look at the grade. Does the ground slope away from the building or toward it? Is there a downspout discharging near your door? Where does water go during a heavy rain?
If You Find Something
Say so before you move in, not after. Ask for a different unit or ask what will be done about it, and get the answer in writing, even if that just means a follow–up email summarizing the conversation. Photograph anything you noticed, with the date visible, before your belongings are inside.
This matters for a reason that becomes clear in Section 23: documentation created before your property was in the unit is far more useful than documentation created after a problem appears.
Ground Floor vs. Upper Floor
If a facility offers both and you are choosing, upper–floor interior units generally carry lower moisture risk. They sit above ground–level water intrusion, they are less exposed to slab condensation, and in most buildings they are within the conditioned envelope. The tradeoff is convenience, you are using an elevator or stairs instead of backing up to a door. For long–term storage of anything sensitive, that tradeoff is usually worth making.
9. Climate–Controlled vs. Temperature–Controlled vs. Standard Units
These terms get used loosely across the industry, and the differences matter enormously for mold. Here is what each generally means, with the caveat that definitions vary by operator, so it is always worth asking directly what a specific facility means by the term.
Standard or Drive–Up Units
No conditioning. Interior temperature and humidity track outdoor conditions, often with amplification, a metal–roofed drive–up unit can run considerably hotter than the outside air on a summer afternoon.
These are perfectly good for the right contents: tools, lawn equipment, plastic bins of holiday decorations, vehicles, and anything genuinely non–sensitive. They are a poor choice for textiles, paper, photographs, electronics, upholstered furniture, wood furniture, musical instruments, or anything you would be upset to lose.
Temperature–Controlled Units
These hold temperature within a range but do not actively dehumidify. That is a meaningful improvement over an unconditioned unit, and for a great many items it is entirely sufficient.
Be clear on what it does and does not do. It takes temperature extremes off the table, and it substantially narrows the daily and seasonal swing, which is the fluctuation damage described in Section 4, and a bigger factor in slow deterioration than most people credit. What it does not give you is a humidity number. In a humid region, moisture management inside the unit remains yours to handle with sealed containers, desiccant, elevation, air gaps, and a hygrometer.
Climate–Controlled Units
Here the term is used more loosely than most people realize, and it is worth understanding before you assume what you are buying. At some operators, “climate–controlled” means both temperature and humidity are actively managed. At many others, including plenty that advertise the phrase prominently, it means temperature is regulated within a range, typically somewhere around 55–80°F, without active dehumidification. Both are genuine upgrades over an unconditioned unit. They are not the same product.
What is consistent is that climate–controlled units are almost always interior spaces inside a conditioned building, and that carries real benefits beyond the thermostat reading: far less air exchange with outdoor air, no uninsulated metal roll–up door acting as a condensation surface, no direct sun load on the walls or roof, less dust, less light, and better pest resistance.
This is exactly why Section 27 recommends asking a facility directly rather than assuming. “Climate–controlled” tells you a unit is conditioned. It does not, by itself, tell you whether humidity is being actively removed.
For mold prevention, moving from an unconditioned unit into a conditioned interior one is still the highest–leverage single decision available to a tenant. It addresses temperature directly, and it removes several of the moisture mechanisms described in Section 5, constant humid air exchange, condensation on uninsulated exterior surfaces, and the wide swings that drive the fluctuation damage covered in Section 4. Whether it also actively manages humidity is a separate question, and one worth asking.
Our complete guide to climate–controlled storage covers unit types, contents, and cost considerations in more depth.
The Honest Caveat
Climate control substantially reduces mold risk. It does not eliminate it, and no operator can promise that it does.
Mold spores exist in every indoor environment, and a climate–controlled unit is still subject to a damp item being carried in, a mechanical failure, a plumbing issue, a severe weather event, or a door left open. Industry legal commentary is fairly direct on this point: because mold occurs naturally in indoor environments generally, an operator cannot guarantee that property in any space, including a climate–controlled one, will be free from the risk of mold.
That is not a reason to skip climate control. It is a reason to combine climate control with the preparation, packing, and monitoring practices in this guide rather than treating it as a substitute for them. Anyone selling you a mold–proof unit is selling something that does not exist.
10. Choosing Containers: What Works and What Fails
What you pack things in matters nearly as much as where you store them.
Rigid Plastic Bins With Gasketed Lids, Best General Choice
Sealed plastic bins keep ambient humidity out, keep pests out, resist crushing, stack uniformly, and do not feed mold. For most household contents, this is the correct default.
The critical condition: contents must be genuinely dry going in. A sealed bin is a moisture trap in both directions. It will keep humidity out beautifully, and it will keep humidity in just as beautifully. Add a desiccant pack to each bin as insurance.
Clear bins are worth the small premium for the ability to inspect contents visually during check–ins without unpacking.
Vacuum–Sealed Bags, Good With Limits
Excellent for clean, fully dry textiles: linens, seasonal clothing, blankets. They remove both air and volume.
Do not use them for:
- Leather or fur, needs to breathe; compression causes permanent creasing.
- Down or feather items, long–term compression damages loft irreversibly.
- Structured garments, suits, tailored coats, and anything with interfacing will not recover its shape.
- Anything not confirmed bone dry, a vacuum bag is the most efficient mold incubator you can buy.
Acid–Free Archival Boxes, Best for Paper and Photographs
For documents, photographs, prints, and books, archival–quality enclosures outperform both cardboard and plastic. They buffer against humidity swings, they do not off–gas acids into your materials, and they allow slow moisture exchange rather than trapping it. See Section 16 for the full treatment.
Cardboard, Use With Caution
See the next section. Cardboard is not disqualified, but it is the weakest link in most units and deserves its own discussion.
What to Avoid Entirely
- Plastic sheeting or shrink wrap directly on furniture. This is the mistake that ruins the most furniture. Wrapping a sofa or a wood dresser in plastic seals moisture against the surface and creates a humid microclimate. Use breathable cotton sheets, moving blankets, or purpose–made furniture covers instead.
- Garbage bags. Non–breathable, prone to tearing, and easy to mistake for trash.
- Original cardboard appliance boxes stored long–term. They hold moisture and attract pests.
- Dry–cleaning plastic left on garments. Remove it before storing.
11. The Cardboard Box Problem
Cardboard deserves its own section because it is what most people default to, and because it fails in a specific way that compounds.
Why Cardboard Is a Liability
Corrugated cardboard is paper, which means it is both hygroscopic and edible. It pulls moisture out of humid air and holds it. It provides a food source. And because it sits in direct contact with the concrete slab and with the items inside it, it transfers whatever moisture it absorbs in both directions.
The failure pattern is predictable. A box on a concrete floor wicks slab moisture from below. The bottom softens. Mold establishes in the corrugation, where you cannot see it. It spreads to the contents. By the time there is a visible spot on the outside, the inside is well along. And because boxes are stacked and touching, the growth moves laterally to neighbors.
When Cardboard Is Acceptable
Cardboard is fine for short–term storage of non–sensitive contents in a climate–controlled unit, elevated off the floor, with air gaps between stacks. Plenty of people store this way for a few months with no issue at all.
If You Are Using Cardboard Anyway
- Use new, double–walled boxes rather than used grocery–store boxes, which arrive with unknown moisture history and sometimes with food residue.
- Never place a box directly on the slab. Pallets, plastic risers, or shelving.
- Leave a few inches between stacks and between stacks and walls.
- Do not overfill, a bulging box cannot be stacked stably and its seams open.
- Put a desiccant pack in each box.
- Reserve cardboard for the items you would replace without heartbreak, and use plastic for everything else.
The Hybrid Approach
Most people do not need to buy plastic bins for an entire household. A practical compromise: use plastic bins for anything organic, sentimental, or difficult to replace, textiles, paper, photographs, electronics, collectibles, and use cardboard for the rest. That gets you most of the protection for a fraction of the cost.
12. Desiccants and Moisture Absorbers: A Practical Guide
Nearly every storage guide says “use silica gel.” Almost none of them explain how much, which type, or the single most important fact about them, which is that they have a finite capacity and stop working.
The Fact Everyone Omits
A desiccant is a sponge, not a dehumidifier. It absorbs moisture until it is saturated, and then it does nothing at all. A silica packet placed in a bin in March may be fully spent by June, at which point it is an inert lump of beads providing zero protection for the remaining ten months.
This is why desiccants are a supplement to good conditions, never a substitute for them. If you are relying on desiccants to compensate for a damp unit, you are relying on something that will quietly stop working without telling you.
Silica Gel
The most common option. Works best inside sealed containers, where it has a defined volume of air to manage.
- Best for: Inside sealed bins, camera cases, instrument cases, boxes of documents, and enclosed spaces generally.
- Rough guidance: A small packet is meaningless in a large bin. For a standard tote, a substantial packet or several small ones is more realistic. Manufacturer sizing guidance is worth following rather than guessing.
- Indicating vs. non–indicating: Buy indicating silica if you can. It changes color when saturated, which converts an invisible problem into a visible one. This is genuinely worth the extra cost.
- Rechargeable: Many silica products can be dried in a low oven and reused indefinitely. Follow the product instructions.
Calcium Chloride Absorbers
The tub–style products that collect water in a reservoir. These pull considerably more moisture than silica and are designed for open room air rather than sealed containers.
- Best for: The open volume of the unit itself, especially in non–climate–controlled units in humid regions.
- Critical warning: The collected liquid is a corrosive brine. If a tub tips or overflows, it will damage whatever it lands on. Place these at floor level, away from and never above anything you care about, and on a tray.
- Capacity: These fill up. In a humid climate a tub can saturate in weeks. They require a replacement schedule, not a one–time placement.
Activated Charcoal
Modest moisture absorption, but genuinely effective on odor. Useful as a supplement in units with a musty smell, and a reasonable addition to boxes of books or textiles.
Cedar
Cedar blocks and hangers are often marketed for storage. Cedar has some pest–deterrent properties, but it is not a meaningful desiccant. Do not count it as moisture control.
Portable Dehumidifiers
Genuinely effective, and generally not an option, the overwhelming majority of storage units have no electrical outlet, and most facilities do not permit tenant–operated appliances. Do not plan around this unless you have confirmed both the outlet and the permission with the facility.
A Realistic Desiccant Plan
- Indicating silica packets inside every sealed bin and box.
- One or two calcium chloride tubs on the floor of the unit if it is not climate–controlled or if you are in a humid region.
- Activated charcoal near textiles and books.
- A calendar reminder to check and replace them. This step is the one people skip, and skipping it makes the other three decorative.
13. Elevation, Air Gaps, and Unit Layout
How you arrange a unit is a moisture–control decision, not just an organization decision.
Get Everything Off the Floor
The concrete slab is the coldest surface in the unit, it holds moisture, and it can wick groundwater upward even when it appears dry. Anything resting directly on it is in the worst microclimate available.
Options, roughly in order of preference:
- Freestanding steel or plastic shelving. Best solution overall, elevates everything, creates airflow on all sides, and makes the unit dramatically easier to use.
- Plastic pallets. Inexpensive, moisture–proof, and easy to arrange.
- Wooden pallets. Cheap and widely available, but wood is organic and can itself mold if the slab is damp. Acceptable, not ideal.
- 2x4s laid flat. A workable improvisation for furniture.
- Rigid foam insulation board. Adds a thermal break as well as elevation, which reduces condensation on the item above. Underused and effective.
Two to four inches of clearance is enough to make a meaningful difference. You are breaking direct contact and allowing air to pass underneath.
Pull Away From the Walls
Exterior walls are the second–coldest surfaces and the second most likely place for condensation. Leave four to six inches between your belongings and every wall. That gap allows air circulation and keeps porous materials out of contact with any condensation that forms.
This is especially important for the wall shared with the roll–up door, which is typically uninsulated metal.
Leave Gaps Between Stacks
Do not build one solid, wall–to–wall mass. Air that cannot move becomes stagnant, and stagnant air holds moisture against surfaces. A few inches between stacks lets the unit breathe and keeps a localized problem from spreading laterally through contact.
Leave a Center Aisle
An aisle down the middle serves two purposes. It maintains airflow through the center of the unit, and it lets you actually inspect your belongings during check–ins. A unit packed solid to the door cannot be monitored, which means a small problem gets a year to become a large one before you see it.
Our guide to organizing a storage unit covers layout planning in more detail.
Do Not Stack to the Ceiling
Beyond the safety issue, warm moist air rises and collects near the ceiling. Leaving headroom keeps your belongings out of the most humid air in the unit and preserves circulation across the top.
14. A Mold–Resistant Loading Plan
Putting the previous sections together, here is a practical loading sequence.
Step 1: Prepare the Empty Unit
Sweep the slab. Confirm it is dry. If the facility permits it, consider laying down a moisture barrier, heavy polyethylene sheeting or interlocking plastic floor tiles, before anything comes in. Ask first; some facilities have policies about floor coverings.
Step 2: Build the Perimeter Framework
Set shelving and pallets first, four to six inches off every wall. Establish the center aisle now, before there is anything in the way.
Step 3: Place Large Furniture
Furniture goes on pallets or risers along the sides, covered with breathable cotton sheets or moving blankets, never plastic sheeting. Leave drawers and doors slightly ajar so interiors can breathe. Stand mattresses on edge, elevated, with a breathable cover rather than a sealed plastic bag.
Step 4: Load Shelving From the Bottom Up
Heavy plastic bins on lower shelves, lighter above. Keep bins about an inch apart rather than pressed together.
Step 5: Position Sensitive Items Strategically
Paper, photographs, textiles, electronics, and instruments belong in the interior of the unit, away from the door, away from exterior walls, elevated, and toward the middle of the vertical range rather than the floor or the ceiling. This is the most environmentally stable zone in any unit, and it is where your irreplaceable things should live.
Step 6: Deploy Moisture Control
Desiccant packs already inside sealed containers. Calcium chloride tubs at floor level in open areas, on trays, away from anything they could damage if they tip.
Step 7: Place a Hygrometer
Put a digital hygrometer at roughly eye level near the aisle, where you can read it the moment you open the door without moving anything. If it records minimum and maximum values, better, you will see what happened between visits.
Step 8: Document
Photograph the finished layout. Photograph the walls, floor, and ceiling while they are still visible. Note the date. Section 25 explains why this matters more than it seems.
For a broader walkthrough of loading order and space efficiency, see our guide on how to pack a self storage unit the right way.
15. Material–by–Material Prevention Guide
Different materials fail in different ways. Here is what each needs.
Upholstered Furniture
Among the highest–risk categories, because foam and batting hold moisture deep inside where surface treatment cannot reach and where you cannot see growth beginning. Vacuum thoroughly, allow extended drying after any cleaning, elevate on pallets, cover with breathable material, and leave air gaps on all sides. Climate control is strongly advisable for anything upholstered that you intend to keep.
Wood Furniture
Wood expands and contracts with humidity, which is why fluctuation matters as much as absolute level. High humidity causes swelling, veneer lift, joint failure, and mold on unfinished surfaces. Very low humidity causes cracking and joint separation. Clean, wax, elevate, cover breathably, and prop drawers open.
Mattresses
Dense, deeply porous, and nearly impossible to remediate once contaminated. Use a breathable mattress cover rather than a sealed plastic bag, store on edge and elevated, and keep it away from walls. Honestly assess whether a mattress is worth long–term storage costs at all, the economics frequently favor replacement.
Clothing and Textiles
Launder and fully dry. Store in sealed plastic bins with desiccant, or vacuum–sealed if appropriate for the fabric. Avoid cardboard for anything you care about. For valuable garments, use acid–free tissue at fold lines and refold periodically, since permanent creases become permanent weak points.
Leather and Suede
Clean, condition, and let it breathe. Cotton or breathable garment bags only. Stuff bags and boots with acid–free tissue to hold shape. Check these more often than anything else in the unit, leather mildews readily and shows it early.
Electronics
Humidity causes corrosion on contacts and boards, and condensation inside a device can cause failure that is not visible from outside. Remove all batteries. Store in original boxes if available, otherwise sealed bins with desiccant. Climate control is close to mandatory for anything expensive.
Books
Paper is hygroscopic and bindings are organic. Store books flat or upright, never resting on the fore–edge, which distorts the spine. Use sealed bins with desiccant, elevated. Do not pack so tightly that air cannot reach the pages. Leather bindings need slightly more humidity than paper alone, which is one more argument for a stable middle range rather than aggressive drying.
Musical Instruments
Wooden instruments are exceptionally sensitive to both humidity extremes and fluctuation. Store in hard cases with a case humidifier or desiccant as the climate requires, loosen string tension, and use climate control without exception. A guitar or violin in a non–conditioned unit through one summer is a repair bill.
Artwork
Canvas, wood stretchers, paper, and organic pigments are all vulnerable. Store paintings upright, never flat and never stacked face to face. Separate pieces with acid–free board. Wrap in breathable material rather than plastic. Climate control is essential for anything of value.
Appliances
Covered in Section 7. The rule is always the same: drain everything, dry everything, prop every door.
Sports and Outdoor Equipment
Dry completely before storage, this category is a top source of storage mold. Clean and dry athletic gear, empty and dry water bottles and hydration bladders, air out sleeping bags, and store them loosely rather than compressed.
Collectibles
Comics, cards, vinyl, stamps, and coins are all humidity–sensitive in specific ways, paper substrates warp and foxing appears, vinyl warps, and metals tarnish and corrode. These belong in climate control, in archival enclosures, elevated, in the interior of the unit.
16. How to Store Prints, Photographs, and Works on Paper
Prints deserve their own section because they are simultaneously the most mold–vulnerable category in a typical storage unit and the most likely to be genuinely irreplaceable. This applies to fine–art prints, photographic prints, family photographs, negatives and slides, maps, documents, and works on paper generally.
Why Paper Is Uniquely at Risk
Paper is hygroscopic, it readily absorbs and releases moisture in response to the surrounding air, coming into equilibrium with whatever conditions it sits in. That means paper does not merely sit in a humid room; it becomes a humid object. And paper, along with the gelatin binders used in photographic prints, is an excellent food source.
The combination of high humidity and warm temperatures is specifically identified in conservation guidance as the condition that encourages mold growth and insect activity in photographic and paper collections. It is also the condition that accelerates the chemical reactions behind fading, discoloration, and the silver mirroring visible on older photographs.
The Target Conditions
Conservation guidance for photographic and paper collections is more specific than general storage advice, and worth knowing even if you cannot hit it exactly:
- Relative humidity: A set point somewhere between 30% and 50% is the commonly cited target for mixed collections of photographic prints, slides, and negatives. Guidance for works on paper often favors the lower end of the 30–50% range.
- Fluctuation: Ideally the set point should not cycle more than about five percentage points in a day. Cycling drives moisture in and out of a print, accelerating chemical deterioration and breaking down the binder that holds the image to its support.
- Temperature: At or below roughly 70°F, with cooler generally better. Mold becomes a serious concern as humidity passes 60% and temperatures climb into the upper 70s and above.
- The general home–collection rule of thumb: around 70°F and under 55% RH, with good air circulation and limited light, will substantially extend the life of a collection.
Notice how directly this maps onto climate–controlled storage and how poorly it maps onto an attic, a basement, a garage, or a non–conditioned drive–up unit, all of which experience exactly the temperature extremes, poor airflow, and moisture problems that this guidance warns against.
Enclosures: What to Use
The enclosure is doing real work here, because it buffers the item against the swings the room experiences.
- Acid–free, lignin–free folders and boxes. The baseline. Ordinary paper folders and cardboard boxes contain acids that migrate into what they hold, causing yellowing and embrittlement independent of any mold issue.
- Look for the Photographic Activity Test. Enclosures that have passed the PAT have been evaluated for chemical interaction with photographic materials. This is the meaningful certification for anything photographic.
- Polyester, polypropylene, or polyethylene sleeves are the accepted plastics for archival use. Avoid PVC entirely, it degrades and off–gasses in ways that damage what is inside it.
- Interleave with acid–free tissue between stacked prints. This prevents surfaces from sticking to one another, which is a common humidity failure mode, and once two photographic prints have bonded, separating them typically destroys at least one.
- Store flat where possible. Flat archival boxes for loose prints; oversize items in flat files or large flat boxes rather than rolled.
- If something must be rolled, roll it around the outside of a large–diameter acid–free tube rather than inside a tube, image side out, with an interleaving sheet.
Buffered vs. Unbuffered
A distinction worth knowing. Buffered enclosures contain an alkaline reserve that neutralizes acids as they develop, which is beneficial for most paper documents and prints. However, some materials, including certain photographic processes, albumen prints, and protein–based materials, are generally recommended to be housed in unbuffered enclosures instead.
If you are storing a mixed collection and do not want to sort it, unbuffered is the more conservative default. For a collection of significant value, this is worth a conversation with a conservator rather than a guess.
The Plastic Sheeting Warning
This is the mistake that most often turns a good collection into a damaged one.
Do not seal prints or photographs in airtight plastic bags or sheeting. If there is any moisture in the material, and paper almost always holds some, sealing creates a small, stable, humid microclimate around the item. Conservation guidance is explicit that sealing paper materials inside plastic without freezing them creates conditions that encourage mold growth rather than preventing it.
Use rigid archival boxes that allow slow moisture exchange, and control the room instead of trying to seal the object.
The Step That Matters Most
Digitize before you store. Scan photographs, prints, and documents at high resolution and keep copies in at least two places, one of them off–site or in cloud storage.
Every physical preservation measure in this section reduces risk. None eliminates it. A digital copy is the only form of protection that survives a flood, a fire, a mechanical failure, or a mistake, and it costs nothing but an afternoon.
For the full treatment of photograph storage beyond the humidity question, see our guide on how to store photos, pictures, and photo albums.
Practical Summary for Prints
- Digitize first.
- House in acid–free, PAT–passed enclosures, interleaved with acid–free tissue.
- Store flat in rigid archival boxes, not sealed in plastic.
- Place inside a sealed outer bin only if the archival boxes are protected from crushing and the contents are confirmed dry; add indicating desiccant.
- Use a climate–controlled unit. This is the category where it matters most.
- Position in the interior of the unit, elevated, away from walls, floor, ceiling, and door.
- Check on the collection at least twice a year.
17. Monitoring Your Unit: Hygrometers and Check–Ins
Prevention that ends on move–in day is only half a strategy. Given how much difference the 24–to–48–hour window makes, discovery speed is itself a preventive measure.
Get a Hygrometer
A basic digital hygrometer measures temperature and relative humidity and costs very little. It converts an invisible risk into a number you can read in three seconds.
Features worth having:
- Min/max memory. Shows the extremes reached since your last visit, which is far more informative than the current reading. A unit sitting at 48% when you walk in may have hit 74% during a humid week.
- A large display. Storage units are poorly lit.
- Data logging, if you are storing something genuinely valuable. Inexpensive loggers record a full history you can download, which shows you the fluctuation pattern rather than a snapshot.
Place it at roughly eye level near the aisle so you can read it the instant the door opens. Consider a second one deep in the unit near your most sensitive items, conditions are not uniform across a space.
What the Reading Means
- Under 50%: Good. Nothing to do.
- 50–60%: Acceptable but worth watching. Check desiccants and consider adding capacity.
- Over 60%: Act. Add absorbers, improve airflow between stacks, look for a moisture source, and talk to the facility.
- Over 70%: Treat as urgent. Inspect belongings item by item and consider whether the unit is the right unit.
A Check–In Schedule
- Two weeks after move–in. The most valuable single visit you will make. Anything you packed slightly damp will be showing by now, while it is still fixable.
- Quarterly at minimum. Every three months for ordinary contents.
- Seasonally, at transitions. Early summer and early winter, when conditions shift most.
- After significant weather. Heavy rain, flooding in the area, a hurricane, or an extended humid stretch. Within a day or two if you can.
- Monthly for high–value contents. If you are storing collections, instruments, or archives, monthly is not excessive.
What to Actually Do During a Check–In
- Smell the air before you look at anything. Your nose detects a problem earlier than your eyes.
- Read the hygrometer, including min/max, then reset it.
- Look at the ceiling, walls, floor, and door seal for new staining or dampness.
- Check desiccants and replace or recharge any that are spent.
- Open two or three containers, rotating which ones each visit.
- Inspect leather, textiles, and anything upholstered specifically, these show problems first.
- Leave the door open for ten or fifteen minutes to exchange air, unless outdoor humidity is higher than what is inside.
- Photograph anything that has changed.
18. The Seasonal Risk Calendar
Mold risk is not constant across the year. Knowing when it peaks tells you when to pay attention.
Spring
Rising humidity meets surfaces still cool from winter, which is the classic condensation setup. Spring rain also tests door seals, roofs, and drainage that were fine all winter. Spring is the highest–value inspection of the year in most regions.
Summer
Peak absolute humidity and peak temperature together, which is the worst combination for growth rate. Non–conditioned units run hot. Every door opening admits very humid air. This is when a problem that began quietly in spring becomes visible.
Fall
Generally the lowest–risk season, but it comes with a specific trap: this is when people store summer gear. Patio cushions, pool equipment, camping gear, and lawn furniture all get packed away, frequently damp, at exactly the moment the unit is about to sit undisturbed for months.
Winter
Cold slows growth, which helps. But warm interior air meeting cold exterior walls and slabs produces condensation, and in mixed climates freeze–thaw cycles open small gaps that admit water. Snowmelt and ice dams are real intrusion sources in northern markets.
A Simple Annual Rhythm
- March or April: Full inspection. Replace all desiccants. Check seals and drainage after winter.
- June or July: Peak–season check. Verify humidity readings. Replace absorbers, which saturate fastest now.
- September or October: Inspect anything stored at end of summer, and confirm it went in dry.
- December or January: Cold–weather check for condensation on walls and slab.
19. Regional and Climate Considerations
Where you store changes how much effort prevention requires.
The Humid Southeast and Gulf Coast
Georgia, Florida, the Carolinas, Alabama, Mississippi, Louisiana, and East Texas combine sustained high humidity with heat for much of the year. Outdoor RH regularly exceeds 70–80% for extended stretches.
In these markets, climate control is close to a requirement rather than an upgrade for anything organic. Non–conditioned storage of textiles, paper, upholstery, or leather through a Gulf Coast summer is a genuine gamble. Plan on calcium chloride absorbers even in conditioned units, and shorten your check–in interval.
The Humid Midwest and Mid–Atlantic
Illinois, Missouri, Michigan, Virginia, and Tennessee see high summer humidity with cold winters. The seasonal swing is the defining challenge here, materials cycle through a wide range annually, which drives the fluctuation damage discussed in Section 4. Climate control earns its cost primarily by stabilizing that swing.
The Arid West and Southwest
Colorado, Oklahoma, and similar climates carry substantially lower mold risk. The opposite problem appears instead: very low humidity causing cracking in wood, brittleness in paper and leather, and adhesive failure. Sealed containers help here by preventing over–drying, and the 30% RH floor becomes the number to watch rather than the 60% ceiling.
One caveat: monsoon season in parts of the Southwest produces brief but intense humidity spikes, and swamp coolers in some regions add indoor moisture. Arid does not mean risk–free year–round.
The Cold North and Northeast
New Hampshire and similar climates see lower absolute humidity but significant condensation risk from temperature differentials, plus snowmelt and ice–dam intrusion. Heated storage matters here as much as dehumidified storage does in the South.
Coastal Everywhere
Proximity to salt water adds salt–laden humid air, which accelerates metal corrosion alongside the mold risk. Interior units well away from exterior walls are worth prioritizing.
20. Early Warning Signs of a Moisture Problem
Catching a problem early is the difference between a cleanup and a loss. Here is what to notice.
Smell
The earliest and most reliable indicator. A musty, earthy, damp–basement odor means active growth somewhere, often before anything is visible. Do not rationalize it as “just how storage units smell.” A dry, well–managed unit does not smell musty.
Visible Signs on the Structure
- Water staining on ceiling, walls, or floor, particularly a stain that was not there last visit.
- Efflorescence, the white powdery mineral deposit that indicates water moving through concrete or masonry.
- Rust developing on door tracks, wall panel seams, or shelving.
- Peeling, bubbling, or discoloration on wall surfaces.
- Standing water or persistent dampness on the slab.
- Condensation beads on walls, the door, or the ceiling.
Visible Signs on Belongings
- Fuzzy or powdery patches in any color on any surface.
- Dark spotting on fabric, especially along folds and seams.
- Cardboard that has softened, warped, or gone slightly wavy.
- Foxing, small rust–brown spots on paper and book pages.
- Books with wavy, cockled page edges.
- White or gray bloom on leather.
- Photographs sticking to one another or to sleeves.
- Green or white powdery deposits on metal.
Other Signals
- Hygrometer readings above 60%, or min/max data showing extended excursions.
- Desiccants saturating faster than expected, a useful early indicator that ambient conditions have changed.
- Increased insect activity. Silverfish and booklice are drawn to damp conditions and are often an early sign of a moisture problem.
21. What to Do If You Find Mold in Your Storage Unit
If you open the door to a problem, the order in which you do things matters.
Step 1: Do Not Disturb Anything Yet
Moving, shaking, or unpacking moldy materials releases spores into the air and spreads contamination to items that are still clean. Stop and plan before you start hauling things out.
Step 2: Document Before You Touch
Photograph and video everything before any cleanup. Capture wide shots of the whole unit, the ceiling, walls, floor, and door, plus close–ups of affected items. Get anything that indicates a source, a stain trail, a wet patch, a gap in a seal. Note the date.
This is the moment the record gets made. Once you have moved things, you cannot recreate it.
Step 3: Notify the Facility in Writing
Tell management immediately, and do it in writing even if you also call. Email creates a timestamped record. Describe what you found, where, and when you discovered it. Ask whether there is a known building issue and what they intend to do.
Step 4: Contact Your Insurer
Before you discard anything. Many policies require the insurer to have an opportunity to inspect, and throwing out damaged property before a claim is filed can complicate it. Ask what documentation they need and what their timeline is.
Step 5: Protect Yourself Before Handling
If you are going to handle moldy materials, take basic precautions. Commonly recommended protection includes an N–95 respirator, gloves, goggles without ventilation holes, and clothing you are willing to launder separately or discard. Work outdoors wherever possible.
If you have asthma, allergies, a compromised immune system, or any respiratory condition, do not do this yourself. Have someone else handle it or hire a professional. This is not an area to be stoic about.
Step 6: Assess the Scale
Federal remediation guidance uses roughly 10 square feet of visible growth, about a three–by–three–foot patch, as a rough planning threshold. Below that, most people can handle cleanup themselves with appropriate precautions. Above that, the guidance points toward more rigorous containment and professional involvement, and areas above roughly 100 square feet are firmly professional territory.
It is worth being clear that this is an advisory rule of thumb rather than a bright legal line. It is a way to gauge the effort and safety involved, not a point at which mold suddenly becomes dangerous. Location, the water source involved, and the health of the people doing the work all matter alongside the size.
Step 7: Move Everything Out
Take items outside. Separate clean from affected. Do not bring anything moldy into your home before it has been assessed and cleaned, that is how a storage problem becomes a house problem.
Step 8: Clean What Can Be Cleaned
Work outdoors. For hard, non–porous surfaces, standard federal guidance recommends cleaning with detergent and water and drying completely. Notably, that same guidance does not recommend using bleach or other biocides as a routine mold–removal step, the point is physical removal and thorough drying, not chemical killing.
Dry everything fully before anything goes back into storage. Sunlight and moving air help, with the caveat that direct sun will fade textiles, paper, and photographs.
Step 9: Fix the Cause
Cleaning without correcting the moisture source guarantees repetition. Identify what let water in or what was packed damp, and resolve it before reloading. If the source is the building itself, that is a conversation with the facility, and it may mean a different unit.
22. What Can Be Saved and What Should Be Discarded
This is the part most guides avoid, because the honest answer is unwelcome. The governing principle is porosity: the deeper a material lets growth penetrate, the less likely surface cleaning is to resolve it.
Usually Salvageable
- Hard, non–porous surfaces, glass, ceramic, metal, sealed plastic, glazed pottery. Clean, dry, done.
- Finished wood with surface–only growth. If the finish is intact and growth has not penetrated, cleaning and drying usually works.
- Washable textiles caught early. Laundering often removes mildew, though staining may persist on light colors.
- Electronics with external growth only. Careful exterior cleaning may be sufficient, though anything that experienced condensation internally should be professionally evaluated before use.
- Leather with light surface bloom. Often recoverable with cleaning and conditioning if addressed promptly.
Sometimes Salvageable, Usually With Professional Help
- Photographs and works on paper. A paper conservator can accomplish things you cannot. For genuinely valuable or irreplaceable items, this is worth pricing before deciding. Conservation practice for wet or actively moldy paper often involves freezing to stabilize items until proper treatment can begin, which is why acting quickly matters more than acting immediately.
- Books with limited growth. Depends on extent and value. Common titles are usually cheaper to replace.
- Artwork. Always consult a conservator rather than attempting cleaning. Amateur intervention on a painting or print can cause more loss than the mold did.
- Antique or high–value furniture. A furniture restorer can often address what a homeowner cannot.
Usually Not Salvageable
This list is difficult, and it is where the real financial loss concentrates:
- Mattresses and box springs. Deeply porous, impossible to clean through, and in contact with people for hours a day. Replace.
- Upholstered furniture with penetrating growth. If it has reached the foam and batting, reupholstery means stripping to the frame, frequently more expensive than replacement.
- Cardboard. Discard it. Never reuse a box that has had mold on it.
- Carpet and rug padding. Padding is not cleanable. Rugs themselves may be professionally cleanable depending on value.
- Insulation and porous building materials. Not cleanable.
- Heavily contaminated paper of no special value. Photocopy or scan what you need and discard the original.
How to Decide
Three questions, in order:
- Is it porous, and has growth penetrated? If yes to both, the odds are poor.
- Is it irreplaceable? If yes, get a professional opinion before deciding, regardless of the answer to question one.
- Does professional restoration cost less than replacement? If not, and it is replaceable, replace it.
Be honest with yourself on question two. Sentimental value is real value, and it is also the thing people use to justify keeping a mattress they should not keep.
23. Are Storage Units Responsible for Mold?
This is the question people search for after they have already found a problem, and it deserves a straight answer rather than an evasion.
The general answer is that in most cases, responsibility for stored property rests with the tenant rather than the facility. That surprises people, and it is worth understanding why it is structured that way, what the common exceptions are, and what you can reasonably do.
What follows is general background on how self–storage agreements typically work. It is not legal advice, it does not describe any particular company’s agreement, and state law varies considerably. Your own rental agreement and your own state’s law govern your situation. For anything involving significant loss, talk to an attorney licensed in your state.
Why the Tenant Usually Bears the Risk
Self–storage operates on a fundamentally different legal footing than a warehouse. When you store goods with a warehouse operator, that operator generally takes custody of your property and assumes duties that go with custody. Self–storage is structured as a rental of space, not a service of safekeeping.
Standard rental agreements across the industry typically make this explicit, often in capitalized text, stating in substance that the operator is not a warehouseman engaged in storing goods for hire, has no obligation to exercise care or control over the occupant’s property, and assumes no responsibility for loss or damage. The tenant holds the only key, controls what goes in, controls how it is packed, and controls whether anyone ever checks on it.
Because mold occurs naturally in indoor environments, industry legal commentary is fairly direct that an operator cannot guarantee stored property will be free from mold risk, and that this is true even in a space marketed as climate–controlled or temperature–controlled. Many modern agreements now include specific mold and mildew provisions putting tenants on notice of that inherent risk, alongside language defining what climate control means and disclaiming warranties.
Where Facility Responsibility May Enter
“Generally not responsible” is not the same as “never responsible.” The analysis usually turns on negligence, whether the facility failed to do something it reasonably should have done. Situations that are more likely to raise that question include:
- A known roof leak or structural defect reported by tenants and left unrepaired.
- A failure to perform reasonable maintenance on the building itself.
- Advertised amenities that were not actually provided, for example, charging for climate control while the system was inoperative for an extended period.
- Misrepresentation about the condition of a unit at move–in.
- Failure to act on a reported problem within a reasonable time.
Even in these situations, outcomes depend heavily on the specific agreement language, the evidence available, and state law. Some states limit the enforceability of certain disclaimers; others do not. This is exactly the kind of question that turns on jurisdiction and facts, which is why a general article cannot answer it for you.
What Makes a Difference in Practice
Regardless of where responsibility ultimately lands, a few things consistently improve a tenant’s position:
- Documentation from before your property went in. Photographs of the empty unit, dated, showing its condition. This is the record almost nobody creates and the one that matters most.
- Written reports of anything you noticed. If you flagged a stain at move–in and there is an email saying so, that is a meaningfully different situation than a verbal comment nobody remembers.
- Prompt written notice on discovery. Delay tends to weaken a position, particularly where an argument exists that earlier action would have limited the damage.
- Evidence you took reasonable care. Records showing you used a climate–controlled unit, elevated your belongings, packed dry, and checked in periodically undercut any suggestion that you contributed to the problem.
- Insurance. Discussed next. This is the mechanism actually designed to handle this, and it resolves far more of these situations than a liability dispute ever will.
The Practical Reframe
Most people arrive at this question hoping someone else will pay. The more useful framing is that self–storage is structured on the assumption that you are managing your own property, and the systems that exist to protect you, insurance, protection plans, your own prevention practices, are the ones designed to work.
That is not an argument that facilities have no obligations. They maintain the building, and a facility that neglects it may well bear responsibility. It is an argument that the reliable protection is the one you control, and that it is worth setting up before you need it rather than after.
24. Insurance, Protection Plans, and What They Typically Cover
Most facilities require some form of coverage on stored property, and most tenants never read what theirs actually does. It is worth ten minutes.
As with the previous section, this is general background rather than advice about any specific policy. Coverage terms vary widely between insurers, between products, and between states. Your policy documents govern, and your agent is the person who can tell you what you actually have.
The Three Common Routes
- Homeowners or renters insurance. Many policies extend some coverage to personal property stored away from the residence, often at a reduced limit relative to the main dwelling coverage. Whether it applies, at what limit, and with what exclusions varies by policy, ask your agent specifically about off–premises storage.
- Tenant protection plans. Offered by many storage operators as an add–on to monthly rent. In some states these are structured as protection plans rather than insurance products, which is a distinction with legal consequences. Convenient, and generally worth reading closely.
- Standalone storage insurance. Purchased separately from a third–party insurer that specializes in stored goods.
Questions Worth Asking Before You Need To
- Is mold or mildew damage addressed at all, and how?
- Is there a distinction between damage from a sudden event and damage that developed gradually? This distinction matters a great deal for mold, and it is the most common reason these claims are complicated.
- Is water damage covered, and does that include flooding, which is frequently excluded?
- What is the limit, and is it replacement cost or actual cash value?
- What is the deductible relative to the value of what you are storing?
- Are there sub–limits on specific categories, collectibles, artwork, documents, jewelry, electronics? These sub–limits are often much lower than people assume.
- What documentation would be required at claim time?
- Are there conditions on your end, a required unit type, packing requirements, an inspection obligation?
The Gradual Damage Issue
This deserves emphasis because it catches people. Insurance is generally designed around sudden, accidental events rather than deterioration over time. Mold that developed slowly over months in ordinary humid conditions may be treated very differently than mold that resulted from an identifiable, sudden event like a burst pipe or a storm.
Two practical consequences: read your specific terms rather than assuming, and understand that prompt discovery and prompt reporting matter to how a situation is characterized. A problem found and reported quickly looks different from one discovered a year in.
Inventory and Valuation
Coverage is only as useful as your ability to prove what you had. Which leads directly to the next section.
25. Documenting Your Unit Before a Problem Happens
Documentation is preventive in the same way a smoke detector is preventive. It does not stop the event; it changes what the event costs you.
Before You Move In
- Photograph the empty unit completely: all four walls, ceiling, floor, door, and door seal.
- Photograph any pre–existing issue specifically, a stain, a crack, a gap, and email the facility about it so a written record exists.
- Photograph the exterior, including the grade and drainage around the building.
- Save your rental agreement, your insurance documents, and any correspondence in one place.
During Move–In
- Photograph valuable items individually before packing.
- Keep receipts and appraisals where you can find them.
- Build a written inventory, ideally box by box with numbered containers.
- Photograph the finished layout, showing elevation and air gaps, this documents that you took reasonable care.
Ongoing
- Photograph the unit at each check–in, even when nothing has changed. A series of dated photographs showing no problem, followed by one showing a problem, establishes a timeline.
- Log hygrometer readings, including min/max values.
- Keep every piece of correspondence with the facility.
Storage of the Documentation Itself
Keep it in the cloud, not on a single device and certainly not in the unit. Our guide on how to photograph and document your stored items covers the full process, including inventory structure and backup strategy.
26. Common Mold Prevention Mistakes
The failures below account for the large majority of preventable storage mold.
1. Storing Items That Were Not Fully Dry
The number one cause, and entirely avoidable. “Dry to the touch” is not dry. Build in extra days.
2. Wrapping Furniture in Plastic
It feels protective and it is actively harmful. Plastic sheeting traps moisture against the surface. Breathable covers only.
3. Placing Boxes Directly on the Slab
Concrete is cold and holds moisture. Two inches of clearance eliminates most of this risk and costs almost nothing.
4. Packing the Unit Solid
No airflow, no ability to inspect, no early detection. Leave gaps and an aisle.
5. Treating Climate Control as a Guarantee
It reduces risk substantially. It does not eliminate it, and it does nothing about an item you packed damp.
6. Never Visiting
The “store it and forget it” approach is the reason small problems become total losses. A problem discovered at month two is manageable. The same problem at month twenty–four is not.
7. Setting Desiccants and Forgetting Them
They saturate and stop working silently. Use indicating products and put replacement on your calendar.
8. Using Cardboard for Everything
Especially for textiles, paper, and photographs. Plastic for anything organic or valuable.
9. Not Reading the Rental Agreement or Insurance Terms
People discover what their coverage does at the worst possible moment. Read it at signing, when you still have options.
10. Ignoring a Musty Smell
The earliest warning available, routinely dismissed. If a unit smells musty, something is wrong, whether or not you can see it yet.
11. Storing Prohibited or Perishable Items
Food attracts pests and rots. Liquids leak. Anything perishable is a moisture source and a food source in one. Our storage FAQ covers what is not permitted in a unit.
12. Choosing a Unit Without Inspecting It
Five minutes of looking prevents months of trouble.
27. What to Look For in a Storage Facility
Your prevention practices matter most, but the building you choose sets the baseline you are working against.
Building and Environment
- Genuine climate control, with a clear answer about whether humidity is managed or only temperature. Ask directly, the terms are used loosely.
- Interior units within a conditioned envelope, which experience far less air exchange and temperature swing than drive–up units.
- Well–maintained roofing and drainage, with grade sloping away from buildings and downspouts discharging away from doors.
- Sound door seals that close tight with no visible daylight.
- Clean, dry common areas. Hallways tell you a great deal about how a building is maintained.
Operations
- Responsive management, with a real path to reporting a problem and getting an answer.
- Regular pest control, since pest and moisture problems travel together.
- Reasonable access hours, because a unit you can only reach during narrow windows is a unit you will not check on.
- Clear coverage options and a straight explanation of what they do.
What Should Make You Cautious
- A musty smell anywhere in the building, including hallways.
- Visible water staining in common areas or in the unit you are shown.
- Standing water anywhere on the property.
- Evasiveness about what “climate–controlled” means at that specific facility.
- Any promise that a unit is mold–proof. That claim is not one anyone can make.
28. Store With 10 Federal Storage
If you are storing anything organic, furniture, textiles, paper, photographs, instruments, electronics, collections, the unit type you choose sets the baseline that every other practice in this guide has to work against. A stable environment does not remove your responsibility to pack dry and check in, but it makes both of those far more forgiving.
10 Federal Storage offers climate–controlled units at facilities across our markets. Ours are temperature–regulated interior spaces, enclosed within a conditioned building, held within a stable temperature range, and shielded from direct sun, from the uninsulated metal surfaces that drive condensation, and from the constant outdoor air exchange a drive–up unit experiences every time the door opens.
That matters for mold for the reasons covered in Sections 4 and 5. Temperature stability reduces the daily and seasonal fluctuation that does slow, cumulative damage to wood, paper, and photographic materials. An interior position keeps your belongings away from the coldest surfaces in the building, which is where condensation actually forms. And less air exchange means less humid outdoor air being pulled in and left behind.
Per Section 9, we would rather tell you plainly than let you assume: our units protect against extreme temperatures, not humidity. There is no dehumidification. Managing moisture inside your unit remains your job, using the practices in this guide, packing genuinely dry, sealed bins with indicating desiccant, elevation off the slab, air gaps at the walls, and a hygrometer you actually read. What a temperature–regulated interior unit gives you is a far better baseline for those practices to work from than a metal drive–up box in August.
Situations where a climate–controlled unit is worth the difference:
- You are storing between homes and your household goods, upholstered furniture, mattresses, wood pieces, clothing, need to come out in the same condition they went in.
- You are storing a collection. Prints, photographs, books, records, comics, and cards are all humidity–sensitive and mostly irreplaceable.
- You are storing business records or inventory that has to remain legible and sellable.
- You are storing through a Southeast summer. In our Georgia, Florida, Carolina, and Texas markets, a metal drive–up unit swings hard through peak season. An interior unit takes the temperature extremes and the worst of the condensation surfaces out of the equation, leaving a much more manageable moisture problem to handle yourself.
- You are storing long–term. Risk compounds with time, and so does the value of a stable environment.
Our facilities feature 24/7 video surveillance, code gate entry, live monitoring, and regular lock checks, and our rental process is fully online, you can browse availability, compare unit types, and rent without waiting on office hours.
To be straightforward about it: no unit type eliminates mold risk, and no operator can honestly promise one that does. What a stable interior unit does is remove several of the mechanisms that cause mold, temperature extremes, wide daily swings, constant humid air exchange, and cold exterior surfaces, so that the remaining variable is the one you control directly. Pair it with the preparation, packing, and monitoring practices in this guide and the odds are strongly in your favor.
Find a storage unit near you to compare climate–controlled availability and pricing, or browse our storage tips library for more packing and organization guidance.
Frequently Asked Questions
The core practices are the same for mildew and mold. Make sure everything going in is genuinely clean and dry, allowing extra drying days for thick textiles and upholstery. Use sealed plastic bins with desiccant packs rather than cardboard for anything organic. Elevate everything two to four inches off the concrete slab. Leave four to six inches between belongings and every wall, plus gaps between stacks. Choose a climate–controlled unit if you are storing anything sensitive. Place a hygrometer where you can read it, and check in quarterly.
Keep relative humidity below 60%, that is the threshold most commonly cited in federal indoor–air guidance as the line to stay under. The generally recommended target range is 30–50%. Below about 30%, you introduce the opposite problem, with wood cracking and paper and leather becoming brittle. For photographs and works on paper, conservation guidance points to a set point between 30% and 50% that does not swing more than about five percentage points in a day.
It substantially reduces the risk, and moving from an unconditioned unit to a conditioned interior one is the single most effective step available to a tenant. But it does not eliminate the risk, and no facility can promise that it does. Mold spores exist in every indoor environment, and a conditioned unit is still vulnerable to a damp item brought in, a mechanical failure, a plumbing issue, or a severe weather event. One thing worth knowing: “climate–controlled” means different things at different operators. At some it covers both temperature and humidity; at many it means temperature is regulated without active dehumidification. Ask the facility directly which one you are getting, because it determines how much of the moisture management is still on you. Either way, treat the unit as a strong foundation rather than a substitute for packing dry and checking in.
Generally, responsibility for stored property rests with the tenant rather than the facility. Self–storage agreements are typically structured as a rental of space rather than a service of safekeeping, and standard agreements usually state explicitly that the operator is not acting as a warehouseman and assumes no responsibility for loss or damage to stored property. Facility responsibility is more likely to come into question where negligence is involved, a known leak left unrepaired, for example, or advertised climate control that was not actually functioning. Outcomes depend heavily on your specific agreement, the evidence available, and your state’s law. This is general background rather than legal advice; for a significant loss, consult an attorney in your state.
Digitize them first, that is the only protection that survives everything else. House prints in acid–free, lignin–free enclosures, ideally ones that have passed the Photographic Activity Test, with acid–free tissue interleaved between stacked pieces so surfaces cannot bond to one another. Store flat in rigid archival boxes rather than sealed in plastic, since sealing traps moisture and creates a humid microclimate. Use a conditioned interior unit and position the box in the interior of the space, elevated, away from walls, floor, ceiling, and door. The conditions to aim for are 30–50% relative humidity at or below roughly 70°F, without much daily swing. Note that a temperature–regulated unit gets you the temperature half of that but does not dehumidify, so unless the facility actively manages humidity, hitting the RH target is on you, indicating desiccant inside the archival boxes, a hygrometer you can read, and a check on the collection at least twice a year.
Yes, and this is one of the most common surprises. A sealed bin keeps ambient humidity out, but it equally keeps trapped moisture in. If anything going in was even slightly damp, the sealed environment becomes close to ideal for growth. Sealed bins are excellent, provided contents are genuinely dry, and better still with an indicating desiccant pack inside.
Standard federal guidance for mold cleanup on hard surfaces recommends detergent and water, and specifically does not recommend biocides such as bleach as a routine removal step. The goal is physical removal followed by complete drying, not chemical killing. Bleach also damages many materials outright and will not penetrate porous items where growth has already established.
Quarterly at minimum for ordinary contents. Visit two weeks after move–in, that is the single most valuable check, because anything packed slightly damp will be showing while it is still fixable. Add seasonal checks at the transitions into summer and winter, and check within a day or two after any significant weather event. Monthly is reasonable for collections, instruments, or archives.
Many homeowners and renters policies extend some coverage to personal property stored off–premises, often at a reduced limit, but whether mold specifically is covered varies considerably. A common complication is the distinction between sudden, accidental events and damage that developed gradually, mold frequently falls into the latter category. Ask your agent directly about off–premises storage, mold and mildew, water damage, and any sub–limits on categories like collectibles or documents. Read the policy rather than assuming.
Usually not. The large majority of storage units have no electrical outlet, and most facilities do not permit tenant–operated appliances for fire–safety reasons. Ask before planning around it. The practical alternatives are calcium chloride absorber tubs in the open unit and silica gel packs inside sealed containers, both of which require a replacement schedule to stay effective.
Because odor precedes visible growth. A musty smell means moisture is present and something is likely growing where you cannot see it, inside a box, in the corrugation of cardboard, under a stack, or on a wall behind your belongings. Do not dismiss it as normal. Read your hygrometer, inspect walls and floor, open containers you have not opened, and check the corners and the area behind stacks.
Stop and document before you touch anything. Moving contaminated items spreads spores to belongings that are still clean, and once you have started hauling things out you cannot recreate the record. Photograph and video the whole unit including ceiling, walls, floor, and door, then close–ups of affected items. Then notify the facility in writing, and contact your insurer before discarding anything.
Generally yes, for several compounding reasons. Drive–up units are typically not conditioned, they have an uninsulated metal roll–up door that acts as a condensation surface, they sit at ground level where water intrusion is most likely, and every door opening exchanges the entire volume of air with outdoor conditions. Drive–up units are excellent for tools, equipment, and non–sensitive contents. They are a poor choice for textiles, paper, photographs, upholstered furniture, or electronics in a humid climate.
About the Author
10 Federal Storage
Our team at 10 Federal Storage has been in the self storage industry for decades. With knowledge gained from multiple universities and in the field, we are well-prepared and excited to assist with your storage needs. When you rent a unit with us, you can feel confident that our seasoned customer service team’s help will make your transition as seamless as possible. Customer satisfaction is our number one priority, and we strive to make your experience exceptional with our automated leasing options, diverse unit sizes, and a strong commitment to sustainability.