

Man Cave Ideas: Design, Layout, and the Constraints That Decide What Fits
by 10 Federal Storage
Published on September 3, 2026
Almost every man cave guide online is a photo gallery. You scroll past a golf simulator, a two-lane bowling alley, a tiered home theater, and a wall of framed jerseys, and you close the tab with a general feeling of ambition and no idea whether any of it fits in your house. The photos are real. The rooms in them are usually not the room you have.
This guide is built the other way around. Before a single design idea, it walks the four measurements and checks that decide what is actually possible in your space: ceiling height, code status, radon, and water. Then it goes activity by activity and gives the real footprint each one needs, because a pool table and a dartboard and a golf simulator have specific, published clearance requirements, and most of the rooms people plan fail at least one of them.
A few things you will find here that you will not find on the pages currently ranking for this search. The ceiling height your basement needs for each activity, compared against what a finished basement typically delivers. Why a golf simulator, recommended constantly in man cave listicles, does not fit in a standard basement and what it takes to make one fit. The branch-circuit arithmetic for a room running a projector, a receiver, a gaming rig, and a beverage fridge at the same time. What pool tables and squat racks weigh, and where that matters. And the resale research showing that the more heavily you theme the room, the less of your money you get back.
There is also a section near the end arguing against renting a storage unit for this project in five specific situations. We run storage facilities. We would still rather you skip the unit than rent one you do not need, because the version of this project that goes well is the one where you were honest about the constraints from the start.
Table of Contents
- What Counts as a Man Cave, and Why the Definition Decides Your Permit
- Start With Ceiling Height: The Measurement That Rules Out Half the Ideas
- The Code Layer: Habitable Space, Egress, and What Triggers a Permit
- Test for Radon Before You Frame a Single Wall
- Water First: Why Moisture Work Comes Before Design
- Choosing the Room: Basement, Garage, Spare Room, Shed, or Bonus Room
- The Sports Bar and Game Day Room
- The Home Theater: Screen Size, Seating Distance, and Throw Math
- The Golf Simulator: The Idea Most Basements Cannot Actually Fit
- The Game Room: Pool, Darts, Shuffleboard, and Their Real Clearances
- The Home Bar: Dry, Wet, and What Each One Requires
- The Gaming and Esports Setup
- The Home Gym: Floor Loading and Overhead Clearance
- The Workshop, Studio, and Loud Hobby Room
- Electrical Load: The Circuit Math Nobody Publishes
- Sound Isolation: What Works and What Only Feels Like It Works
- Lighting a Room With No Windows
- HVAC, Ventilation, and the Combustion Appliance Problem
- Flooring, Walls, and Ceilings That Survive Below Grade
- Furniture, Layout, and Sightlines
- Man Cave Ideas on a Budget
- Small Man Cave Ideas: Making Under 200 Square Feet Work
- What a Man Cave Actually Costs
- The Resale Question: Why Heavy Theming Costs You Money
- Clearing the Room: The Storage Problem Every Build Runs Into
- Sizing a Storage Unit for a Man Cave Build
- When Renting a Storage Unit Is the Wrong Call
- Frequently Asked Questions
- Building a Room You Will Actually Use
What Counts as a Man Cave, and Why the Definition Decides Your Permit
A man cave is a room in a house given over to one person's recreation rather than to the household's shared function. That is the whole concept. The term showed up in print in the early 1990s and has since expanded well past its original meaning, which is why the phrase now covers a spare bedroom with a gaming desk, a detached shed with a beer fridge, and a $90,000 tiered theater with equal accuracy.
For design purposes that vagueness is fine. For permitting purposes it is the single most important thing to pin down, because building codes do not recognize a category called "man cave." They recognize habitable space and non-habitable space, and which side of that line your project lands on determines what rules apply to it.
The International Residential Code, which most United States jurisdictions adopt in some edition, defines habitable space as space used for living, sleeping, eating, or cooking. Bathrooms, closets, halls, storage rooms, and utility spaces are explicitly excluded. A finished lounge where you watch football is living space. An unfinished corner of the basement where you put a folding chair and a television is not, because you have not built anything.
That distinction produces four practical categories, and it is worth deciding which one you are in before you buy anything:
- The furnish-only man cave. You add furniture, a television, a rug, and lighting that plugs into existing outlets. No framing, no drywall, no new circuits, no plumbing. In most jurisdictions this is not construction and does not require a permit. It is also, for a large number of people, entirely sufficient.
- The finish. You frame walls, insulate, hang drywall, install flooring and a ceiling, and add circuits and lighting. You are creating habitable space where none existed. This almost always requires a permit and brings ceiling height, egress, electrical, and smoke and carbon monoxide alarm requirements with it.
- The specialty build. A finish plus something with its own requirements: a wet bar with plumbing, a bathroom, a dedicated theater with structural changes, a bar with a range hood. Multiple trade permits, multiple inspections.
- The outbuilding. A shed, a detached studio, or a garage conversion. Zoning enters the picture alongside building code: setbacks, lot coverage, maximum accessory structure size, and in many neighborhoods a homeowners association with its own opinion.
The reason to sort this out first is that the four categories have wildly different costs, timelines, and failure modes, and the man cave content online treats them as interchangeable. A photo of a finished basement lounge and a photo of a furnished corner look similar in a gallery. One of them is a weekend and a few hundred dollars. The other is a permitted construction project with a two-month schedule.
One more note on terminology, because it affects how you plan the room. The label has drifted. Plenty of the spaces being built under this search term are shared family rec rooms, couples' lounges, or multi-use flex spaces that happen to have a bar and a big screen. If the room is going to serve more than one person, design it for more than one person from the beginning. Retrofitting a single-purpose shrine into a space two people want to sit in is harder and more expensive than building a flexible room and adding personality to it, which is a point Section 24 returns to with resale figures attached.
Start With Ceiling Height: The Measurement That Rules Out Half the Ideas
Go stand in the room and measure from the floor to the lowest thing above your head. Not to the joists. To the lowest duct, beam, or pipe. Write the number down. That number eliminates more man cave ideas than budget does, and it is the first thing you should know.
Here is why it matters so much in a basement. Under IRC Section R305.1, habitable spaces, hallways, bathrooms, toilet rooms, laundry rooms, and the portions of basements containing them require a finished ceiling height of not less than 7 feet, measured from the finished floor to the lowest projection. Portions of a basement that do not contain those spaces are allowed to come down to 6 feet 8 inches under R305.1.1. Beams, girders, ducts, and similar obstructions get an exception and may project to within 6 feet 4 inches of the finished floor.
The word doing the work there is finished. Your unfinished basement might measure 7 feet 6 inches to the joists today, which sounds comfortable. Then you add a subfloor system, a finished floor, and a ceiling, and you are measuring something closer to 7 feet. That is legal for habitable space in most jurisdictions, and it is also low enough to rule out several of the activities people plan for these rooms.
Local amendments vary meaningfully here, and this is one of the places where checking your own jurisdiction genuinely pays. Minnesota, for example, amends the code so that alterations to existing basements may have a ceiling height as low as 6 feet 4 inches including beams, ducts, and obstructions, which is a substantial departure from the new-construction baseline. Other states enforce the base IRC text without modification. Your building department will tell you which applies in a five-minute phone call.
What each activity actually needs overhead
These are working clearances, not code minimums. Code tells you what is legal. This tells you what is comfortable and safe to do in the room:
- Seated activities (theater, gaming, lounge, poker, bar seating): 7 feet works. This is why the theater and the lounge are the most reliable basement man cave ideas. They are the only ones that do not care much about height.
- Standing and walking around comfortably: 7 feet is legal and feels low. 7 feet 6 inches to 8 feet feels normal. Below 7 feet, tall guests will notice constantly.
- Pool: the table is low, but the cue is not. You need enough height that a cue raised for a jump or a masse shot does not hit the ceiling, and more practically, enough that a light fixture over the table does not become a hazard. 7 feet 6 inches or more is comfortable. Below that, use a low-profile fixture or a recessed one.
- Darts: the board's bullseye sits at 5 feet 8 inches from the floor, so the board itself fits anywhere. The throw is flat. Height is not the constraint here; depth is.
- Overhead pressing in a home gym: a six-foot person pressing a barbell overhead from a rack needs roughly 8 feet of finished ceiling. Add height for taller lifters or for any movement involving a jump. Section 13 goes into this.
- Golf simulator: around 10 feet, which is the reason Section 9 exists as its own section.
- A projector on a ceiling mount: the projector itself hangs down 6 to 12 inches depending on the mount, and it needs a clear line to the screen that nobody walks through. In a 7-foot room a ceiling-mounted projector becomes something people bump into. A short-throw unit on a shelf or console is usually the better answer at that height.
If the number you wrote down disqualifies what you wanted to build, you have three real options and one bad one. You can change the activity to fit the room, which is nearly always the right call. You can move the project to a garage or an outbuilding with more height. You can underpin or bench the foundation and lower the floor, which is genuine structural work costing tens of thousands of dollars and requiring an engineer. Or you can build it anyway and spend the next decade in a room that does not quite work, which is the option most people accidentally choose by not measuring first.
The Code Layer: Habitable Space, Egress, and What Triggers a Permit
No man cave article we found in the search results for this topic mentions egress. Not one. That is a strange omission for a genre built almost entirely around basement conversions, because the emergency escape and rescue opening requirement is the single most expensive surprise in a basement finish, and it is the one that most often turns up after the drywall is hung.
What an egress opening has to be
IRC Section R310 sets the specifications, and they are all met simultaneously or not at all:
- Net clear opening area: not less than 5.7 square feet. Grade-floor and below-grade openings get an exception at 5 square feet.
- Net clear opening height: not less than 24 inches.
- Net clear opening width: not less than 20 inches.
- Sill height: not more than 44 inches above the finished floor.
- Operation: the opening has to reach those dimensions through normal operation from the inside, without keys, tools, or special knowledge.
The trap in that list is that the minimum height and the minimum width do not multiply to the minimum area. 24 inches by 20 inches is 3.3 square feet, well short of 5.7. You have to exceed at least one minimum substantially. Window manufacturers publish egress-compliant sizing charts for exactly this reason.
If the sill sits below the adjacent ground level, you also need a window well meeting R310.2.3: a horizontal area of not less than 9 square feet, with a horizontal projection and width of not less than 36 inches, sized so the window can open fully. Wells deeper than 44 inches require a permanently affixed ladder or steps. The well has to drain, typically by connecting to the foundation drainage system.
Where the sources genuinely disagree
Here is the part that requires care, and we are going to describe the disagreement rather than pretend it does not exist.
The base IRC text at R310.1 reads that basements, habitable attics, and every sleeping room shall have not less than one operable emergency escape and rescue opening. The word "basements" in that sentence is unqualified. Read literally, finishing a basement into a lounge with no bedroom in it still triggers the requirement.
Several things complicate that literal read. Some states amend the language: Michigan's version specifies basements with habitable space, which means a basement containing only storage, a toilet room, and utility space does not require an opening. Newer IRC editions add Section R310.6, which states that an emergency escape and rescue opening is not required where existing basements undergo alterations or repairs, with an exception requiring one for any new sleeping room created in an existing basement. Under that section, finishing an existing basement into a rec room would not trigger the requirement, while adding a bedroom would.
And in practice, enforcement varies. Building code forums contain accounts of inspectors requiring egress for a finished basement containing a wet bar, a home theater, and a play area with no bedroom at all, citing R310.1. They also contain accounts of inspectors in other jurisdictions declining to require it for the same scope.
The honest summary is that whether your specific project triggers an egress requirement depends on which code edition your jurisdiction has adopted, what local amendments it has made, and how your inspector reads it. This is not a question that a national article can answer for your address, and any article that gives you a confident single answer is guessing. Call your local building department, describe the scope, and ask directly. It is a short call and the answer is free.
What we can say without hedging: if you are putting a bed in that room, or if anyone might ever sleep in it, it needs an egress opening. That is consistent across every edition and every amendment we reviewed. A basement bedroom without one is both a safety problem and a resale problem, because appraisers and inspectors will not count it as a bedroom.
What else the permit brings with it
Once you are pulling a permit for a finish, expect the inspection to cover more than the walls. Smoke alarms and carbon monoxide alarms come into scope, particularly where fuel-fired appliances are present, which in a basement they usually are. Stair headroom has its own minimum under R311.7.2, generally 6 feet 8 inches measured vertically from the sloped line adjoining the tread nosings, and basement stairs in older houses frequently fail it. Electrical work will be inspected separately, and Section 15 covers what has changed there.
None of this is a reason not to build the room. It is a reason to know the scope before you get a quote, because a contractor bidding a finish and a contractor bidding a finish plus an egress window and a stair rebuild are quoting two different projects, and the gap between them is a five-figure number.
Test for Radon Before You Frame a Single Wall
You are about to take the lowest level of your house, the one closest to the soil, and turn it into the room where you spend the most voluntary hours of your week. That change matters for one reason nobody in the man cave genre mentions: radon.
Radon is a naturally occurring radioactive gas that moves up out of uranium-bearing soil and rock and enters houses through cracks in the slab, gaps around pipes, sump pits, and floor drains. It is a recognized cause of lung cancer. It concentrates in basements because the basement is the first enclosed space it reaches and usually the least ventilated.
The numbers worth knowing are straightforward. Outdoor air averages around 0.4 picocuries per liter. The national indoor average is roughly 1.3. The EPA's action level, the reading at which it recommends fixing the home, is 4.0 picocuries per liter, and it recommends considering action in the 2 to 4 range as well, because there is no threshold below which radon is known to be entirely safe. The World Health Organization uses a lower reference level of 100 becquerels per cubic meter, about 2.7 picocuries per liter, where achievable. These are not contradictory figures. They are different framings of the same principle, which is that lower is better and there is no line where the risk switches off.
The reason this belongs in a man cave guide rather than a home inspection guide is the exposure math. EPA guidance directs homeowners to test the lowest level of the home that is lived in or that could reasonably be lived in. An unfinished basement with a 6 picocurie reading that you enter twice a month to change a furnace filter produces relatively little exposure. The same basement, finished, with you and your friends in it for four hours every Sunday and three evenings a week, is a different situation entirely. The reading did not change. Your exposure did, by an order of magnitude.
There is a second reason to test before rather than after. Finishing a basement changes the airflow in it. Sealing, framing, adding a ceiling, and extending or modifying the HVAC can all shift the pressure relationships that drive soil gas entry, which is why EPA recommends retesting after major renovations affecting the lowest level. And the mitigation work itself is dramatically easier before the finish. A sub-slab depressurization system needs a suction point through the slab and a vent pipe routed up and out. Running that pipe through open joists and unfinished walls is simple. Running it after the drywall is up means opening the drywall.
The practical sequence:
- Test now, before design. Short-term test kits are inexpensive and widely available. Place the kit per its instructions, generally well off the floor, away from windows, exterior doors, vents, and drains, in a central open spot rather than a closet or a crawl space.
- Confirm a high result with a second test. Radon fluctuates with weather, season, and how the house is being operated. A single reading is a snapshot, and results near the action level in particular deserve confirmation. A long-term test averages out the variation.
- If mitigation is warranted, do it before the finish. The system is far cheaper and far less intrusive to install into an open basement.
- Retest after the work is done. Both to verify the mitigation and because the renovation itself changed the building.
This is not a scare tactic and it is not a reason to abandon the project. Plenty of basements test low. The point is that the test costs very little and takes a few days, and it is the only item on this list that is genuinely about the health of the people who will use the room. Doing it first also means the answer arrives while changing plans is still cheap.
Water First: Why Moisture Work Comes Before Design
Every experienced basement contractor says a version of the same sentence: fix the water before you build anything, because water will find the finish and destroy it faster than anything else in the project. It is the least interesting section of any basement guide and the one with the highest cost of ignoring.
Water reaches a basement by a small number of routes, and identifying which one you have determines the fix:
- Surface water and grading. The ground slopes toward the house instead of away from it, or downspouts discharge next to the foundation. This is the most common cause and by far the cheapest to fix. Extending downspouts and correcting grade solves a meaningful share of basement water problems for a few hundred dollars.
- Hydrostatic pressure. The water table rises against the foundation and pushes water through the slab or the wall-floor joint. Symptoms show up at the perimeter and after sustained rain. Interior perimeter drain systems tied to a sump are the usual remedy.
- Foundation cracks and penetrations. Discrete leaks at a specific spot, often around a pipe penetration or a settlement crack. Injection or patching addresses these directly.
- Window well flooding. A well with no drainage fills during heavy rain and pushes water through the window. Worth checking specifically if you are adding an egress window.
- Condensation. Warm humid air meeting cold foundation walls or cold water lines. This is not a leak and it does not respond to leak repairs. It responds to insulating the foundation properly, insulating cold pipes, and managing air conditions in the space.
The diagnostic step costs nothing. Go down after the next heavy rain and look at the corners, the base of the foundation walls, the slab-wall joint, and around every penetration. Look for staining, efflorescence (the chalky white mineral deposit left behind by water moving through concrete), and any rust at the base of steel columns. A dehumidifier running constantly in an unfinished basement is a signal about the space, not a solution to a leak.
The reason this section sits ahead of every design section is sequencing. Framing against a foundation wall that leaks buries the problem behind insulation and drywall, where it will grow mold in the cavity and rot the bottom plate, and you will not see it until the finish is visibly failing. Correcting it then means demolishing what you built. The order is always: identify the water, fix the water, verify the fix through at least one significant rain, then build.
One note specific to man caves rather than basements in general. These rooms accumulate things that respond badly to a moisture event more than an ordinary rec room does: upholstered theater seating, felt on a pool table, subwoofers and amplifiers sitting on the floor, guitars, vinyl records, framed memorabilia, and cardboard-boxed collectibles. The cost of a basement water event scales with what is in the room, and a finished man cave concentrates a lot of value at floor level. That is worth factoring into how thoroughly you address the water beforehand and how far off the slab you keep the things you care about.
For a full treatment of waterproofing approaches with cost ranges, our guide to basement remodel ideas and what they cost breaks down interior perimeter systems, exterior excavation and membrane, and the layered moisture measures that go in during a finish.
Choosing the Room: Basement, Garage, Spare Room, Shed, or Bonus Room
Most guides list the candidate locations and describe each one positively. That is not useful, because the choice involves real trade-offs and the right answer depends on what you are going to do in the room. Here is the honest comparison.
The basement
The default for good reasons. It is separated from household traffic, naturally dark which suits screens, thermally stable, and already enclosed. The concrete slab carries heavy things without any structural question. It is also the location with the most constraints stacked against it: ceiling height, egress, radon, water, and limited natural light. Best for theaters, lounges, bars, game rooms, and gyms. Worst for anything needing overhead swing room or good daylight.
The garage
Usually the best ceiling height in the house and often the best width, which makes it the realistic home for golf simulators, workshops, and full-height gym setups. The costs are real: you give up parking, which affects resale in cold and hot climates differently, and conditioning a garage is genuinely difficult because the walls and the overhead door were never built to hold temperature. Budget for insulating the door, insulating and air-sealing the walls, and a dedicated heating and cooling source, typically a ductless mini-split. Also confirm whether the fire separation between an attached garage and the dwelling is affected by what you are building, because that assembly is code-required and is easy to compromise accidentally.
The spare bedroom
Underrated and cheapest by a wide margin. It is already finished, already conditioned, already lit, already wired, and already has a window. The entire project can be furniture, paint, and a television. The drawbacks are size, which caps what you can do, sound transmission through a wall shared with the rest of the house, and the resale consideration that converting a bedroom into a single-purpose room removes a bedroom from the listing, which is a bigger valuation hit than most people expect. Keep it convertible.
The bonus room over the garage
Good height, good separation, and usually good daylight. The structural note that matters: this floor is framed lumber, not a slab. Under IRC Table R301.5, habitable rooms other than sleeping rooms are designed for a 40 pounds-per-square-foot live load, and sleeping rooms for 30. A slate pool table or a loaded weight rack concentrates several hundred pounds over a small footprint, which is a different question from a distributed load. If you are putting anything genuinely heavy in a room above grade, that is a question for a structural engineer, not for an internet article. On a basement slab it is a non-issue.
The shed or detached outbuilding
The best isolation available. Nothing you do out there bothers anyone in the house, which makes it the natural home for drums, power tools, and a loud sound system. It is also the option with the most bureaucracy: zoning setbacks, lot coverage limits, maximum accessory structure size, homeowners association review, and the fact that running power, and possibly water, out to it is a trenching project. Conditioning a small detached building is easy with a mini-split. Insurance is worth a phone call, because coverage for detached structures and their contents is often limited to a percentage of the dwelling coverage.
The attic
Usually the worst option, and worth being direct about. Attics have sloped ceilings that eat usable floor area, the hardest thermal conditions in the house, floor framing that was frequently sized for storage rather than occupancy, and access by a stair that may not meet code for habitable space. IRC allows sloped-ceiling rooms where at least half the required floor area has a 7-foot ceiling and no part of the required floor area is under 5 feet, which tells you how much of a typical attic is not countable. The exception is a house with a genuinely large, already-framed-for-living attic, which is a different situation.
If you are weighing a conversion against building new square footage instead, our breakdown of what a home addition costs covers the per-square-foot ranges for garage conversions, attic conversions, basement finishes, and additions side by side.
The Sports Bar and Game Day Room
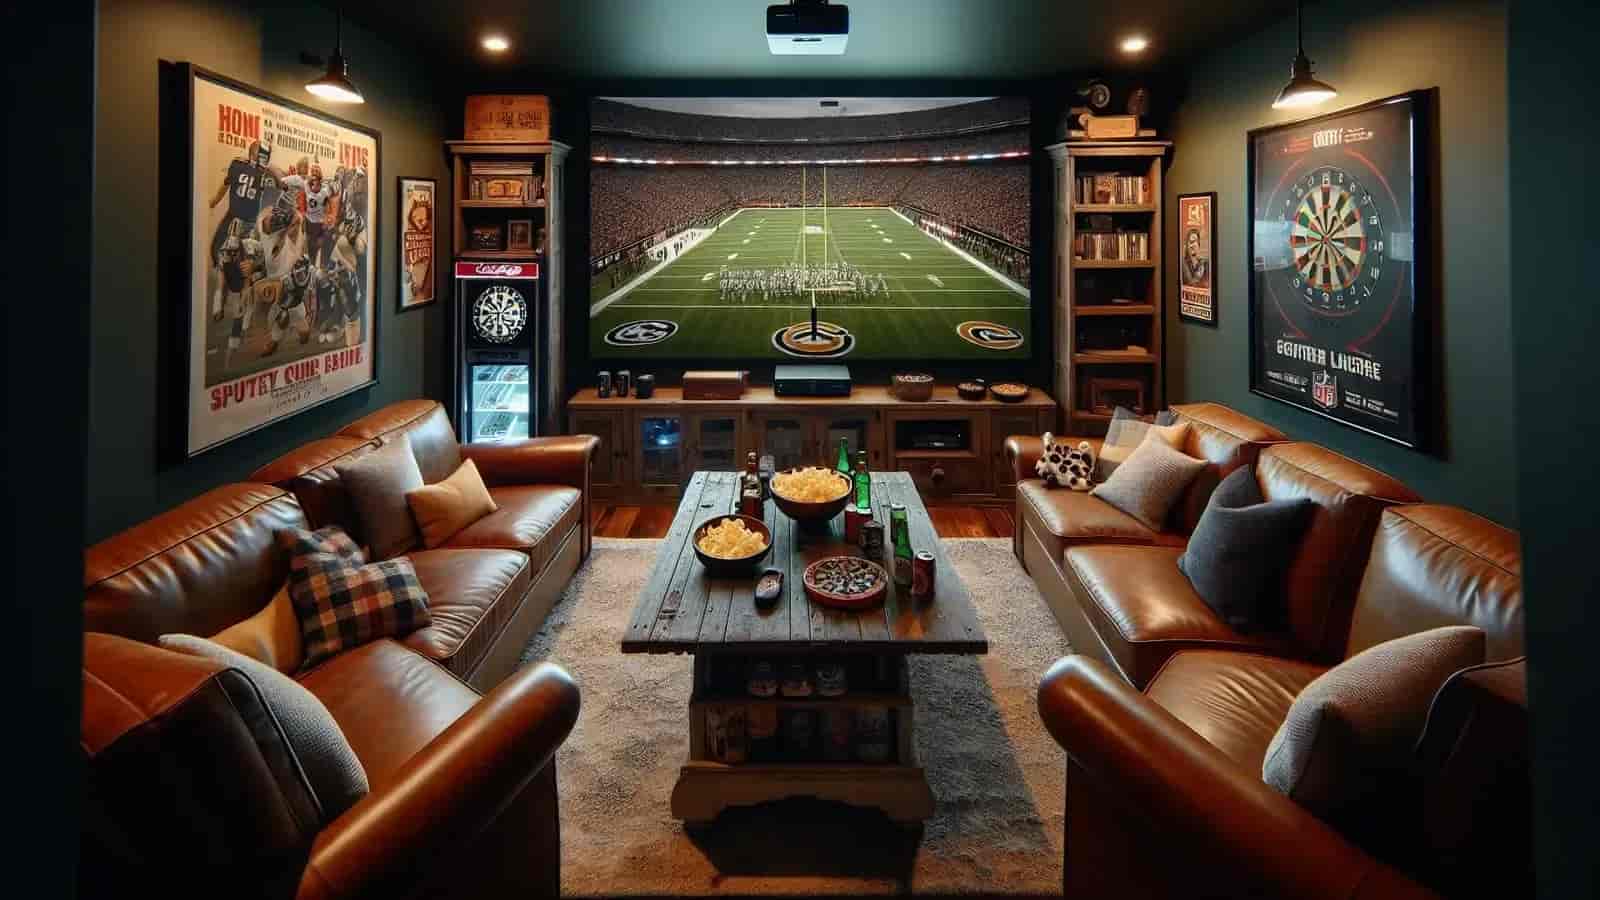
The most-built man cave and the most forgiving. It wants seated viewing, which means it does not care about ceiling height, and it wants a screen and comfortable seating, which means the core of it can be assembled without construction. If your ceiling measurement disqualified everything else, this is the room your space is best suited for.
The design problem in a game day room is not the television. It is sightlines for a group. A theater is designed around one ideal seat and a narrow arc around it. A game day room is designed around six people arriving with plates of food, some of whom will end up on the floor or standing behind the couch, and all of whom want to see the screen. That changes the layout priorities:
- Mount the screen lower than feels right. The common mistake is mounting above a fireplace or at standing eye level, which puts a seated viewer's neck at an angle for three hours. Center of screen at roughly seated eye level, generally 40 to 50 inches from the floor depending on your seating, is the target. If the screen has to go over a mantel, a tilting mount recovers part of the problem.
- Plan a second row. Even in a casual room, a bar counter with stools behind a sectional gives you a real second row instead of people hovering. The counter needs to be far enough back that the standing sightline clears the heads of the seated row, which usually means the stools sit 12 to 18 inches higher than the couch seat.
- Wide viewing angle matters more than peak picture quality. A group room has people watching from well off center. Panel technologies vary substantially in how much contrast and color they hold at an angle, and that is worth more in this room than a specification that only pays off from the center seat.
- Multiple screens are legitimate here. A main screen plus one or two smaller side screens for a second game is one of the few genuinely functional man cave clichés. Plan the wiring for it rather than adding it later.
The features that get used constantly in these rooms, based on what people keep rather than what photographs well: a beverage refrigerator within arm's reach of the seating, surfaces to put a plate down within reach of every seat, dimmable lighting, and enough outlets that phones charge without an extension cord across the floor. The features that photograph well and get used rarely: an elaborate memorabilia wall built around a team the household does not universally support, and a full wet bar in a room where a beverage fridge would have done the job.
On memorabilia, a practical note. Framed jerseys, signed items, and photographs are the most likely things in the room to be damaged by a basement water event or by sunlight, and they are the hardest to replace. Hang them well above the slab, keep them off exterior foundation walls where condensation can form behind a frame, and if something is genuinely valuable, consider whether displaying it in the lowest room of the house is the right choice.
The Home Theater: Screen Size, Seating Distance, and Throw Math
A dedicated theater is the man cave idea that basements suit best, because everything working against a basement (no windows, low ambient light, isolation from the rest of the house, thermal stability) is exactly what a theater wants. It is also the idea where the arithmetic is most worth doing before you buy, because the relationship between screen size, seating distance, and room depth is fixed by geometry.
Screen size and seating distance
The professional standard is expressed as a horizontal viewing angle: the number of degrees of your field of view that the screen occupies from the primary seat. SMPTE's reference recommendation is around 30 degrees; THX recommends a wider angle, around 36 degrees, for a more immersive presentation. You do not need to do trigonometry to use this. The practical translation for modern high-resolution content is that seating distance lands at roughly 1.2 to 1.6 times the screen's diagonal measurement.
Worked through for common sizes:
- 75-inch screen: primary seating roughly 7.5 to 10 feet back.
- 85-inch screen: roughly 8.5 to 11 feet back.
- 100-inch screen: roughly 10 to 13 feet back.
- 120-inch screen: roughly 12 to 16 feet back.
Now add the parts people forget. Behind the last row you want at least 2 to 3 feet of walkway. In front of the screen you want a foot or so of clearance. If you are running two rows, the rows themselves take 6 to 7 feet including legroom and recline. A 120-inch screen with two rows of recliners therefore wants a room in the neighborhood of 20 feet deep, not 16. Measure your room's usable depth before you choose the screen, not after.
Projector throw
If you are going with a projector rather than a panel, throw ratio is the specification that determines whether the unit can produce your target image size from where you can actually mount it. Throw ratio is the distance from lens to screen divided by the image width. A standard-throw projector with a 1.5 ratio needs 1.5 times the image width in distance: a 100-inch diagonal 16:9 image is about 87 inches wide, so roughly 11 feet of throw distance. A short-throw unit at 0.6 needs about 4.4 feet. An ultra-short-throw unit sits on a console under the screen.
In a low basement, this decision interacts directly with ceiling height. A ceiling-mounted projector hangs into the room. In a 7-foot space that puts hardware at head level in the middle of the room, where people walk. A short-throw or ultra-short-throw unit on furniture avoids that entirely and is usually the right answer under 8 feet, at the cost of some flexibility and typically a higher price for equivalent image quality.
Riser platforms
A second row needs to be elevated to see over the first, and the standard riser is 8 to 12 inches. That comes straight off your ceiling height for anyone sitting on it. A 7-foot basement with a 12-inch riser leaves 6 feet of headroom for the back row, which is unacceptable for standing and marginal for a tall person sitting upright. If your ceiling is low, run one row and put the extra seats at the sides rather than behind.
Acoustics versus isolation
These are two different problems and conflating them wastes money. Acoustic treatment (panels, bass traps, thick rugs) controls how sound behaves inside the room: echo, flutter, and boominess. Isolation controls how much sound gets out of the room to the rest of the house. Foam panels on the wall do essentially nothing for isolation. Section 16 covers what does.
The Golf Simulator: The Idea Most Basements Cannot Actually Fit
This section exists because the advice circulating on this topic is wrong in a way that costs people real money, and the correction is simple arithmetic.
Man cave listicles recommend basement golf simulators constantly. Extra Space Storage's man cave guides recommend one twice, describing simulators as realistic enough that you can play from your basement and noting only that they "require some space." Neither mention includes a ceiling height figure. That omission is the entire problem, because ceiling height is the specification that decides whether a golf simulator is possible, and a typical finished basement fails it.
Here is what the equipment manufacturers publish. TrackMan lists 10 feet or more as its recommended simulator room height, alongside roughly 15 feet of width and 18 feet of depth. TruGolf describes 10-foot-plus ceilings as the ideal position for a full installation, with 9 feet workable for a compact setup, and puts total room depth at 15 to 20 feet. Carl's Place notes that many golfers can make 8 to 9 feet work with shorter clubs but recommends 10 feet or more for swinging a driver and for taller players, with about 18 feet of total depth broken into roughly a foot behind the screen, 10 to 12 feet from screen to ball, and around 7 feet behind the ball for the swing.
Compare that against what a finished basement delivers. IRC sets the habitable-space minimum at 7 feet finished. A generous unfinished basement measuring 8 or 9 feet to the joists loses height to the floor assembly and the ceiling, and typically lands somewhere between 7 and 8 feet 6 inches finished. Ducts and beams project lower still, down to the 6-foot-4 exception in many cases, and a duct run crossing the swing path is exactly as disqualifying as a low ceiling.
The gap is not marginal. It is one to three feet, on the single dimension that cannot be worked around with a smaller purchase. A driver swing at speed into a ceiling is a broken club, a damaged ceiling, and a plausible injury.
What actually works
- Measure to the lowest obstruction across the entire swing area, not the average ceiling. A single duct in the wrong place disqualifies an otherwise adequate room.
- Test before you buy anything. Take your longest club into the room and make slow full swings, then faster ones. Manufacturers recommend this and it takes two minutes. It is the only test that accounts for your actual height and swing plane.
- Consider the garage instead. This is the honest answer for most people. Garages routinely have the height that basements do not, plus the width. The trade-off is conditioning and parking.
- Scale the ambition to the room. A launch monitor and a hitting net for iron and wedge practice is a legitimate, useful setup that fits in far less space than a full enclosure and screen. It is not the photograph from the listicle, but it gets used.
- Lowering the floor is a real option and an expensive one. Underpinning or benching to gain height is structural work requiring an engineer and permits, and it belongs in a conversation with a contractor, not on a project list.
If you have 10 feet of clear height, 15 feet of width, and 18 to 20 feet of depth, build the simulator. It is a genuinely excellent use of the space. If you have 7 feet 6 inches, no amount of careful shopping changes the geometry, and it is better to learn that from an article than from an installer standing in your basement.
The Game Room: Pool, Darts, Shuffleboard, and Their Real Clearances
Game tables are the most common man cave purchase that does not fit. The table itself is smaller than the space it requires, sometimes by a factor of two in floor area, because what you actually need is the table plus room to play around it.
Pool tables
The governing dimension is not the table. It is the cue, which is standard at 58 inches. You need roughly a cue length of clear space on every side of the playing surface so a shot from the rail can be taken without choking up. That produces these approximate room requirements with a full-length cue:
- 7-foot table (roughly 39 by 78 inch playing surface): a room around 13 by 16.5 feet.
- 8-foot table (roughly 44 by 88 inches): a room around 13.5 by 17.5 feet.
- 9-foot table (roughly 50 by 100 inches): a room around 14 by 18.5 feet.
Shorter cues (52-inch and 48-inch) buy back several inches per side and are a legitimate accommodation in a tight room, though they change how the game plays. Note also that these figures assume clear space, not space occupied by a sofa. A pool table in the same room as the seating area needs the seating outside the cue envelope.
Weight is the other consideration. A slate table is heavy: roughly 700 pounds for a 7-foot, commonly 800 to 1,000 for an 8-foot, and over 1,000 pounds for a 9-foot, concentrated on a small number of legs. On a basement slab this is irrelevant. On a framed floor above grade it is a real question, per the live-load discussion in Section 6. Slate tables are also assembled in place and are not casually moved afterward, which matters if you are getting one down a basement stair with a turn in it. Measure the stair, the landing, and every doorway before purchase, not after delivery.
Darts
Darts is the highest fun-per-square-foot item in this category and it fits almost anywhere, which is why it belongs in small rooms. The regulation setup for steel tip: bullseye at 5 feet 8 inches from the floor, and the throw line 7 feet 9.25 inches from the face of the board measured horizontally. Soft tip play uses 8 feet. Add room to stand behind the line and you want roughly 11 feet of depth and about 5 feet of width, with wall protection either side of the board because missed darts are a certainty. Ceiling height is not a factor.
Shuffleboard
The sleeper pick, and the one that most often surprises people with its footprint. Tables run from about 9 feet to a tournament-length 22 feet, and you need 2 to 3 feet of clear space at each end for players. A 22-foot table therefore wants a room approaching 28 feet long. Basements are frequently long enough for this when they are not wide enough for pool, which makes shuffleboard the better fit in a narrow rectangular basement. Nine-foot and 12-foot tables fit in ordinary rooms.
Foosball, air hockey, and table tennis
Foosball and air hockey want roughly 3 feet of clear space around the table for players and handle travel, which puts a standard foosball table in a space around 10 by 12 feet. Table tennis is the demanding one: the table is 9 by 5 feet, and competitive play wants substantial run-off at the ends. Recreational play in a 13 by 19 foot space is workable, and a folding table that stores upright against a wall is often the right compromise in a multi-use room.
The general principle across all of these: measure the room, subtract the seating and circulation, and see what is left before you shop. Almost every game table that ends up sold at a loss on a local marketplace was bought before that subtraction was done.
The Home Bar: Dry, Wet, and What Each One Requires
The bar is the feature with the widest gap between what people plan and what they end up using. The distinction that controls both cost and complexity is simple: a dry bar has no plumbing, and a wet bar has a sink and a drain.
The dry bar
Base cabinets, a countertop, a beverage refrigerator, lighting, and seating. No water supply, no drain, no permit in most jurisdictions beyond whatever electrical work is involved. It handles the overwhelming majority of what a home bar is actually used for: cold drinks, a surface to make a drink on, a place for glassware and bottles, and somewhere for people to sit and talk that is not the couch.
The wet bar
Everything above plus a sink, which means a supply line, a drain, a vent, and a plumbing permit. In a basement the drain is the expensive part. If your basement floor sits below the level of the main sewer line, which is common in deeper basements and on sloped lots, gravity drainage is not available and you need a pump. That is a real cost and a real maintenance item, and your plumber will identify which situation you are in during the first walkthrough.
The honest question to ask before committing: how often will you use a sink that is 15 feet from a kitchen sink? For some layouts, particularly a walkout basement where the kitchen is two floors away, the answer is constantly. For a basement directly below the kitchen with a stair in between, the answer is often "less than you think," and the money is better spent on seating or on the screen.
What gets used and what does not
Ranked by how consistently people report using them, rather than by how they photograph:
- Beverage refrigerator: used constantly, cheap, and the single highest-value addition to any bar area. An undercounter unit slots into a standard cabinet run.
- Counter space and seating: used constantly. A bar with nowhere to sit becomes a shelf.
- Good lighting over the bar: used constantly and consistently underspecified. Pendants or a dedicated fixture, on a dimmer.
- Glassware and bottle storage: used constantly. Open shelving looks better and collects more dust than people expect in a basement.
- Kegerator: genuinely used by some households and abandoned by others. It runs on electricity alone with no plumbing, which is a point in its favor. The realistic considerations are that kegs are heavy and awkward to swap down a basement stair, and that a keg has a finite freshness window that only makes sense if the room gets regular use.
- Ice maker: the item most often regretted. A production ice maker wants a water supply line and a drain, which is a wet-bar-level intervention for a convenience that a freezer and an ice tray address. Undercounter units that require plumbing are frequently disconnected within a few years.
- Dishwasher drawer: rarely used in practice unless the room hosts genuinely frequently.
Two practical notes
First, ventilation. If the bar plan involves any cooking appliance, that changes the code picture significantly and needs a professional conversation, not a weekend plan. Section 18 covers why combustion and basements interact badly.
Second, if wine is part of the plan, understand what wine storage actually requires. Long-term wine storage is a controlled-condition problem involving stable cool temperature, protection from light and vibration, and specific humidity conditions. An ordinary basement corner with a rack is fine for bottles you will drink within a year and is not a cellar. Purpose-built wine rooms use dedicated cooling systems and insulation for exactly this reason. It is worth being clear-eyed about which one you are building before you fill the racks with anything you care about.
The Gaming and Esports Setup
A gaming room is the man cave idea with the lowest construction requirement and the highest electrical and thermal requirement, which is an unusual combination and the reason it gets planned badly.
The construction side is nearly nothing. You need a desk or seating, a screen, and power. No clearances, no height requirement, no structural consideration. A gaming setup fits in a spare bedroom, a basement corner, or a 100-square-foot room, which is why it is the most achievable idea in this entire guide.
The parts that need actual planning:
- Heat. A high-end gaming PC, a large display, and a person generate meaningful heat in a small enclosed room. Basements start cool, which helps, but a small room with the door closed and 700 watts of equipment running for six hours will climb. If the room is small and closed, plan for air movement, and consider whether the existing HVAC actually reaches the space or just terminates near it.
- Power and circuit sharing. A gaming rig, monitors, peripherals, a receiver, and a mini fridge on one 15-amp circuit that also serves half the basement is how people discover breaker limits. Section 15 does the arithmetic.
- Network. A basement is the worst place in the house for wireless, because you are asking a signal to travel through a floor and often past ductwork and foundation walls. A hardwired run is the single biggest quality-of-life improvement for a basement gaming room, and it is far easier to pull cable during a finish than after.
- Seating. The most consequential purchase in the room and the one most often made last with whatever budget remains. If you are going to spend six hours at a time in a chair, the chair matters more than the lighting does.
- Screen distance for desk use. Desk gaming inverts the theater math: you sit close and the screen is small, so the constraint is desk depth rather than room depth. A 27-to-32-inch monitor wants roughly 2 to 3 feet of viewing distance, which means a desk about 30 inches deep.
On lighting: the LED strip aesthetic is genuinely functional, not just decorative. Bias lighting behind a display reduces the contrast between a bright screen and a dark room, which is the main driver of eye strain in a windowless space. It is also the cheapest upgrade in this article. Where it goes wrong is when colored light is the room's only light source, which makes every other task in the room, including finding a dropped cable, unnecessarily hard.
The Home Gym: Floor Loading and Overhead Clearance
Basements suit home gyms for the same reasons they suit theaters: cool, separated, few windows, and a concrete slab underneath. The slab in particular removes the question that makes an upstairs gym complicated. The two constraints that remain are overhead clearance and what happens to your floor and your neighbors' ears when weight comes down.
Overhead clearance
Work out the tallest thing you will do in the room and add clearance for the bar and your grip. For most people the binding movement is an overhead press from a rack: a six-foot person pressing a barbell to lockout needs roughly 8 feet of finished ceiling. Taller lifters need more. Anything with a jump (box jumps, jump rope, snatches) needs more again, and jump rope in particular is a fast way to discover exactly where your ceiling is.
This is a common point of failure because plenty of finished basements land at 7 feet or a bit above, which is legal habitable space and is not enough for overhead work. If that is your situation, the room can still be a genuinely good gym. It just needs to be built around movements that stay low: squats and presses from a rack at chest height, deadlifts, rows, bench, dumbbells, kettlebells, a rower or a bike, cable work. What it cannot be is a room where you press or jump.
Floor loading and dropped weight
On a slab, the static load of a rack and a full set of plates is not a structural concern. Dropped weight is a different matter. A loaded barbell released from lockout delivers a large impact force to a very small contact area, and dropping heavy loads onto bare concrete, or onto a thin mat over concrete, can crack a slab. It also transmits impact energy into the structure, which is why the person upstairs hears every rep.
The standard answers, in ascending order of cost and effectiveness: rubber stall mats over the slab, which handle ordinary training; rolled or interlocking rubber flooring over a subfloor layer, which is better; and a dedicated lifting platform under the bar for anything involving genuinely dropped weight. If you are training in a way that involves dropping loaded bars, budget for the platform rather than discovering the limits of the mat.
Above grade, the calculation changes entirely. IRC Table R301.5 designs habitable rooms other than sleeping rooms for a 40 pounds-per-square-foot live load. A rack with several hundred pounds of plates on it, plus the lifter, is a concentrated load rather than a distributed one, and a bonus room over a garage is a framed floor. That is a question for a structural engineer.
The rest of the room
Mirrors matter more than people expect, both for form and because they make a low windowless room feel considerably larger. Air movement matters, because a basement that is pleasantly cool at rest is not pleasantly cool during intervals. And equipment storage matters: an uncontained gym spreads, and a gym that has spread across the whole basement is a gym that has eaten the man cave.
The Workshop, Studio, and Loud Hobby Room
Workshops, music rooms, and recording spaces get grouped together here because they share the same three problems in the same order: noise, air, and power. Solve those and the rest is furniture.
The workshop
A basement workshop is convenient and has one significant drawback: dust. Woodworking dust is fine, airborne, and travels, and a basement is usually where the HVAC air handler lives. Cutting and sanding in the same space as a return air intake distributes sawdust through the entire house. If the shop is going in the basement, the mitigation is real dust collection at the tool, an air filtration unit running during and after work, and attention to whether the return is drawing from the shop area.
Bench height, lighting, and outlet placement are the three things that determine whether a shop gets used. Bench at roughly 34 to 38 inches for general work, lower for hand planing. Task lighting at the bench rather than relying on overhead. Outlets at bench height along the wall so cords are not running across the floor. And clearance around any stationary tool for the length of stock you actually cut, which is the constraint that eliminates table saws from small basements more often than the tool's own footprint does.
The music room
The isolation problem here is the hardest in this article, because low frequencies are the hardest thing to contain and drums and bass amplifiers produce them in quantity. Section 16 explains why. The short version: absorptive panels do not stop sound from leaving a room, and no amount of foam will keep a drum kit from being heard upstairs. Meaningful isolation requires mass, decoupling, and airtightness, and it is expensive.
This is the reason a detached outbuilding is often the honest recommendation for genuinely loud hobbies. A shed in the yard with power run to it will outperform a heavily treated basement room for a fraction of the isolation budget, because distance and an air gap do work that construction assemblies struggle to match.
For recording rather than rehearsal, the goals invert. You are trying to keep sound from getting in (HVAC noise, household noise, street noise) and to control the room's acoustic character, which is a treatment problem rather than an isolation problem, and much more tractable. A basement room with a good rug, some absorption at the first reflection points, and bass trapping in the corners is a workable recording space at reasonable cost.
Ventilation for finishes and solvents
If the hobby involves paint, stain, solvent, resin, or soldering, ventilation stops being a comfort issue and becomes a safety one. A basement is the hardest room in the house to ventilate, because the openings are few and small and the space is below grade. Anything producing meaningful fumes needs an exhaust path to the outside, and that exhaust path interacts with the combustion appliance problem described in Section 18. This is a conversation to have with a professional rather than a project to improvise.
Electrical Load: The Circuit Math Nobody Publishes
Nothing in the man cave genre discusses electrical capacity, and it is one of the most common reasons a finished room is annoying to live with. The symptom is familiar: the breaker trips when the projector, the receiver, and the space heater are on at once, or the lights dim briefly when the beverage fridge compressor kicks in. Both are capacity problems, and both are avoidable with arithmetic done before the walls close.
To be clear about scope: what follows is planning math to help you have an informed conversation with a licensed electrician and to size the work in your budget. It is not installation guidance. Electrical work in a finished space is permitted and inspected work, and running new circuits is not a DIY project for most people.
The arithmetic
A standard residential branch circuit is 120 volts. Watts equal volts times amps, so:
- A 15-amp circuit carries 1,800 watts at maximum.
- A 20-amp circuit carries 2,400 watts at maximum.
You cannot plan to the maximum. The code treats a load running three hours or more as continuous and requires the circuit to be sized at 125 percent of that load, which is the same thing as limiting a continuous load to 80 percent of the circuit rating. That gives you the real working numbers:
- 15-amp circuit, continuous: about 1,440 usable watts.
- 20-amp circuit, continuous: about 1,920 usable watts.
A movie night, a long gaming session, and a Sunday of football are all comfortably over three hours, so the continuous figures are the ones that apply to a man cave.
What the equipment draws
Approximate figures, since actual draw varies substantially by model and by how hard the device is working:
- Large LED or OLED television (65 to 85 inch): roughly 100 to 200 watts.
- Home theater projector: roughly 250 to 400 watts.
- AV receiver: under 100 watts idling, several hundred when driving speakers hard.
- Powered subwoofer: highly variable, commonly 100 to 500 watts under load.
- Gaming PC: roughly 400 to 750 watts under load for a high-end build, less at idle.
- Game console: roughly 150 to 200 watts.
- Beverage refrigerator or kegerator: roughly 85 to 150 watts, cycling rather than continuous, but with a startup surge that is much higher.
- Portable space heater: 1,500 watts. This single device consumes essentially an entire 15-amp circuit's continuous capacity by itself.
- LED recessed lighting: roughly 10 to 15 watts per fixture, which is why lighting is rarely the problem in a modern build.
Working an example
A moderately equipped theater and gaming room: projector at 350, receiver at 250 under load, subwoofer at 200, gaming PC at 500, console at 175, beverage fridge at 120, and eight recessed LEDs at 12 watts each for 96. That totals roughly 1,691 watts.
On a single 15-amp circuit with 1,440 usable continuous watts, that room is over capacity before anyone plugs in a laptop. On a single 20-amp circuit at 1,920 usable watts, it fits with a modest margin that a single space heater would erase instantly. The practical conclusion is that a well-equipped man cave wants its equipment split across at least two dedicated circuits, and that anything with a resistive heating element deserves its own.
Two code changes worth knowing about
These affect what your electrician will install and are worth understanding so the quote makes sense:
- GFCI protection now covers all basements. From 1987 through the 2017 code cycle, the requirement at NEC 210.8(A)(5) applied only to unfinished portions of basements. The 2020 edition removed that distinction, and GFCI protection is now required for basement receptacles whether the space is finished or not. The 2023 edition further expanded the covered voltage range. The rationale from the code committee was that the hazards in a basement do not disappear because drywall went up.
- AFCI protection applies to habitable rooms. Arc-fault protection under NEC 210.12 covers branch circuits serving family rooms, dens, recreation rooms, and similar spaces, which is what a finished man cave is. Dual-function breakers satisfy both requirements where both apply.
Two other things to raise with your electrician while the walls are open, because both are cheap now and expensive later. First, whether your existing panel has the physical space and the service capacity for the circuits you are adding, since a panel upgrade is a significant line item that is much better discovered at quoting time. Second, pulling low-voltage runs (network cable, speaker wire, HDMI) at the same time as the electrical rough-in. Wireless is not a substitute for a hardwired run in a basement, and the labor cost of pulling cable through open framing is a fraction of the cost of doing it through finished walls.
Sound Isolation: What Works and What Only Feels Like It Works
The most common wasted expenditure in a man cave build is acoustic foam bought to stop sound from reaching the rest of the house. It does not do that, and understanding why saves both money and disappointment.
There are two separate problems, and the products that address them are different:
- Absorption controls sound inside the room. Foam panels, fabric-wrapped fiberglass, heavy rugs, and upholstered furniture soak up reflections and reduce echo and flutter. This makes dialogue clearer and the room less harsh. It does essentially nothing to reduce what the person upstairs hears.
- Isolation stops sound from leaving the room. It is a function of mass, decoupling, damping, and airtightness, and it is achieved through construction assemblies rather than through anything you hang on a finished wall.
Sound transmission between spaces is rated in STC, Sound Transmission Class. For context, building codes commonly require STC 50 between separate dwelling units in multifamily construction. A conventional interior wall, two-by-four studs with a single layer of drywall on each side, typically lands in the low-to-mid 30s. That gap between the low 30s and 50 is the gap between "we can hear every word" and "we know something is happening down there."
What actually raises isolation, in order of effectiveness per dollar
- Seal the air paths. Sound follows air. Gaps around the door, an undercut door bottom, unsealed electrical boxes, duct penetrations, and the gap where a wall meets the floor all leak sound directly. Sealing these is cheap and delivers more improvement than most people expect, and it is the step most often skipped.
- Add mass. A second layer of drywall on the room side of the wall and ceiling. Mass is the fundamental mechanism, and doubled drywall is the cheapest mass available.
- Add damping between the layers. A viscoelastic damping compound sandwiched between two layers of drywall converts sound energy to heat and substantially outperforms two layers alone. The material cost is modest and the labor is one additional day during a drywall phase that is already happening.
- Decouple the layers. Resilient channel, sound isolation clips with hat channel, or staggered or double stud framing break the mechanical path that lets vibration travel through the structure. This is the biggest single improvement and the most sensitive to correct installation. Done wrong, for instance by driving a screw through the channel into the stud behind it, it performs no better than a rigid wall.
- Treat the door. A hollow-core interior door is an acoustic hole in an otherwise good wall. A solid-core door with gasketing and a bottom seal is a meaningful upgrade and is often the weakest link in a room where everything else was done well.
Two honest limitations
First, low frequencies are the hard case. Subwoofer output and kick drums travel through structure as vibration, and structure-borne low frequency is far harder to stop than airborne mid and high frequency. A room that comfortably contains dialogue and crowd noise will still transmit bass. If bass is the concern, decoupling is the mechanism that matters and half measures do not help much.
Second, all of this is dramatically cheaper before the drywall goes up. Doubled drywall, damping compound, and decoupling clips are inexpensive materials installed during work that is happening anyway. Adding them to a finished room means demolition first. If there is any chance the room will host a theater, a drum kit, or a serious sound system, decide about isolation during framing, not afterward.
For genuinely loud activities, revisit Section 6. A detached structure separated by 40 feet of yard achieves isolation that no reasonable construction budget matches indoors.
Lighting a Room With No Windows
Lighting is the cheapest thing that separates a room that feels finished from a room that feels like a basement, and it is consistently underspecified because a single overhead fixture technically illuminates the space.
The principle is layering. A room with one light source has one mood and a lot of shadow. A room with three sources can be a bright work space, a dim movie room, and a warm conversation space depending on what you turn on:
- Ambient. The general illumination, typically recessed fixtures on a dimmer. In a low basement, low-profile canless LED fixtures are the standard choice because they need almost no plenum depth above the ceiling, which matters when you are counting inches.
- Task. Light aimed at where something happens. Over the bar, over the pool table, at the workbench, at the desk. This is the layer most often missing.
- Accent. Cove lighting, LED strip behind a screen or under a bar counter, picture lights on the memorabilia wall. This is the layer that does the most for how the room feels relative to its cost.
Specific choices that matter more in a windowless room than they would upstairs:
- Put everything on dimmers. A room that serves as both a game day space and a theater needs at least two lighting states, and dimmers are the cheapest way to get them. Confirm dimmer and fixture compatibility, since mismatched LED and dimmer combinations flicker and buzz.
- Choose color temperature deliberately. Warmer light, in the 2700K to 3000K range, reads as residential and comfortable. Cooler light in the 4000K range and above reads as a workspace or a garage. Use warm for the lounge and cool for the workshop, and do not mix them in the same visual field.
- Bias lighting behind screens. A modest light source behind the television or projection screen reduces eye strain by narrowing the contrast between a bright image and a dark surround. Cheap, effective, and genuinely functional rather than decorative.
- Kill reflections on the screen. Any fixture in the direct line between a seat and a glossy screen will show up in the picture. Position fixtures out of that path, or use adjustable trims aimed away from the screen wall.
- Do not light a low ceiling from below. Uplighting emphasizes ceiling height and draws attention to how low the ceiling is. Wall washing and horizontal layers make a low room feel wider instead of shorter.
- Keep one bright state available. Cleaning the room, finding something behind the couch, and fixing a cable all need real light. A room that only has mood lighting is a room where routine tasks are irritating.
HVAC, Ventilation, and the Combustion Appliance Problem
Basements are thermally stable, which is a genuine advantage, and poorly ventilated, which is a genuine problem. The room that feels perfectly comfortable when you are alone with the door open feels stuffy with eight people, a projector, and a closed door.
Conditioning the space
The existing forced-air system may or may not actually serve the basement adequately. Many houses have a token supply register or two down there and no meaningful return, which means air is delivered but does not circulate. Extending ductwork properly is one answer, and its feasibility depends on whether the main system has spare capacity, which a contractor can assess.
The alternative that has become standard for this kind of project is a ductless mini-split. It gives the room independent temperature control, which matters because a theater full of people and equipment has a very different load than an empty room, and it does not depend on the main system having headroom. It also solves the garage and outbuilding cases, where extending house ductwork is usually impractical.
The combustion appliance problem
This is the safety item in this section and it deserves a direct explanation, because it is the kind of thing that goes wrong quietly.
Many basements contain fuel-burning appliances: a furnace, a water heater, sometimes a boiler. Older units are frequently atmospherically vented, meaning they rely on natural draft up a flue to carry combustion gases out of the house. That draft is not strong, and it depends on the pressure in the room around the appliance.
Now consider what a man cave build can add to that room: a powerful exhaust fan over a bar cooking appliance, a shop dust collection system venting outside, a bathroom exhaust fan, or simply a much tighter, better-sealed enclosure around the space. Each of these can lower the pressure in the basement relative to outside. If the depressurization is strong enough, it can overcome a weak natural draft and pull combustion gases back down the flue into the room. That is backdrafting, and the gas it brings with it includes carbon monoxide.
The practical protections:
- Install carbon monoxide alarms in the basement and outside sleeping areas, and test them. Modern codes require them where fuel-fired appliances are present, and they are inexpensive regardless of what your code edition requires.
- Tell your HVAC contractor what you are adding. Any significant exhaust fan being installed in a basement with atmospherically vented appliances warrants a combustion safety test, including a worst-case depressurization test with the new equipment running. This is a routine service that most competent HVAC contractors perform.
- Do not seal the appliance area into the finished space without professional input. Combustion appliances need combustion air, and framing a mechanical closet around a furnace without providing for that air is a genuine hazard rather than a code technicality.
- Maintain access. Whatever you build has to leave the furnace, water heater, panel, and shutoffs reachable and serviceable. This is both a code requirement and the thing that makes the difference between a $200 service call and a technician cutting into your new drywall.
If the appliances in your basement are sealed-combustion or direct-vent units, most of this concern does not apply, because those units draw combustion air from outside through their own dedicated intake. Knowing which type you have is a useful thing to establish early.
Flooring, Walls, and Ceilings That Survive Below Grade
Material choices below grade are governed by a single question: what happens to this if water reaches it. Everything else is preference.
Flooring
- Luxury vinyl plank. The default for basement finishes and deservedly so. Waterproof, convincing wood appearance, comfortable underfoot, and installable by a competent homeowner with click-lock systems. It is what most of the rooms in the photos you have been scrolling are actually standing on.
- Porcelain or ceramic tile. Completely waterproof and durable indefinitely. Cold without rugs, hard on the feet during long standing sessions, and more expensive to install. Excellent in a bar zone or bathroom, usually overkill for an entire lounge.
- Carpet over a subfloor panel. Warm and quiet, which matters in a room where people sit for hours and where impact noise travels. Install over a dimpled plastic subfloor panel that lifts the pad off the slab rather than directly on concrete. A significant water event will still ruin it.
- Rubber. For gym zones. Stall mats for basic coverage, rolled or interlocking rubber for a finished look.
- Sealed or epoxy concrete. The legitimate low-budget option and the right choice for a workshop. It also reads as intentional in an industrial-styled room rather than as unfinished.
- Solid hardwood and laminate. Generally not worth the risk below grade. Engineered hardwood over a proper vapor barrier is possible in a dry basement, but the risk-adjusted math rarely beats vinyl plank.
Walls
The assembly matters more than the finish. Framing a stud wall directly against a cold foundation wall and filling it with fiberglass batt is the classic mistake, because warm interior air reaches the cold concrete, condenses inside the cavity, and the assembly stays wet. The standard correct approach is rigid foam insulation directly against the foundation, sealed at the edges, then the stud wall with cavity insulation, then drywall. The foam keeps the condensing surface warm enough that it does not condense.
Other worthwhile choices: moisture-resistant drywall at the lowest courses, holding the bottom of the drywall slightly above the slab so a minor water event does not wick straight up into it, and treated bottom plates in contact with concrete.
On finish materials, the two that show up most in man cave design are wood paneling and dark paint. Both work, with caveats. Dark paint makes a theater better and a small room smaller, so use it where the room's purpose is to disappear around a screen and avoid it in a space already tight on volume. Wood paneling on every surface reads as dated to many buyers, and doing an accent wall rather than a full wrap gets most of the character with less of the commitment.
Ceilings
This is the decision with the most consequences in a low room:
- Drywall ceiling. Looks like a real ceiling, costs the least height (roughly half an inch), and is what buyers expect in a finished basement. Every future access to a pipe, valve, or junction box means cutting and patching.
- Drop ceiling. Permanent access to everything above it, which in a basement is where the plumbing, wiring, and ductwork live. It costs 3 to 6 inches of height, which in a 7-foot room is a substantial fraction of what you have.
- Exposed and painted. Spray the joists, ducts, and pipes a single dark color, usually flat black or dark gray. Costs no height at all, keeps full access, and has become a legitimate design choice rather than a compromise, particularly in a theater where a dark ceiling is an advantage. It does mean living with visible mechanicals, and it does not read as "finished" to an appraiser.
- Hybrid. Drywall over the main lounge, drop panels over the mechanical and laundry zones. Common in larger finishes and usually the most practical answer.
If your basement is tight on headroom, the ceiling choice is where you either preserve the room or lose it. Exposed and painted preserves every inch; a drop ceiling can cost you the difference between a room that feels acceptable and one that does not.
Furniture, Layout, and Sightlines
Two constraints govern furniture in a basement man cave, and only one of them is about the room.
The first is the stair. Everything that goes into a basement has to get down the stair, around whatever turn it has, and through the door at the bottom. Sectionals, recliners, pool tables, and large cabinets routinely fail this test after purchase. Before you buy anything large, measure the narrowest point of the path: stair width, ceiling height over the stair, the diagonal clearance at any landing or turn, and the door opening. Then compare against the item's packaged dimensions, not its finished dimensions.
This is a solved problem for furniture manufacturers, incidentally. Modular sectionals that ship in pieces and assemble in the room, and knock-down furniture generally, exist substantially because of basements and apartment stairwells. If the path is tight, buy modular and skip the problem.
The second constraint is circulation. The measurements worth holding to:
- Primary walkways: 36 inches minimum, and this is a floor rather than a target in a room where people carry drinks and plates.
- Between a coffee table and seating: 14 to 18 inches. Closer and people bark their shins; farther and nobody can reach it.
- Behind bar stools: 24 inches minimum to slide out, 36 inches if anyone needs to walk behind a seated person.
- Around a pool table: a full cue length from the rail, per Section 10. This is the clearance most often violated.
- Between rows of theater seating: 6 to 7 feet front to front, more if the seats recline deeply.
- In front of a dartboard: the throw distance plus room to stand behind the line, roughly 11 feet total.
The layout principle that makes multi-purpose rooms work is zoning. A room that tries to be one undifferentiated space with everything in it feels chaotic and serves nothing well. The same room divided into a viewing zone, a game zone, and a bar zone, defined by rugs, lighting, and furniture placement rather than by walls, feels intentional and lets three things happen at once without interference. Walls are expensive, cost daylight and airflow, and are hard to undo. Rugs and lighting are cheap and reversible.
Last practical note: build in more surface area than you think you need. Somewhere to set a drink within reach of every seat is the difference between a room people relax in and a room where everyone holds their glass. Side tables, a console behind the sofa, a bar rail along a half wall, and a wide ottoman with a tray all do this cheaply.
Man Cave Ideas on a Budget
The premise of most man cave content is a construction project. It does not have to be. Some of the best-used rooms in this category involved no framing at all, and the highest-satisfaction-per-dollar version of this project is almost always smaller than the version people plan.
Under $500
The goal at this level is to make an existing space feel deliberate rather than leftover. Paint is the highest-leverage purchase in the entire article: a weekend, under a hundred dollars, and it changes the room more than anything else at this price. Add a large area rug, which does triple duty by defining the zone, warming a concrete or vinyl floor, and absorbing enough reflection to make the room sound better. Add two lamps so the room is not lit by a single overhead. Add a dartboard with a proper surround. Mount the television at seated eye level rather than wherever the existing bracket was.
The most common mistake at this tier is spending the whole budget on a television and leaving the room otherwise untouched, which produces a nice screen in a space nobody wants to sit in.
$500 to $2,500
Now you can address the room's real deficiencies. A beverage refrigerator. Better seating, which is where a large share of this budget should go, because seating determines how long people stay. Plug-in track or picture lighting to add the accent layer without an electrician. An LED strip behind the screen. Peel-and-stick or nail-up wall treatment on one accent wall. Blackout curtains if there are windows. Sealing and painting the concrete floor. Painting the exposed ceiling joists and mechanicals flat black, which is a weekend of unpleasant overhead rolling and transforms an unfinished basement more than any other single thing at this price.
$2,500 to $10,000
This is where a used game table becomes realistic, and the used market for pool tables, shuffleboard, and arcade cabinets is genuinely good because these items are bought optimistically and sold when people move. Verify the stair path first. This tier also covers a proper projector and screen, a real surround system, a dry bar built from stock base cabinets and a solid-surface counter, quality theater seating, and hiring an electrician for two dedicated circuits, which is the single best money spent in this range if the room is equipment-heavy.
Where the budget goes wrong
- Buying the display first. The screen is the most visible purchase and the least determinative of whether the room gets used. Seating, lighting, and temperature decide that.
- Buying game tables before measuring. Covered in Section 10, and it remains the most expensive avoidable mistake in this category.
- Skipping the electrical and then living with it. Adding circuits after the finish costs several times what it costs during.
- Buying acoustic foam to stop noise. It does not, per Section 16.
- Theming before living in the room. Use the space for a season before committing to permanent decor. What you thought you would do in there and what you actually do are frequently different, and Section 24 explains why permanent theming is also the most expensive choice at resale.
Small Man Cave Ideas: Making Under 200 Square Feet Work
A spare bedroom is typically 100 to 150 square feet. A basement corner carved out of a larger space might be less. That is genuinely enough for several of the best versions of this room, provided you pick one thing and commit to it.
What fits comfortably in under 200 square feet:
- A gaming or esports setup. The best small-room use by a wide margin. A desk, a chair, a display, and power. Nothing about it needs floor area.
- A one or two person theater. A 65-to-75-inch screen with seating 7 to 9 feet back fits in a small room, and a small room is easier to darken and easier to treat acoustically than a large one.
- A darts room. Roughly 5 by 11 feet of clear space, and the rest of the room can be something else.
- A reading, listening, or cigar-free lounge. Two good chairs, a side table, a lamp, a small speaker system, and shelving. Underrated and cheap.
- A music practice or recording corner. Small rooms are acoustically challenging but treatable, and for recording rather than rehearsal, small is workable.
- A hobby or model-building bench. A bench, task lighting, and wall storage.
What does not fit, and forcing it produces a room that works badly for everything: pool, shuffleboard, golf simulation, table tennis, and a full gym.
Techniques that buy back space
- Go vertical. Wall-mounted everything: the display, shelving, bottle storage, the dartboard cabinet, headphone hooks. Floor space is the scarce resource, and wall space usually is not.
- Wall-mount the display rather than using a console. A media console eats 18 inches of depth across the width of a wall for storage that a floating shelf provides.
- Use furniture that stores. An ottoman that opens, a bench with cubbies, a bar cart that rolls out of the way.
- Mirrors and light color on at least one wall. Both genuinely change perceived size, which is worth more in a small windowless room than anywhere else in a house.
- Fold-down and wall-mounted surfaces. A drop-leaf bar shelf against the wall gives you a drink surface that disappears.
- Pick one focal point. A small room with a screen, a bar, a dartboard, and a bookshelf reads as cluttered. The same room built around one of those, with the others reduced to accents, reads as designed.
The general finding, and it holds across the whole category: small rooms that do one thing well get used more than large rooms that do five things adequately. If your space is limited, that is a constraint pushing you toward the better outcome rather than away from it.
What a Man Cave Actually Costs
Cost figures for this project are close to meaningless without specifying scope, because the same phrase covers a $400 weekend and a $120,000 construction project. What follows are published national ranges, which is what is honestly available. Regional variation is large, material and labor pricing moves, and the only number that describes your project is a written quote from a contractor who has stood in your basement.
By scope tier
- Furnish an existing finished room: a few hundred dollars to a few thousand. No construction, no permit, no schedule. Paint, seating, lighting, a display, and a beverage fridge.
- Stabilize and use an unfinished basement without finishing it: commonly quoted in the low thousands. Seal the floor, add real lighting, address moisture, insulate rim joists, paint the ceiling black, add shelving. The space stays unfinished and becomes usable, which is a legitimate endpoint rather than a compromise.
- A basic basement finish: published per-square-foot figures for basement finishing commonly run in the $30 to $75 range, with basic work quoted lower and full remodels higher. HomeAdvisor data cited in industry summaries puts the average basement finishing project around $32,000 with a typical range of roughly $15,000 to $75,000.
- A finish with specialty builds: add a bar, a dedicated theater, a bathroom, or an egress window and the total climbs substantially. Egress window installation including excavation, cutting the foundation, the well, and drainage is commonly quoted in the $3,500 to $8,500 range.
- Garage conversion: published ranges run roughly $50 to $200 per square foot depending heavily on how much conditioning and insulation the space needs.
- Detached outbuilding: extremely variable, from a modest prefab shed with power run to it up to a fully conditioned studio priced like small new construction.
Where the money actually goes
The line items that surprise people, in rough order of how often they blow a budget:
- Water remediation discovered after demo. The reason Section 5 comes before every design section.
- Egress, if it applies. A four-figure item that appears when the scope crosses a code line, per Section 3.
- Electrical, including a possible panel upgrade. Adding circuits is routine. Discovering the panel is full is not.
- Plumbing below the slab. Any wet bar or bathroom that needs a new drain means breaking concrete, and a basement below the sewer line means a pump.
- Scope creep. The most reliable budget killer in this category. A finish becomes a finish with a bar, then with a bathroom, then with a bedroom, and each addition felt small at the time.
The single most effective cost-control measure is deciding the scope in writing before you get quotes, then getting at least three itemized bids on that identical scope. Spreads of 30 to 50 percent between bidders on the same basement work are routinely reported, which means the third quote is frequently worth more than any material substitution you could make. Holding 15 to 20 percent of the budget in reserve is also standard advice for basements specifically, because something behind the foundation or under the slab will surprise you.
Our companion guide to basement remodel ideas and what they cost breaks the tiers down line by line, including waterproofing systems, framing assemblies, ceiling options, flooring, bathrooms, and what is realistically worth doing yourself.
The Resale Question: Why Heavy Theming Costs You Money
This is the section that most directly contradicts the rest of the internet on this topic, so it is worth laying out the evidence rather than just asserting it.
Every man cave guide encourages committing hard to a theme: build the room around your team, install the trophy wall, put in the casino, wrap it in wood paneling and neon. The resale data points the other direction, and the effect runs through two separate mechanisms.
Mechanism one: below-grade space is valued differently
In standard appraisal practice, finished square footage below grade is reported separately from above-grade Gross Living Area and is generally not added to the GLA total, even when the space is fully finished to the same standard as the rest of the house. Appraisers typically value below-grade finished space at roughly 50 to 70 percent of the per-square-foot value of above-grade space, with the exact treatment varying by market and by whether the basement is a walkout with direct exterior access.
The practical translation: an 800 square foot finished basement does not add 800 square feet to your listed heated square footage the way an 800 square foot addition on the main floor would. It gets its own line, at a lower rate. This is not a knock on finishing a basement. It is the correct expectation to hold going in.
Mechanism two: cost recovery is partial
The 2025 Cost vs. Value Report from Zonda and the Journal of Light Construction puts national average cost recovery for a basement remodel at roughly 71 percent. The National Association of Realtors' 2025 Remodeling Impact Report arrives at a similar figure through a different methodology. The range across markets is wide, reported from the low twenties in some areas to the mid eighties in others, and it correlates strongly with whether basements are standard in the local housing stock. Markets where basements are rare tend to show lower recovery, because buyers there are not shopping for one.
Basement finishing still compares favorably to many interior projects on this measure. The point is not that it is a bad investment. The point is that it is a partial-recovery investment, and planning as though you will get every dollar back leads to overbuilding.
Where theming specifically hurts
Layered on top of both mechanisms is a consistent finding in remodeling guidance: highly personalized designs, including themed rooms and built-in single-purpose setups, tend to reduce return relative to a neutral, flexible finish of the same cost. The reasoning is straightforward. A buyer walking into a neutral finished basement sees a family room, an office, a gym, a playroom, or a guest space, and mentally fits their own life into it. A buyer walking into a room built permanently around a specific team, a casino motif, or a fixed bowling lane sees a demolition line item.
This creates a resolution that is better than it sounds, because you do not actually have to choose:
- Make the permanent layer neutral. Flooring, wall color, ceiling, lighting, and the layout itself. These are the expensive, hard-to-change elements, and neutral versions of them cost the same as themed versions.
- Make the personality layer removable. Furniture, framed art and memorabilia, rugs, signage, LED accent color, and freestanding equipment. All of it comes with you when you move, which is a second advantage.
- Be cautious with built-ins that serve one activity. A permanently installed bowling lane, a bar built around a specific bottle collection, or a tiered riser that only works for one seating arrangement are all difficult to repurpose. A well-built bar with neutral cabinetry is not.
- Avoid removing a bedroom if you can help it. Converting a spare bedroom into a single-purpose man cave changes the bedroom count in the listing, and bedroom count is a coarse filter that buyers search on. Keeping the room convertible preserves it.
- Get permits for permitted work. Unpermitted finishes cause real problems at sale. An appraiser may decline to count the square footage, an inspector will flag it, and a lender may require remediation before closing. The retroactive permit is always more expensive than the original one.
One more consideration worth raising even though it is not universal: finishing a basement can increase your property assessment and therefore your property taxes, since assessors generally recognize the added finished area. The increase is typically smaller than the value added because most assessors apply the same below-grade discount that appraisers do, but it is a recurring cost rather than a one-time one, and it belongs in the arithmetic. Your county assessor's office can explain how your jurisdiction handles it.
None of this is a reason to build a boring room. It is an argument for putting the personality in the layer you can take with you, which is also the layer you are most likely to want to change in five years anyway.
Clearing the Room: The Storage Problem Every Build Runs Into
Ask a basement contractor what surprises homeowners most and it is not the cost or the schedule. It is that the basement was holding far more than anyone realized, and every bit of it has to go somewhere for the duration.
The room you are about to convert is, for most houses, the largest storage space on the property. It holds holiday decorations, off-season clothing, luggage, sports and camping gear, tools, leftover building materials, old electronics, photo albums, keepsakes, spare furniture, paint cans, the artificial tree, and the boxes from the last two moves that never got unpacked. A finish project displaces all of it, not for a weekend but for the length of the build.
The realistic timelines: a basic finish commonly runs four to eight weeks. A mid-range finish with specialty rooms runs eight to fourteen. A full conversion with a bathroom and bedroom can run several months. That is a long time for your garage to be unusable, which is the usual improvised answer and the one that fails first, because the garage is already full.
There is a second problem that does not arrive until the work is finished, and it catches people harder than the first one. A basement finish is a permanent storage displacement. Unlike a kitchen remodel, where everything goes back in the cabinets when the cabinets arrive, the 700 square feet of open basement that used to absorb everything is now a lounge with a sectional and a screen. The items that lived down there still exist. They no longer have anywhere to live. The common outcome is overstuffed closets, a garage you cannot park in, and bins stacked in the laundry room, which is a slow erosion of the rest of the house to pay for the improvement of one room.
There is also a dust argument. Framing, drywall sanding, and any concrete cutting produce fine dust that gets into everything within reach. Leaving boxes of photographs, textiles, upholstered furniture, or anything soft-sided near an active work zone is a guaranteed cleanup job at best.
This is where a storage unit does honest work in this project, both during the build and after it. 10 Federal Storage operates fully automated facilities across sixteen states, which suits a construction schedule rather than fighting it:
- Rent online before demo starts. No office visit, no appointment, no waiting for business hours. You can do it the evening before the weekend you plan to clear the basement.
- Move over a weekend or two ahead of the contractor. Clearing the space before the crew arrives is also the cheapest way to speed up the job, since nobody is being paid to work around your boxes.
- Get in whenever you need something. 24/7 access means retrieving the thing you forgot you needed does not require planning around anyone's hours.
- Keep the unit for a month afterward. Month-to-month leases with no long-term contract mean you can sort what genuinely returns to the finished room and what does not, without making that decision under time pressure on moving day.
On the permanent displacement problem specifically, a small unit kept past the end of the project solves it cleanly. The camping gear, the decorations, the keepsakes, and the genuinely worth-keeping items that do not need to be in the house every day live somewhere else, the finished basement stays a finished basement rather than slowly refilling with bins, and the garage stays a garage.
Sizing a Storage Unit for a Man Cave Build
The sizing question for this project is different from a move, because you are not storing a household. You are storing whatever a basement had accumulated, which is mostly boxes, seasonal items, and a few awkward large objects.
Rough guidance by what you are clearing:
- A partial clear-out, or an already-tidy basement: a 5x5 or 5x10 unit handles boxes, seasonal decorations, luggage, and a modest amount of gear. This covers a surprising number of projects where the basement was half-finished already or where only one zone is being converted.
- A typical full basement clear-out: a 10x10 unit is the common answer. It absorbs the boxes plus a few pieces of displaced furniture, shelving units, and bulk items like a disassembled bed frame or a spare mattress.
- A large basement, or one that was doubling as a workshop: a 10x15 or 10x20 unit handles the volume when tools, a workbench, lumber, exercise equipment, and furniture are all coming out at once.
If you want to work from an actual inventory rather than an estimate, the storage size calculator works from a list of what you are storing, and the unit size guide shows what fits in each footprint with dimensions and typical contents.
Two practical notes on packing a basement out
First, this project is an unusually good sorting opportunity and most people waste it. Everything in the basement is going to be handled once regardless. Handling it with a donation pile and a disposal pile alongside the keep pile costs almost no extra time and permanently reduces the volume you are paying to store and eventually move back. The alternative is paying to store, for months, a box you would have thrown away if you had opened it.
Second, think about what is temperature-sensitive before it goes in a box. Electronics, vinyl records, candles, some adhesives, musical instruments, and anything with a battery are all affected by temperature swings, and a climate-controlled unit is temperature-regulated for exactly that reason. Standard drive-up units are the right choice for tools, lumber, patio furniture, and general household overflow, and they cost less.
When Renting a Storage Unit Is the Wrong Call
We rent storage for a living, and we would still rather tell you when not to. Here are five situations where a unit is the wrong answer for this project.
You are furnishing, not building. If the plan is paint, a rug, a screen, and better seating, nothing needs to leave the house. There is no demolition, no dust, and no crew needing the floor. A unit in this case is solving a problem you do not have. Skip it.
You have somewhere free that actually works. A genuinely empty garage bay, a spare room you are not using, or a relative's unused space is cheaper than a unit and often more convenient. The test is whether the space is really available for the full duration and whether it is protected from the dust. If yes, use it. The unit is for people who have honestly run out of options in the house, and plenty of people have not.
The contents are not worth the rent. Add up what a unit would cost for the length of the build and compare it against what is actually in the boxes. If the answer is four months of rent to preserve items you have not opened in years and would not replace if they vanished, the project has just handed you a reason to deal with them. Donation and disposal are legitimate outcomes and they are permanently cheaper than storage.
You are storing something a self-storage unit is not built for. Our units are temperature-regulated, and that is a real and useful thing for the great majority of household belongings. It is not the same as a purpose-built wine cellar, which is a controlled-condition environment maintained for long-term bottle aging. If you are moving a serious wine collection out of the space you are renovating, it needs a wine storage solution, not a storage unit. The same honesty applies to anything with genuinely specialized preservation requirements. Ask what the item actually needs, and if the answer is more than temperature regulation, a general-purpose unit is the wrong tool.
The project is not scheduled yet. Renting a unit while you are still getting quotes means paying for months of storage during a planning phase that may run longer than you expect, or may end with you deciding not to build. Rent when the contractor has a start date. Because the leases are month to month and the rental happens online in a few minutes, there is no advantage to being early.
The related judgment call, and it is a real one: a unit kept indefinitely after the project ends is either solving the permanent displacement problem described in Section 25 or it is deferring a decision. Both happen. If a year has gone by and you have not opened the door, that is information worth acting on rather than a bill worth continuing to pay.
Frequently Asked Questions About Man Cave Ideas
Under IRC Section R305.1, habitable spaces and the portions of basements containing them require a finished ceiling height of at least 7 feet, with beams, ducts, and similar obstructions permitted to project to within 6 feet 4 inches. That is the legal minimum. What you need in practice depends on the activity: seated uses like a theater, lounge, or gaming setup work fine at 7 feet, overhead pressing in a home gym wants roughly 8 feet, and a golf simulator wants about 10. Local amendments vary, so confirm with your building department.
It depends entirely on scope. Adding furniture, a rug, and a television to an existing finished room is generally not construction and generally does not require a permit. Framing walls, hanging drywall, adding circuits, or installing plumbing creates habitable space and almost always does. Requirements vary by jurisdiction, so the reliable answer is a call to your local building department describing what you plan to do.
This is genuinely unsettled and depends on your jurisdiction. The base IRC text at R310.1 refers to basements without qualification, some states amend it to apply only to basements containing habitable space, and newer editions add a provision exempting alterations to existing basements except where a new sleeping room is created. Enforcement varies between inspectors as well. Any room where someone might sleep needs an egress opening in every version of the code. For a lounge with no bedroom, ask your local building department before you plan the scope.
The range is very wide because the term covers everything from furnishing a spare room to a permitted basement construction project. Furnishing an existing finished space can be a few hundred dollars. Published national figures for basement finishing commonly run in the range of $30 to $75 per square foot, with industry summaries putting the average full project around $32,000 and a typical span of roughly $15,000 to $75,000. Regional variation is significant, and only an itemized quote on your actual scope will tell you your number.
Only if the basement has the height for it. Manufacturers generally recommend around 10 feet of ceiling clearance for comfortable full swings with a driver, along with roughly 15 feet of width and 18 to 20 feet of depth. A typical finished basement lands between 7 and 8 feet 6 inches once the floor and ceiling assemblies are in, which is not enough. Measure to the lowest obstruction across the whole swing area, then take your longest club into the room and make full swings before buying anything. Garages more often have the height.
Plan for the table plus roughly a cue length of clear space on every side, since a standard cue is 58 inches. That works out to approximately a 13 by 16.5 foot room for a 7-foot table, 13.5 by 17.5 feet for an 8-foot table, and 14 by 18.5 feet for a 9-foot table. Shorter 48-inch and 52-inch cues buy back some space in a tight room. Also measure the stair and doorways before buying, because slate tables are heavy and are assembled in place.
Yes, and before rather than after. The EPA recommends testing the lowest level of the home that is lived in or could reasonably be lived in, and its action level is 4.0 picocuries per liter, with action worth considering between 2 and 4. Finishing a basement dramatically increases the hours you spend at the lowest level of the house, and renovations can change airflow enough to affect readings, which is why the EPA also recommends retesting afterward. Mitigation is far easier and cheaper to install before the walls close.
No. Acoustic foam is an absorption product, which controls echo and reflections inside a room. Stopping sound from leaving the room is isolation, and it requires mass, decoupling, damping, and airtightness built into the wall and ceiling assemblies. Sealing air gaps, adding a second layer of drywall with a damping compound between layers, decoupling with resilient channel or isolation clips, and upgrading to a solid-core gasketed door are what actually reduce transmission.
Paint, lighting, and a rug, in that order. Painting exposed ceiling joists and mechanicals a flat dark color transforms an unfinished basement more than any other single low-cost step. Adding layered lighting rather than relying on one overhead fixture changes how finished the space reads. A large area rug defines the zone, warms a hard floor, and improves how the room sounds. All three together are typically a weekend and a few hundred dollars.
A finished basement generally adds value, but not dollar for dollar. The 2025 Cost vs. Value Report from Zonda and the Journal of Light Construction puts national average cost recovery for a basement remodel around 71 percent, with wide variation by market. Separately, finished below-grade square footage is reported apart from above-grade Gross Living Area in standard appraisal practice and is typically valued at roughly 50 to 70 percent of the above-grade per-square-foot rate. Heavy permanent theming tends to reduce return relative to a neutral finish, which is why keeping the personality in removable elements is the better approach.
It depends on the activity. Basements suit theaters, lounges, bars, game rooms, and gyms because they are dark, separated, thermally stable, and sit on a slab. Garages suit golf simulators, workshops, and full-height gym setups because they usually have more ceiling height and width, at the cost of parking and conditioning. Spare bedrooms are the cheapest option and work well for gaming and small lounges. Detached sheds offer the best sound isolation for loud hobbies. Attics are usually the most difficult because of sloped ceilings, thermal extremes, and floor framing that may not have been sized for occupancy.
Usually, if the room will run significant equipment. A 15-amp circuit provides about 1,440 watts of continuous capacity and a 20-amp circuit about 1,920, and a room with a projector, an AV receiver, a subwoofer, a gaming PC, a console, and a beverage refrigerator can exceed the smaller of those before anything else is plugged in. Splitting the equipment across at least two dedicated circuits is the usual answer. Note also that recent code editions require GFCI protection for basement receptacles whether the space is finished or not. Circuit work should be done by a licensed electrician and is typically permitted and inspected.
For a typical full basement clear-out, a 10x10 unit is the common answer, holding boxes plus displaced furniture and shelving. A partial clear-out or an already-tidy basement often fits in a 5x5 or 5x10. A large basement that was also serving as a workshop, with tools, lumber, and exercise equipment coming out, is usually a 10x15 or 10x20. Working from an actual inventory using a size calculator is more accurate than estimating.
A basic finish commonly runs four to eight weeks. A mid-range finish including specialty builds like a bar, a bathroom, or a dedicated theater typically runs eight to fourteen weeks. A full conversion involving a bedroom, a full bathroom, and a separate entrance can run several months. Furnishing an already-finished room is a weekend. Add time at the front for any water remediation, radon mitigation, or permitting.
Building a Room You Will Actually Use
The rooms in this category that succeed have one thing in common, and it is not budget. It is that the person building them was honest about the constraints early and designed to them instead of around them.
That means measuring the ceiling before choosing the activity. Calling the building department before scoping the work. Testing for radon before framing. Fixing the water before building on top of it. Doing the clearance arithmetic before buying the table. Running the circuit math before the walls close. And putting the personality into the layer you can take with you, so the room can become something else when your life does.
Every one of those steps is cheap. All of them together cost less than one wrong purchase or one round of demolition, and they are the difference between a room that gets used every week and a room that quietly becomes storage again within two years.
If your project starts with clearing out a basement that has been absorbing your household's overflow for a decade, that part is solvable in a weekend with somewhere to put it all.
Find a 10 Federal Storage location near you and rent online in a few minutes. Automated access, 24/7 entry, month-to-month leases, and no long-term commitment, so the unit lasts exactly as long as your project does.
About the Author
10 Federal Storage
Our team at 10 Federal Storage has been in the self storage industry for decades. With knowledge gained from multiple universities and in the field, we are well-prepared and excited to assist with your storage needs. When you rent a unit with us, you can feel confident that our seasoned customer service team’s help will make your transition as seamless as possible. Customer satisfaction is our number one priority, and we strive to make your experience exceptional with our automated leasing options, diverse unit sizes, and a strong commitment to sustainability.