
.svg)
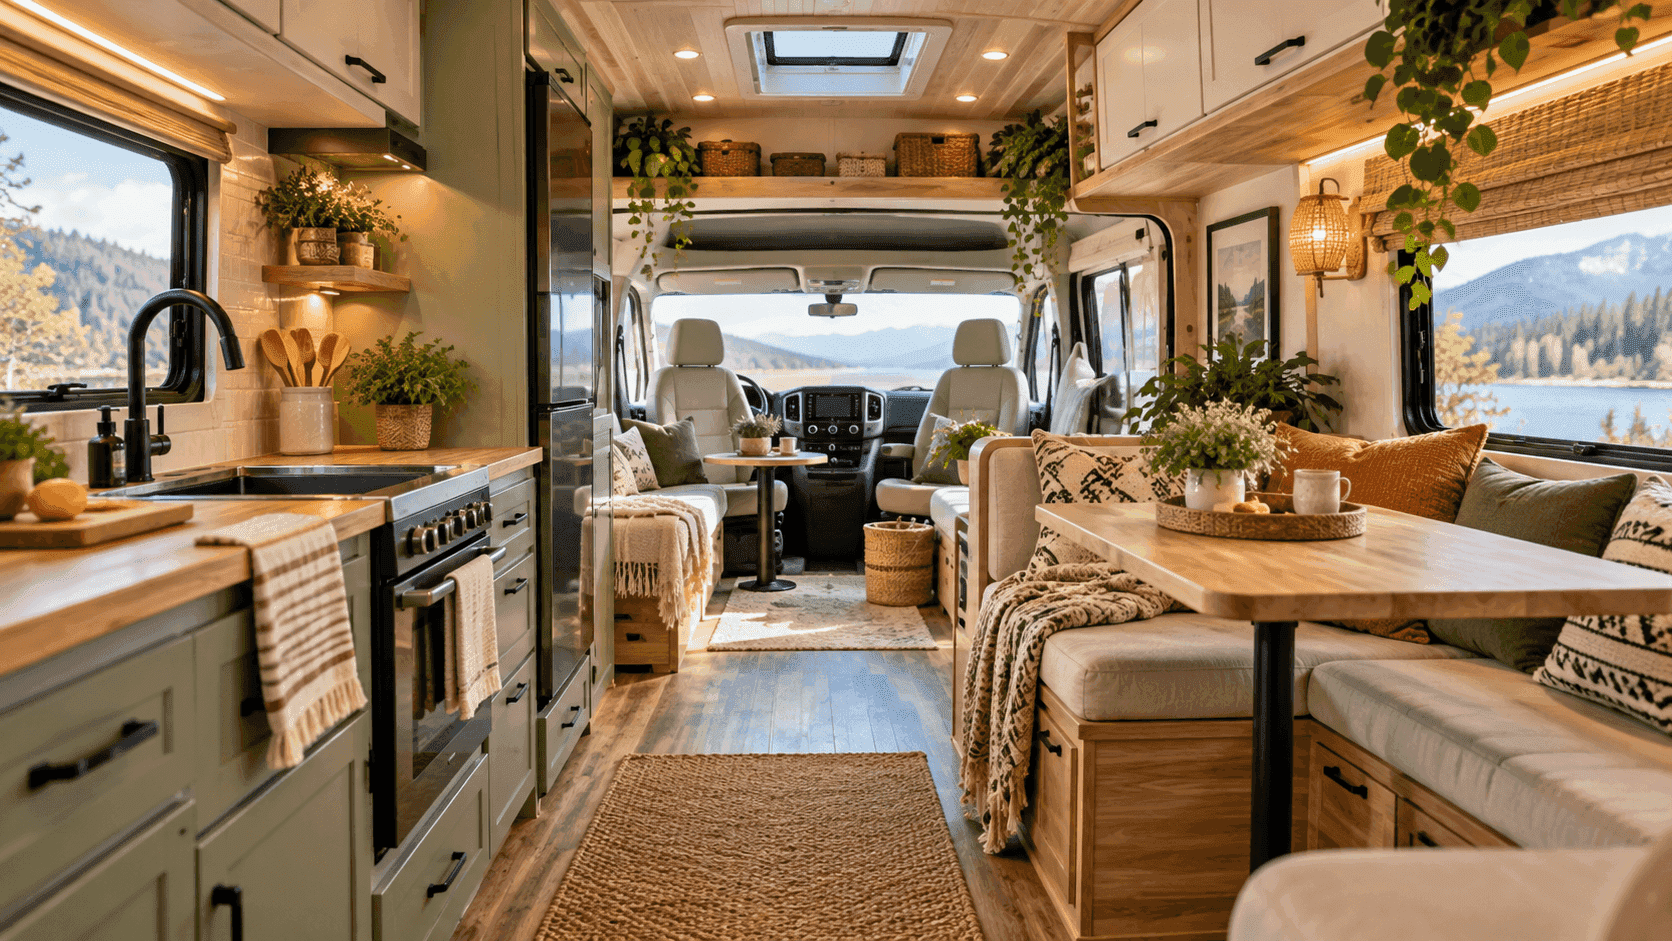
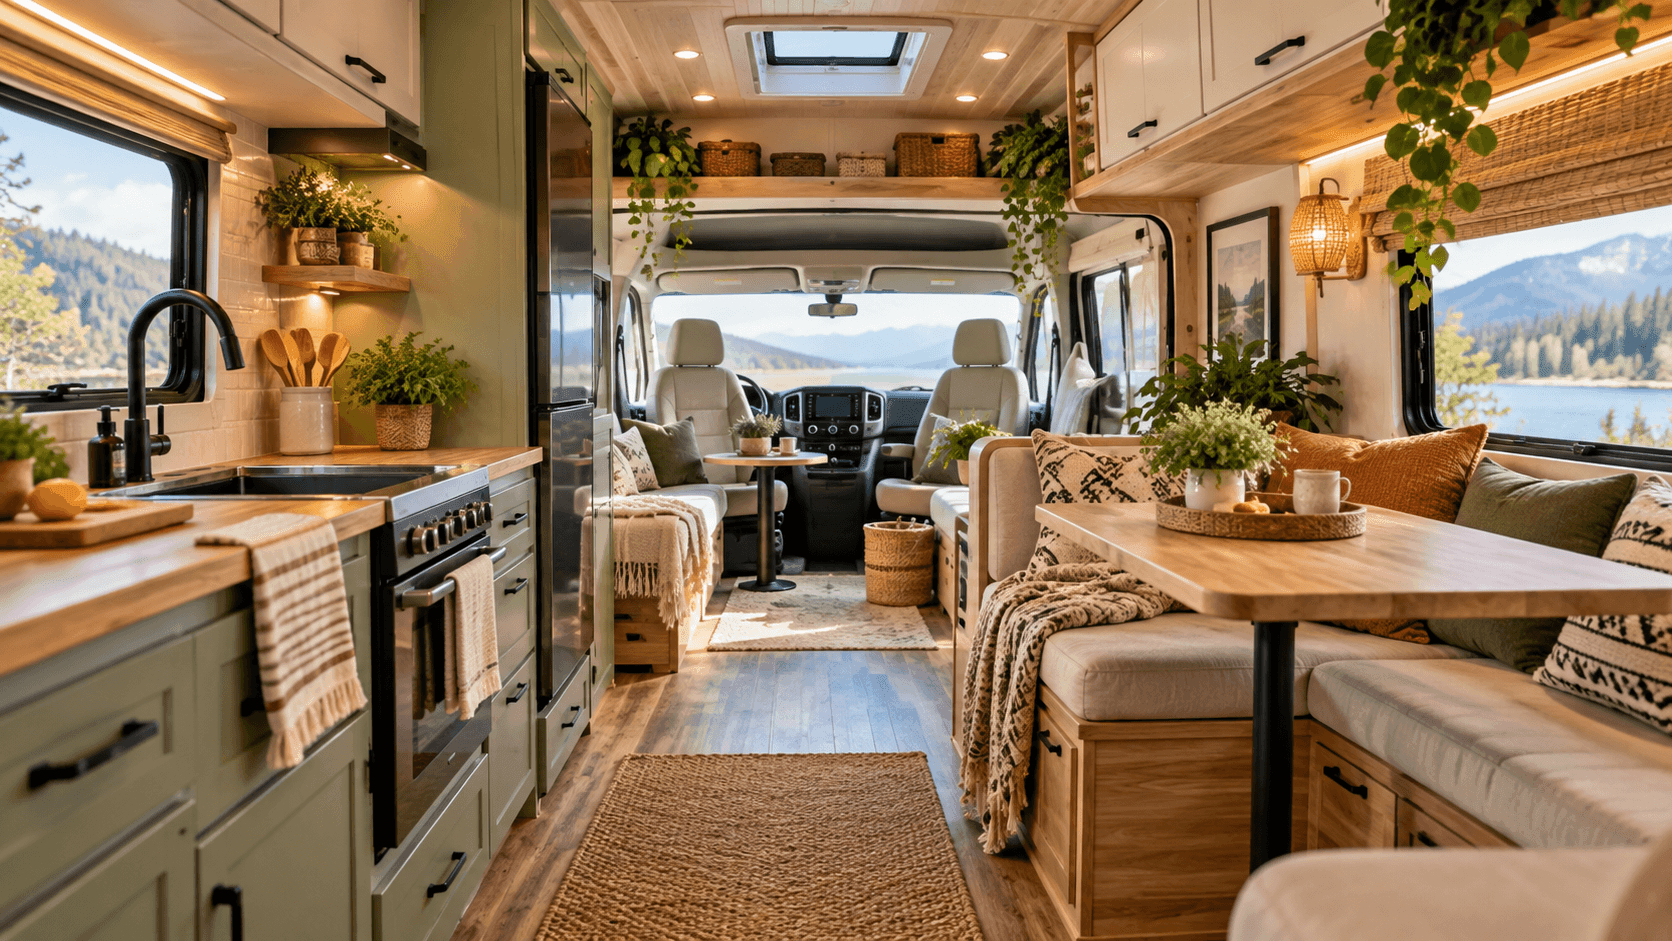
RV Remodel Ideas: How to Renovate a Camper Without Overloading It
by 10 Federal Storage
Published on October 7, 2026
Most RV remodel ideas you’ll find online are house ideas shrunk to fit: paint the walls white, swap the carpet for wood-look planks, put in a stone countertop, hang a chandelier over the dinette. Some of those are excellent. A few of them will quietly push a travel trailer past its weight rating, stop a slide-out from closing, or block the only window anyone in the back bunk could climb out of in a fire.
The difference between a house and an RV is that an RV has a fixed weight budget, a limited electrical supply, a body that flexes every time it moves, and a set of fire and life-safety features designed into a very small space. None of that shows up in a before-and-after photo. All of it determines whether the remodel you finish is one you can actually tow, plug in, and sleep in safely.
This guide covers the full range of camper renovation ideas, from a weekend of paint to a complete gut, but it treats each one the way an RV does: by what it weighs, what it draws, and what it changes. It starts with two things almost no remodel article mentions. The first is the cargo capacity label that federal rules require on every RV built for the U.S. market since mid-2008, and why the National Highway Traffic Safety Administration says any weight added after the sale is the owner’s to subtract. The second is the water-damage inspection that should come before any cosmetic decision, because new paint over a soft wall is money spent twice.
You will also find the material weights worked out per square foot, the slide-out clearance problem that catches people installing new floors, the power math behind a residential refrigerator swap, what to do about formaldehyde and older hazardous materials in vintage campers, and which jobs belong to a certified RV technician rather than a weekend.
Near the end, we cover where removed furniture, new materials, and the finished RV can live while the work happens. We also say plainly when renting storage for a remodel does not make sense, including the projects our own facilities cannot accommodate.
Table of Contents
- Why an RV Remodel Is Not a Small House Remodel
- Start With Water: The Inspection That Comes Before Any Idea
- Your Weight Budget Is Printed Inside the Door
- What Common Remodel Materials Actually Weigh
- Where Added Weight Sits Changes How the RV Handles
- Wall Ideas: Paint, Wallpaper, and Panels That Survive the Road
- Cabinet and Storage Ideas That Add Function Without Adding Much Weight
- Flooring Ideas and the Slide-Out Clearance Problem
- Kitchen Remodel Ideas: Counters, Sinks, Backsplashes, and Cooktops
- Residential Refrigerators and Other Upgrades That Live on Your Power Budget
- Bathroom and Wet Bath Remodel Ideas
- Bedroom, Bunk, and Loft Ideas That Keep the Escape Window Clear
- Furniture and Dinette Ideas, Plus the Seat Belt Question in Motorhomes
- Lighting, Fans, and Low-Draw Electrical Upgrades
- Windows, Skylights, and Every Hole You Cut in the Roof
- Exterior Refresh Ideas: Paint, Decals, Doors, and Awnings
- Smoke, Carbon Monoxide, and Propane Alarms: The Upgrade Nobody Photographs
- Choosing Wood Products and Finishes for a Small Sealed Space
- Vintage Camper Renovation: Lead, Asbestos, and the Value of Original Parts
- The Work to Hand to a Certified RV Technician
- Warranties, Insurance, and Resale After a Remodel
- Sequencing a Camper Renovation So You Only Do Each Job Once
- Where the Work Actually Happens: Driveways, HOAs, and Shop Space
- Where to Keep Parts, Materials, and the Finished RV
- When Renting Storage During an RV Remodel Does Not Make Sense
- Frequently Asked Questions About RV Remodels
- Remodel the RV You Will Actually Tow
Why an RV Remodel Is Not a Small House Remodel
A kitchen remodel in a house is constrained by budget, taste, and maybe a building permit. A kitchen remodel in an RV is constrained by four things a house never has to think about, and every idea in this guide runs into at least one of them.
It has a weight ceiling
A house foundation does not care whether the countertop is laminate or granite. An RV’s axles, tires, frame, and hitch were sized for a specific maximum loaded weight, and the manufacturer has already spent most of that number on the vehicle itself. What remains is shared between water, food, clothing, gear, passengers in a motorhome, and anything you add during a remodel. Section 3 explains where to find that number and how to work with it.
It moves, flexes, and vibrates
Every mile of highway is a long, low-grade earthquake. Walls rack slightly, the floor flexes, and anything fastened with the wrong hardware works itself loose. Rigid, brittle materials that are perfectly happy in a house, such as large ceramic tiles, thick grout lines, and heavy mirrors hung on a single anchor, can crack or let go after a season of washboard roads. Temperature swings make it worse: an RV parked in July sun and January cold sees a range most houses never do.
It runs on a small, fixed power supply
A typical house has a 100- to 200-amp service. A 30-amp RV plugged into a campground pedestal has about 3,600 watts to work with, total. That is enough to run a roof air conditioner and a few small loads, and not much more. Any remodel idea that adds a residential appliance, an electric cooktop, or a second air conditioner is really an electrical project, and Section 10 covers the arithmetic.
Its safety systems are built into a very small space
RVs built by members of the RV Industry Association are constructed to NFPA 1192, the National Fire Protection Association’s Standard on Recreational Vehicles, which covers fire and life safety, egress, propane and fuel-burning systems, plumbing, and electrical. Smoke alarms, carbon monoxide alarms, propane leak detectors, fire extinguishers, and emergency exit windows are placed where they are for a reason. A remodel that covers a detector, blocks an escape window, or reroutes a propane line without testing it changes that design, usually without anyone noticing until it matters.
None of this means you should not remodel. It means the order of operations is different. In a house you start with the look you want. In an RV you start with what the vehicle can carry and what must stay working, then find the look that fits inside those limits. The rest of this guide is built in that order.
Start With Water: The Inspection That Comes Before Any Idea
Water is the single most common reason an RV remodel turns from a cosmetic project into a structural one. RV walls, floors, and roofs are typically built as layered assemblies of thin plywood, framing, insulation, and an exterior skin, and once water gets into that sandwich it travels, rots, and delaminates out of sight. Painting over it does not stop it. It just hides it until the next owner, or until you pull up the floor you installed six months ago.
Before you buy a single gallon of paint, walk the RV with a flashlight and a notepad. If you are shopping for a used camper to renovate, do this before you make an offer.
Where to look
- The roof: Every seam, vent, skylight, antenna base, air conditioner gasket, and ladder mount is a penetration. Look for cracked, lifted, or missing sealant and for any spot where the roof membrane feels soft when you press it.
- The ceiling below every roof opening: Stains, sagging panels, rippled wallpaper, or a ring around a vent or light fixture usually mean the roof above has been leaking for a while.
- Corners and window frames: Run your hand along the walls under and beside every window, and in the upper and lower corners of the coach. Soft, spongy, or bubbled spots indicate wet or rotted wall material.
- The cab-over on a Class C: The forward-projecting bunk area is exposed to rain and road spray, and its seams are a well-known leak point.
- The floor: Walk every square foot, paying attention near the entry door, the bathroom, the kitchen sink, the water heater, and the front of a travel trailer. A floor that gives, bounces, or feels lower in one spot is a subfloor problem.
- Slide-out boxes: Check the slide floor and the corners of the slide room, which take water when seals age or the slide is retracted wet.
- Exterior sidewalls: Sight down the side of the RV in low light. Bulges or ripples in a smooth fiberglass wall often mean the skin has separated from the wall behind it.
What to do with what you find
A small, dry, old stain with solid material around it may be a leak that was fixed long ago. An active soft spot is a repair job that comes before anything else in this guide. Fix the source first, because rebuilding a wall without fixing the roof seam above it is how the same repair gets done twice.
If you find mold, the U.S. Environmental Protection Agency’s general guidance for homes is that a patch smaller than about 10 square feet can usually be handled by the owner, while larger growth or extensive water damage calls for the agency’s remediation guidance or a professional. The EPA is equally clear that cleanup is pointless until the water problem causing it is fixed. If anyone in your household has health concerns, talk to a health professional before you start tearing into moldy material.
Many RV manufacturers recommend inspecting exterior seams and sealant on a regular schedule, commonly every 90 days, and many treat sealant upkeep as owner maintenance rather than a warranty item. Check your owner’s manual for the interval and the sealant your roof requires. If you do nothing else from this guide, put that inspection on the calendar before and after your remodel.
Your Weight Budget Is Printed Inside the Door
Every remodel decision in an RV is ultimately a weight decision, and the good news is that you do not have to guess at your budget. Federal rules put it on a label.
The federal cargo capacity label
In a final rule published in December 2007 and effective in June 2008, the National Highway Traffic Safety Administration began requiring manufacturers of all motor homes and recreation vehicle trailers to label the vehicle’s load carrying capacity. The requirement applies to motor homes and RV trailers regardless of their weight rating, from small travel trailers up to the largest fifth wheels and motorhomes.
- On an RV trailer: the label states the weight that cargo should never exceed. This is the cargo carrying capacity, often abbreviated CCC.
- On a motor home: the label states the combined weight of occupants and cargo that should never be exceeded, along with the number of seating positions equipped with safety belts. This is the occupant and cargo carrying capacity, or OCCC.
- On both: the label lists the weight of a full load of fresh water and the unit weight of water, with a caution that water counts as cargo.
The rule calls for the label on the inside of the forward-most exterior passenger door on the right side of the vehicle. Manufacturers may instead place a temporary label there and a permanent duplicate in the area where tire information is required, so if you do not see it on the door, check near the tire placard.
Under the same rule, the weight of a full propane load is included in the vehicle’s unloaded weight rather than in the cargo figure, while water is treated as cargo because the owner decides how much to carry.
The sentence that matters most for a remodel
Dealers that add significant equipment before the first retail sale have to correct the label. The threshold is added weight greater than the lesser of 1.5 percent of the vehicle’s gross vehicle weight rating or 100 pounds. After the first retail sale, NHTSA puts it directly: it is up to the consumer to subtract any weight added after that point from the vehicle’s load carrying capacity.
That is the whole remodel problem in one line. Every pound of countertop, flooring, furniture, appliance, battery, or built-in storage you add, minus whatever you removed, comes straight out of the number on that label. The label will not update itself, and it will not warn you.
If your RV is older or the label is missing
RVs built before the federal requirement took effect may carry an older voluntary industry label, or none at all. Used RVs also arrive with whatever the previous owners added. In either case, the label is a starting estimate, not a fact about your vehicle today.
The reliable method is the one RV clubs and NHTSA’s own rulemaking point toward: weigh it. A certified truck scale gives you actual axle weights for a modest fee. Subtract the loaded weight from the gross vehicle weight rating on the vehicle certification label and you have your true remaining margin, which is the number your remodel has to fit inside.
A worked example
The figures below are hypothetical, chosen to show the method rather than to describe any specific model.
- Label cargo carrying capacity: 1,500 pounds
- A 40-gallon fresh tank, full for a boondocking trip: 40 gallons at about 8.3 pounds per gallon is roughly 330 pounds, leaving about 1,170
- The owner’s normal camping load, weighed by loading the RV and visiting a scale: say 700 pounds of food, bedding, clothing, cookware, chairs, tools, and hoses, leaving about 470
That 470 pounds is the entire remodel budget, and it is also the safety margin. A stone countertop, a residential refrigerator, and a second battery could each consume a large share of it on their own, as the next section shows. Many owners discover they had far less room than the brochure implied, which is exactly why the label exists.
What Common Remodel Materials Actually Weigh
Remodel articles describe materials by how they look. In an RV, the more useful description is pounds per square foot, because that is how the weight budget gets spent. The figures below are worked from published material densities. Specific products vary, so treat them as planning numbers and confirm against the spec sheet for whatever you buy.
Countertops
- Granite: Natural granite generally runs about 160 to 175 pounds per cubic foot. A standard 3 centimeter slab is about 1.18 inches thick, which works out to roughly 16 to 17 pounds per square foot. A thinner 2 centimeter slab is roughly 10.5 to 11.5 pounds per square foot.
- Engineered quartz and other stone-look slabs: Heavy in the same general class as natural stone. Ask the fabricator for the weight per square foot at the thickness you are considering.
- Hardwood butcher block: The U.S. Forest Products Laboratory lists sugar maple at about 44 pounds per cubic foot when air-dry, at roughly 12 percent moisture content. A 1.5-inch maple top works out to about 5.5 pounds per square foot, roughly a third of 3 centimeter granite. Thinner tops and lighter species weigh less.
- Laminate, solid-surface veneers, and countertop film or paint kits: Typically the lightest options, and film or paint adds almost nothing to what is already there.
Run the numbers on a small galley with 12 square feet of counter. In 3 centimeter granite, that is roughly 190 to 205 pounds. In 1.5-inch maple, roughly 66 pounds. The difference, around 125 to 140 pounds before you subtract the original top, is a quarter or more of the hypothetical 470-pound budget in the previous section, spent on one surface.
Water, which is heavier than people expect
Fresh water weighs about 8.3 pounds per gallon, which is why the federal label lists it separately. Any remodel that adds tank capacity, a washer, or a larger water heater adds operating weight every time it is filled, not just the weight of the hardware.
Flooring, walls, and everything else
Flooring and wall panels are sold by the square foot, and the box or bundle lists both coverage and weight. Divide one by the other and multiply by your floor or wall area. Do the same for tile, which is heavier once you add the setting material and any backer board underneath it.
For appliances, furniture, and batteries, use the manufacturer’s listed weight or shipping weight. In its rulemaking, NHTSA noted that dealers may use any accurate method to determine the weight of added items and observed that ordinary consumer bathroom scales are suitable for weighing most of them. The same approach works for owners.
Keep a weight ledger
The most useful habit in an RV remodel costs nothing. Before you install anything, weigh what comes out on a bathroom scale and write it down. When something goes in, record its weight. Keep a running total of the net change. At the end of the project you will know exactly how much of your cargo capacity the remodel consumed, and you can confirm it with a trip to a certified scale.
Owners who skip this step usually find out the answer the hard way: tires that wear oddly, a trailer that will not settle down at highway speed, or a scale ticket that shows an axle over its rating.
Where Added Weight Sits Changes How the RV Handles
Staying under the cargo capacity is necessary but not sufficient. Where the new weight lands matters almost as much as how much of it there is, and remodels are unusually good at putting weight in the wrong place, because the kitchen, the bathroom, and the bedroom are wherever the floor plan put them.
Tongue weight on a travel trailer
A bumper-pull trailer needs a certain share of its weight pressing down on the hitch to tow steadily. In its cargo capacity rulemaking, NHTSA described tongue weights as typically 10 to 14 percent of a trailer’s weight, with the exact range depending on the hitch setup and the number of axles, and said owners should load trailers to keep tongue weight within the range the manufacturer recommends.
Weight added behind the trailer’s axles reduces the share on the hitch. Weight added ahead of the axles increases it. A rear-kitchen trailer that gains a heavy countertop and a residential refrigerator can lose enough tongue weight to become noticeably less stable, and too little tongue weight is a well-known contributor to trailer sway. A front-bedroom remodel that adds a heavy bed platform and built-ins can push tongue weight up and eat into the tow vehicle’s payload, because the hitch load counts against the truck, not the trailer.
If you are not sure how your tow vehicle’s payload and the trailer’s hitch load interact, our guide to RV types and the towing math behind them walks through the calculation step by step.
Axles and individual tires
Every axle has its own gross axle weight rating, and an RV can be under its overall rating while one axle, or one tire, is overloaded. NHTSA acknowledged this directly when it adopted the labeling rule: a capacity label tells you about the vehicle as a whole, but it does not stop an owner from distributing weight in a way that overloads individual tires, and the only way to know the true distribution is to weigh the loaded vehicle at each wheel position.
Side-to-side balance is the version of this problem that remodels create most often. Many floor plans already put the refrigerator, the pantry, and the slide-out on the same side. Add a stone counter and a heavier sofa to that side and the imbalance compounds. Some RV clubs offer wheel-position weighing at rallies and events, and it is worth seeking out once your remodel is done.
Slide-out rooms
A slide-out is a room that moves on a mechanism designed for a particular load. Swapping a light jackknife sofa for a heavy recliner, or adding stone counters to a kitchen slide, adds weight the slide motor and rails have to move every time. Before you put anything significantly heavier into a slide room, look up the slide system manufacturer’s documentation or ask an RV service center what that system is rated to carry.
Height and leverage
Weight mounted high, such as heavy upper cabinets, a loaded overhead shelf, or a rooftop addition, raises the center of gravity and adds leverage on the walls and their fasteners every time the RV rocks. Wherever you have a choice, keep heavy things low and close to the axles.
Wall Ideas: Paint, Wallpaper, and Panels That Survive the Road
Painting the interior is the most popular RV remodel idea for good reason. It changes the feel of the space more than any other single project, it costs little, and it adds almost no weight. It is also the project most often done badly, because RV walls are not drywall.
Know what you are painting
Many RV interior walls are thin plywood panels with a printed vinyl or paper film bonded to the surface, and the seams between panels are often covered with strips of vinyl tape or trim. Paint that sticks beautifully to primed drywall can peel off a slick vinyl film within a season, especially in a vehicle that bakes in the sun and freezes in storage.
- Clean thoroughly: Years of cooking residue and cleaning products leave a film that paint will not bond to. Degrease every surface first.
- Scuff and test: Lightly scuff a small area and test your primer on it before committing to a whole wall. Press a piece of tape onto the cured test patch and pull it off. If the primer comes with it, the adhesion will not survive the road.
- Use a primer built for slick surfaces: Bonding primers and shellac-based primers are the usual choices for vinyl-wrapped panels. Follow the primer manufacturer’s guidance for the surface type.
- Decide about the seam strips: Some owners remove the vinyl seam tape, fill and sand the seams, and paint for a smooth look. Others paint over the strips or replace them with thin wood trim. Seams in an RV move, so a rigid filler across a seam may crack.
- Ventilate and allow full cure time: A small, closed RV concentrates fumes. Keep doors, windows, and roof vents open while you work, and give the paint the full cure time on the can before you close the RV up or travel.
Peel-and-stick wallpaper and decals
Removable wallpaper is a low-commitment way to add pattern to an accent wall or a cabinet back. In an RV, heat is its enemy: adhesives soften in a hot interior and the edges can lift. Applying it over a primed or painted surface usually holds better than applying it directly to slick vinyl, and a small test panel through one hot weekend tells you more than any product description.
Shiplap, planking, and wood accent walls
Wood planking is the signature look of a lot of remodel photos, and it is also a weight decision. Real solid-wood planks on a full wall can add meaningful pounds. Thin plywood strips, thin veneer panels, or lightweight wood-look panels deliver most of the look for a fraction of the weight. Whatever you use, fasten it into the wall framing rather than relying on adhesive or on the thin wall skin alone, and leave small gaps for seasonal movement.
Hanging anything on an RV wall
The thin skin of an RV wall will not hold a screw under load on the road. Shelves, mirrors, televisions, and artwork need to be fastened into the framing behind the panel, or attached with hardware designed for thin hollow walls and rated for the load. Locate the framing before you drill, and keep in mind that wiring and plumbing run inside some walls.
Fire performance of finishes
NFPA 1192 limits how quickly the interior finish materials on walls, ceilings, and cabinets in a manufactured RV can spread flame. The standard governs manufacturers, not owners, but the principle is worth keeping: in a space this small, with exits this few, avoid covering large wall or ceiling areas with materials whose fire performance you know nothing about, and favor products whose manufacturers publish fire ratings.
Cabinet and Storage Ideas That Add Function Without Adding Much Weight
Cabinets are where most RV interiors look their age, and they are also where a remodel can add the most everyday function. The trick is to update them without turning every new cubic foot of storage into a new pound of permanent weight.
Paint and hardware
Painting cabinet doors and frames, then replacing pulls and hinges, is the cabinet equivalent of painting the walls: big visual change, almost no weight. The same preparation rules apply, since many RV cabinet doors are veneered or wrapped in film. Remove doors and paint them flat, label every door and its hinge location, and let them cure fully before rehanging.
When you choose new hardware, think about latching. Ordinary residential cabinet catches are designed for a building that does not move. RV cabinet doors and drawers open on their own on rough roads unless they have positive latches, push-button locks, or travel catches. A drawer full of canned goods flying open on a curve is a real hazard, not a nuisance.
Open shelving instead of upper cabinets
Removing upper cabinet doors or replacing a bank of uppers with open shelves is a popular way to make a small kitchen feel larger. It works well for a stationary camper and needs more planning for one that travels: anything on an open shelf needs a lip, a rail, a non-slip liner, or a fitted holder, and it all has to be stowed or secured before you drive.
Pull-outs, organizers, and under-bed storage
- Pull-out pantries and drawer inserts: Make deep, dark cabinets usable. Choose slides rated for the load and fasten them to solid framing, because cabinet boxes in many RVs are built light.
- Under-bed storage: Many RV beds sit on a lift-up platform with storage beneath. Gas struts that hold the platform up weaken with age and are an inexpensive replacement.
- Toe-kick drawers and dinette bench storage: Turn dead space into storage with minimal added material.
- Hooks, rails, and magnetic strips: Light, cheap, and effective in kitchens and bathrooms, provided they are fastened into framing.
The storage paradox
Here is the part no remodel gallery mentions. Every cubic foot of new storage is an invitation to carry more, and the cargo capacity label does not care whether weight arrived as a built-in or as the things you filled it with. A remodel that adds a pantry, three drawers, and an under-bed bay can easily add more weight in contents than in construction.
Plan new storage around what you actually carry on a typical trip, not around what would fit. If you find yourself building storage for gear that rarely leaves the RV, the better answer is often to take that gear out of the vehicle entirely between trips.
Replacing cabinets outright
Full cabinet replacement is a bigger project than it looks. RV cabinets are often fastened from inside other cabinets or through walls, they may conceal wiring and plumbing runs, and they sometimes contribute to the stiffness of the interior. If you are removing cabinetry, go slowly, photograph everything, and expect surprises. For new cabinet boxes, Section 18 covers how to choose composite wood products with formaldehyde emissions in mind, which matters more in an RV than in a house.
Flooring Ideas and the Slide-Out Clearance Problem
Pulling up dated carpet and putting down a hard floor is near the top of nearly every RV remodel list, and it is one of the most rewarding upgrades you can make. It is also the remodel most likely to stop a slide-out from closing properly, and that problem is almost never mentioned until someone discovers it with a half-installed floor.
Choose flooring for an RV, not a house
- Vinyl plank and vinyl tile: The most common RV choice. Light, water-resistant, and tolerant of flexing. Thin glue-down and peel-and-stick products add the least height.
- Sheet vinyl: Continuous, with few seams for water to find, and very thin. Less fashionable than plank and still one of the most practical options in an RV.
- Click-together rigid-core plank: Popular and attractive, but thicker and heavier than thin vinyl. Floating installations need expansion gaps at the edges, and an RV sees larger temperature swings than a house.
- Laminate: Can work, but many products are vulnerable to standing water at the seams and add more thickness than vinyl.
- Ceramic and porcelain tile, and solid hardwood: Heavy, and tile in particular is brittle in a structure that flexes. These are the flooring choices most likely to crack, loosen, or blow your weight budget.
The slide-out clearance problem
When a slide-out room retracts, its floor typically passes over or rests on the main floor of the coach. The gap between them was set at the factory for the original flooring. Make the main floor thicker, even by a quarter of an inch, and one of several things can happen: the slide catches on the new floor, the slide’s rollers gouge or lift the planks, or the room closes but no longer seals properly against the wall because it is riding higher than designed.
Long-time RV technical columnists have warned that if a slide already drags on the existing vinyl, a thicker laminate is unlikely to clear it, and owner forums are full of reports of slides that would not retract, or seals that no longer closed tightly, after new flooring went in. The fix is simple and has to happen first.
- Measure the clearance: With the slide retracted and the RV level, measure the gap where the slide floor passes over the main floor.
- Test before you buy in bulk: Lay a sample piece of your new flooring, plus any underlayment, in the slide’s path and run the slide in and out over it.
- Match the thickness you remove: If you are replacing carpet and pad, the new floor may be thinner than what came out. If you are going over existing vinyl, it will be thicker.
- Ask about adjustment: Some slide systems can be adjusted to ride slightly higher. That is a job for an RV service center, not a guess.
What is under the old floor
Pulling flooring is often when owners find the soft subfloor that Section 2 warned about, especially by the entry door, the bathroom, and the kitchen. Plan for the possibility. If you are working on an older or vintage RV, read Section 19 before you scrape up old tile or adhesive.
Weigh the old flooring as it comes out and the new flooring before it goes in. A full floor is one of the larger line items in the weight ledger, and the difference between thin vinyl and rigid plank across a whole coach can be real.
Kitchen Remodel Ideas: Counters, Sinks, Backsplashes, and Cooktops
The kitchen is where RV remodels get ambitious, and where weight, water, power, and propane all meet in a few square feet. These are the ideas that deliver the most, roughly in order of how much they ask of the vehicle.
Countertops
Section 4 covered the weight math, so the short version is this. Countertop film, paint kits, and new laminate change the look with almost no weight. Hardwood butcher block adds warmth and moderate weight, and it needs a finish suited to a kitchen and attention around the sink. Stone and engineered quartz look spectacular and are the heaviest option by a wide margin; if you choose them, do the arithmetic against your cargo capacity first, consider the thinner 2 centimeter thickness, and ask the fabricator about supporting the slab properly on cabinets that were built for something much lighter.
Large stone slabs also have to get into the RV through a narrow door, and they do not flex. Fabricators who work on RVs sometimes cut counters in sections for that reason.
Sinks and faucets
A deeper single-bowl sink, a residential-style faucet, or a sink cover that doubles as counter space are popular upgrades. RV plumbing is typically flexible tubing with fittings that differ from household plumbing, so check that the faucet you love can connect to your system, and choose fixtures with water-saving flow rates if you camp away from hookups. Heavy cast iron and stone sinks add the same weight problem as stone counters.
Backsplashes
A backsplash protects the wall behind the stove and sink and gives the kitchen a finished look. Peel-and-stick tile is light, fast, and forgiving of a moving wall. Real ceramic tile is heavier, and thick grout lines can crack as the wall flexes, so if you use real tile, keep it small in area, use a flexible setting product suited to the substrate, and fasten the backer securely. Thin metal or composite panels are another lightweight route.
Cooktops and ovens
Many owners replace an old propane range with a newer gas cooktop, add a separate countertop oven, or switch to induction. Two cautions apply.
- Anything connected to propane is technician work. Moving, replacing, or extending a gas appliance or line changes a system that has to be leak-tested afterward. Section 20 covers who should do it.
- Induction is an electrical decision. A typical plug-in induction burner can draw up to about 1,800 watts, which is half of everything a 30-amp RV has available. It is a great upgrade for an RV that spends most nights on 50-amp hookups, and a tougher fit for one that runs on a small generator or batteries.
Ventilation over the stove
An RV kitchen produces a lot of cooking steam and combustion byproducts in a small volume. If you are replacing the range hood or adding cabinets near the stove, keep the hood ducted to the outside and keep clearances to combustible materials at least as generous as the appliance manufacturer specifies. Steam that is not vented outside tends to condense on cold walls and windows, which is the beginning of the water problems Section 2 described.
Islands and peninsulas
Adding a kitchen island is a popular idea in remodel galleries. In most RVs, floor space between the kitchen and the living area doubles as the path to the exit, so any island or peninsula should leave a clear route to the entry door and to every emergency exit window. Fasten it to framing, and remember that it will carry weight on the road.
Residential Refrigerators and Other Upgrades That Live on Your Power Budget
Some remodel ideas are really electrical projects wearing a kitchen costume. The residential refrigerator swap is the classic example, but it applies equally to electric cooktops, dishwashers, washer-dryer combinations, electric fireplaces, second air conditioners, and space heaters.
The basic arithmetic
Electrical capacity in an RV is set by its shore power service. Watts are volts times amps:
- 30-amp service: a single 120-volt supply at 30 amps, about 3,600 watts in total
- 50-amp service: two separate 120-volt legs at 50 amps each, about 12,000 watts in total, split between the two sides of the RV’s panel
A 50-amp RV plugged into a 30-amp pedestal with an adapter is limited to the 30-amp figure. Everything running at the same moment has to fit inside the number, which is why the classic 30-amp experience is a tripped breaker when the air conditioner, the microwave, and a hair dryer all start together.
Before adding any appliance, find its wattage on the nameplate or spec sheet and add it to what already runs at the same time. If the sum is close to your service limit, the upgrade will change how you live in the RV, not just what it looks like.
Residential refrigerators
Many RVs come with absorption refrigerators that can run on propane or electricity. A residential compressor refrigerator offers more space and colder, steadier performance at a lower purchase price, which is why it is a popular swap. The trade-offs:
- It needs 120-volt power all the time, including while you drive and when you camp without hookups. That means an inverter and a battery bank large enough to carry it, and a way to recharge those batteries.
- The opening may not match. Absorption refrigerators sit in a cutout with specific dimensions and are usually vented through the roof or the sidewall. Residential units have different dimensions and different ventilation needs, and the old vents may need to be sealed properly afterward.
- Doors need to stay closed on the road. Residential refrigerators are not built with travel latches.
- The weight changes. Compare the old and new units’ listed weights, and remember the batteries and inverter that come with the decision.
Batteries and solar
Battery and solar upgrades often accompany a remodel, and they interact with the weight budget in both directions. Lithium batteries typically weigh considerably less than lead-acid batteries of similar usable capacity, so a battery swap can free up weight. Adding batteries, solar panels, mounts, and wiring adds it. Charging equipment, converters, and battery settings also have to match the battery chemistry, which is a common source of problems in do-it-yourself installations.
Upgrading from 30-amp to 50-amp service
Converting an RV’s shore power service involves the power cord or inlet, the wiring to the distribution panel, the panel itself, and often new circuits. The National Electrical Code has a dedicated article covering recreational vehicle wiring, and this is not a project to improvise. If your remodel plans depend on more power than your RV has, get an RV electrical technician’s assessment before you buy appliances, because the answer may change the plan.
Bathroom and Wet Bath Remodel Ideas
RV bathrooms are small, wet, and full of plumbing that does not behave like a house’s. That combination makes them a place where modest, well-chosen upgrades pay off and where ambitious ones can create leaks that do not show up for months.
Showers and surrounds
A new shower surround is one of the most satisfying bathroom upgrades. Lightweight one-piece or panel surrounds made for RVs and small baths are designed for a structure that flexes, and they keep the number of seams low. Real tile in an RV shower is heavier and depends on grout and setting materials staying intact while the walls move, which is a hard ask on the road. If you love the look of tile, panels printed or molded to resemble it are the RV-friendly compromise.
Whatever surround you choose, the sealant joints where it meets the pan, the walls, and the fixtures are the critical part. They are also maintenance items: inspect and renew them on the same schedule as the exterior seams.
Wet bath conversions
Converting a cramped separate shower and toilet into a single waterproof wet bath can make a small RV feel larger. It also means every surface in that room has to tolerate standing water, every penetration has to be sealed, and the floor has to drain properly. This is a full waterproofing project rather than a decorating one, and it is worth looking at how manufacturers build their own wet baths before you design yours.
Vanities, sinks, and faucets
A new vanity top, vessel or compact sink, and faucet transform a bathroom quickly. The same cautions as the kitchen apply: confirm the faucet connects to RV plumbing, avoid heavy stone and cast iron, and secure everything for travel. Under-sink space is valuable storage, so keep access to plumbing shutoffs and drain connections clear.
Toilets
RV toilets are designed to work with holding tanks and to use little water, so a residential toilet is not a drop-in replacement. Porcelain-bowl RV toilets are a common upgrade from plastic, and some owners install composting toilets to reduce black tank use. If you consider a composting toilet, check how you will handle waste disposal where you camp, and confirm any campground or park rules before you rely on it.
Ventilation
A strong roof vent fan in the bathroom is one of the most practical upgrades in the whole RV. It moves shower steam outside before it condenses on cold walls, windows, and the inside of cabinets, where water does slow damage. Fan replacements that fit the standard roof opening are a common do-it-yourself project; any job that changes the size of the roof opening falls under the roof penetration cautions in Section 15.
Mirrors and medicine cabinets
A larger mirror makes a small bathroom feel bigger. Glass is heavy and unforgiving, so mount mirrors to framing with hardware rated for the load, consider acrylic or lightweight framed mirrors, and avoid relying on adhesive alone in a vehicle that vibrates.
Bedroom, Bunk, and Loft Ideas That Keep the Escape Window Clear
Bedroom remodels are where RV owners get creative with space: bunk rooms become offices, couches become lofts, and fixed beds turn into fold-away platforms. They are also where a remodel is most likely to interfere with an emergency exit, because escape windows are usually located in sleeping areas.
Find your emergency exits before you design anything
RVs are built with designated emergency exit windows, typically marked with a label and a red or otherwise distinct release handle. NFPA 1192 requires minimum exit facilities providing an unobstructed way out of the vehicle. The Oregon State Fire Marshal’s RV fire safety checklist tells owners to keep emergency exit windows and hatches clearly marked and working, make sure everyone knows how to operate them, and keep exit routes unobstructed.
Walk through the RV and locate every exit before you plan a single built-in. Then design around them:
- Do not build in front of an exit window. Cabinets, desks, bunks, shelving, and headboards placed in front of or below an exit window can make it impossible to open or climb through.
- Do not replace an exit window with a fixed one. A window upgrade that looks better but no longer opens as an exit has removed a safety feature.
- Keep the release handle reachable. Curtains, blinds, and valances should not cover the handle or the label in a way that slows someone down in the dark.
- Think about who sleeps where. A child in a new loft bunk needs a way out that does not depend on reaching the main door.
Lofts and Murphy beds
Lofted beds and fold-down wall beds are popular space savers, and the standard has been catching up with them. Editions of NFPA 1192 published in recent years added requirements addressing lofts, including stairway configuration, handrails, and guardrails, and later added safety provisions for wall beds of the Murphy type. Those requirements apply to manufacturers, but they tell you what the industry learned the hard way: elevated sleeping areas need guardrails, safe access, and secure attachment, and fold-down beds need mechanisms that cannot fall on someone.
A loft also puts weight high, which affects the center of gravity, and it has to be anchored to framing strong enough to carry a sleeping adult on a moving vehicle when the RV is parked and when it is not.
Mattress upgrades
Replacing a thin factory mattress is one of the best comfort upgrades available. RV beds are frequently non-standard sizes, with RV queens often shorter than residential queens, so measure the platform before you shop. A heavy memory foam or hybrid mattress can weigh considerably more than the original, so add it to the weight ledger, and check that the lift struts under a lift-up bed can still raise the platform.
Bunk room conversions
Turning a bunkhouse into an office or a flex room is one of the more useful remodels for families whose kids have outgrown camping. Removing bunks usually reduces weight. The new desk, shelving, and equipment add some back. Keep the bunk room’s exit window clear, and remember that the motorhome seating question in the next section applies if any of that furniture was a belted seating position.
Furniture and Dinette Ideas, Plus the Seat Belt Question in Motorhomes
Replacing factory furniture is high on most remodel lists, because RV sofas and dinettes are often the least comfortable things in the coach. Lighter, better-designed furniture is a genuine improvement. A few furniture decisions, though, change more than comfort.
Residential furniture in an RV
Recliners, sleeper sofas, and theater seating designed for houses can be comfortable, and they are usually heavier than RV-specific furniture of the same size. They also need to be secured: anything that is not fastened to the floor or walls becomes a projectile in a sudden stop. If a piece cannot be anchored to framing with appropriate hardware, it does not belong in a vehicle that moves.
Weigh the furniture you remove and look up the weight of what replaces it. Furniture swaps are an area where owners often end up lighter than they started, by replacing a heavy factory sofa with a lighter piece, which is a welcome entry in the weight ledger.
Dinette conversions
Turning a booth dinette into a freestanding table and chairs, a desk, or extra counter space is one of the most common RV layout changes. In a travel trailer, the main considerations are weight and securing the new pieces. In a motorhome, there is one more.
The seat belt question
Under the federal cargo capacity rule, a motor home’s occupant and cargo capacity label lists its safety-belt-equipped seating capacity. In many motorhomes, dinette benches or sofas include belted seating positions that count toward that number. Remove a belted dinette or sofa and you remove those positions.
That matters because state seat belt laws vary, and many apply to occupants beyond the front seats. Before you take out a belted seat, count how many belted positions your household needs while the motorhome is moving, and make sure the remodel leaves at least that many. Adding belts to a new seat is not a matter of bolting a strap to the floor; belt anchorages have to withstand crash forces, so that work belongs to a qualified installer.
Travel trailers raise a different issue. Most towable RVs are not designed to carry passengers in motion, and many states restrict riding in a towed trailer. A remodel does not change that, whatever new seating you add.
Table and desk ideas
- Fold-down wall tables: Light, space-saving, and simple to secure for travel.
- Pedestal tables with removable legs: A long-standing RV design that converts to a bed platform in many layouts.
- A dedicated work desk: For owners who work from the road, a desk with cable management and a proper task light is worth more than any decorative upgrade. Keep it clear of exits and secure the monitor for travel.
Cushions and upholstery
Reupholstering factory cushions or replacing the foam is one of the best value upgrades available, adding little weight and a lot of comfort. Choose durable, cleanable fabrics, and consider replacing foam at the same time, since cushions that have been sat on for a decade have often compressed well past their original support.
Lighting, Fans, and Low-Draw Electrical Upgrades
Lighting is the rare RV remodel idea that usually reduces demand on the vehicle instead of adding to it. Older RVs often use incandescent or halogen 12-volt fixtures, and replacing them with LED bulbs or fixtures cuts their draw substantially and reduces the heat they put into the ceiling.
LED swaps and new fixtures
- Bulb swaps: Many RV fixtures accept LED replacement bulbs. Match the base type and voltage, and check that the replacement fits inside the fixture’s lens.
- New fixtures: Replacing dated fixtures with modern 12-volt LED fixtures is one of the most visible upgrades for the money. Use fixtures rated for 12-volt DC if they connect to the house battery system.
- Pendants and sconces: A pendant over a dinette looks great in photos. Make sure anything that hangs is short, secured, and will not swing into a cabinet or window on the road.
- Under-cabinet and accent strips: Inexpensive and effective in kitchens, bathrooms, and storage bays.
- Dimmers: Not every dimmer works with every LED. Choose components designed to be used together.
Roof vent fans
Upgrading a basic roof vent to a powered fan with variable speed, a thermostat, or a rain sensor makes an RV dramatically more comfortable and helps move cooking steam and shower vapor outside. Many replacement fans fit the standard roof opening, which keeps the roof work limited to removing the old unit and resealing the flange with the sealant your roof membrane requires.
Outlets and charging
Adding USB charging points and 12-volt outlets where you actually use devices is a small, practical upgrade. On the 12-volt side, wire size and fuse rating have to match the load and the length of the run. On the 120-volt side, adding outlets or circuits is work governed by the RV’s electrical design and code, and is better handled by someone qualified.
The 12-volt basics
Most interior lighting, fans, the water pump, and many control systems run off the house battery through the RV’s 12-volt distribution panel. When you add loads, add them to the battery budget the same way Section 10 adds appliances to the shore power budget. When you replace wiring or add circuits, protect every new run with a properly sized fuse close to the power source. Undersized wire and unprotected circuits are a classic way for wiring to overheat inside a wall where nobody can see it.
Windows, Skylights, and Every Hole You Cut in the Roof
Skylights, new roof vents, solar panel mounts, antennas, and extra air conditioners all have one thing in common: each one is a hole in the roof. Every hole is a future leak unless it is installed and sealed correctly and then maintained, and roof leaks are the leading path to the hidden damage described in Section 2.
Skylights
A skylight brings daylight into a dark RV interior and is one of the most-requested remodel ideas. Before you cut, consider:
- Roof framing: RV roofs have rafters or trusses at intervals. The opening has to fit between them or be properly framed, and any wiring or ducting in the ceiling cavity has to be found first.
- Heat and cold: A skylight is a thermal hole as well as a light source. Shades or insulated covers help in summer sun and winter cold.
- Sealant compatibility: RV roofs are commonly EPDM rubber, TPO, fiberglass, or aluminum, and the sealant has to be compatible with the membrane. Use the product your roof manufacturer specifies.
- Maintenance: A new skylight adds another perimeter of sealant to inspect on the regular schedule your owner’s manual recommends.
Replacing an existing skylight or vent with a new unit in the same opening is a much smaller job than cutting a new one.
Windows
Window upgrades include replacing fogged or cracked glass, swapping single-pane units for dual-pane, installing tinted or reflective film, and replacing old blinds with day-night shades. Three cautions:
- Exit windows must stay exit windows. If a window is a designated emergency exit, any replacement must still open fully as an exit. Section 12 covers why.
- Dual-pane units are heavier than the single-pane windows they replace, and the frame has to fit the wall thickness.
- Window seals are a leak point. Re-bedding a window with fresh butyl tape or the sealant the manufacturer specifies is a common and worthwhile repair during a remodel.
Solar panels, antennas, and second air conditioners
Every roof-mounted addition adds weight high on the vehicle, adds penetrations or adhesive mounts, and adds height. Measure the RV’s total height after the addition and record it, because low clearances at fuel stations, bridges, and covered parking are measured from the ground to the tallest thing on the roof. A second air conditioner also adds a large electrical load that has to fit the service limits in Section 10.
Doing roof work safely
Not every RV roof is designed to be walked on, and falls from RV roofs are a real hazard. Check your owner’s manual for whether the roof is walkable and where, use a stable ladder, and consider having roof installations done by an RV service center if you are not comfortable working at height.
Exterior Refresh Ideas: Paint, Decals, Doors, and Awnings
The outside of an RV is what everyone else sees, and exterior work is often the most dramatic part of a camper makeover. Most exterior ideas add little weight. The bigger concerns are surface preparation, water-tightness, and knowing which jobs are cosmetic and which are structural.
Faded decals and graphics
Sun-baked factory decals are one of the clearest signs of an aging RV. Removing them, typically with gentle heat and a plastic scraper, and then cleaning off the adhesive residue can make an RV look years newer. New graphics, or none at all, finish the job.
Fiberglass and gelcoat restoration
Chalky, oxidized fiberglass can often be restored with compounding, polishing, and a protective wax or sealant. It is labor rather than materials, and the results can be striking.
Exterior paint
Full exterior paint jobs and two-tone designs are a popular way to give a vintage trailer or an older motorhome a new identity. Professional RV paint work involves extensive preparation and paint systems suited to the substrate. Do-it-yourself painting is possible on smaller campers, especially vintage aluminum-skinned trailers, but preparation determines whether the result lasts. Before painting a vintage trailer, read Section 19 about older paint layers.
Siding and skin replacement
Replacing damaged siding or an exterior skin is a different category of project. On many modern RVs the sidewall is a laminated assembly, with the exterior skin bonded to the structure behind it, and the insulation lives inside the wall rather than in the skin. Changing the outer surface alone does little for insulation. Delaminated or damaged walls are a structural repair, usually for an RV body shop.
Entry doors and screen doors
Upgrading the entry door, adding a screen door, or replacing the lock with a keypad lock are practical upgrades. Doors are part of the RV’s sealed envelope, so check weatherstripping and re-seal the frame where needed, and make sure any new lock can still be opened quickly from inside.
Awnings
Replacing a worn awning fabric is one of the more cost-effective exterior updates. Converting a manual awning to a powered one adds electrical work and some weight. Awning lights add ambiance and very little draw if they are LED. Whatever you change, the awning has to stay securely closed and latched for travel.
Exterior storage and accessories
Rear bumper racks, cargo carriers, and bike racks are popular additions. Weight hung off the very back of a travel trailer reduces tongue weight, which is the problem Section 5 describes, and many RV bumpers are not designed to carry heavy loads. Check the RV manufacturer’s guidance before hanging weight off the rear.
Smoke, Carbon Monoxide, and Propane Alarms: The Upgrade Nobody Photographs
No remodel gallery features a new carbon monoxide alarm. It is still one of the most important upgrades on this list, and a remodel is the natural time to do it, because the walls and cabinets around these devices are already being changed.
What an RV typically has
NFPA 1192 addresses smoke alarms, carbon monoxide alarms, propane (LP gas) detectors, and fire extinguishers in RVs, with requirements depending on the vehicle’s equipment. Manufacturers’ own owner guides describe the standard set: smoke detectors, carbon monoxide detectors, propane leak detectors, fire extinguishers, and escape windows.
Replace on schedule, not when they fail
The Oregon State Fire Marshal’s RV fire safety checklist advises installing both a carbon monoxide alarm and a smoke alarm inside the RV, replacing smoke alarms every 10 years, and replacing carbon monoxide alarms based on the manufacturer’s recommendations. If an alarm chirps, replace the battery or the whole unit as the manufacturer directs. Check the date on every alarm and detector in your RV during the remodel; many older RVs are still carrying their original units.
Propane detectors belong low
Propane is heavier than air, so it settles toward the floor. That is why RV propane detectors are typically mounted low, near the floor. A remodel that adds a toe-kick drawer, a new floor level, a cabinet face, or a piece of furniture in front of the detector can block the path gas would take to reach it. Keep the detector unobstructed and at the height the manufacturer intended.
Most RV propane detectors run on the 12-volt house system, which means they stop working if the battery is disconnected or dead. If your remodel includes a battery or electrical upgrade, confirm the detector is powered when you are done.
Carbon monoxide alarms
Carbon monoxide can come from propane appliances, the generator, the engine of a motorhome, or a neighbor’s generator in a crowded campground. If you replace a CO alarm, use a unit intended for recreational vehicle use and install it according to its listing and instructions. If your remodel adds a fuel-burning appliance, such as a new furnace, water heater, or range, that is a reason to confirm the CO alarm covers the space.
Fire extinguishers
The same Oregon checklist calls for an extinguisher installed near the primary exit. Remodels sometimes relocate or bury the extinguisher behind new cabinetry. Keep it visible, reachable, and charged.
Do not paint or cover detectors
Painting the ceiling and walls is the most common way detectors get compromised. Remove or mask alarms before painting, never paint over vents or sensors, and test every device when the project is finished.
Choosing Wood Products and Finishes for a Small Sealed Space
An RV is a small, tightly built space with a lot of surface area relative to its volume. That makes the materials you bring into a remodel matter more than they would in a house, because whatever those materials release into the air has less room to dilute.
What the CDC found in FEMA trailers
After Hurricanes Katrina and Rita, the Federal Emergency Management Agency housed displaced Gulf Coast residents in travel trailers, park models, and mobile homes. In December 2007 and January 2008, the Centers for Disease Control and Prevention measured formaldehyde in a stratified random sample of 519 occupied units. The average across all units was about 77 parts per billion, many units had levels higher than typical U.S. indoor air, and travel trailers had significantly higher average levels than park models and mobile homes. The CDC also noted that levels tend to be higher in newer units and in warmer weather, and recommended fresh air and ventilation for residents.
Two caveats are important. The CDC stressed that those findings applied to the FEMA-supplied units it studied in the Gulf Coast, not to every trailer in use elsewhere. And formaldehyde rules for wood products have changed considerably since then. The lesson for a remodel is not that RVs are dangerous. It is that the composite wood you install, in a small space that heats up in the sun, is worth choosing deliberately.
What TSCA Title VI means at the lumber counter
Title VI of the Toxic Substances Control Act sets federal formaldehyde emission standards for three types of composite wood products: hardwood plywood, medium-density fiberboard (including thin MDF), and particleboard. According to the U.S. Environmental Protection Agency, composite wood panels manufactured in or imported into the United States after March 22, 2019 must be compliant, and the panel label must include the producer’s name, a lot number, the number of an EPA-recognized third-party certifier, and a TSCA Title VI compliance statement.
For a remodeler, that translates into a simple practice:
- Look for the label on any hardwood plywood, MDF, or particleboard you buy for cabinets, panels, platforms, or furniture.
- Be cautious with salvaged and very old panels of unknown origin, which may predate current standards.
- Know what the rule does not cover. Solid lumber and softwood plywood are outside these composite wood standards, so their labels will not carry the same statement.
Paints, stains, sealers, and adhesives
Products labeled low in volatile organic compounds reduce what you breathe during and after the work, which matters in a space this small. Whatever you use, follow the label’s ventilation and cure-time directions, keep the RV open and ventilated while finishes cure, and give everything the full cure time before you close up the coach for storage or sleep in it.
Heat and new materials
Because the CDC observed higher formaldehyde levels in warmer conditions, it is worth airing out a freshly remodeled RV thoroughly, especially before the first warm-weather trip. Running roof vent fans, opening windows, and giving new cabinetry and furniture time to off-gas before you close the RV up for a hot summer weekend are inexpensive precautions.
Vintage Camper Renovation: Lead, Asbestos, and the Value of Original Parts
Restoring a vintage trailer is a different project from refreshing a ten-year-old travel trailer. The appeal is obvious: rounded aluminum shells, birch interiors, and designs that do not exist anymore. The considerations are different too, because older campers can contain materials that should not be sanded, scraped, or cut without knowing what they are.
Lead in older paint
The U.S. Consumer Product Safety Commission banned lead-based paint for use in housing in 1978, which is why federal lead disclosure rules for homes focus on housing built before that year. A camper painted, or repainted, before then may have paint layers containing lead, inside or out. Sanding, scraping, or heat-stripping that paint can create hazardous dust.
Before you strip old paint on a vintage camper, test it. Lead test kits and laboratory testing are both available, and the EPA’s lead program and your state or local health department are the places to start for guidance on testing and safe work practices. If lead is present, the safest choices are often to leave stable paint in place and encapsulate it, or to hire someone trained in lead-safe work.
Asbestos in older flooring and adhesives
Older vinyl floor tiles, the backing on some older sheet vinyl, and some older flooring adhesives, especially dark adhesives, can contain asbestos. These materials are generally considered lower risk when intact and undisturbed. The risk comes from breaking, sanding, grinding, or dry-scraping them, which can release fibers.
If a vintage camper has original resilient flooring or old adhesive residue, do not sand or grind it to find out. Have a sample tested by an accredited laboratory, and contact your state environmental or health agency for guidance on what is allowed and recommended. In some cases, covering intact old flooring with a new floating floor, rather than removing it, is the approach professionals suggest, though that interacts with the floor height and slide-out issues in Section 8.
Older electrical, propane, and plumbing
Vintage campers often have original wiring, propane lines, regulators, and appliances that predate current standards by decades. Treat all of it as suspect until inspected. A vintage restoration is the remodel where Section 20, which covers the work to hand to a technician, matters most.
No federal cargo label, so weigh it
A vintage trailer predates the federal cargo capacity label described in Section 3, and decades of modifications may have changed its weight. Find the original weight rating if it survives on a plate or in documentation, weigh the trailer on a certified scale before and after the restoration, and be especially careful with wood-heavy interior rebuilds, which can add up quickly on a lightweight frame.
Originality and value
In the vintage market, original components can matter to some buyers in a way they never do with a modern RV. Original appliances, hardware, light fixtures, cabinet doors, and trim may be difficult or impossible to replace. If there is any chance you will sell the camper or want to return it toward original condition, keep the original parts you remove, labeled and photographed, rather than discarding them during demolition. Section 24 covers how to keep them.
The Work to Hand to a Certified RV Technician
A great deal of RV remodeling is genuinely do-it-yourself work: paint, cabinet hardware, flooring, fixtures, upholstery, lighting swaps, decor. A smaller set of jobs involves systems where a mistake creates a fire, a gas leak, an electrical shock, or a structural failure on the highway. Those are worth paying a qualified RV technician to do or to inspect.
- Any propane work: Moving, extending, or replacing gas lines, regulators, or gas appliances such as ranges, furnaces, water heaters, and refrigerators. After propane work, the system should be leak-tested by someone equipped to do it.
- The 120-volt AC system: New circuits, panel changes, a 30-amp to 50-amp conversion, transfer switches, inverter integration, and generator installation.
- Battery bank and charging changes: Especially lithium conversions, where charger, converter, and alternator charging settings have to match the battery chemistry.
- Slide-out adjustment: If new flooring or new furniture changes how a slide moves or seals.
- Structural repairs: Rotted wall framing, delaminated sidewalls, roof structure, and subfloor replacement.
- Seat belts and anchorages: Adding, moving, or reinstalling belted seats in a motorhome.
- Axles, suspension, brakes, and tires: If the remodel changes the RV’s weight enough to raise questions about any of them.
The RV industry has its own technician training and certification pathways, separate from residential trades, because RV systems differ from house systems in ways that matter. When you hire, ask about RV-specific certification and experience with the system involved. A residential electrician or plumber may be excellent and still unfamiliar with low-voltage DC systems, RV transfer switches, or RV gas appliances.
A good middle path for capable do-it-yourselfers is to do the cosmetic and carpentry work yourself and have a technician inspect anything touching propane, 120-volt power, or structure before you close up the walls. An inspection costs far less than reopening a finished interior.
Warranties, Insurance, and Resale After a Remodel
A remodel changes the RV you own, and that can affect your warranty coverage, your insurance, and what the RV is worth when you sell it. None of this should stop a remodel. All of it is worth checking before you start, with the people who can actually answer the questions for your situation.
Warranties
Newer RVs often carry several separate warranties: one from the RV manufacturer for the coach, one from the chassis manufacturer on a motorhome, and others from the makers of individual appliances and components. Read each one before modifying anything it covers.
The Federal Trade Commission enforces the Magnuson-Moss Warranty Act. In its consumer guidance on vehicle warranties, the FTC has said that simply using an aftermarket or recycled part does not void a warranty, and that a manufacturer or dealer must show that the aftermarket part caused the need for repairs before denying coverage. The same guidance is equally clear that if an aftermarket part was itself defective or improperly installed and damaged a covered part, coverage for that damage can be denied.
In practice, that means a remodel does not automatically end your coverage, and it also means a botched installation can leave you paying for what it damages. Keep records of what you changed, who did it, and when. Many RV warranties also treat sealant upkeep as owner maintenance, so documenting your seam inspections is worthwhile.
Insurance
Talk to your insurer before and after a significant remodel. Policies differ in how they value an RV, how they treat upgrades and custom work, and what documentation they want. Keep receipts and before-and-after photos. Ask your agent or insurer directly how your specific policy handles the changes you plan, rather than assuming the improvements are covered.
State rules on RV alterations
RVs are built to national standards, and at least one state has addressed alterations directly. California’s Department of Housing and Community Development has issued guidance stating that RVs should not be altered in a way inconsistent with the applicable recreational vehicle standards, and California law also ties occupying a lot in certain parks to evidence that the RV complies with those standards. Rules vary by state, and most apply most clearly to businesses that alter RVs for sale. If your remodel is extensive, especially in structure, electrical, or propane systems, check your own state’s requirements, or have the work done by a business that knows them.
Resale
A remodel can make an RV more appealing to some buyers and less appealing to others. Tastes in paint colors and layouts vary widely, and buyers of used RVs often look closely at quality of workmanship, signs of water damage, and whether systems were modified by someone qualified. Documentation helps: photos of the work in progress, receipts, technician inspection records, and your weight ledger all tell a buyer the job was done carefully. If the RV is vintage or might be sold to a buyer who values original condition, keeping the original parts you removed preserves options.
Sequencing a Camper Renovation So You Only Do Each Job Once
Most wasted effort in an RV remodel comes from doing things in the wrong order: painting a wall that later gets torn open for wiring, installing a floor before discovering the subfloor is soft, or finishing a beautiful kitchen and then learning the RV is over its weight rating. This sequence avoids most of that.
- Weigh the RV and record the label numbers. Note the cargo capacity, the gross vehicle weight rating, and the axle ratings, and weigh the RV on a certified scale in the condition you normally travel. This is your baseline.
- Inspect for water and fix the sources. Roof seams, windows, and doors first, then the damage they caused. Nothing cosmetic happens until the RV is dry and sealed.
- Plan the layout around exits, detectors, and belted seats. Mark every emergency exit, alarm, and detector, and in a motorhome count the belted seating you need to keep.
- Do demolition and weigh what comes out. Start the weight ledger. Label and photograph anything you might reinstall or sell.
- Make structural repairs. Subfloor, wall framing, and roof structure, with professional help where needed.
- Rough in systems. Electrical, plumbing, and propane changes, with technician work and inspection before walls and cabinets close them in.
- Work top to bottom on surfaces. Ceiling first, then walls and cabinets, so drips and dust fall onto surfaces that are not finished yet.
- Install counters, fixtures, and appliances. Record every weight.
- Install flooring, after testing slide-out clearance. Flooring late in the sequence protects it from the rest of the work.
- Replace alarms and confirm every safety device works. Test smoke, carbon monoxide, and propane detectors, check the extinguisher, and open every exit window.
- Add soft goods and decor. Cushions, window treatments, rugs, and the finishing touches.
- Ventilate thoroughly, then weigh again. Air the RV out while finishes cure, then load it the way you travel and go back to the scale. Compare the result to your baseline and the ratings.
The final weigh-in is the step most remodels skip and the one that tells you whether the finished RV is one you can safely tow or drive. If the numbers are tight, the easiest fixes are usually reducing what you carry, traveling with less water, or removing heavy items you rarely use, rather than undoing the remodel.
Where the Work Actually Happens: Driveways, HOAs, and Shop Space
Remodel articles show the finished interior. They rarely mention where the RV sat for the six weeks, or six months, it took to get there. For many owners, that question shapes the whole project.
Driveways, HOAs, and local ordinances
Many homeowners associations and many municipalities restrict how long an RV can be parked in a driveway or on the street, and some prohibit it except for brief loading. A remodel that stretches across a season can turn a weekend exception into a violation notice. HOA covenants and city ordinances are separate sets of rules, and either can prohibit what the other allows, so check both before you start a long project at home.
Power, weather, and noise
Remodeling at home usually means running power tools off household outlets through extension cords sized for the load, working around weather with an RV that may have open roof penetrations or missing windows mid-project, and keeping the noise reasonable for neighbors. Plan for rain: an open roof opening or a removed window needs a weather-tight temporary cover before you leave it overnight.
The garage as a shop
Most RVs do not fit in a residential garage, but the garage can still be the most valuable part of the project as a workshop. Cabinet doors, furniture, countertops, and trim can be built, painted, and finished there while the RV stays in the driveway or at a service center. Turning a garage into a shop usually means moving its normal contents somewhere else for the duration.
Shops, mobile technicians, and service centers
RV service centers and mobile RV technicians handle the technician-level work in Section 20, and some also offer full remodeling. Having the system work done at a shop, then bringing the RV home for cosmetic work, is a common way to split a project.
What storage facilities are not for
Storage facilities are built for keeping things, not for working on them. Most prohibit vehicle repair and maintenance on site, and ours do as well: no repairs, no maintenance, no washing, and no living in a stored RV. If a remodel plan depends on doing the work at a storage lot, check the rental agreement before you rely on it. A facility can be very useful for the parts of a remodel that need to be kept somewhere, which is what Section 24 covers, but it is not a workshop.
Where to Keep Parts, Materials, and the Finished RV
A full RV remodel generates a surprising amount of stuff that has to be somewhere other than inside the RV: the factory sofa and dinette cushions you have not decided about, original parts from a vintage camper, boxes of flooring bought on sale, cabinet doors waiting for paint, and all the household gear that normally lives in the coach. Leaving it in the RV means working around it and, often, damaging it. Leaving it in the garage means losing the shop space Section 23 described.
A worked staging estimate
Here is a rough planning estimate for a mid-size travel trailer getting a full interior refresh. Your items will differ, so measure what you are actually removing.
- Factory sofa or jackknife sofa: roughly the footprint of a small residential loveseat
- Dinette cushions, backrests, and table: a few cubic feet each, stackable
- RV mattress: often a short queen, stored flat or on edge in a mattress bag
- Cabinet doors and drawer fronts: a flat stack, best kept flat and separated with cardboard or blankets
- Window valances, blinds, and light fixtures: a few labeled boxes
- Household contents of the RV: cookware, bedding, tools, hoses, chairs, and supplies, typically several large totes
- New materials bought ahead: flooring cartons, wall panels, and hardware
For most owners that adds up to a few hundred cubic feet. A 5x10 unit is 50 square feet of floor and, at a typical 8-foot height, roughly 400 cubic feet of space, which comfortably holds the removed furniture, cushions, and household gear for a single trailer with an aisle left open. A full gut of a larger fifth wheel or motorhome, or a project where you are also clearing the garage to use it as a shop, is closer to a 10x10. Our storage unit size guide shows what each size holds, and you can browse medium units near you to see current availability and pricing.
What does not go in a storage unit
Remodels produce a lot of materials that are not allowed in storage units. Our facilities, like most, prohibit flammables, hazardous materials, and perishables. That rules out fuel, propane cylinders, solvents, and similar products, and it means anything you are unsure about, such as leftover paint, adhesives, sealants, or removed batteries, should be checked with our customer support team before it goes in. Propane appliances you remove should be disconnected and free of gas before storage.
When temperature matters
Most remodel overflow does fine in a standard drive-up unit. Wood cabinet doors and solid-wood trim you plan to reinstall, upholstered cushions, original vintage components, and electronics removed from the RV are more sensitive to extreme summer heat and winter cold. For those, a climate-controlled unit keeps them in a temperature-regulated space instead of riding through the same seasonal swings as the outdoors. Make sure everything goes in clean and completely dry.
Parking the finished RV
Once the remodel is done, the RV still needs somewhere to live between trips, and a freshly finished interior is a good reason to choose that place carefully. Our RV and trailer storage includes outdoor parking spaces in 20-, 30-, and 40-foot lengths, with covered parking and enclosed options at select locations. Measure the RV’s full overall length and its height including any new rooftop additions before you reserve. Stored RVs need current registration and insurance, motorized RVs must be operable, and vehicles with fluid leaks are not accepted, so plan to bring the RV in once it is roadworthy rather than mid-project.
When Renting Storage During an RV Remodel Does Not Make Sense
We rent storage, and we would still rather tell you when you do not need it. Plenty of RV remodels finish perfectly well without a single month of storage, and a few situations make renting a unit or a space the wrong answer.
The project is cosmetic and short
If your remodel is paint, hardware, lighting, and new cushions over a few weekends, there is very little to remove and nowhere it needs to go. Move the RV’s contents into the house or the garage for a month and skip the rental.
You are throwing it away anyway
Storage is for things you will use again. If the factory sofa, the old carpet, and the dated valances are headed for the curb or a donation center, take them there now. Paying monthly to store something you have already decided to get rid of is the most common way remodel storage costs more than it should. Sell or donate what has value while you still have momentum.
Your garage or a spare room can hold it
A single trailer’s worth of cushions, cabinet doors, and totes often fits in a corner of a garage or basement. If you are not using the garage as a workshop, use it as the staging area.
The RV is mid-project and not roadworthy
A motorhome that does not run, or any RV with open roof penetrations, missing windows, or fluid leaks, is not ready for a storage space. Our facilities require motorized RVs to be operable and do not accept vehicles that leak fluids. Finish the work that makes the RV road-ready first.
You want to work on the RV at the facility
Storage facilities are not workshops. Ours do not allow repairs, maintenance, or washing on site. If the plan depends on doing remodel work wherever the RV is parked, a storage space will not serve that plan.
The materials are flammable or hazardous
Fuel, propane cylinders, solvents, and other flammable or hazardous products cannot be stored in a unit. Buy them close to when you need them, store them safely at home according to the label, and dispose of leftovers through your local household hazardous waste program.
The project has stalled
If a remodel has sat untouched for a season or two and no restart date is on the calendar, the storage bill is deferring a decision rather than supporting a project. That is the moment to decide whether to finish, scale back, or sell the RV as it is, before more months of fees accumulate.
When it does make sense
Storage earns its cost during a remodel when you are removing a large amount of furniture and gear you intend to reinstall or sell, when you are keeping original parts from a vintage camper, when the garage is needed as a shop, or when HOA or local rules mean the finished RV cannot be parked at home. Those are real problems, and a unit or a parking space solves them well.
Frequently Asked Questions About RV Remodels
It depends far more on which systems you touch than on the size of the RV. Cosmetic work such as paint, hardware, lighting, and soft goods is the least expensive. Costs rise sharply once a remodel involves structural water damage repair, electrical changes, propane work, or new appliances, and professional labor is often the largest single line. Get quotes for the specific work you plan, and set aside a contingency for problems you will only find after demolition.
It can be, if the camper’s structure is sound. A dated interior on a dry, solid RV is a good renovation candidate. A camper with soft floors, delaminated walls, or a long-term roof leak may cost more to repair than it will be worth, so inspect for water damage before you buy or begin.
Focus on the upgrades that change the most for the least: interior paint with proper primer, new cabinet hardware, LED lighting, window treatments, reupholstered cushions, and peel-and-stick backsplashes. These add little weight and require no technician work. Put any remaining budget toward fixing leaks and updating smoke, carbon monoxide, and propane alarms.
Yes, but many RV walls are thin panels covered in a vinyl or paper film that ordinary paint will not grip. Clean and degrease the walls, scuff a test area, use a bonding or shellac-based primer suited to slick surfaces, and test adhesion before painting everything. Ventilate well and let the paint cure fully before closing up the RV.
Thin vinyl plank, vinyl tile, or sheet vinyl is the usual choice because it is light, water-resistant, and adds little height. The critical step is measuring the slide-out’s clearance and test-fitting a sample of the new flooring in the slide’s path before buying. Flooring that is even slightly thicker than the original can keep a slide from retracting or sealing correctly.
Many owners do, but it is an electrical project as much as an appliance swap. A residential refrigerator needs 120-volt power continuously, including while traveling and when camping without hookups, which usually means an inverter and enough battery capacity. Confirm the cutout dimensions, ventilation, travel latching, and weight before buying, and have the electrical work done or checked by a qualified RV technician.
Start with the cargo carrying capacity label, which federal rules require on RVs built since 2008, typically inside the main entry door or near the tire information. Everything you add after purchase, plus water, food, and gear, comes out of that number. Because previous owners may have added weight, the most reliable answer comes from weighing the loaded RV on a certified scale and comparing it with the weight ratings.
Physically, yes, but stone is one of the heaviest remodel choices you can make. A standard 3 centimeter granite slab weighs roughly 16 to 17 pounds per square foot, about three times as much as a 1.5-inch hardwood butcher block. Run the numbers against your cargo capacity, consider thinner slabs or lighter materials, and confirm the cabinets can support the load.
Not automatically. Federal Trade Commission guidance on the Magnuson-Moss Warranty Act says using aftermarket parts does not by itself void a warranty, and the manufacturer must show an aftermarket part caused the problem before denying coverage. Damage caused by a defective or improperly installed modification can be excluded, so read each warranty and keep records of the work.
RVs are titled as vehicles rather than permitted as buildings, so an interior remodel generally does not go through a local building permit office. Rules on RV alterations still vary by state, especially for structural, electrical, and propane work, and California has addressed alterations directly. Check your state’s requirements, along with HOA and local rules on where the work can take place.
A paint-and-hardware refresh can take a few weekends. A full gut with water damage repair, systems work, and new cabinetry can take months, especially if you are working around weather, technician schedules, and cure times. Plan where the RV will sit for the whole project before you start.
You can, but check first whether the dinette includes belted seating positions. A motorhome’s capacity label lists its safety-belt-equipped seating, and removing a belted dinette reduces that number. State seat belt laws vary, so make sure the finished layout still has enough belted seats for everyone who rides while the motorhome is moving.
Lighter colors, LED lighting, updated cabinet hardware, hard flooring, new window treatments, and refreshed upholstery do most of the work. Behind the scenes, modernizing should also mean replacing aged smoke, carbon monoxide, and propane alarms, resealing the roof, and having old propane and electrical components inspected.
Usually not. Most storage facilities prohibit repairs and maintenance on site, and 10 Federal Storage facilities do not permit repairs, maintenance, washing, or living in a stored RV. Storage can be useful during a remodel for holding removed furniture, materials, and the finished RV, but plan to do the work at home or at a shop.
Decide quickly whether each item will be reinstalled, sold, donated, or discarded. Items you plan to reuse or sell, and original parts from a vintage camper, are worth labeling, photographing, and keeping somewhere dry and secure. Items you will never use again are usually better sold or disposed of right away than stored.
Remodel the RV You Want
The best RV remodels are not the ones with the most dramatic before-and-after photos. They are the ones that still tow straight, close every slide, keep every alarm and exit working, and leave enough cargo capacity for the trips the remodel was meant to make better. Start with the water inspection and the label inside the door, keep the weight ledger, hand the propane and high-voltage work to a technician, and the look you want will fit inside the limits the RV already has.
When the furniture comes out and the finished RV needs a place to wait for the next season, 10 Federal Storage has units and RV parking on month-to-month terms, with online rental and 24/7 gate access at nearly all locations.
About the Author
10 Federal Storage
Our team at 10 Federal Storage has been in the self storage industry for decades. With knowledge gained from multiple universities and in the field, we are well-prepared and excited to assist with your storage needs. When you rent a unit with us, you can feel confident that our seasoned customer service team’s help will make your transition as seamless as possible. Customer satisfaction is our number one priority, and we strive to make your experience exceptional with our automated leasing options, diverse unit sizes, and a strong commitment to sustainability.