
.svg)
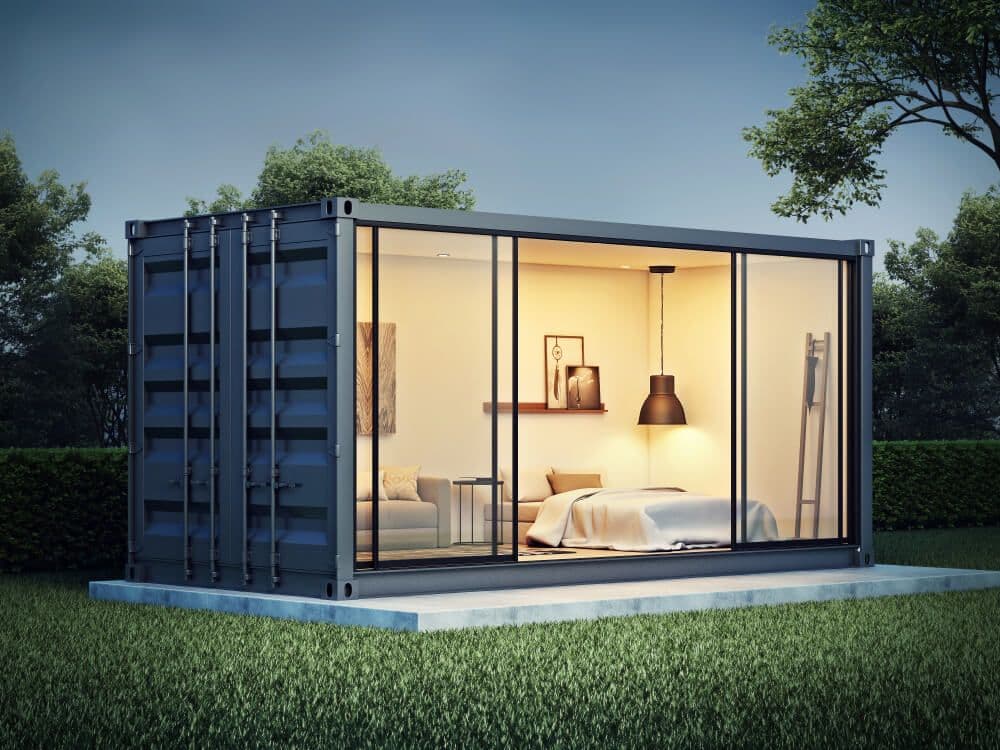
Shipping Container Homes: Costs, Codes, and Design Ideas
by 10 Federal Storage
Published on August 27, 2026
Container homes are a real and often excellent way to build. They are also the most consistently over-simplified building type on the internet, described in listicles that skip the arithmetic and the code entirely. The result is a lot of people who buy a box, discover halfway through that the ceiling will not clear the minimum legal height once the roof is insulated, and stall out.
So this guide leads with the numbers. Real ISO dimensions, not rounded ones. Finished floor area, not shell area. The vertical budget you have between the container ceiling and the code minimum, and exactly how much of it your climate zone will consume. What the model building code says about repurposed containers, which provisions let you skip a full structural analysis, and the single modification that voids that shortcut. What the box costs, what the build costs, and why those two figures are not related in the way most articles imply.
It also covers the fun part: design ideas, floor plan arrangements, and interior strategies that work with a 7-foot-8-inch interior width rather than fighting it. Container architecture has genuine aesthetic strengths, and they come from respecting the geometry, not disguising it.
Two things you should know about our perspective. We are a self-storage operator, not a builder, and there is a storage angle at the end of this post because container builds create a real and predictable storage problem, but it is at the end, after 20-plus sections of information you can use whether or not you ever rent anything from anyone. And we include a section on when a container home is the wrong choice, along with several scenarios where renting a storage unit during a build is a bad idea. Both of those are here because they are true.
Table of Contents
- What a Shipping Container Home Actually Is
- Container Types and Real ISO Dimensions
- The Square Footage Math No One Publishes
- The Ceiling Height Problem That Decides Your Entire Build
- Condition Grades and What You Are Actually Buying
- The CSC Plate and Why You Read It First
- The Floor Question and Treated Plywood
- Building Codes and What the Model Code Actually Says
- Why Stacking Containers Is Not Like Stacking Blocks
- Insulation, Thermal Bridging, and Condensation
- Foundations and Site Preparation
- Roofs and Why You Add One to a Box That Has One
- Utilities, Plumbing, Power, and HVAC
- What a Container Home Actually Costs
- Financing, Appraisal, and Insurance
- Zoning, ADUs, and Neighborhood Rules
- Design Ideas That Work With the Box
- Floor Plan Ideas by Container Count
- Interior Design and Storage Ideas for a Narrow Footprint
- Container Builds That Are Not Houses
- Prefab, Custom Build, or DIY
- The Build Timeline and Where Your Belongings Live
- Sizing Storage for a Container Home Downsize
- When a Container Home Is the Wrong Choice
- Frequently Asked Questions
- Planning a Container Build Near a 10 Federal Storage Location
What a Shipping Container Home Actually Is
A shipping container home is a dwelling built using one or more intermodal freight containers as structural elements. The model building code now has a formal definition for these: a six-sided steel unit originally constructed as a general cargo container for the transport of goods and materials. That definition matters more than it sounds like it should, because it is the trigger for a specific set of code provisions we will cover in Section 8.
The design language is sometimes called cargotecture, and it descends from a broader movement in shipping container architecture that predates residential use by decades. Containers were pressed into service as site offices, clinics, classrooms, data centers, retail kiosks, and military housing long before anyone put a kitchen in one. The residential application arrived in the mid-2000s and has been growing steadily since.
What makes a container different from other building materials
The critical thing to understand is that a shipping container is not a building shell that happens to be made of steel. It is a self-supporting structural system with a very specific and very unusual load path.
In a conventional house, load travels down through walls distributed across the whole perimeter. In a shipping container, load travels almost entirely through the four corner posts and into the eight corner castings, the reinforced steel blocks at each corner that twist-locks grab. The corrugated side walls are not primarily gravity-bearing. They are shear panels, and they provide the racking resistance that keeps the box square when a ship rolls.
This has three consequences that shape every decision downstream:
- Cutting the walls costs you shear capacity. Every window, door, and pass-through you cut into a corrugated side wall removes structural material. Enough openings and the box needs supplementary framing to stay square.
- The corners are sacred. Notching, cutting, or removing any part of a corner casting, corner post, or the top and bottom rails changes the container from a known engineered object into an unknown one.
- Loads want to land on the corners. Anything you stack, hang, or build on top of a container should be transferring its weight into the corner posts, not the roof panel. The roof of a shipping container is thin sheet steel designed to shed water and support a person walking on it, not to carry a second story or a snow load in its own right.
What it is not
A container home is not a manufactured home in the regulatory sense. Manufactured homes are built to a federal standard administered by HUD and carry a HUD label. A container home built on site or delivered as a modular unit is generally regulated under state and local building codes instead, which is a different track with different inspections, different financing, and different resale characteristics.
It is also not automatically a tiny house, though many are. Tiny house has a specific meaning in the model residential code (a dwelling unit with a limited maximum floor area), and whether your build falls inside that definition changes which provisions apply to it. A single container is almost always under the threshold. A four-container build usually is not.
And it is not inherently cheaper than conventional construction. That claim is repeated constantly and it is true only in specific circumstances, which Section 14 covers honestly.
Container Types and Real ISO Dimensions
Container dimensions are governed by ISO 668, the international standard that fixes the external envelope of freight containers. This standardization is the entire reason the global shipping system works. A box loaded in Shanghai fits a chassis in Texas and stacks on a container built sixty years earlier. For a builder, it means the dimensions in this section are reliable in a way that very little else about used containers is.
One correction before the numbers, because it appears in most container home articles including the one currently ranking first for this topic: standard-height containers are 8 feet 6 inches tall, not 8.6 feet. Those are different measurements: 8.6 feet would be 8 feet 7.2 inches. It is a small error but it propagates into planning spreadsheets and it is worth catching.
Standard dry containers
External dimensions are fixed by ISO 668. Internal dimensions are not standardized in the same way (ISO 1496 sets minimums only), so a specific box may be marginally roomier than the figures below. Treat these as planning numbers and measure the actual container you buy.
- 20 ft standard: External 20 ft long by 8 ft wide by 8 ft 6 in tall. Internal roughly 19 ft 4 in by 7 ft 8 in by 7 ft 10 in. About 1,170 cubic feet. Tare weight around 4,900 pounds.
- 20 ft high cube: Same footprint, external height 9 ft 6 in, internal height roughly 8 ft 10 in. About 1,320 cubic feet. Genuinely harder to source than the 40 ft high cube in most US markets.
- 40 ft standard: External 40 ft by 8 ft by 8 ft 6 in. Internal roughly 39 ft 5 in by 7 ft 8 in by 7 ft 10 in. About 2,390 cubic feet. Tare weight around 8,300 pounds.
- 40 ft high cube: External height 9 ft 6 in, internal height roughly 8 ft 10 in. About 2,700 cubic feet. This dominates new container production and is the default choice for residential builds.
- 45 ft high cube: External 45 ft by 8 ft by 9 ft 6 in. The largest ISO Series 1 container. Less common, and transport logistics get harder.
- 10 ft: External 10 ft by 8 ft by 8 ft 6 in. Covered separately below because it is a trap.
Width is the constant. Every ISO container from the 10 ft to the 45 ft is 8 feet wide externally and roughly 7 feet 8 inches internally. You cannot buy your way out of the narrowness. The only ways to get a wider room are to join containers side by side and remove the shared walls, or to build conventional structure in the gap between two containers.
The 10 ft container problem
Most container home articles list 10 ft units as a standard size alongside 20 ft and 40 ft. In practice they are not mass-produced the way the other sizes are. The overwhelming majority of 10 ft containers on the US market are 20 ft units that have been cut down and re-welded, and that fabrication labor means a 10 ft frequently costs nearly as much as a 20 ft while giving you half the space.
They also carry a structural asterisk. A cut-and-rewelded box is no longer the certified object that left the factory, which complicates the code path described in Section 8. If you want a small footprint, a 20 ft is almost always the better buy. If you genuinely need 10 feet, buy purpose-built rather than cut-down and get documentation.
High cube versus standard
A high cube is one foot taller externally and about one foot taller internally. Most guides describe this as helpful. Section 4 explains why, for a code-compliant insulated build in much of the country, it is closer to mandatory than helpful. If you read only one other section of this guide, read that one before you buy a container.
Refrigerated containers
Reefer containers arrive pre-insulated, which sounds like a shortcut and occasionally is. The insulation is typically polyurethane foam bonded between an inner stainless or aluminum liner and the outer steel skin, and the interior is already a smooth washable surface.
The tradeoffs are real. Reefers cost substantially more than dry containers, including on the used market. The refrigeration machinery occupies one end and has to be removed and disposed of, which involves refrigerant recovery by a licensed technician. The insulation thickness eats interior width and height, so you start from a smaller box. The floors are typically T-bar aluminum grating designed for airflow rather than a walking surface. And the insulation R-value, while real, is usually well short of what current residential energy codes require in colder zones, so you may end up adding insulation anyway on top of what you paid a premium for.
Reefers work well for specific applications such as cold rooms, food service builds, and workshops in hot climates, and less well as a general shortcut to an insulated house.
Other variants you will encounter
- Open-side containers: Full-length doors along one long wall. Attractive for retail or workshop conversions where you want a wide opening. The trade-off is a structurally different box with a heavier frame and a higher price.
- Open-top containers: Removable tarpaulin roof over a steel frame. Occasionally used where a build wants a rooftop opening, but the missing roof panel changes the structural picture considerably.
- Flat racks and platforms: Not usable as an enclosure. Ignore for residential purposes.
- Pallet-wide containers: European variants with a slightly wider interior. Not ISO-standardized and rare in North America.
The Square Footage Math No One Publishes
Here is the arithmetic that should appear in every container home guide and appears in almost none of them.
A 20 ft container has an external footprint of 160 square feet. That is the number you will see quoted. But the external footprint includes the thickness of the corrugated steel walls and the corner structure, so the actual interior shell is closer to 148 square feet. Then you insulate.
Finished floor area for a 20 ft container
Interior shell dimensions are roughly 19 ft 4 in by 7 ft 8 in. Subtract the wall assembly from all four sides:
- Shell, before any finishing: about 148 square feet, at 7 ft 8 in wide
- With about 2.5 inches per surface (closed-cell spray foam plus thin furring and a finish layer): about 137 square feet, at roughly 7 ft 3 in wide
- With about 4.5 inches per surface (a framed stud wall with cavity insulation and drywall): about 128 square feet, at roughly 6 ft 11 in wide
So the honest range for a finished 20 ft container is 128 to 137 square feet, against a headline number of 160. You lose 15 to 20 percent, and you lose it in the dimension you can least afford: width.
Finished floor area for a 40 ft container
- External footprint: 320 square feet
- Interior shell: about 302 square feet
- With about 2.5 inches per surface: about 283 square feet
- With about 4.5 inches per surface: about 267 square feet
The proportional loss is smaller on a 40 ft because the wall thickness eats a smaller fraction of the length. This is one of several reasons the 40 ft high cube is the workhorse of container residential construction.
Why the width loss matters more than the number suggests
A finished interior width somewhere between 6 ft 11 in and 7 ft 3 in is the defining constraint of container design, and it is worth sitting with for a moment. The model residential code sets a minimum hallway width of 3 feet. If you run a corridor down one side of a 40 ft container, you have about 4 feet of usable depth left on the other side for everything else: cabinets, appliances, a bed, a desk, seating.
Four feet is enough for a standard 24-inch kitchen counter plus circulation. It is enough for a twin bed placed lengthwise. It is not enough for a queen bed placed lengthwise with a walkway beside it, which is why in single-container builds the bed almost always runs crosswise and touches both walls.
The model residential code also requires habitable rooms to be at least 70 square feet. A finished 20 ft container at roughly 130 square feet can technically contain one habitable room plus a bathroom and not much else. This is why single-container homes are nearly always studios: the geometry does not permit two habitable rooms plus circulation plus a bath.
The practical takeaway
When you are calculating how many containers you need, use finished area, not external footprint. A 1,000 square foot container home is not three 40 ft containers. Using the 2.5-inch assembly, three 40 ft containers get you to roughly 850 square feet of finished interior, and that is before you subtract anything for the structure required where you join them. Four is the realistic number, or three plus conventionally framed infill between them.
Budget the difference at the start. Discovering it after you have bought three containers is an expensive way to learn arithmetic.
The Ceiling Height Problem That Decides Your Entire Build
This is the section that changes people’s plans, and it is the one thing we would most like you to take away from this guide. It is a conflict between two numbers, and almost nobody writing about container homes puts them next to each other.
The two numbers
Number one: your interior height. A standard-height container gives you about 7 feet 10 inches, or 94 inches, floor to ceiling in the raw shell. A high cube gives you about 8 feet 10 inches, or 106 inches.
Number two: the code minimum. The model residential code requires habitable space and hallways to have a finished ceiling height of not less than 7 feet, or 84 inches, measured from finished floor to finished ceiling. Bathrooms, toilet rooms, and laundry rooms are allowed down to 6 feet 8 inches.
Subtract, and you get your vertical budget: the total inches you have available for floor assembly plus ceiling assembly before you fall below the legal minimum.
- Standard height container: 94 minus 84 equals 10 inches total, for floor and ceiling combined
- High cube container: 106 minus 84 equals 22 inches total
What the roof insulation costs you
Now put the energy code next to that budget. The model energy code sets prescriptive minimum insulation values by climate zone, and the ceiling requirement is the largest single number in the table. Broadly, it rises from around R-30 in the warmest zones to R-49 in the middle of the country and R-60 across the northern half.
Closed-cell spray polyurethane foam is the usual choice inside a container because it is a vapor retarder as well as an insulator and it conforms to the corrugation. It delivers roughly R-6 to R-7 per inch. At R-6.5 per inch, here is what those code values cost in thickness:
- R-30: about 4.6 inches
- R-38: about 5.8 inches
- R-49: about 7.5 inches
- R-60: about 9.2 inches
Put the two together
A standard-height container has a 10-inch vertical budget. In a climate zone requiring R-49 at the ceiling, spray foam alone consumes 7.5 of those inches, leaving 2.5 inches for the entire floor assembly plus any ceiling finish. That is achievable only with an extremely thin floor buildup and a finish applied directly to the foam.
In a climate zone requiring R-60, the foam wants 9.2 inches out of a 10-inch budget. There is nothing left. A standard-height container insulated to the prescriptive ceiling requirement on the interior cannot deliver a 7-foot finished ceiling in those zones. The arithmetic simply does not work.
A high cube, with 22 inches of budget, absorbs R-60 at the ceiling and still leaves roughly 13 inches for the floor and finishes. It is comfortable.
This is the real answer to why container home builders default to high cubes, and it is a considerably stronger claim than the usual framing that the extra foot is nice to have. In much of the United States, for a code-compliant build insulated on the interior, the extra foot is the difference between a legal dwelling and a very expensive shed.
The three ways out
Before you conclude that a standard-height container is unusable, know that experienced builders route around this constantly. There are three legitimate paths:
- Insulate above the container. Build a new roof structure over the container and put the ceiling insulation in that assembly rather than inside the box. This is the most common solution and it has a second benefit covered in Section 12. It gets water off the container roof and shades the steel. Your interior ceiling height is then preserved almost entirely.
- Use a performance compliance path. The energy code offers alternatives to the prescriptive table, including a total building envelope tradeoff and a simulated performance path. These let you compensate for a lower ceiling R-value with better performance elsewhere: superior windows, tighter air sealing, more wall insulation. This requires an energy modeler and produces a compliance report, but it is a normal, routine thing that thousands of unusual buildings do every year.
- Insulate on the exterior. Rigid foam or mineral wool applied outside the steel, behind cladding, keeps the entire interior dimension intact and dramatically improves the thermal bridging picture discussed in Section 10. It costs more and it means you are covering up the corrugation, which some people want and some people specifically do not.
What to do with this before you buy
Find your climate zone. Look up the prescriptive ceiling and wall R-values for it. Decide whether you are insulating inside, above, or outside. Only then choose between standard height and high cube. Doing it in that order costs you an afternoon. Doing it in the other order has cost people the price of a container.
Condition Grades and What You Are Actually Buying
Container grading is an industry convention rather than a legal standard, which means the terms are used loosely and inconsistently between sellers. Knowing what the terms are supposed to mean lets you ask the right follow-up questions.
- One-trip or new: Manufactured overseas, loaded once with cargo for the voyage to North America, then sold. Cosmetically near-new, structurally uncompromised, and typically still carrying valid certification. The most expensive option and the easiest to work with.
- Cargo worthy (CW): Inspected and certified as structurally sound and fit for international shipment. Surface rust, dents, and repaired patches are normal. For a build, this is usually the value sweet spot.
- Wind and water tight (WWT): Keeps weather out but has not been certified for cargo service. Often perfectly fine for a stationary building. Costs meaningfully less than cargo worthy.
- As-is: Sold with no condition guarantee. May have holes, floor damage, door problems, or structural repairs of unknown quality. Only worth considering if you can inspect in person and you are comfortable with steel work.
Used containers have typically spent 18 to 22 years in ocean service before they enter the resale market. That is a long time in salt air, and it is why inspection matters more than grade labels.
What to inspect before you buy
Whenever possible, inspect the specific unit rather than buying sight-unseen from a photo of a different container. If you cannot travel to the depot, ask for photographs of the specific unit number you are being sold, including all of the following:
- Roof panel from above. The single most commonly damaged surface and the hardest to inspect from the ground. Standing water, deep dents, and pinholes all live here. Bring a ladder or ask for drone photos.
- Interior with the doors closed. Stand inside, have someone shut the doors, and look for daylight. This is the fastest and most reliable leak test there is.
- Floor condition. Delamination, soft spots, gouges from forklift tines, and separation from the cross members.
- Door gaskets and hardware. Cam locks, hinges, and the rubber seals. Doors that do not close cleanly on a level surface can indicate a racked frame.
- Corner castings and posts. Any deformation, prior repair, or crack here is disqualifying for a build.
- Rust character. Surface rust on the paint is cosmetic and expected. Rust that has scaled, flaked, or perforated is structural. Tap suspicious areas.
- Bottom rails and cross members. Look underneath. This is where corrosion concentrates and where a build will be hardest to repair after placement.
- Prior repairs. Patch welds are normal on cargo worthy units. Ask what was repaired and by whom.
Where you buy changes the price more than you expect
The largest single variable in container pricing is distance from a port or inland depot. Imported goods arrive at coastal ports and the boxes accumulate there, so container prices near major ports run substantially below prices in landlocked markets, and the delivery charge compounds the difference. The same used 20 ft unit can differ by a thousand dollars or more between a Gulf Coast market and a mountain-state market.
Always ask for delivered pricing rather than depot pricing. Quoting the box and adding freight later is a common practice, and the freight can be a significant fraction of the total.
The CSC Plate and Why You Read It First
Every container certified for international shipment carries a metal plate, usually mounted on one of the doors, known as the CSC plate after the International Convention for Safe Containers. It is also called the safety approval plate or the consolidated data plate. It is the container’s birth certificate and its most useful single document, and most container home guides do not mention it at all.
Read it before you buy, and photograph it before it disappears under paint or cladding.
What is on it
- Manufacturer and date of manufacture. Establishes the container’s age, which bears directly on the floor treatment question in Section 7 and on likely corrosion.
- Owner and container identification number. The alphanumeric code assigned under the ISO marking standard. This is how you confirm the box you are being sold is the box that arrives.
- Maximum gross weight and allowable stacking weight. The structural ratings assigned when the container was certified. Note carefully that the stacking rating is a shipping rating, established under specific test conditions with loads applied through the corner castings on an unmodified box. It is not a residential structural rating. Section 9 covers why that distinction matters enormously.
- Racking test load value. The lateral load the box was proven against.
- Timber or wood component treatment. This field names the chemical treatment applied to the wooden floor. It is the direct answer to a question most people research secondhand.
Why building officials care
Where the model code provisions for repurposed containers have been adopted, plan reviewers commonly want documentation of the container’s original certification, and the data plate is the primary evidence. Some jurisdictions want it verified by an approved agency. Removing the plate may require written approval from the building department.
The practical implication is straightforward: an as-is container with a missing or illegible plate is harder to permit than a cargo worthy container with a clean one. If you are planning a permitted residential build, treat a legible CSC plate as close to a requirement rather than a nice extra, and factor that into which grade you buy.
The Floor Question and Treated Plywood
Container floors are typically marine-grade plywood roughly an inch thick, laminated from tropical hardwoods such as keruing or apitong, bonded and screwed to steel cross members. Before installation, that plywood is treated with insecticide to satisfy plant-health inspection requirements at international ports, because tropical hardwood carries insect populations that importing countries will not accept.
The compounds most often named in industry documentation are Basileum SI-84, a permethrin-based formulation, along with products marketed as Tailileum 400 and Radaleum. Containers built before the early 2000s may carry residue from compounds that have since been restricted, including tributyltin oxide and older organochlorine pesticides.
The sources genuinely disagree, and you should know that
This is one of the few container-home topics where reputable sources reach different conclusions, and rather than pick one silently, here is the actual disagreement.
One position, held by several established container fabricators and supported by toxicology work they commissioned, is that these compounds are selectively toxic to insects, have low mammalian toxicity, and have low vapor pressure, meaning they do not readily off-gas into the air. On that reading, removal is unnecessary, and installing new flooring directly over the original plywood is fine.
The other position, held by many builders and by families making the decision for their own homes, is that a freight container floor was never designed for a sealed occupied space where people sleep and children play on the floor, that the treatment history of a used box is often unverifiable, and that the cost of removing the question entirely is modest relative to the total build.
Both positions are defensible. The disagreement is real, not manufactured. What we would say is that the risk calculus changes with the application: a container workshop opened daily is not a container bedroom.
Your four options
- Read the plate and decide from evidence. Check the timber treatment field on the CSC plate. A known modern permethrin-based treatment on a recent container is a different situation from an unlabeled 1990s box. Start here regardless of which way you lean.
- Seal in place. Clean thoroughly, then apply a solvent-free epoxy or polyurethane coating rated for wood, typically in two coats, and install finish flooring over it. The coating acts as a barrier. Ventilate heavily during application.
- Overlay with a non-permeable assembly. A sheet membrane or an impermeable underlayment over the original floor, then new subfloor and finish flooring above. Costs you vertical height, which matters given Section 4.
- Remove and replace. Pull the original plywood off the cross members, clean the adhesive, and install new untreated subfloor. This is the option that ends the conversation permanently and it is not a large job, typically a day or two of labor for a single container.
One thing every source agrees on: do not sand the original flooring. Sanding aerosolizes exactly the material you are worried about. If you are removing it, lift it out intact and wear appropriate protection.
If you are buying new or one-trip, you can often specify the floor at order time (untreated plywood, bamboo, or steel) and skip this section entirely.
Building Codes and What the Model Code Actually Says
Nearly every container home article handles this section with a sentence telling you to check your local regulations. That is true and useless. Here is what actually happened, and what it means for your project.
The code caught up in 2021
For years, container construction sat in a regulatory gap. There were no model code provisions written for repurposed containers, so jurisdictions improvised. Some wrote their own ordinances, some processed container projects under the alternative materials and methods provision that exists for anything the code does not contemplate, and some simply said no.
That changed with the 2021 edition of the model codes. The International Building Code added a dedicated section for intermodal shipping containers repurposed as buildings or structural components. The International Residential Code added a corresponding provision under its design criteria that points at the building code section for structural requirements, while the residential code’s ordinary requirements (energy, plumbing, mechanical, electrical, egress) continue to apply as they would to any dwelling. The 2024 edition refined and expanded these provisions further.
The stated purpose of the change was to give code officials a consistent framework, because they had been asking for one.
What the provisions require
In broad terms, and recognizing that the exact text varies by edition and by local amendment:
- Structural analysis is required and must be provided to the building official to demonstrate the container is adequate for the loads it will see: dead, live, wind, seismic, snow, and flood as applicable to your site.
- Foundations are conventional. Containers used as a permanent building must sit on foundations designed and constructed under the ordinary structural chapters. There is no container exemption from foundation design.
- Welds and modifications must match or exceed the original. New structural welding has to be at least as strong as what it replaces, and reinforcement around openings is a requirement, not a best practice.
- Material properties may need testing. Where the steel grade cannot be established from manufacturer documentation, testing may be required to establish it. This is another argument for a legible data plate.
- Floor treatment must be addressed. The code contemplates protection of the wood floor assembly, which connects directly to Section 7.
- Seismic detailing is specified. Where the corrugated container sides serve as the lateral force-resisting system, the code directs how they are to be classified and detailed.
The simplified path, and the thing that voids it
This is the most useful piece of code knowledge in the entire guide, and it should shape your design from day one.
The building code offers two structural design routes. One is a full engineered analysis. The other is a simplified design method that avoids much of that work, but it is available only under a specific set of limitations. Broadly, the simplified route requires that:
- The container is a single, stand-alone unit supported on a foundation
- It is not in contact with, supporting, or supported by any other container or structure
- The top and bottom rails, corner castings, and corner columns are not notched, cut, or removed in any way
- It is erected level and horizontal
- Openings comply with prescribed limitations
Read that list against the design you have in your head. The moment you stack a second container, join two side by side, cantilever one over another, or cut into a corner post to create a wide opening, you have left the simplified path and you are into a full engineered analysis with stamped drawings.
That does not make multi-container designs unbuildable. It makes them a different and more expensive project, and knowing that at the sketch stage rather than at plan review is worth a great deal. A single high cube on a pier foundation with modest openings is a fundamentally easier permit than two containers welded together, and the cost difference is not marginal.
Whether any of this applies to you
Model codes are not law until a state or local jurisdiction adopts them, and adoption cycles run years behind publication. Some jurisdictions are still on older editions with no container provisions at all. Some have adopted with local amendments that change the requirements. Some have their own container ordinances that predate the model provisions and continue to govern.
So the honest guidance is: find out which code edition your jurisdiction has adopted, and ask specifically whether the container provisions are in force. If they are, you have a defined path. If they are not, you may be in an alternative-materials review, which is discretionary and slower.
Request a pre-application meeting with your building department before you buy anything. Bring a sketch, your site address, and your container specifications. Ask what documentation they will want. Building officials generally prefer answering these questions early over rejecting a submitted project, and thirty minutes in that office is the highest-return time you will spend on the entire build.
Why Stacking Containers Is Not Like Stacking Blocks
You will read, in a great many places including the article currently ranking first for this topic, that shipping containers can be stacked eight or nine high like toy blocks and that this makes multi-story container homes straightforward. This claim confuses two entirely different things, and correcting it is one of the more useful things this guide can do.
Where the number comes from
Containers are indeed rated for high stacking. That rating is established under the ISO testing standards, and it describes a very particular situation: a fully intact, unmodified container, loaded through its eight corner castings only, with the load path running straight down the four corner posts, in a stack that is secured with twist-locks and lashings on a ship or in a depot yard.
Everything in that description is doing work. The load goes through the corners. The box is unmodified. The stack is engineered as a system.
Why it does not transfer to a house
A container home departs from every one of those conditions.
- You cut holes in it. Windows and doors in the corrugated side walls remove shear material. The corrugation is the racking resistance, and the ISO racking rating was established on a box with none of your openings in it.
- You load it in the wrong places. A rooftop deck, a green roof, a snow load, or a second container placed anywhere other than directly on the corner castings applies load the roof panel was never designed to carry.
- You offset it. The cantilevered container is the signature container-home move, and it is precisely the arrangement where the corner-to-corner load path does not exist. Every cantilever requires supplementary structure.
- The design loads are different. A ship stack is designed for the accelerations of a rolling vessel. A house is designed for the wind, seismic, and snow loads of a specific site under a specific risk category. These are not interchangeable analyses.
- The code says so. As covered in Section 8, the simplified structural path is explicitly unavailable to a container that touches, supports, or is supported by another container. The model code treats stacking as the trigger for full engineering.
What this means practically
Multi-container and multi-story container homes get built all the time and many are excellent. But they are engineered buildings, with a licensed structural engineer producing stamped calculations and drawings, supplementary steel around openings, and a load path deliberately designed rather than inherited from the shipping industry.
Budget for that engineering from the beginning. It is a meaningful line item, and it is the line item most often missing from the optimistic cost estimates that draw people to container construction in the first place.
If your goal is the lowest-friction path to a permitted container dwelling, the single-container, single-story, modest-openings build is dramatically easier than anything else. That is not a limitation on good design, since Sections 17 and 18 cover a lot of interesting things you can do within it, but it is worth knowing which side of the line your sketch falls on.
Insulation, Thermal Bridging, and Condensation
Steel conducts heat roughly a thousand times better than wood. That single fact drives most of what is difficult about making a container comfortable, and it produces a failure mode that has ruined a meaningful number of container conversions.
Thermal bridging
In a conventional wood-framed wall, the studs are a modest thermal weakness in a field of insulation. In a container, the entire enclosure is a continuous, highly conductive steel sheet. Insulating it on the inside means the steel skin sits outside your insulation layer and tracks the outdoor temperature closely: hot in summer sun, cold on a winter night.
Every point where something penetrates or bypasses the insulation becomes a thermal bridge. The corner posts and rails are the most significant, because they are heavy steel that runs continuously from outside to inside. Interior partitions welded to the shell are another. So are fasteners driven through to the steel.
Insulating on the exterior largely solves this. The steel then sits inside the thermal envelope, stays close to indoor temperature, and stops being a bridge. It is the technically superior approach and it costs more, both in materials and in the cladding you then need. Interior insulation with closed-cell foam is the more common compromise and it works, but it demands more attention to detail at the bridges.
Condensation, and why it is the real risk
Here is the mechanism. Warm interior air holds more water vapor than cold air. When that air reaches a surface cold enough, the vapor condenses into liquid water on that surface. In a steel box insulated on the inside, the coldest surface in winter is the steel skin, which is now hidden behind your insulation, where you cannot see it.
If interior air can reach that steel, water forms there. It runs down inside the wall assembly. It sits on the bottom rail. It corrodes the container from the inside, rots any wood framing it touches, and creates conditions for microbial growth in the cavity. In severe cases in cold climates, it condenses on the underside of the roof panel and drips, a phenomenon shipping people call container rain. None of this is visible until it is advanced.
This is the most-cited construction failure in container conversion, and it is entirely preventable.
How it is prevented
- Closed-cell spray foam applied directly to the steel is the standard answer because it does two jobs at once: it insulates, and at sufficient thickness it is a vapor retarder that is fully adhered to the substrate. There is no air gap for interior air to reach the steel through, because there is no gap at all.
- Continuous application matters more than thickness. A gap, a missed corner, or a void behind a partition is where the problem starts. Full coverage into every corrugation valley is the point.
- Do not use fibrous batt insulation directly against the steel. Batts are air-permeable. Interior air reaches the cold steel behind them and condenses there. This is the classic container conversion mistake and it is a slow, hidden failure.
- Exterior insulation moves the dew point outward and is the most robust approach where budget and aesthetics allow it.
- Ventilation is part of the system. Mechanical ventilation is a code requirement in modern residential construction and it is especially important in a small, tight, steel enclosure. Bathrooms and kitchens need exhaust that actually moves air outside.
- Detail the penetrations. Every fastener, conduit, and pipe that crosses the envelope is a potential bypass. Seal them.
Do container homes overheat?
An uninsulated container in direct sun becomes brutally hot. The steel absorbs solar radiation and re-radiates it inward, and the interior can exceed outdoor temperature by a wide margin. This is why the videos of people sweating inside bare containers are accurate.
A properly insulated container behaves like any other small, tight building and is often easier to condition than a conventional house of the same volume, precisely because it is small and tight. The tools are conventional: shade the steel, use a light-colored or reflective exterior finish, add roof overhangs, orient the long walls thoughtfully relative to the sun, and size the mechanical system for the actual load rather than by rule of thumb.
The single highest-value move in a hot climate is a separate roof above the container with an air gap between, which shades the steel entirely and lets the heat convect away before it reaches your ceiling. Section 12 covers this.
Foundations and Site Preparation
A container needs a real foundation for the same reason any building does, and where the container code provisions apply, foundation design follows the ordinary structural chapters with no shortcut.
There is a further reason specific to containers: they must be supported level. A container that sits on uneven bearing racks slightly out of square, and a racked box has doors that will not close and cut openings that will not stay true. Level is not a comfort preference here. It is structural.
The four common approaches
- Pier foundation. Concrete piers or blocks placed under the corner castings, sometimes with intermediate supports. The most common and least expensive choice, and it suits the container load path perfectly because the corners are where the load already wants to go. Raises the box off grade, which helps with drainage and gives you a service space for plumbing.
- Slab foundation. A poured concrete slab beneath the container. More expensive and more site work, but gives you a solid base, a thermal mass, and a clean approach where you want the building close to grade. Requires attention to keeping the bottom rail from sitting in standing water.
- Strip or perimeter foundation. Continuous concrete around the perimeter. Uses more concrete than piers and less than a slab. Provides continuous support to the bottom rails.
- Pile foundation. Driven steel tubes capped with concrete, for poor soils, steep sites, or high water tables. The most expensive option and sometimes the only one.
Anchorage
The container must be positively connected to the foundation. A 40 ft container weighs somewhere around 8,000 pounds empty, which sounds like a lot until you consider that it also presents an enormous flat sail area to the wind. In high-wind regions, uplift and overturning govern, and the connection detail at the corner castings is engineered, not improvised.
Site preparation you should not skip
- Grade for drainage away from the building. Water pooling against a steel bottom rail is the fastest corrosion path there is.
- Confirm delivery access before you buy. A tilt-bed truck needs meaningful straight-line clearance to slide a container off, and a crane placement needs room to set outriggers. Narrow driveways, low branches, soft ground, overhead lines, and tight turns have all stranded containers on the street. Ask your supplier exactly what access they need and walk the route.
- Establish utility locations early. Water, sewer or septic, and electrical service routes affect where the container can sit.
- Check frost depth. Foundations must reach below the local frost line, and that depth is a code-specified value for your jurisdiction.
- Check flood mapping. If the site is in a flood hazard area, elevation requirements and flood-resistant construction provisions apply, and they are not optional.
Roofs and Why You Add One to a Box That Has One
A shipping container already has a roof. Nearly every experienced container builder adds another one anyway, and the reasons are more compelling than aesthetics.
Why the container roof is not enough
- It is nearly flat and it ponds. Container roofs have minimal slope and slight dishing between the corrugations. Water sits there. Standing water on steel, cycling through freeze and thaw, is the primary cause of roof panel failure on used containers.
- It is thin. The roof panel is light-gauge steel supported by the top rails at the perimeter. It is not designed to carry a design snow load, a green roof, or a deck.
- It has no overhang. Water runs straight down the side walls, over your window heads and door openings, and onto the bottom rail. Overhangs are the cheapest waterproofing in construction and containers have none.
- It absorbs solar heat directly into your ceiling assembly. Covered in Section 10.
- It is where you want your insulation. This is the escape valve from the Section 4 arithmetic. Insulate in the new roof structure and your interior ceiling height survives intact.
Roof options
- Pitched or gabled roof over the container. The most conventional and most weather-robust choice. Sheds snow and rain decisively, creates overhangs, provides an insulated attic space, and reads as a house rather than a box, which some people want and some do not. Best for high-precipitation and high-snow regions.
- Shed or mono-pitch roof. A single sloped plane. Cheaper than a gable, keeps a modern profile, and gives you a high side for clerestory windows. The most popular choice in contemporary container design.
- Flat roof over the container. A properly built low-slope assembly with membrane roofing, above the container. Simplest and cheapest to build, more demanding to maintain, and the least tolerant of detailing errors.
- Leaving the container roof exposed. Viable in dry climates with a good coating system and diligent maintenance. Not advisable where it snows or rains heavily.
- Green roof. Attractive and genuinely improves thermal performance, but a saturated growing medium is a serious dead load. This requires structure and engineering, and it cannot sit on the container roof panel.
- Rooftop deck or terrace. One of the best uses of a container home, since it recovers outdoor living space on a small footprint. Requires a structural deck framed to bear on the corner posts, plus code-compliant guardrails and stair or ladder access.
The gap between the container roof and the new roof is worth designing deliberately. Vented, it becomes a heat-shedding air space that materially reduces cooling load. Sealed and insulated, it becomes conditioned attic. Either is fine. Accidentally creating an unvented, uninsulated, moisture-trapping cavity is not.
Utilities, Plumbing, Power, and HVAC
The systems in a container home are ordinary residential systems. The difficulty is not the systems. It is that you are installing them in a steel box with no wall cavities and a hard limit on how much depth you can give up.
Plumbing
Standard practice is to concentrate all plumbing on a single wet wall, usually at one end, and keep the kitchen and bathroom back to back or adjacent. This minimizes the runs, minimizes the wall depth you sacrifice, and simplifies venting.
The complications specific to containers:
- Drain slope needs vertical room. Waste lines need consistent fall. In a container on piers, that space is under the floor. On a slab, you need to plan penetrations before the pour.
- Vent stacks penetrate your new roof. Coordinate them with the roof assembly from the beginning rather than cutting later.
- Freeze protection. Pipes in an exterior wall of a steel building in a cold climate are exposed. Keep plumbing inside the thermal envelope, always.
- Septic changes the site plan. If there is no sewer connection, percolation testing and septic design need to happen early, and they can determine where on the lot the building goes.
Electrical
Wiring a container is conventional work with two wrinkles. First, running cable requires either surface-mounted raceway, furring strips that create a chase, or conduit, and each option consumes some of the interior dimension you are short on. Second, a steel building has bonding and grounding considerations, and this is a place to use a licensed electrician who has thought about it rather than a generalist.
Plan circuits and device locations before insulation goes in. Retrofitting a circuit into a wall filled with closed-cell foam and clad in finish material is genuinely unpleasant.
Heating and cooling
Ductless mini-split heat pumps are the near-universal choice for container homes, and for good reason: no ductwork to route through space you do not have, high efficiency, heating and cooling in one unit, a single small wall penetration, and zoning if you have multiple containers.
Two things worth stating plainly. Size the system to the calculated load, not by rule of thumb. A small, tight, well-insulated container is a much smaller load than its square footage suggests, and oversized equipment short-cycles instead of running efficiently. And do not skip mechanical ventilation. A tight steel enclosure needs deliberate fresh air, and modern residential codes require it.
Off-grid considerations
Container homes are popular for off-grid builds. The relevant points are that the roof area on a single container is modest (a 40 ft gives you around 300 square feet of gross roof area before you subtract for vents and access), and that a new roof structure above the container may give you both more area and a better solar orientation than the flat container roof.
Water catchment, battery storage, and composting or alternative waste systems all interact with local code, and permissibility varies enormously by jurisdiction. That conversation belongs in the pre-application meeting described in Section 8.
What a Container Home Actually Costs
Cost is where container home coverage is least reliable, so two framing points before any numbers.
First, published market data genuinely disagrees on container prices, sometimes by a factor of two for the same nominal grade. That is not sloppiness. It reflects real regional variation, and the ranges below are wide on purpose. Get current quotes for your ZIP code rather than budgeting from any article, including this one.
Second, and more importantly: the container is a small fraction of a finished home. On a permitted, code-compliant, fully finished container dwelling, the boxes themselves commonly land in the single digits as a percentage of total project cost. Engineering, foundation, site work, utility connections, insulation, mechanical systems, windows, doors, and interior finishes dominate the budget, exactly as they do in conventional construction. Cost estimates that lead with the container price are measuring the smallest line item.
Container purchase, approximate 2026 ranges
Before delivery, and varying substantially with distance from a port:
- Used 20 ft: roughly $1,200 to $3,200 depending on grade
- Used 40 ft standard: roughly $1,500 to $3,500
- Used 40 ft high cube: roughly $1,800 to $3,800
- One-trip 20 ft: roughly $2,500 to $5,000
- One-trip 40 ft high cube: roughly $3,500 to $7,500
- Delivery: roughly $150 to $500 locally from a nearby depot, rising to several thousand for a long haul to a remote site
Two pricing quirks worth knowing. A used 40 ft frequently costs only marginally more than a used 20 ft, because forties accumulate at import-heavy ports, making the 40 ft dramatically better value per square foot. And a 10 ft often costs close to a 20 ft, for the fabrication reasons in Section 2.
If you need a container temporarily rather than permanently, renting typically runs in the neighborhood of $75 to $150 per month, which means buying tends to pay for itself somewhere in the 18-to-30-month range.
Where the rest of the money goes
In rough descending order of typical cost on a finished residential build:
- Site work and foundation: highly site-dependent, and the line item most likely to surprise you on a difficult lot
- Utility connections: water, sewer or septic, and electrical service. On a raw rural parcel these can rival the structure itself
- Structural engineering and stamped drawings: effectively mandatory for anything beyond a single stand-alone unit
- Steel modification labor: cutting, reinforcement framing, and welding, which is skilled trade work priced accordingly
- Insulation and envelope: closed-cell foam is not cheap, and container builds use a lot of it relative to their floor area
- Windows and doors: each one carries reinforcement cost on top of the unit cost
- Mechanical, electrical, and plumbing
- Interior finishes and cabinetry: often custom, because standard cabinet runs and standard door sizes do not always suit the geometry
- Permits, plan review, and inspections
Is it cheaper than conventional construction?
Sometimes, and less often than the internet suggests.
Container construction tends to win when the site is remote and conventional trades are expensive or unavailable, when speed of enclosure matters, when the build is small enough that a single container covers it, when you are doing significant labor yourself, or when the industrial aesthetic is something you actively want and would otherwise pay to imitate.
It tends to lose when you are hiring a general contractor for a fully finished build in a market with abundant conventional trades, when the design requires extensive cutting and stacking, when the jurisdiction has no container provisions and the approval path is uncertain, and when you need wide open rooms that fight the geometry at every turn.
The honest summary is that container construction is a design and logistics choice more than a cost strategy. Choose it because it fits your site, your schedule, and what you want to live in. If it also saves money, that is a bonus rather than the plan.
Financing, Appraisal, and Insurance
This is the layer that container home guides skip almost universally, and it is the layer most likely to stop a project that has already cleared design and permitting. We are a storage operator, not a lender or an insurer, so what follows describes mechanisms rather than giving advice. Talk to a mortgage professional and an insurance agent in your market before committing to anything.
The core issue is comparable sales
Conventional residential lending depends on an appraisal, and appraisals depend on comparable sales, meaning recent transactions of similar properties nearby that establish market value. Container homes are still uncommon in most markets, which means an appraiser may struggle to find genuine comparables.
When comparables are thin, appraisals come in low or come back with qualifications, and that affects the whole financing structure. This is the single most common financing obstacle for container homes, and it is a market-maturity problem rather than a judgment about the construction.
It also means the difficulty is highly geographic. In a market where container and modular dwellings have become established, the problem shrinks considerably. In a market where yours would be the first, it does not.
What generally makes financing easier
Lenders and appraisers are broadly looking for evidence that the finished structure is a permanent dwelling rather than something movable. The factors that come up repeatedly:
- A permanent foundation and the building affixed to it
- Title as real property rather than personal property or a vehicle-class title
- Full permitting and a certificate of occupancy from the local jurisdiction
- Complete utility connections: water, waste, and power
- Stamped engineering and complete architectural drawings, which signal a legitimate, documented project
- Conventional residential systems and finishes, since the more the finished home functions like any other house, the more straightforward the appraisal
Common financing routes
Without endorsing any of these or suggesting eligibility, these are the paths people typically explore:
- Construction financing that converts to permanent financing once the build is complete and can be appraised as a finished dwelling. Common for ground-up builds of any construction type.
- Home equity borrowing against a property you already own, which is frequently how accessory dwelling unit builds get funded and which sidesteps the comparable-sales problem for the new structure.
- Accessory dwelling unit programs. Secondary mortgage market programs specific to ADUs have expanded, and some contemplate rental income in the underwriting. Details and eligibility change, so this is a current-guidance question for a lender.
- Personal or unsecured lending for smaller builds, generally with shorter terms.
- Cash or owner financing, which remains common in this category precisely because the conventional routes are harder.
Insurance
Insurance is a separate conversation from financing and it is worth having early, because a lender will require coverage and discovering it is hard to obtain after you have broken ground is a poor sequence.
Standard homeowners policies are underwritten around conventional construction, and carriers vary widely in their willingness to write a container dwelling. Some decline outright. Some write it without difficulty. Some require the same evidence of permanence that lenders want.
You will typically need builder’s risk coverage during construction and a homeowners policy afterward, and they are different products from potentially different carriers. Get preliminary quotes before you buy containers. An agent who has written container homes in your state is worth finding, and a carrier’s answer is a real data point about how established this construction type is in your market.
Resale
The buyer pool for a container home is smaller than for a conventional house, and the same comparable-sales dynamics that complicate the original appraisal complicate the resale appraisal. That is not an argument against building one. It is an argument for building one you intend to live in for a while, and for keeping your permitting and engineering documentation organized, because a complete file is genuinely valuable at resale.
Zoning, ADUs, and Neighborhood Rules
Building codes govern how you build. Zoning governs whether you may build at all, and what, and where on the lot. They are separate systems administered by separate reviews, and passing one tells you nothing about the other.
Zoning questions to answer before buying anything
- Is the use permitted? Is a single-family dwelling allowed in this zoning district, and is a second dwelling unit allowed if that is what you are building?
- Minimum dwelling size. Some jurisdictions set a minimum floor area for a dwelling unit that a single container cannot meet. This is one of the more common hard stops, and it is a zoning rule rather than a building code rule.
- Setbacks. Required distances from property lines. A 40 ft container is long, and on a narrow lot the setbacks may determine its orientation entirely.
- Lot coverage and floor area ratio. Caps on how much of the lot may be built on.
- Height limits. Relevant if you are stacking or adding a roof structure above a high cube.
- Container-specific ordinances. Some municipalities regulate shipping containers directly by prohibiting them, restricting them to certain districts, requiring them to be clad so the corrugation is not visible, or limiting how long one may sit on a property. These ordinances often predate the model code provisions and frequently were written with storage containers in mind rather than dwellings.
- Design review or overlay districts. Historic districts and design overlays add discretionary aesthetic review, which is where container aesthetics sometimes meet resistance.
Accessory dwelling units
A great many container projects are ADUs rather than primary residences, and this is often the smoothest path. Many states and municipalities have liberalized ADU rules substantially in recent years, and where they have, an ADU may face reduced parking requirements, relaxed setbacks, or streamlined review.
ADU rules typically address maximum size, owner-occupancy requirements, whether short-term rental is permitted, utility metering, and entrance location. These vary enormously and change frequently, so verify current local rules rather than relying on anything you read about another jurisdiction, including this paragraph.
Homeowners associations and deed restrictions
An HOA can prohibit what zoning permits. Covenants may restrict materials, architectural style, minimum square footage, or accessory structures, and some name shipping containers specifically. Deed restrictions run with the land and may exist even where there is no active association.
Read the covenants before you buy the land, not after. Architectural review committee approval, where required, is a separate approval from both zoning and permitting, and it is frequently the most subjective of the three.
Rural and unincorporated land
Unincorporated county land often has lighter zoning and is genuinely more permissive, which is part of why container builds cluster there. Do not assume it means no rules. County building departments, health departments for septic, and floodplain administrators all still have jurisdiction. What rural land more often means is fewer aesthetic constraints and more room for the delivery truck.
Design Ideas That Work With the Box
Good container architecture comes from treating the container as a module with a grammar rather than as a house-shaped object that happens to be steel. The proportions, the corner-driven structure, and the corrugation are the material. The designs that succeed use them. The designs that fail spend enormous money hiding them and end up with an expensive, oddly narrow conventional house.
Here are the moves that consistently work.
The breezeway, or dogtrot
Set two containers parallel with a gap between them, anywhere from 8 to 16 feet, and roof over the whole assembly including the gap. The covered space in the middle becomes a room.
This is the single best value move in container design, for several reasons at once. The middle space is the widest room in the project and the only one that escapes the 7-foot-8-inch constraint. It is framed conventionally and therefore cheap per square foot compared to modified steel. The two containers do not touch, which may preserve the simplified structural path from Section 8. And it is a genuinely old building type. The dogtrot house predates air conditioning in the American South for exactly this reason, because the shaded breezeway moves air.
Glaze the ends and it becomes an interior room. Leave it open and it becomes a covered outdoor room. Do half of each.
Perpendicular arrangements
Two containers meeting at right angles in an L generate a sheltered outdoor corner and break the relentless linearity of a single box. Three in a U enclose a courtyard. These arrangements work well on a site with a view or a prevailing wind you want to block, and they let you separate a sleeping wing from a living wing without a long internal corridor.
Offsetting and cantilevers
The stacked, offset container with an overhang is the signature image of container architecture, and it works visually because it declares the modularity rather than hiding it. The overhang shades the level below and the top of the lower container becomes a deck.
Be clear-eyed that this is the expensive move. As covered in Section 9, cantilevers require engineered supplementary structure, and stacking eliminates the simplified code path. Budget accordingly, and if the budget cannot carry it, a single-story arrangement with a strong roof form will look considerably better than a compromised cantilever.
Keep the cargo doors
The original doors at the end of a container are heavy, well-engineered, and dramatic. Rather than cutting them off, many of the best container homes glaze the opening behind them and keep the doors as an operable shutter: open for light and view, closed for shade, weather, storm protection, and security when the building is unoccupied.
This is genuinely useful in vacation, rental, and seasonal properties. It also costs almost nothing, since the doors are already there.
Glaze the ends, not just the sides
The two short ends of a container are the ends of a long tube, and glazing them floods the entire length with daylight along the axis. Because these walls are less structurally critical than the corrugated long sides, large end openings are often easier to justify structurally than an equivalent area of side glazing.
A 40 ft container with substantial glass at both ends reads as a bright gallery rather than a corridor, and it is often a cheaper way to get light than the same square footage of window cut into the sides.
Cluster the openings
Every opening cut into a corrugated side wall costs shear capacity and requires reinforcement framing. Two consequences follow. First, several openings grouped together in one bay of the wall are structurally cheaper than the same openings distributed evenly along the length, because the reinforcement can be shared and the remaining wall stays continuous. Second, a design with one generous glazed zone and long stretches of unbroken corrugation is usually both cheaper and better-looking than a row of evenly spaced punched windows, which tends to read as an office trailer.
Roof forms that do work
Since you are adding a roof anyway (Section 12), make it do something. A shed roof sloping up toward the view gives you a clerestory band above the container that admits light without sacrificing wall. A roof extended well past one long side creates a covered porch running the length of the building, which is the cheapest square footage you will ever add. A butterfly roof over two parallel containers collects water centrally, which matters on a catchment system.
Cladding decisions
You have three honest positions and the middle one is usually the weakest.
- Leave the corrugation exposed. Paint it, and let the building be what it is. Cheapest, most durable, and most confident. Works especially well when the roof form and the openings are strong.
- Clad it completely in wood, metal panel, or fiber cement over furring. Gives you a rainscreen gap and, if you add exterior insulation behind the cladding, solves the thermal bridging problem from Section 10. Reads as a contemporary house rather than a container, which for some sites and some HOAs is the point.
- Clad part of it. Wood on the entry elevation, corrugation everywhere else. This can be excellent when it is decisive, meaning a full elevation or a full volume, and looks apologetic when it is a small applied panel that reads as a fig leaf.
Color
In a hot climate, a light or reflective exterior finish measurably reduces cooling load, and this is one of the few design decisions that is simultaneously free and thermally significant. Dark containers photograph beautifully and cost more to cool. Coastal sites want a marine-grade coating system regardless of color.
Floor Plan Ideas by Container Count
Every area figure below is finished interior square footage using the Section 3 arithmetic, not external footprint. This is the number you can actually furnish.
One 20 ft high cube : roughly 130 square feet
A studio, home office, guest room, or backyard retreat. Realistically one habitable room plus a compact bathroom. The bath goes at one end against the wet wall, with a pocket or barn door because a swing door consumes floor area you cannot spare.
The bed runs crosswise, touching both walls, at the end opposite the bath. A kitchenette occupies one long wall in the middle. Storage goes above head height along the entire opposite wall, and the whole thing lives or dies on whether the end walls are glazed. This is a small space and it will feel small; the question is whether it feels small and bright or small and dim.
One 40 ft high cube : roughly 265 to 285 square feet
The most common single-container home, and genuinely comfortable for one person. The reliable layout is a straight linear sequence with no corridor at all: entry and living at one end, kitchen in the middle along one wall, bathroom, then sleeping at the far end.
Because there is no hallway, every square foot is a room. Separation comes from a partial partition, a change in ceiling treatment, or a step, rather than from doors. A full-height partition with a door creates two narrow rooms and both of them feel worse than the single long space did.
This is a legitimate one-bedroom-scale dwelling, and it is the size most ADU projects land on.
Two 20 ft containers, parallel with a breezeway : roughly 260 square feet enclosed, plus the middle
One container is sleeping and bath. The other is living and kitchen. The roofed gap between them is a covered outdoor room, an entry, or, once glazed, the dining and gathering space and the only wide room in the house.
If you glaze the breezeway at 12 feet wide by 20 feet long, you have added roughly 240 square feet of conventionally framed, full-width space for considerably less per square foot than modified steel, and the containers may still qualify as stand-alone units. This is the best value-per-dollar arrangement in container design.
Two 40 ft high cubes, side by side : roughly 550 to 570 square feet
Remove the shared long walls and you get a room roughly 15 feet wide by 39 feet long, the arrangement that finally escapes the width constraint. This is the classic two-bedroom container home.
Be clear about the cost. Removing a shared long wall removes the shear panel on that side of both containers, which requires a substantial engineered moment frame or portal frame along the joint, plus a weatherproof structural connection between two boxes. This is the most engineering-intensive common container move, and it is where multi-container budgets go.
Two 40 ft high cubes with a dogtrot : roughly 570 square feet plus the middle
The same two containers set 10 to 14 feet apart with a roof spanning across. Bedrooms and bath in one, kitchen and utility in the other, living and dining in the wide middle. Frequently cheaper than joining them, always brighter, and it gives you the wide room without the moment frame.
If you are choosing between joining two containers and separating them under one roof, run both budgets. The separated scheme wins more often than people expect.
Three to four containers : roughly 800 to 1,100 square feet
At this scale you are designing a house that happens to use containers, and conventional framing between and around the modules becomes a large part of the project. Common arrangements are an L with a courtyard, a U around an outdoor room, or two below and one above for a two-story scheme.
Remember the Section 3 arithmetic: four 40 ft high cubes get you to roughly 1,100 square feet finished, not the 1,280 the external footprints suggest.
Two-story arrangements
Stacking gets you a second floor without a larger footprint, which matters on a small or expensive lot. It also brings in a stair, and a code-compliant stair with required headroom and landings consumes a significant fraction of a container’s floor area at both levels.
An external stair preserves interior area and works well in mild climates. An internal stair is more comfortable year-round and costs you roughly a quarter of the lower container. Neither is wrong. Decide early, because it changes the plan completely.
Interior Design and Storage Ideas for a Narrow Footprint
Interior design in a container is really the design of a 7-foot-wide room, and the strategies that work are the ones that stop the space from reading as a corridor.
Make the long axis do the work
- Run flooring lengthwise. Boards along the long axis reinforce the length, which sounds counterproductive but reads as generous rather than cramped, because the eye follows an uninterrupted line to a bright end wall.
- Terminate the view. The far end of a container is the most valuable surface in the building. A window, a piece of art, or a strong material there gives the length a destination. A blank wall there makes it a tunnel.
- Avoid full-height cross partitions wherever possible. Every one chops the length into a series of small boxes. Half-walls, freestanding storage volumes that stop below the ceiling, curtains, and level changes all divide space without severing it.
- Keep the ceiling continuous. An unbroken ceiling plane running the full length is one of the most powerful tools you have, and it is why dropped soffits for ductwork are worth designing out.
Furnish one side, circulate on the other
With roughly 7 feet of width, the workable discipline is a 3-foot circulation zone along one side and a 4-foot depth of everything else along the other. Fight this and you get a room you cannot walk through.
- Use shallow furniture. Apartment-scale sofas at 30 to 32 inches deep instead of 40. Wall-mounted desks. A 24-inch counter rather than a 30-inch one where it does not affect function.
- Wall-mount and float. Anything not touching the floor makes the floor read as continuous, and visible floor is what makes a narrow room feel wider.
- Build in rather than furnish. Custom millwork sized to the actual dimension outperforms bought furniture in a space this specific, and it is one of the places where spending money genuinely pays.
- Run the bed crosswise. In a container, a bed almost always spans wall to wall. Design the storage under and above it accordingly.
Go vertical, especially with a high cube
A high cube gives you meaningful ceiling height and it is the dimension you have to spare. Cabinets to the ceiling. A storage band above door height running the full length. A sleeping loft where headroom allows. Ceiling-height doors, which cost slightly more and make the whole space read taller.
Light from more than one direction
A single window in a narrow room creates a bright zone and a dark remainder. Two sources, ideally on different walls or at opposite ends, is the difference between a cabin and a hallway. Clerestory glazing in an added roof structure is particularly effective because it brings light in high, where it bounces off the ceiling and distributes.
Material and color
- Light surfaces on the long walls to bounce light down the length.
- A darker or richer end wall to give the space depth and a terminus.
- Limit the palette. Small spaces reward restraint; too many materials in 280 square feet reads as busy.
- Consider leaving corrugation exposed on one interior wall. Painted, it is a genuine architectural feature and it costs nothing. It also loses you the insulation on that wall, so it works best on an interior partition or where you have insulated on the exterior.
- Mind the acoustics. A steel box with hard finishes is a live, echoing room. Soft flooring, textiles, upholstery, and an acoustically absorptive ceiling treatment make a large difference to how the space feels day to day.
The honest limit
Every interior trick in this section helps, and none of them changes the arithmetic. A 40 ft container is roughly 275 square feet. Clever design makes 275 square feet pleasant. It does not make it 500.
The people who are happiest in container homes went in with an accurate picture of the volume and made deliberate decisions about what they own. The people who struggle are the ones who assumed good design would absorb a household’s worth of belongings. Sections 22 and 23 deal with that arithmetic directly.
Container Builds That Are Not Houses
If the code path, the financing, or the appraisal picture in this guide has cooled your interest in a full container residence, it is worth knowing that most of the appeal survives in non-residential applications, and the regulatory burden drops sharply when nobody sleeps in the building.
- Home office or studio. The most popular container conversion. Often classified as an accessory structure rather than a dwelling, which can mean a substantially lighter permit path. All the design ideas in Section 17 apply.
- Workshop or garage. Insulation requirements ease considerably for unconditioned or lightly conditioned space, which means the Section 4 ceiling problem largely disappears and a standard-height container becomes viable.
- Guest suite. Occupies a middle ground. If people sleep there, most jurisdictions treat it as habitable space with the corresponding requirements. Worth confirming rather than assuming.
- Pool house or changing room. Small, simple, and frequently permitted as an accessory structure.
- Garden and agricultural buildings. Tool storage, feed rooms, tack rooms, and equipment shelters. Often exempt from permitting below a size threshold, though never assume.
- Retail and hospitality. Coffee kiosks, bars, pop-up shops, and food service. Commercial code applies, along with health department review, but containers are well established here and the aesthetic is an asset.
- Backyard studio for music or art. Steel enclosures take acoustic treatment well, and the separation from the main house is the point.
- Storm shelter or secure storage. Note that a purpose-built storm shelter is governed by a specific referenced standard and a container is not a shelter by default. Do not assume steel equals safe in a tornado.
A useful strategy for the uncertain: build the accessory structure first. You learn the container process, your building department, and your own tolerance for the aesthetic on a low-stakes project, and you end up with a useful building either way.
Prefab, Custom Build, or DIY
Three delivery methods, three very different projects.
Prefab and modular container homes
A manufacturer builds the unit in a factory and delivers it substantially complete. You handle site work, foundation, utilities, and connection.
Strengths: Predictable pricing, because the manufacturer has built this model before. Compressed schedule. Factory quality control, with work done indoors on jigs rather than outdoors in weather. Often includes engineering documentation, which materially helps with both permitting and the financing picture in Section 15. Frequently the easiest path to a code-compliant result.
Limitations: Design is constrained to the catalog, or customization costs meaningfully more. Transport logistics matter and get expensive with distance. You still own the site work, and the site work is where budgets break.
Best for: Most people, honestly, and particularly ADU builds and anyone who needs a predictable outcome on a schedule.
Custom build with a contractor
An architect or designer produces drawings, an engineer stamps them, and a general contractor experienced with container construction executes on site.
Strengths: The design is yours. Adapts to a difficult site. Handles multi-container arrangements that no catalog offers.
Limitations: Most expensive path. Finding a contractor with genuine container experience is the hard part, and hiring one without it means paying for their learning curve in change orders. Longest schedule.
Best for: Distinctive sites, larger multi-container projects, and clients who want a specific building rather than a good building.
One screening question that separates experienced container contractors from optimistic ones: ask how they handle reinforcement at wall openings and what their approach to the thermal bridge at the corner posts is. A vague answer to either is informative.
DIY
You buy the container and do the work, hiring licensed trades for the parts that require them.
Strengths: Lowest cash cost by a wide margin. Complete control. It is genuinely satisfying, and there is a large, generous community of people documenting their builds in detail.
Limitations: Cutting and welding structural steel is skilled work with real consequences, and reinforcement around openings is not a place to learn. Spray foam application is typically a licensed trade. Electrical and plumbing require permits and inspection in most jurisdictions regardless of who does the work. Structural engineering is still required, and DIY does not exempt you from Section 8. Schedules extend dramatically when the labor is evenings and weekends, which feeds directly into Section 22.
Best for: Experienced builders, non-residential projects, and people whose actual goal is the process as much as the result.
A realistic middle path that many people take: DIY the interior finishes, cabinetry, and non-structural work, and hire out the steel modification, the foundation, the spray foam, and the licensed trades. It captures a large share of the savings and none of the structural risk.
The Build Timeline and Where Your Belongings Live
You will read that container homes can be built in days or weeks. That figure describes the container modification (cutting openings, welding reinforcement, spraying foam), which genuinely is fast, and which is one of the real advantages of the method.
It does not describe the project. A permitted, code-compliant, connected container dwelling includes design, structural engineering, plan review, permitting, site work, foundation, utility connections, delivery scheduling, inspections at multiple stages, and a certificate of occupancy. Each of those has its own queue and none of them care about how fast the welding went.
Where the schedule actually goes
- Design and engineering. Drawings and stamped structural calculations. Weeks to months, depending on complexity and on how quickly you make decisions.
- Plan review and permitting. Entirely dependent on your jurisdiction, and the least predictable phase. Where container provisions have been adopted this is a defined process. Where they have not, and you are in an alternative-materials review, it can extend considerably.
- Site work and foundation. Weather-dependent, and the phase most often delayed by conditions discovered after excavation.
- Container procurement and delivery. Sourcing the specific grade and size you want, plus transport scheduling.
- Modification and finishing. The fast part.
- Utility connections and inspections. Utility companies and inspectors work on their calendars, not yours.
The honest planning assumption is months, not weeks, and a schedule with meaningful uncertainty in the middle of it.
The gap nobody plans for
Here is the logistical problem that shows up in nearly every container build, and it has nothing to do with steel.
Most people building a container home are leaving somewhere else. They sell a house, or a lease ends, or they are moving to the land the container is going on. That departure has a fixed date. The certificate of occupancy does not. It has an estimated date that moves.
So there is a window, frequently several months long and of genuinely unknown length, between having somewhere to put your belongings and having somewhere to put your belongings. Meanwhile the build site is an active construction site with a foundation pour, a delivery truck, and trades coming and going, which makes it a poor place to stack furniture under a tarp.
This is the part of a container build where a storage unit is the obvious tool, and the specific feature that matters is month-to-month terms. You do not know when your certificate of occupancy will issue. A lease that requires you to commit to a fixed term is the wrong instrument for a timeline that is genuinely uncertain. Being able to leave the month your inspection passes is worth more than a small difference in rate.
10 Federal Storage rents month to month with no long-term contract, and you can rent a unit online without visiting an office first, which is useful when you are already spending your weekends at a job site.
Section 23 covers what size you actually need, and Section 24 covers the situations where you should not rent one at all.
Sizing Storage for a Container Home Downsize
There are two separate storage questions in a container build and people routinely conflate them. Answer them separately.
Question one: what needs to go somewhere during construction?
This is everything you currently own, and it is sized by the home you are leaving, not the one you are building. The usual anchors:
- A 10x10 unit: 100 square feet, roughly the contents of a one- to two-bedroom apartment
- A 10x15 unit: 150 square feet, roughly a two- to three-bedroom home
- A 10x20 unit: 200 square feet and about the size of a one-car garage, holding a three- to four-bedroom home, or a vehicle plus household goods
If you are genuinely between those, our 10x15 versus 10x20 comparison works through the decision, and the storage size calculator and full size guide will get you to a number from an inventory.
One adjustment specific to a container build: you will likely need access during the project, not just at the end. Furniture goes in and never moves, but tools, boxes of fixtures, and the things you are living out of get retrieved repeatedly. Size up slightly and leave a center aisle, or you will spend the build unloading the front of the unit to reach the back.
Question two: what is permanently displaced?
This is the harder question and it is where the arithmetic gets uncomfortable.
A finished 40 ft high cube container home is roughly 275 square feet. Of that, realistically 10 to 15 percent can be dedicated storage. Call it 30 to 40 square feet of closet, cabinet, and under-bed volume, plus whatever you gain vertically with a high cube.
Now compare that to where you are coming from. A conventional 2,000 square foot house with bedroom closets, a coat closet, a linen closet, a pantry, a garage, and an attic routinely has 200 to 400 square feet of dedicated storage, more than the entire floor area of the container home.
That is the actual downsize. Not 2,000 square feet to 275, which people expect, but 300 square feet of storage to 35, which almost nobody calculates in advance. And the second number is what determines whether daily life in the finished home is pleasant or a constant negotiation with your own belongings.
What to do with that number
You have three honest options and most people use some blend:
- Reduce permanently. Sell, donate, or give away, ideally before the build rather than after. This is the option that costs nothing every month and it is the right answer for most of what you own.
- Build the storage in. Custom millwork, a storage band above door height, under-bed drawers, and an exterior storage structure. Section 19 covers the interior strategies, and our guide to small-space storage ideas applies almost directly, because a container is a narrow apartment with better proportions.
- Keep a small unit long term for the genuinely seasonal and genuinely irreplaceable: holiday decorations, camping and sport equipment, family archives, tools you use twice a year. For most container households this is a 5x10 or a 10x10 rather than anything larger.
If you are storing wood furniture, electronics, leather, artwork, musical instruments, or documents for an extended period, temperature-regulated units protect against the extreme heat and cold swings that damage those materials. For tools, plastic bins, lawn equipment, and general household goods, a standard drive-up unit is usually the sensible choice and costs less. Our storage tips cover packing and organizing either one.
Browse medium units for a long-term overflow unit, or large units for whole-home storage during construction.
When a Container Home Is the Wrong Choice
Container construction suits a lot of situations. It does not suit all of them, and the guides that treat it as universally good do readers a disservice.
Reconsider if any of these describe you
- You are choosing it primarily to save money and hiring out the whole build. As Section 14 covers, container construction is not reliably cheaper when you are paying a contractor for a finished home in a market with plentiful conventional trades. If cost is the driver, price a conventional small build side by side before committing.
- Your jurisdiction has not adopted the container code provisions and has no container ordinance. You may be facing a discretionary alternative-materials review with an uncertain outcome and timeline. Find this out in the pre-application meeting, not after you have bought steel.
- You expect to sell within a few years. The comparable-sales dynamics in Section 15 apply to your resale appraisal exactly as they applied to your purchase, and a thin buyer pool is a real cost when you are on a deadline.
- You need wide, open rooms. The 7-foot-8-inch interior is not a problem to be solved, it is the material. If your program requires a great room, you will spend heavily joining containers and end up with a conventional building at container prices.
- You are in a high-snow or high-seismic region on a tight budget. The engineering that Sections 8 and 9 describe scales with your design loads, and in demanding regions it can consume the savings that attracted you.
- You have not been able to get an insurance quote. If carriers in your state will not write it, that is a signal about the whole picture, not just a paperwork obstacle.
- An HOA or deed restriction prohibits it. Read the covenants before you buy the land. This one ends projects.
- You want the aesthetic but not the constraints. Corrugated metal siding, exposed steel, and industrial detailing are all available on conventional construction, at conventional cost, with none of the code, financing, or geometry complications. If what you love is the look, that is a completely legitimate way to get it.
And when you should not rent a storage unit
We rent storage, and there are still several situations in a container build where renting a unit is the wrong move. Being straight about them is more useful to you than pretending otherwise.
- Your build is still hypothetical. No land, no permit, no engineered drawings, then you do not have a storage timeline, you have an intention. Renting now starts a monthly cost against a project that has not begun. Wait until you have a permit in hand.
- You are storing things that will never fit in the finished home. If you have already worked out that your belongings do not fit in 275 square feet, storage is not solving that. It is postponing the decision and charging you monthly for the delay. Do the reduction before the build, when you have time and space to sell things properly, rather than after, when you are living in a finished container and paying rent on the overflow.
- The monthly cost over your build will exceed what the contents are worth. Multiply the monthly rate by a realistic build length, not an optimistic one. For a unit full of ordinary furniture and an eighteen-month timeline, the arithmetic sometimes says sell it and rebuy later. Run it honestly.
- You already have somewhere. A garage, a barn, family with space, an empty outbuilding on the land. Use it.
- You own the land and want storage permanently. This one is worth saying plainly. If you need long-term storage on a property you already own, buying a used 20 ft container and setting it on gravel may well cost less over time than renting a unit indefinitely, since the break-even against a monthly rental typically lands somewhere in the range of a couple of years. You will need to confirm your zoning permits a container on the lot, and it is unconditioned space, so it is unsuitable for anything sensitive to temperature extremes. But if you are already buying containers and already have the delivery truck coming, one more box is a reasonable thing to consider.
Storage during a container build is a genuinely good fit for one specific reason: the timeline is uncertain and month-to-month terms match uncertain timelines. Where that reason does not apply, neither does the recommendation.
Frequently Asked Questions About Shipping Container Homes
Sometimes, but far less reliably than commonly claimed. The container itself is a small share of a finished home. Foundation, site work, utility connections, engineering, insulation, mechanical systems, and finishes dominate the budget just as they do in conventional construction. Container builds tend to win on cost when the site is remote, when the build is small, when you are contributing significant labor, or when speed of enclosure matters. They tend to lose when a contractor is building a fully finished home in a market with plentiful conventional trades.
The steel shell is durable and a well-detailed container home can last many decades. Longevity depends almost entirely on two things: keeping water off the steel, and controlling condensation inside the wall assembly. Containers that fail early nearly always fail from corrosion, and corrosion nearly always traces back to standing water on a flat roof or moisture trapped behind interior insulation.
In virtually all cases where the container will be a dwelling, yes. Permitting requirements are set by your local jurisdiction, and the 2021 and 2024 editions of the model building and residential codes added dedicated provisions for repurposed intermodal shipping containers. Whether those provisions apply to you depends on which code edition your jurisdiction has adopted and what local amendments it made. Contact your building department before purchasing anything.
It is possible and it is harder than for conventional construction. The most common obstacle is appraisal: lenders rely on comparable sales, and container homes remain uncommon in many markets. Financing is generally more straightforward where the home is on a permanent foundation, titled as real property, fully permitted, and connected to utilities. Requirements and programs vary by lender and change over time, so speak with a mortgage professional in your market about your specific situation.
Yes, when built to code with proper engineering. A container repurposed as a dwelling is subject to structural analysis requirements, and modifications such as window and door openings require reinforcement designed by a qualified professional. The safety questions worth attention are structural adequacy after modification, the treated wood floor, and controlling condensation. All three are addressed by ordinary good construction practice.
Container floors are typically treated with insecticides to meet plant-health inspection requirements at international ports. Sources genuinely disagree about the residential risk: some fabricators cite toxicology work indicating low mammalian toxicity and low vapor pressure, while many builders and homeowners prefer to remove the question entirely. The practical steps are the same either way. Check the timber treatment field on the container’s CSC data plate, then either seal the floor with a solvent-free epoxy or polyurethane coating, overlay it with an impermeable assembly, or remove and replace it. Do not sand the original flooring.
Roughly four 40-foot high cube containers, not three. External footprint overstates usable area: a 40 ft container has a 320 square foot footprint but delivers roughly 265 to 285 square feet once insulated and finished. Always calculate with finished interior area rather than external dimensions.
Yes, with engineering. The high stacking ratings you see quoted come from ISO shipping standards and apply to unmodified containers loaded through their corner castings in a secured stack, not to a modified container carrying residential loads. Once you cut openings, offset containers, or place loads anywhere other than the corner posts, a licensed structural engineer needs to design the load path. Stacking also removes access to the simplified structural design path in the building code.
A high cube is one foot taller: 9 feet 6 inches externally versus 8 feet 6 inches, giving roughly 8 feet 10 inches of interior height instead of 7 feet 10 inches. For residential builds this extra foot is close to essential. A 7-foot finished ceiling is the code minimum for habitable space, and a standard-height container leaves only about 10 inches for floor and ceiling assemblies combined, less than the roof insulation alone requires in colder climate zones.
An uninsulated container in direct sun gets extremely hot, since steel absorbs and re-radiates solar heat efficiently. A properly insulated container behaves like any other small, tight building. The most effective measures are shading the steel, ideally with a separate roof structure above the container with an air gap, plus light-colored exterior finishes, roof overhangs, and correctly sized mechanical equipment.
Closed-cell spray polyurethane foam is the usual choice and it is one of the larger envelope line items, because container builds use a lot of it relative to their floor area. Cost scales with thickness, and thickness is driven by the prescriptive R-values for your climate zone. Get quotes based on your zone requirements and your chosen assembly rather than a general figure, since the difference between a warm-climate and a cold-climate specification is substantial.
No. Zoning determines whether a dwelling is permitted on a given parcel, and separate rules may govern minimum dwelling size, setbacks, lot coverage, and height. Some municipalities regulate shipping containers specifically, and homeowners associations or deed restrictions can prohibit them even where zoning allows. Confirm zoning, any container-specific ordinance, and any covenants before purchasing land or containers.
Plan in months rather than weeks. The container modification itself is fast, but design, structural engineering, plan review and permitting, site work, foundation, utility connections, and inspections all take time and run on schedules outside your control. Permitting is typically the least predictable phase.
Resale depends heavily on local market acceptance. In markets where container and modular dwellings are established, appraisals and buyer interest are more straightforward. In markets where yours would be among the first, the buyer pool is smaller and comparable sales are thin, which affects valuation. Complete permitting and engineering documentation is genuinely valuable at resale, so keep the file organized.
Size by the home you are leaving, not the one you are building. A 10x10 unit holds roughly a one- to two-bedroom apartment, a 10x15 holds a two- to three-bedroom home, and a 10x20 holds a three- to four-bedroom home or a vehicle plus household goods. Because container builds involve repeated trips for tools and materials, consider sizing up slightly and leaving a center aisle so you can reach the back of the unit without unloading the front.
Planning a Container Build Near a 10 Federal Storage Location
If there is one thing to carry out of this guide, it is to do the arithmetic before you buy the box. Find your climate zone and check the ceiling math in Section 4. Calculate finished floor area rather than external footprint. Ask your building department which code edition governs and whether the container provisions apply. Get an insurance quote. Then choose your container.
Everything else, including the design ideas, the floor plans, and the cladding decisions, gets better when the constraints are known rather than discovered.
When the build is underway and your belongings need somewhere to be, the thing that matters most is not committing to a term you cannot predict. Permitting timelines move. Foundation work waits on weather. Inspections get scheduled when they get scheduled. 10 Federal Storage rents month to month with no long-term contract, online rental without an office visit, and units ranging from small overflow spaces to whole-home sizes across our locations.
And if you work through Section 23 and conclude you do not need a unit, that is a good outcome too. The arithmetic is the point.
About the Author
10 Federal Storage
Our team at 10 Federal Storage has been in the self storage industry for decades. With knowledge gained from multiple universities and in the field, we are well-prepared and excited to assist with your storage needs. When you rent a unit with us, you can feel confident that our seasoned customer service team’s help will make your transition as seamless as possible. Customer satisfaction is our number one priority, and we strive to make your experience exceptional with our automated leasing options, diverse unit sizes, and a strong commitment to sustainability.