

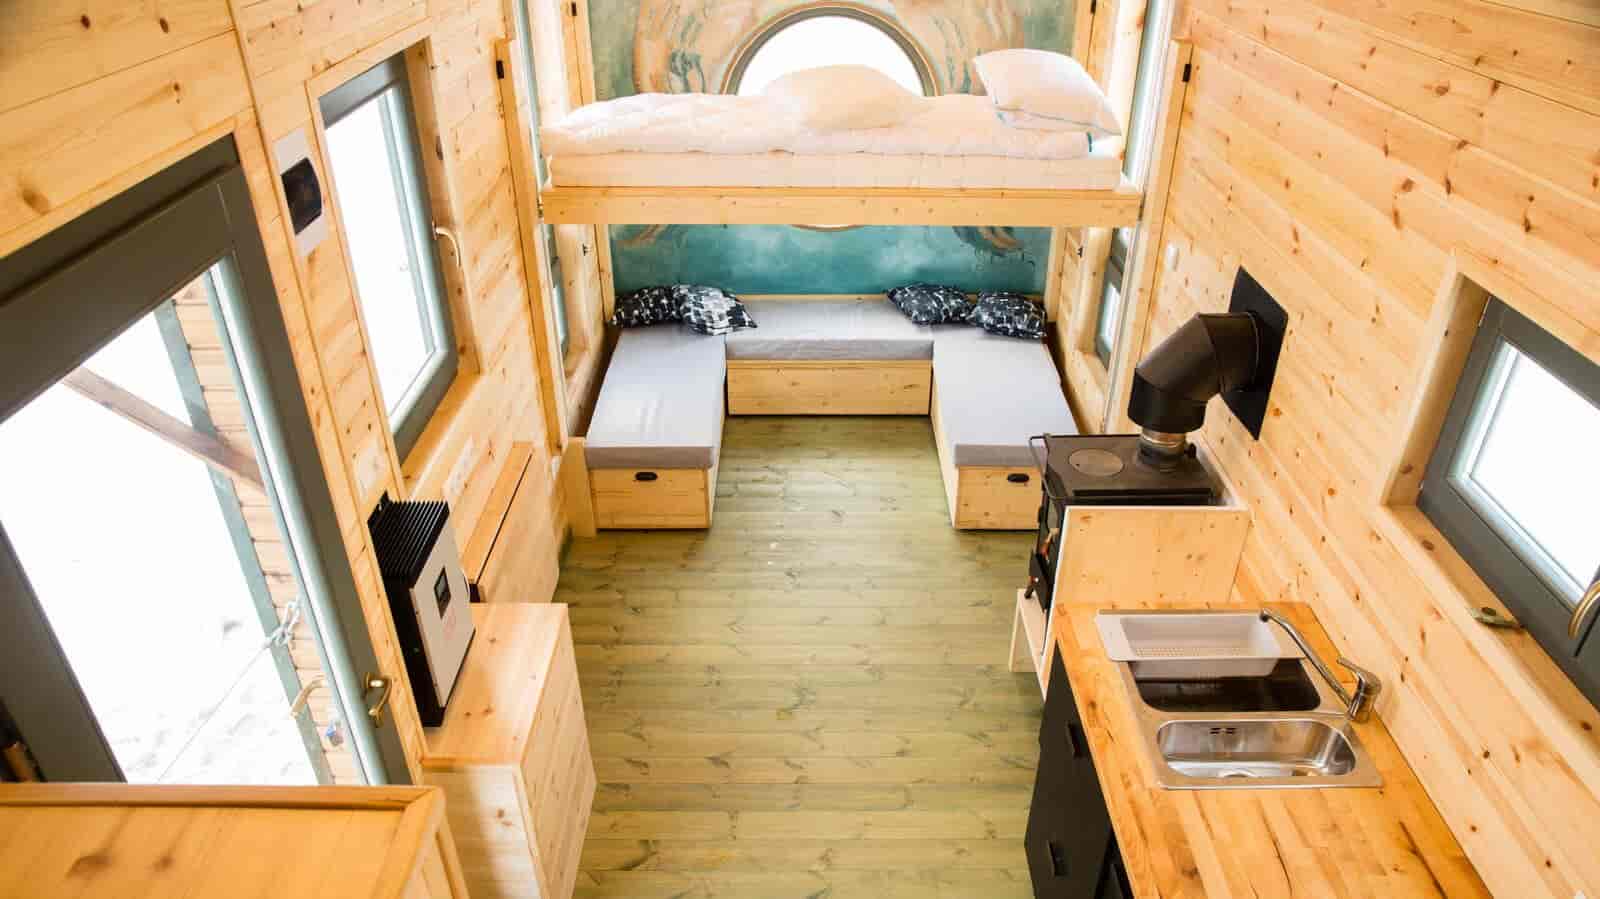
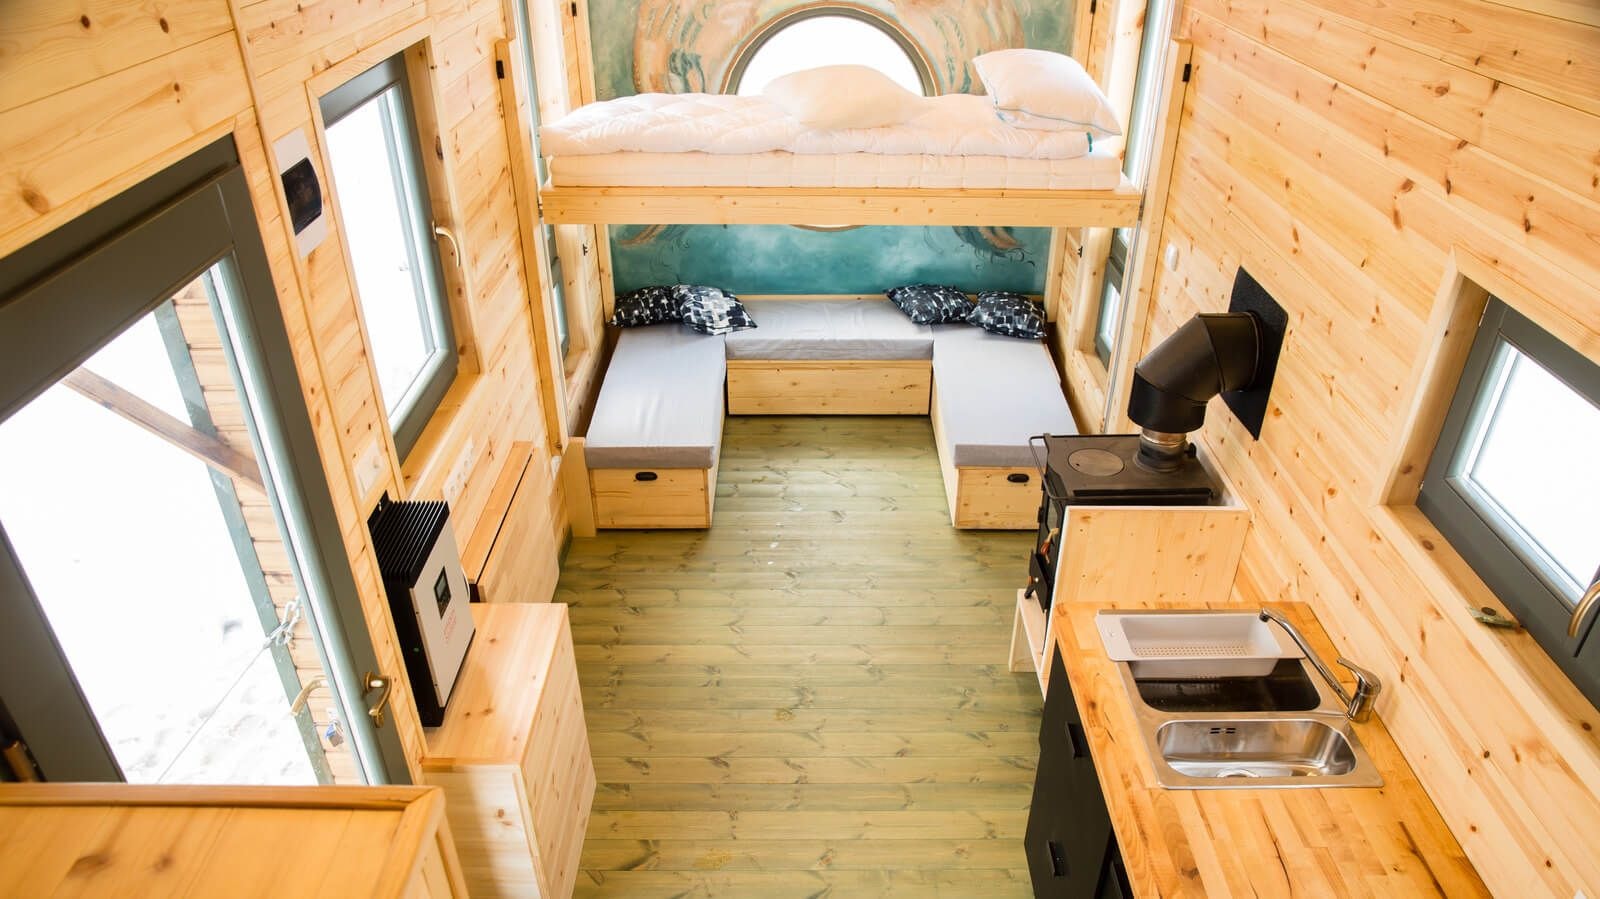
Tiny Home Storage Ideas: What Actually Works in Under 400 Square Feet
by 10 Federal Storage
Published on August 27, 2026
Almost every tiny home storage guide on the internet is a list of clever ideas. Turn the stairs into drawers. Put a hatch in the floor. Hang a pegboard. Build a storage wall. The ideas are usually fine, and if you have been reading them for a while you have probably seen the same eighteen of them a dozen times over, illustrated with the same photographs.
What almost none of them mention is that a tiny home is not simply a small room. If your home sits on a permanent foundation, it is a dwelling of 400 square feet or less, and in most of the country the loft, the stairs to that loft, and the escape route out of it are governed by a specific appendix of the residential building code, one that sets minimum dimensions for the exact features these articles cheerfully tell you to fill with storage. And if your home sits on a trailer, it is also a vehicle. It has a maximum weight it is rated to carry, a legal width and height it has to stay inside, and a set of physics that applies every time it moves at highway speed. Every drawer you add, and everything you put in that drawer, comes out of a fixed budget.
That budget is the thing nobody publishes. You can find a hundred articles telling you to build storage under your stair treads. You will struggle to find one that tells you a finished tiny house commonly runs somewhere in the range of 500 to 550 pounds per linear foot of trailer, that your trailer has a rating stamped on it, and that the difference between those two numbers is the entire amount of stuff you are allowed to own.
So this guide covers both layers: the ideas (genuinely useful, with real measurements) and the constraints that determine which of those ideas you can actually use. It covers the code requirements for lofts and loft stairs, because they change what you can build. It covers securing storage for transit, because a cabinet that is fine parked is a projectile at 60 miles per hour. And near the end it covers the part every storage company glosses over: what to do with the roughly two-thirds of your possessions that will not fit, including a frank section on when renting a storage unit is the wrong call.
Table of Contents
- What Counts as a Tiny Home
- The Three Legal Categories Your Tiny Home Falls Into
- Start With a Weight Budget, Not a Shopping List
- How to Find Your Actual Payload Number
- The Road Envelope and Why Exterior Storage Is Rarely Free
- Storage That Has to Survive Highway Speeds
- Your Loft Is Governed by Code, and That Includes Storage
- The Egress Rule Nobody Publishes
- Under-Stairs Storage Done to Code
- In-Floor and Under-Floor Storage
- The Dead Zone Along the Loft Perimeter
- Vertical Storage and the Fastener Problem
- Tiny Home Kitchen Storage
- Tiny Home Bathroom Storage
- Multi-Function Furniture That Earns Its Weight
- Securing Furniture Against Tip-Over and Transit
- Exterior Storage: Decks, Sheds, and Tongue Boxes
- Condensation, Airflow, and Why Packing Walls Solid Backfires
- What You Should Never Store Inside a Tiny Home
- The Honest Math of Living in 400 Square Feet
- What to Keep, What to Sell, and What to Store Off-Site
- Choosing a Storage Unit Size for Tiny Home Living
- When You Should Not Rent a Storage Unit
- Frequently Asked Questions About Tiny Home Storage
- Making a Tiny Home Work Long Term
What Counts as a Tiny Home
The number that matters is 400 square feet. When the International Code Council added a tiny house appendix to the International Residential Code, it defined a tiny house as a dwelling of 400 square feet or less in floor area, excluding lofts. That same 400-square-foot line shows up in the recreational vehicle world too: a trailer-mounted unit with a gross trailer area over 400 square feet in set-up mode is generally treated as manufactured housing instead, which brings HUD standards into play.
So 400 square feet is not a lifestyle preference. It is a regulatory boundary that several different rule sets happen to share, and which side of it you are on determines which rules apply to your home.
Below that line, the practical categories look like this:
- Under about 200 square feet: the typical towable tiny house on a 20- to 24-foot trailer. Storage is a zero-sum game here. Every cubic foot you dedicate to storing something is a cubic foot you cannot stand in, and there is no slack anywhere in the floor plan.
- 200 to 300 square feet: a longer trailer build, a park model, or a small permanent structure. You get one genuine luxury: usually a proper closet or a dedicated storage wall. Everything else still has to do two jobs.
- 300 to 400 square feet: an accessory dwelling unit, a small cabin, or a large park model. This is close enough to a studio apartment that conventional small-space advice starts to apply, though the ceiling and loft constraints usually do not go away.
The other variable, and the one that changes the most, is whether your home has wheels under it. A 240-square-foot cabin on a concrete foundation and a 240-square-foot house on a triple-axle trailer look identical in photographs and are completely different storage problems. One has a floor rated for whatever you can carry through the door. The other has a weight limit, a legal width, and a bad day waiting for it on the interstate if you ignore either one.
Most of this guide applies to both. The sections on weight, road dimensions, and transit securing apply only to homes on wheels, and they are labeled clearly so you can skip them if your home does not move.
The Three Legal Categories Your Tiny Home Falls Into
This sounds like a detour from storage. It is not, and here is why: the category your home falls into determines what you are allowed to build into it, what an inspector will look at, and in several cases whether your insurance will pay out if a storage modification you made turns out to be a contributing factor in a claim.
There are broadly three tracks.
Built to residential code, on a foundation
This is the tiny house as a dwelling. The relevant document is the tiny house appendix of the International Residential Code: Appendix Q in the 2018 edition, redesignated Appendix AQ in 2021. The appendix does not add requirements so much as relax them: it exists specifically to make compact stairs, ladders, reduced loft ceiling heights, loft guards, and loft escape openings workable in a home too small for conventional code geometry.
The important caveat is that appendices are optional adoptions. Your state or municipality may have adopted the tiny house appendix, may have adopted a modified version of it, or may not have adopted it at all, in which case a tiny house is held to the full residential code, which is a much harder standard for a compact loft to meet. Check with your local building department before you build anything structural. This genuinely varies, and a neighboring county can have a different answer.
Built to RV standards, on wheels
A large share of towable tiny houses are built and certified as recreational vehicles, to NFPA 1192 or to ANSI A119.5, the park model standard. Both standards were developed with fire and life safety as their central focus. Certification is what makes a towable unit registrable, titled, and, in practice, financeable, insurable, and accepted in RV parks and tiny home communities, because those are typically the standards local ordinances name.
There is a real tension baked into this track, and it is worth understanding before you commit to it. RVs and park model RVs are, by definition, designed as temporary quarters for recreational, camping, or seasonal use. The industry is explicit that they are not houses and are not intended as permanent residences. Plenty of people live in them full time anyway, but if you are one of them, you are living in a structure whose governing standard did not contemplate that, and the gap tends to surface at exactly the wrong moments: a zoning complaint, an insurance claim, a permit application.
Somewhere in between
Third-party certification programs exist that blend RV standards with residential structural and energy requirements, aiming at units intended for full-time occupancy. There is still no single unified national standard for a movable tiny house, and jurisdictions, lenders, and insurers can each define it differently.
What this means for storage: if your home is certified to a standard, cutting into a wall, adding a heavy built-in, penetrating the floor for an under-floor hatch, or bolting a box to the frame can all affect that certification and your coverage. Before any structural storage modification, call the certifying body and your insurer. Two phone calls, and they are cheaper than the alternative.
Start With a Weight Budget, Not a Shopping List
This section applies to tiny homes on wheels. If yours is on a permanent foundation, skip ahead to Section 7.
Here is the single most useful reframing in this entire guide, and it is one no competing article makes.
In a conventional house, storage capacity is limited by volume. You run out of room. In a tiny house on wheels, storage capacity is limited by weight, and you will usually run out of pounds well before you run out of cubic feet. This inverts almost all conventional storage advice. Building more storage into a towable tiny house does not give you more capacity. It consumes capacity, because the cabinetry itself has mass, and then you fill it with things that have more mass.
The arithmetic is unforgiving. Your trailer carries a gross vehicle weight rating, which is the maximum the trailer is built to carry including its own weight. Subtract the trailer’s own weight and you have your payload: everything that can sit on top of it, forever. The house is the first and largest claim on that payload. Whatever is left is your furniture, your water, your propane, your appliances, your clothes, your tools, your books, and every clever storage solution you have been reading about.
A commonly cited planning figure is that a finished tiny house runs roughly 500 to 550 pounds per linear foot of trailer length. Treat that as a rough estimate for early planning and nothing more. Actual weight swings enormously with framing material, insulation type, roofing, siding, appliance choices, and whether you used solid surface counters or plywood. It is a starting point for a conversation with your builder, not a number to design against.
What things actually weigh
Most people badly underestimate the weight of ordinary possessions. Some rough working figures, useful for sanity-checking a plan:
- Water is the one that surprises everyone. Fresh water weighs a little over 8 pounds per gallon. A modest 40-gallon fresh tank is well over 300 pounds when full, and a full grey tank adds its own. If you tow with tanks full, you are moving a substantial fraction of a small car’s worth of water.
- Books are the second surprise. A packed banker’s box of books commonly runs 30 to 40 pounds. A single shelf of hardcovers can outweigh the shelf holding it several times over. Book collections and tiny houses are in genuine tension, and this is the most common thing people are forced to give up.
- Tools and hardware. A modest hand-tool collection with a few cordless tools and a small stock of fasteners runs into the low hundreds of pounds very quickly. Hardware is dense and it accumulates invisibly.
- Kitchen goods. Cast iron, stoneware, ceramic dishes, and small appliances are all far heavier than their volume suggests. A cast iron Dutch oven can weigh as much as an entire wardrobe of clothing.
- Clothing is the reverse, and it is good news. Clothes are bulky and light. A full wardrobe is a volume problem, not a weight problem.
- Batteries. If you are running an off-grid system, the battery bank may be one of the heaviest single items in the house, and its placement matters as much as its mass.
Where the weight sits matters as much as how much there is
A trailer is not balanced evenly by design. Some proportion of the load transfers forward onto the tow vehicle through the tongue, and that tongue weight has to stay within a workable band. Too little and the trailer sways dangerously. Too much and you overload the hitch and the rear axle of the tow vehicle.
This has a direct storage consequence that nobody mentions: where you build heavy storage changes the towing behavior of your home. Concentrating dense storage (a pantry, a tool cabinet, a battery bank, a book wall) at the far rear of the trailer reduces tongue weight and can induce sway. Concentrating it all over the tongue overloads the hitch. Heavy storage generally belongs low and near the axles.
If you are designing a build, raise this with your builder before framing, not after. If you are retrofitting storage into an existing home, keep dense items low and central, and have the home weighed after any significant change.
How to Find Your Actual Payload Number
Applies to tiny homes on wheels.
You cannot budget against a number you do not have. Getting the real one takes an afternoon.
Step 1: Read the trailer’s rating
Trailers carry a manufacturer’s certification label listing the gross vehicle weight rating and the gross axle weight ratings. On a finished tiny house this label is often awkward to reach. It may be on the trailer frame near the tongue, sometimes behind skirting. Find it anyway. If the house was built over it, the builder should have documentation.
Note both numbers. The axle ratings matter independently: it is entirely possible to be under your total rating while overloading one axle, which is how tires fail.
Step 2: Check the tires, separately
This is the step people skip. Tires carry their own load rating, molded into the sidewall, and the tires fitted to a trailer are not always rated to the trailer’s full capacity, particularly if they have been replaced at some point with whatever was available. Your real-world limit is the lowest of the trailer rating, the axle ratings, and the combined tire capacity. Check the manufacture date on the sidewall too; trailer tires age out on time as much as on mileage, and a tiny house that sits parked for years is exactly the case where that matters.
Step 3: Weigh the house
Estimates are estimates. A certified public scale, the kind at truck stops, will give you real numbers for a modest fee, and many will give you individual axle weights, which is what you actually need. Weigh it the way you would tow it, then weigh it again loaded for travel if those differ.
Do this after any substantial storage build-out. A run of cabinetry, a stone counter, or a full pantry can move the number more than people expect.
Step 4: Subtract, then subtract again
Your payload is the rating minus the actual weight. Then take a real safety margin off the top. You do not want to be operating at the edge of a rating, because ratings assume good tires, good roads, and even loading, and you will not always have all three.
Whatever remains is your storage budget. Not your aspiration. Your budget.
Step 5: Know your tow vehicle’s side of the equation
The trailer’s rating is only half of it. Your tow vehicle has a towing capacity, a payload capacity of its own that the tongue weight eats into, and a combined rating for the whole rig. A tiny house that is legal on its own trailer can still be far more than a given truck should be pulling.
On the regulatory side: weight and size rules for a private tow are set by state law, and they vary. Some states require vehicles above a certain weight to stop at weigh stations, sometimes with exemptions for non-commercial and recreational vehicles. Rather than reproduce thresholds that differ by state and change over time, check the current rules with the transportation or motor vehicle agency for every state on your route before you move. If your home is close to any limit, this is worth doing properly rather than assuming.
The Road Envelope and Why Exterior Storage Is Rarely Free
Applies to tiny homes on wheels.
Adding storage to the outside of a tiny house looks like free capacity. A bump-out pantry, a wall-mounted cargo box, a rack for bikes or lumber, a deeper eave with hooks underneath. None of it eats interior floor space, so it feels like a clean win.
It is not free, because your home has to fit inside a legal envelope every time it moves.
Width
Federal regulation sets the width standard that the rest of the system is built around. Under 23 CFR 658.15, no state may impose a width limit of more or less than 102 inches (that is 8 feet 6 inches) on a vehicle operating on the National Network of highways. Hawaii is the single exception, permitted to keep a 108-inch maximum. The regulation also preserves the ability of states to grant special use permits to vehicles that exceed 102 inches.
Two things to be careful about here, because most tiny house articles state “8 feet 6 inches” as though it were a universal law and stop there.
First, that federal provision governs vehicles on the National Network. A privately towed tiny house is operating under state vehicle law, and while state limits are almost universally built around the same 102-inch figure, the operative rule for your trip is your state’s, not the federal one directly. Second, the limit applies to the widest point of the vehicle, which includes anything you have attached to the outside of it.
That second point is where exterior storage goes wrong. If your home was built at or near the maximum width (and many are, because builders maximize interior space), then a cargo box, a bracket, or a bump-out that projects even a couple of inches past the wall can put you over. Being over width does not mean a warning. It means you are an oversize load, which means permits, sometimes route restrictions, sometimes travel-time restrictions, and a meaningfully more complicated and expensive move.
Height
Height is where roof storage dies. Tiny houses are commonly built to a maximum around 13 feet 6 inches, which is the figure that appears throughout federal size regulation for vehicle height, and most builders design right up to it in order to get a usable sleeping loft.
If your home is already at that height, there is no roof rack, no rooftop cargo box, and no roof deck. There is not even room for a tall vent you did not plan for. And even a home built a few inches under is not really clear, because the practical constraint is not just the legal limit. It is every bridge, every overpass, every drive-through canopy, and every low branch on the route. Bridge strikes are common and expensive, and clearance signs are not always accurate.
Length and overhang
Length limits also vary by state, and the whole combination, tow vehicle plus trailer, is usually what gets measured. A cargo carrier hung off the back adds length and cantilevers weight behind the rear axle, which is the worst possible place for it from a stability perspective.
The practical rule
Before you attach anything to the outside of a tiny house on wheels, measure the finished width and height of your home as it stands, at its widest and tallest points, including any existing trim, gutters, vents, and light fixtures. Write those two numbers down. Then treat them as a hard budget, exactly like the weight budget, and check every exterior addition against it.
Some exterior storage passes this test easily: a tongue-mounted box in front of the house, storage under a removable deck, or anything that gets taken off and packed inside before a move. Section 17 covers those. The point here is only that the outside of your home is not free space; it is space rented from your road envelope.
Storage That Has to Survive Highway Speeds
Applies to tiny homes on wheels.
A tiny house that moves is subjected to forces no house ever experiences. Braking, cornering, wind gusts from passing trucks, expansion joints, potholes, and the sustained vibration of hours at highway speed. Anything not fastened down is, in the language of vehicle safety, an unsecured load, and inside a small enclosed space, that means it is a projectile aimed at your cabinetry, your windows, and your appliances.
This is the single largest blind spot in mainstream tiny house storage advice. Open shelving, pegboards, hanging pot racks, and open cubbies photograph beautifully and are exactly wrong for a home that travels. Every one of those solutions relies on gravity alone to keep its contents in place.
Design for travel from the start
- Prefer doors and drawers to open shelves. A closed cabinet with a positive latch is the baseline. If you love the look of open shelving, confine it to items that are light, unbreakable, and cheap to replace.
- Use positive-latching hardware, not magnets. Magnetic catches and roller catches hold a door closed against a nudge, not against a hard stop or a hard corner. Push-to-open latches, positive catches, and barrel bolts are the RV-appropriate answer, and they are inexpensive.
- Fit drawer slides with a locking detent so drawers cannot roll open in transit. A drawer full of cast iron that opens on a downhill braking event will keep going.
- Fiddle rails on any open surface. A raised lip along the front edge of open shelving, a technique borrowed straight from boats, is the difference between shelving that works in a moving home and shelving that empties itself onto the floor.
- Bungees and cargo nets across open cubbies. Cheap, removable, and effective for baskets, bins, and firewood-style stacks.
- Non-slip liner in every drawer and cabinet. It reduces the sliding that turns contents into a rattling mass and gradually destroys both the contents and the cabinet interior.
The pre-travel routine
Even a well-built travel-ready interior needs a walkthrough before a move. Build a written checklist and keep it in the house:
- Everything off every horizontal surface. Counters, tables, windowsills, the top of the refrigerator. Nothing loose.
- Heavy and breakable items down low, ideally on the floor of a closed cabinet, padded with towels or clothing you were carrying anyway.
- Every cabinet and drawer latched, then physically tested with a firm pull.
- Anything hanging on a wall or a hook comes down: artwork, mirrors, pots, clothing on open racks. Hooks are for parked living.
- Interior doors latched or blocked open so they cannot swing and slam.
- Loose items in the loft removed entirely or strapped. The loft is where a projectile has the most distance to fall and the least to stop it.
- Tanks at the level you have planned for, not incidentally full.
Do the walkthrough the same way every time. Most damage happens on the moves people considered too short to bother.
Your Loft Is Governed by Code, and That Includes Storage
Every tiny house article recommends loft storage. None of them mention that lofts are one of the most specifically regulated features in the entire tiny house appendix, and that several of those requirements constrain what you can put up there and where.
The requirements below come from the tiny house appendix to the International Residential Code: Appendix Q in the 2018 edition, Appendix AQ in 2021. Details were revised between editions and adoption varies by jurisdiction, so treat these as the shape of the rules rather than the final word, and confirm the version your building department enforces.
What the code defines as a loft
A loft is a floor level more than 30 inches above the main floor, open to the main floor on at least one side, with a reduced ceiling height, used as living or sleeping space. If your platform is under 30 inches, or fully enclosed, it may not be a loft at all in code terms, which changes which rules apply.
The dimensional requirements that affect storage
- Minimum ceiling heights below. Habitable space and hallways require a finished ceiling height of at least 6 feet 8 inches; bathrooms, toilet rooms, and kitchens at least 6 feet 4 inches. This is the constraint that squeezes the loft from underneath. If you build storage into the underside of a loft and it drops the finished ceiling of the space below past those minimums, you have created a code problem.
- Loft guards. A guard is required along the open side of a loft, at a height of not less than 36 inches or one-half the clear height to the ceiling, whichever is less. This matters because people routinely treat the guard as a place to hang or stack things, and loading a guard is not what it was designed and inspected for.
- The 16-inch area rule. This is the useful one, and Section 11 is built entirely around it. Loft area where the finished floor to finished ceiling measurement is less than 16 inches does not count toward the loft’s minimum required area.
Why this changes your storage plan
Read that last rule again, because it is quietly the most useful piece of code in this entire guide. The band around the perimeter of your loft, where the roof slopes down to almost nothing, is space the code has already decided cannot be counted as usable loft area.
It is, in other words, the one place in your home where storage costs you nothing you were allowed to count anyway. Everywhere else, storage competes with living space. There, it does not.
The corresponding warning: loft floors carry a design load, and a loft framed for sleeping is not automatically framed for a dense storage load. If you are planning to put substantial weight in a loft (a library, tools, water containers, a battery bank), that is a question for the builder or an engineer, not a decision to make with a tape measure.
The Egress Rule Nobody Publishes
This is the most important section in this guide, and it is the one no competing tiny house storage article contains.
Tiny houses are required to meet the residential code’s requirements for emergency escape and rescue openings. The tiny house appendix adds a specific allowance for sleeping lofts: an egress roof access window, a skylight or roof window, is deemed to satisfy the requirement where it is installed so that the bottom of the opening is not more than 44 inches above the loft floor, provided the window meets the minimum opening area requirement.
That provision exists because a sleeping loft usually has no wall tall enough for a conventional egress window. It means that in a great many tiny houses, the only way out of the sleeping loft in a fire is a window in the roof, positioned within arm’s reach above the mattress.
Now consider what every tiny house storage guide tells you to do with a loft. Build shelves along the perimeter. Add cabinetry at the head of the bed. Stack bins in the low space where you cannot sit up. Use the area under the slope. All of that advice is aimed at precisely the zone where your escape window is likely to be, and none of it comes with a warning.
The rules, without hedging
- Identify your egress opening before you build anything in the loft. Not after. Know exactly which window or skylight is the designated escape route, and confirm it with your builder or building department if you are not certain.
- Never build storage that obstructs it. Not shelving across it, not a cabinet in front of it, not a headboard under it that you have to climb over, not a bin stack beneath it.
- Never store anything in front of it, even temporarily. Temporary becomes permanent in a small space faster than anywhere else, and a fire does not care that you meant to move the box.
- Keep the path to it clear. An opening you can reach only by crawling over a storage platform is compromised, particularly in darkness and smoke, which is the only condition in which you will ever use it.
- Confirm it still opens. Roof windows that are never opened seize, paint over, and corrode. Open yours on a schedule, twice a year alongside your smoke alarm test, and make sure anyone who sleeps in that loft has physically opened it themselves at least once.
- Apply the same logic on the main floor. Bedroom egress windows in the rest of the home have their own requirements, and the same rule applies: nothing stored in front of them, ever.
Storage in a tiny home is a game of finding every unused cubic inch. This is the one place where the unused space is unused on purpose. Leave it alone.
Under-Stairs Storage Done to Code
Stair storage is the number one recommendation in every tiny house article, and it deserves to be. A staircase to a loft occupies a substantial share of a tiny footprint, and leaving that volume hollow is genuinely wasteful. Turning treads into drawers and risers into cubbies is the highest-return storage project in most tiny homes.
What the articles leave out is that loft stairs are dimensioned by code, and you cannot let the storage drive the geometry.
The dimensions the storage has to work around
Under the tiny house appendix, stairways accessing a loft have a minimum clear width: not less than 17 inches at or above the handrail, with a specified minimum below it. Riser heights and tread depths fall within a defined range calculated by formula. Handrails and guards at open sides have their own requirements.
The provision most likely to catch a storage build is the landing platform. Where the loft ceiling height is low at the point the stairway meets the loft, the top tread and riser must be constructed as a landing platform, with specified minimum depth and a riser height to the loft floor within a defined range. The exact figures differ between the 2018 and 2021 editions, which is precisely why you check your local adoption rather than a blog post.
The practical consequence: design the staircase to code first, then fit storage into whatever volume the compliant staircase encloses. Doing it the other way around (sizing treads to suit a drawer box, or shaving a riser to gain an inch of drawer height) is how people end up with a staircase that fails inspection or, worse, one that passes inspection and is still unpleasant and unsafe to descend at three in the morning.
Making the volume actually work
- Drawers in the risers, front-facing. The most accessible option, and the best use of the lower steps. Full-extension slides are worth the cost, because a drawer you can only open halfway wastes the back third of its volume permanently.
- Top-opening treads for deep storage. Hinged treads give you a large single cavity, which suits bulky, rarely accessed items: off-season bedding, camping gear. The tradeoff is that you cannot open one while standing on it, so this is genuinely deep storage, not daily storage.
- A full-height cabinet or closet at the tall end. The volume under the highest steps is often deep enough for hanging clothing, and in a house with no proper closet, this may be your only hanging space. This is frequently the single most valuable cubic foot in the house.
- Side-access from the adjacent room where the staircase backs onto another space. A cupboard opening into the bathroom or kitchen from the back of the stair is space you would otherwise never reach.
- Open cubbies only on the lowest two steps, where they function as a shoe drop and where a spill in transit falls a few inches rather than down a stairwell.
Assign contents by height
The same frequency logic that governs any storage applies here, sharpened by the fact that the bottom of a staircase is easy to reach and the top is not:
- Lowest steps: daily items. Shoes, bags, the things you grab on the way out.
- Middle steps: weekly items, and this is also where dense items belong, because it keeps weight low and central in a home on wheels.
- Top steps and the tall cabinet: hanging clothes, seasonal items, anything you touch monthly or less.
One safety note that applies to homes on wheels and homes on foundations equally: do not store anything on the stairs themselves. A tiny house staircase is steep, narrow, and often the only route to where you sleep. It is not a shelf.
In-Floor and Under-Floor Storage
Floor hatches are a genuinely good tiny house idea and one of the few that competitors cover without significant error. The floor cavity is dead space, it is the lowest point in the house, ideal for weight distribution, and it is perfectly suited to long, awkward objects that fit nowhere else.
What belongs in the floor
The floor cavity is uniquely good at long, flat, rarely needed things:
- Skis, snowboards, fishing rods, and paddles.
- Folding tables, ironing boards, and drying racks.
- Spare lumber, trim stock, and long tools.
- Bulk supplies with weight (canned goods, water containers, dense pantry stock), where the low placement is an active advantage.
- Documents and archival items in a sealed, labeled container.
What does not belong: anything you need frequently. Retrieving something from a floor hatch means clearing whatever furniture or rug sits on top of it, then lifting a hatch, then reaching down. That friction is fine twice a year and intolerable twice a week.
The constraints nobody mentions
- The cavity is usually full. In a tiny house on wheels, the floor system typically contains insulation, and often plumbing runs, wiring, and tank connections. The available cavity is whatever is left, and it is rarely the full depth of the floor.
- Cutting a floor is structural. You are interrupting joists. This is not a weekend project to improvise. If your home is built on a trailer, the floor system also ties the structure to the frame, and a badly placed cut is a serious problem. Get a builder or an engineer involved.
- Certification and warranty. As covered in Section 2, penetrating the floor of a certified unit can affect that certification. Ask first.
- Underside exposure. On a trailer, the underside of the floor is exposed to road spray, debris, and stone impact. Anything stored in the floor cavity needs to be protected from that side, and any hatch needs to seal properly.
- Insulation loss. A poorly detailed hatch is a hole in your thermal envelope. In a home this small, a cold spot in the floor is noticeable, and it is also exactly where condensation problems begin. See Section 18.
If you are retrofitting rather than building
Under-floor storage boxes that mount to the trailer frame rather than penetrate the floor are the lower-risk alternative, and they are the standard approach in the RV world for a reason. They add no interior intrusion and no thermal penalty. They do add weight low and, depending on placement, can affect ground clearance and departure angle, worth checking if you ever tow anywhere with a steep driveway apron.
The Dead Zone Along the Loft Perimeter
This is the highest-value storage insight in this guide for anyone with a sleeping loft, and it comes directly out of the code discussion in Section 7.
In a loft under a sloped or gabled roof, the ceiling drops toward the walls until, at the perimeter, there is no usable headroom at all. Everyone knows that band is awkward. What almost nobody knows is that the code has already written it off: loft area where the finished floor to finished ceiling measurement is less than 16 inches is not counted toward the loft’s minimum required area.
The practical translation: that perimeter band is the only floor area in your entire home that you can fill with storage without giving up anything the code lets you count as living space. Everywhere else in a tiny house, storage and living space are in direct competition. Here they are not.
How to use it well
- Low, long, drawer-style boxes on runners that pull out toward the center of the loft. This is the single best solution, because it converts an unreachable crawl space into something you can access from a comfortable position. Full-extension hardware matters enormously here, because the back of that band is otherwise unreachable.
- Soft-sided bins with handles, if drawers are not in the budget. Cheaper, lighter, and they conform to the slope. Label the end that faces out, because that is the only part you will ever see.
- Divide the band by season. One end for winter, the other for summer, so a seasonal swap is a single operation rather than an excavation.
- Keep it shallow at the very edge. The last few inches, where the roof meets the floor, are not worth chasing. Leave them, because you will also want airflow there. Section 18 explains why.
The hard limits on this zone
Two rules, both already covered but both worth restating precisely because this band is so tempting:
- Not in front of the egress opening. If your roof escape window sits within this band, and given that it must be within 44 inches of the loft floor it very often does, that section stays empty. This overrides every other consideration in this section.
- Watch the weight, and watch where it sits. The loft is the highest point in the house. In a home on wheels, mass up high raises the center of gravity and makes the whole rig less stable in crosswinds and cornering. Light and bulky belongs in the loft. Dense and heavy belongs in the floor or in the lowest stair drawers.
That last point is a genuinely useful sorting rule, and it inverts what most people do by instinct. Bedding, off-season clothing, pillows, and camping sleeping bags are perfect loft storage. Books, tools, canned goods, and cast iron are not.
Vertical Storage and the Fastener Problem
“Use your vertical space” is the most repeated piece of small-space advice in existence, and in a tiny home it is correct. What the advice never addresses is that hanging something on a tiny house wall is a different engineering problem than hanging it on the wall of a conventional house.
Why tiny house walls are different
- Framing may be lighter and spaced differently. Weight reduction is a design priority in towable builds, so framing is often lighter and laid out on a spacing chosen for the build rather than the conventional interval you would assume. A stud finder is not optional, and a guess is not a plan.
- The wall may not be stick-framed at all. Structural panel construction and steel framing are both common in tiny houses, and neither behaves like wood framing when you drive a fastener into it. Ask your builder what your walls are made of before you drill.
- Wall cavities are dense with services. In a house this small, plumbing, wiring, and mechanical runs are packed into very little wall area. The odds of hitting something are far higher than in a conventional home.
- Interior finishes are often thin. Many tiny homes use thin plywood or panel finishes rather than drywall. They hold a screw differently, and drywall anchors designed for half-inch gypsum may not behave as expected.
- And if the house moves, everything is a dynamic load. This is the big one. A shelf rated to hold a static weight parked is subject to repeated shock loading in transit. Fasteners work loose, screw holes elongate, and a bracket that held for a year of stationary living can fail on a rough stretch of interstate.
Practical approach
- Hit framing, every time, for anything with real weight. Anchors in a thin panel are not a substitute. If you cannot find framing where you need it, add blocking. And if the wall is already closed up, mount a continuous rail or backer board across several framing members and hang from that instead.
- Spread load across multiple points. A long cleat or French cleat across three framing members is dramatically better than two screws into one.
- Plan the heavy stuff before the walls close. If you are in the build phase, decide now where the pot rack, the loft ladder, the fold-down desk, and the book wall are going, and have blocking installed. It costs almost nothing at framing stage and is a significant job afterward.
- Re-torque on a schedule if your home travels. Add fastener checks to the same twice-yearly routine as the smoke alarms and the egress window.
- Use adhesive hooks only for genuinely light items, and expect them to underperform on the textured and unfinished wood surfaces common in tiny houses. They are for tea towels and keys, not for anything you would mind having land on you.
What to hang, in priority order
Given that every fastener is a small project, spend them where they return the most:
- A rail or rod system in the kitchen. Hanging utensils, mugs, and light pans off a single well-anchored rail clears more counter space per fastener than anything else in the house.
- Hooks by the door. Coats, bags, and keys. Prevents the pile that otherwise forms on the only horizontal surface near the entrance.
- A fold-down surface. A wall-mounted desk or table that folds flat is the highest-value use of a wall in a tiny home, and it must be anchored properly because people lean on it.
- Bike and gear hooks, if you have the wall for it and are prepared to take them down before travel.
- Magnetic strips for knives and small tools. Light, and they use wall area that is too narrow for anything else.
Tiny Home Kitchen Storage
The kitchen is where a tiny home is won or lost. It holds the highest density of objects per square foot of any space in the house, most of those objects are heavy, and it is the room people most often report as the reason tiny living did not work for them.
Reduce before you organize
In a conventional kitchen, a duplicate is a minor inefficiency. In a tiny kitchen it is a genuine cost, paid in both volume and weight. The reduction pass is not optional and it should come first:
- One of each, sized to your actual household. Not the household you host twice a year. Dishes for the people who live there plus a small margin.
- Nesting and stacking over matching. Nesting mixing bowls, stacking cookware with removable handles, and collapsible colanders and strainers each replace several objects with one. Collapsible silicone items are the highest-return purchase in a tiny kitchen.
- Ruthless about single-purpose appliances. Every appliance has to justify both its volume and its weight. In practice most tiny kitchens support one or two, not five.
- Cast iron is a decision, not a default. It is excellent cookware and it is extraordinarily heavy for the volume it occupies. Owning one piece is reasonable; owning a set is a meaningful share of a payload budget.
The moves that actually create space
- Cover the sink and the cooktop. A cut-to-fit board over either one converts it into counter when it is not in use. In a kitchen with three feet of counter, this can double your working surface. Make sure any cooktop cover is a purpose-made one appropriate for your appliance.
- Toe-kick drawers. The few inches beneath base cabinets are dead volume in every kitchen ever built. Shallow drawers there hold baking sheets, cutting boards, placemats, and flat pan lids, and they keep that weight at the lowest possible point.
- Vertical dividers instead of stacking. Baking sheets, boards, and pan lids stood on edge take less room and are individually retrievable without unstacking.
- Shelf risers and under-shelf baskets inside cabinets, recovering the dead air between shelf levels. Cheap, no installation, immediately effective.
- A narrow pull-out beside the refrigerator or at the end of a run. Tall, slim pull-outs use gaps too narrow for anything else and are genuinely good pantry storage.
- Decant into square containers. Round containers and original packaging waste a surprising share of shelf volume. Square containers with flat tops stack and use the full depth. In a moving home they also travel far better than boxes and bags.
- Magnetic containers and a knife strip. The side of a refrigerator is a large unused steel surface, and a magnetic knife strip frees the counter space a block occupies.
- Cargo netting inside cabinet doors. Straight from the RV world. Adds a shallow pocket of storage and holds contents in place in transit, which a shelf does not.
Two travel-specific kitchen rules
If your home moves, the kitchen is where most transit damage happens, because it holds the heaviest and most breakable things in the house.
- Nothing glass or ceramic stored high. Plates, bowls, and glassware belong in low cabinets with positive latches, ideally with non-slip liner and a cloth between stacked items. Dishes stored in an upper cabinet are a bad outcome waiting for a pothole.
- Hanging pot racks come down before travel, without exception. A hanging cast iron pan in a moving vehicle is the single most dangerous object in a tiny house interior.
Tiny Home Bathroom Storage
Tiny house bathrooms are frequently wet baths, a single sealed room where the shower is not separated from the rest, which changes the storage problem entirely. Anything left out gets wet every time someone showers.
In a wet bath
- Everything lives behind a door or comes out with you. The workable pattern is a single sealed cabinet plus a caddy that you carry in and carry out. Open shelving in a wet bath is a wet shelf.
- A recessed cabinet is worth the build cost. Recessing into the wall cavity keeps the storage out of a room where every inch of projection matters. Confirm what is in the cavity first, because in a tiny house it is often plumbing.
- Sealed containers, not cardboard or paper packaging. Anything porous will not survive.
- Hooks over shelves for towels and robes, positioned as far from the shower head as the room allows, and expect to bring towels out to dry properly.
In a separated bathroom
- Build over the toilet. The wall above a toilet is the most reliably wasted vertical space in any bathroom. A shelf unit or a recessed cabinet there frequently solves a small bathroom on its own.
- A tension-mounted corner caddy in the shower, running floor to ceiling, holds more than a hanging caddy with no fasteners at all. Note that tension fittings can lose grip over time and are not travel-proof, so take it down before a move.
- Work around the plumbing under the sink with two-tier organizers designed to fit around a trap, and a tension rod across the cabinet to hang spray bottles by their triggers.
- Over-the-door hooks and organizers, if the door has clearance to swing with them fitted. Check this before buying, because tiny house bathroom doors often have very little margin.
Store the backstock somewhere else
This is the highest-impact bathroom rule in a tiny home, and it is simple: the bathroom holds what is in current use, and nothing else. Bulk paper goods, backup toiletries, and cleaning supplies live in the floor cavity, a stair cabinet, or an exterior box, anywhere but the smallest and wettest room in the house.
The same goes for medications and supplements, which do poorly in a room that is repeatedly warm and wet. Keep them somewhere dry and stable instead.
Multi-Function Furniture That Earns Its Weight
Multi-function furniture is the most repeated tiny house recommendation after stair storage, and it is right, but the standard advice is missing the test that matters. In a tiny home, and especially one on wheels, a piece of furniture has to justify itself on three axes at once: footprint, weight, and how it behaves when the house moves.
A convertible sofa bed that weighs 200 pounds and does two jobs is a worse deal in a towable home than two light pieces that each do one, even though every article will tell you otherwise. Run the weight test, not just the footprint test.
The pieces that consistently earn their place
- Bench seating with storage underneath, built in rather than freestanding. Built-in means it is part of the structure, needs no securing for travel, and puts its contents low. This is the best storage furniture in a tiny house by a wide margin.
- A fold-down wall table or desk. Two to three inches of depth when folded, a full work or dining surface when down. Anchor it into framing properly, because people put weight on these.
- A platform bed with drawers, where you have a ground-floor bedroom rather than a loft. Roughly a dresser’s worth of storage in a footprint you were using anyway.
- Nesting or stacking stools instead of dining chairs. Light, stackable into a tiny footprint, and usable as side tables and step stools.
- A storage ottoman, the one piece of conventional small-space advice that transfers perfectly. Seating, footrest, surface with a tray, and closed storage, all light.
- Wall-mounted folding seating, which returns the entire floor when not in use.
The pieces that usually do not
- Heavy convertible mechanisms. Sofa beds and wall beds with substantial hardware carry a lot of mass for the function delivered. In a home on a foundation they are fine; in a towable, run the numbers first.
- Modular sectionals. Excellent advice for a studio apartment, poor advice for 200 square feet. There is no reconfiguring to be done in a room with one workable layout.
- Anything freestanding and tall. Covered in the next section, but the short version is that in a home that moves, freestanding tall furniture is a liability.
- Furniture bought for the space rather than the doorway. Tiny house doors are frequently narrower than standard residential doors, and the path in may involve a tight turn at the base of a loft stair. Measure the door, the turn, and the ceiling clearance before ordering anything.
Build in wherever you can
The general principle: in a tiny home, built-in beats freestanding almost every time. Built-ins use the awkward geometry that freestanding furniture cannot, they need no clearance around them, they require no travel securing, and they can be shaped to the exact space available. The tradeoff is flexibility and cost, and the fact that you cannot take them with you if you sell the house.
Securing Furniture Against Tip-Over and Transit
Two separate risks live in this section. One applies to every home. The other applies only to homes that move, and it is considerably more serious than most people realize.
Tip-over
Furniture tip-over is a well-documented cause of serious injury and death, overwhelmingly involving young children. The Consumer Product Safety Commission maintains a mandatory safety standard for clothing storage units at 16 CFR Part 1261, which incorporates an ASTM stability specification and is aimed at protecting children up to 72 months of age. The standard reaches free-standing clothing storage units above defined thresholds for height, weight, and enclosed storage volume, in the range of roughly 27 inches tall, 30 pounds, and 3.2 cubic feet.
Two things worth being precise about, because this is easy to misread. That standard governs what manufacturers must build and test, not what you must do in your home. And it addresses one category of furniture. It is not a statement that other tall furniture is safe. A bookcase or a shelving unit is not a clothing storage unit, and it can absolutely tip.
The practical guidance is unchanged regardless of the standard: anchor tall furniture to framing, put the heaviest items on the lowest shelves, and do not place anything a child would want to climb for on top of a tall piece. Tiny homes make this more pressing rather than less, because tiny house storage advice pushes relentlessly toward tall and narrow, which is the least stable geometry there is.
Transit
Applies to tiny homes on wheels.
Anchoring for tip-over asks a bracket to resist a child pulling on a drawer. Anchoring for transit asks it to resist the entire mass of a loaded cabinet under braking, cornering, and impact loading, repeatedly, for hours. These are not the same requirement, and hardware sized for the first will not necessarily survive the second.
- Ideally, do not have freestanding furniture at all. Built-in and fastened to the structure is the correct answer in a home that travels. This is why RV interiors look the way they do.
- Where you do have freestanding pieces, secure them at multiple points into framing, not into thin panel finish, and use hardware rated well beyond the static weight of the piece.
- Ratchet straps for anything not permanently fixed, with dedicated anchor points installed for the purpose. Bungee cords stretch and are not a securing method for anything with mass.
- Empty tall pieces before moving, or at minimum move their contents to the floor. A loaded bookcase is a much harder thing to restrain than an empty one.
- Inspect after every move. Check fasteners, look for elongated screw holes, and look for movement marks in the finish where something has been working loose.
The framing rule of thumb: if you would not be comfortable with an object hitting you while it is doing 60 miles an hour, it needs to be either fastened to the structure or packed inside a latched cabinet before the house moves.
Exterior Storage: Decks, Sheds, and Tongue Boxes
Section 5 explained why bolting storage to the outside of a towable home is constrained by your road envelope. This section covers the exterior options that work anyway, because for most tiny home dwellers, exterior storage is where the bulky problem actually gets solved.
The tongue box
A weatherproof box mounted on the trailer tongue, forward of the house, is the single best exterior storage solution for a tiny home on wheels. It sits within the length you already have, it does not affect width or height, it puts weight forward where tongue weight generally wants it, and it is the natural home for the things you never want inside: leveling blocks, chocks, hoses, electrical cords, sewer connections, tools, and jacks.
Watch the tongue weight if you load it heavily, and confirm your existing tongue weight is not already at the top of its workable range before adding a full box in front of the axles.
Under-deck and porch storage
Many tiny homes have a small deck or porch, either permanent or removable. The volume under a deck is ideal for bulky, weather-tolerant items: firewood, garden tools, outdoor gear, hoses.
For homes that travel, the requirement is that it all packs down. Removable decks, folding steps, and collapsible storage are worth the extra cost, because a deck build that has to be dismantled with a drill every time you move is a deck build you will come to resent.
A separate shed or outbuilding
If you are parked on land you own or have a long-term arrangement on, a small shed is dramatically cheaper per cubic foot than any interior storage solution and removes the weight problem entirely. It is the obvious answer for bikes, tools, garden equipment, and seasonal gear.
Two cautions. Sheds are frequently subject to local permitting and setback rules, and in a jurisdiction where your tiny home’s own status is ambiguous, drawing attention with an unpermitted outbuilding is not always wise. And a shed is not the same as a sealed, secured, temperature-regulated space. It is fine for tools and outdoor equipment, and a poor choice for anything you actually care about protecting.
Vehicle-based storage
If you tow with a truck, the bed and a tonneau or cap is real storage capacity that costs you nothing in the house. The obvious limitation is that it disappears the moment you drive somewhere.
What does not work
- Roof storage, on a home built anywhere near maximum height. Covered in Section 5.
- Rear cargo carriers, which add length and hang weight behind the axles.
- Anything projecting past the widest point of the house, if that dimension is already close to the limit.
- Unsecured stacks under the trailer. Tempting, universally done, and a reliable way to lose things or forget them entirely when you leave.
Condensation, Airflow, and Why Packing Walls Solid Backfires
Every instinct in tiny home storage pushes toward filling gaps. Push the cabinet tight to the wall. Pack the bins to the very edge of the loft. Use the last inch behind the sofa. It is exactly the wrong instinct in one specific respect, and it is a failure mode that shows up months later as a stain, a smell, or a soft spot.
Here is the physics, briefly. A tiny home is a very small volume containing people who breathe, a shower, a cooktop, and often a propane appliance, all of which release water vapor into the air. That air holds the vapor comfortably at room temperature. When it contacts a cold surface, it cannot, and the water comes out of the air onto that surface as liquid.
In winter, the cold surfaces in your home are the exterior walls, the corners where two exterior walls meet, and the underside of the roof at the perimeter of the loft, which is to say precisely the surfaces this guide has been encouraging you to fill with storage.
Why storage makes it worse
A box pressed flat against an exterior wall does two things. It blocks air movement across that wall surface, so the surface runs colder than the rest of the room. And it traps whatever water does condense in a place with no airflow to carry it away and where you cannot see it. Cardboard, fabric, paper, and leather sitting in that spot absorb it. Mold follows, and in an enclosed space that small, it does not stay local.
Tiny homes are more susceptible than conventional houses for structural reasons, not because their owners are careless. The volume of air is small, so the moisture generated by ordinary living is concentrated. The ratio of exterior wall surface to interior volume is high. And well-built tiny homes are tightly sealed, which is good for efficiency and means that without deliberate ventilation, the vapor has nowhere to go.
What to actually do
- Leave an air gap behind storage on exterior walls. An inch is usually enough. Furring strips, spacers, or simply not pushing the cabinet fully back. This is the single most effective measure and it costs you almost nothing.
- Do not fill the loft perimeter completely tight to the roof line. Section 11 recommends leaving the last few inches; this is why. That is the coldest surface in the house in winter and the least ventilated.
- Use breathable containers against exterior walls, not sealed plastic. A sealed bin traps condensate against its own contents. Fabric bins, baskets, and cardboard all allow the contents to dry, though cardboard itself does poorly if it is repeatedly wetted.
- Slatted or perforated shelf bottoms in cabinets on exterior walls, so air can move through rather than sitting in a sealed box.
- Run your ventilation. The bathroom fan during and after every shower, the range hood whenever you cook, and cracked windows when weather allows. Cooking and showering are the two largest vapor sources in a tiny home by a wide margin.
- Look behind things on a schedule. Twice a year, pull storage away from exterior walls and inspect the wall surface. Add it to the same routine as the smoke alarms, the egress window, and the fastener check. Catching a damp corner early is the entire game.
- Watch the loft especially. Warm air rises and the loft is where you breathe for eight hours a night against the coldest surface in the building. It is the most common location for this problem.
None of this means you cannot use those spaces. It means storage against an exterior surface needs a gap and needs to be checked, and that the items you put there should be ones that tolerate the conditions.
What You Should Never Store Inside a Tiny Home
Standard household advice about storing hazardous items assumes a garage, a basement, or at minimum a utility closet with a door and some distance from where people sleep. A tiny home has none of that. Everything is in the same room as everything else, and the person sleeping is a few feet from wherever you put it.
That changes the calculus enough to warrant its own list.
Keep outside the living space entirely
- Spare propane cylinders. Propane is heavier than air, so a leak pools at floor level rather than dispersing. Cylinders belong outside in a ventilated compartment, upright and secured, never in a floor cavity, under a bench, or in a closet.
- Gasoline and fuel of any kind, including for a generator or a chainsaw. Outside, in an approved container, with ventilation.
- Paint, solvents, thinners, and adhesives. These give off vapor continuously in a very small volume of air.
- Charging lithium batteries, unattended. Power tool packs, e-bike batteries, and scooter batteries have a small but real thermal runaway risk. Charge them where you can see them, never overnight next to a sleeping loft, and never in the only exit path.
- Generators, obviously, but it is worth stating: never run one in, under, or adjacent to a tiny home. Carbon monoxide in a volume this small is fast.
Keep out of storage, wherever you put it
- Anything damp. Wet gear, damp towels, unwashed clothing. In this volume of air, one damp item stored in a closed space affects everything near it. See Section 18.
- Open food in soft packaging. Tiny homes, particularly ones parked in rural settings, are attractive to rodents, and a mouse in 200 square feet is a whole-house event. Decant into sealed hard containers.
- Anything blocking an exit, a window, an alarm, or a fire extinguisher. Non-negotiable, and worth walking your home specifically to check.
Requires actual thought
- Cleaning chemicals and aerosols. Reduce to what you genuinely use, keep them in a sealed bin, low, ventilated, and away from heat sources and sleeping areas.
- Ammunition, where applicable, which needs secure and appropriate storage and is subject to its own rules.
- Important documents. Passports, titles, birth certificates, and insurance policies belong in one small fire-resistant container that you can grab on the way out.
Worth noting that most of the items in the first list are also prohibited in self storage facilities, for the same underlying reasons. Flammables, fuels, and pressurized cylinders are not a “store them off-site instead” solution. They need appropriate outdoor storage, not a different indoor space.
The Honest Math of Living in 400 Square Feet
Everything up to this point has been about fitting more into a tiny home. This section is about the part that does not fit, because pretending otherwise is the central dishonesty of most tiny house content.
The average new single-family home in the United States is well over 2,000 square feet. Moving from something in that range into 250 square feet is not a reduction of ten or twenty percent. It is closer to an order of magnitude. And square footage understates it, because the larger home also had a garage, an attic, a basement, closets in every room, and a shed, none of which counted as living area, and all of which held things.
Nobody moves into a tiny home and keeps most of their belongings. The honest framing is that tiny living involves parting with the substantial majority of what you own, and the interesting question is not whether that happens but which of three destinations each item goes to: it comes with you, it leaves permanently, or it goes somewhere else and waits.
Storage capacity in a tiny home, roughly
Rather than think in square feet, think in the actual containers you will have:
- A well-designed 200-square-foot home on wheels typically nets out to something like a compact closet’s worth of hanging space, the volume of a staircase, a floor cavity, a loft perimeter band, and a kitchen’s worth of cabinets. Added together, that is meaningfully less storage than a single bedroom plus a closet in a conventional house.
- Add the weight ceiling on top of the volume ceiling, and dense categories (books, tools, kitchenware, hobby equipment) get squeezed hardest, regardless of how much shelf space you build.
The categories that reliably do not fit
Across the tiny house community, the same categories cause the same problem, essentially every time:
- Books. The most common single point of grief. Heavy, dense, and emotionally difficult to reduce.
- Seasonal sports and recreation equipment. Skis, snowboards, surfboards, kayaks, bikes, camping gear, golf clubs. Bulky, awkward, used for a few weeks a year, and frequently the reason someone chose this lifestyle in the first place, so selling it defeats the purpose.
- Tools and workshop equipment. Especially anything beyond a basic hand tool kit.
- Hobby and craft supplies. Sewing, woodworking, art, music, fishing, photography. Materials accumulate and equipment is often bulky.
- Holiday decorations, the bulkiest annual category in most households.
- Inherited and sentimental items. Furniture, china, photographs, family papers. These are the hardest, because the decision is not really about space.
- Furniture from a previous home, particularly if the tiny home is a stage rather than a permanent plan.
- Business inventory, equipment, and records, if you run something. This is unworkable inside a tiny home almost immediately.
Notice how many of those are things you would use again, and would have to buy again at full price if you sold them. That is the actual case for off-site storage, and it is a narrower and more honest case than “store your extra stuff.”
What to Keep, What to Sell, and What to Store Off-Site
Three destinations, and a decision rule for each. The rule that works: frequency of use decides what comes with you, and reversibility decides what you sell.
Bring it into the home
The test is weekly use, or a genuine emergency function. In a space this small, monthly is already marginal.
- Clothing you wear this season. Bulky and light, so it is a volume problem you can solve.
- Kitchen items used weekly, in single quantities.
- Current documents and a small fire-resistant box for the irreplaceable ones.
- Medication, first aid, and emergency supplies.
- One hobby’s worth of equipment, whichever one you actually do. Not the three you intend to return to.
- Anything digital rather than physical. Books, music, films, and paperwork all shrink to nothing when they stop being objects, and in a weight-constrained home the case for digitizing is much stronger than in a conventional one.
Sell, donate, or recycle
The test is whether you could replace it, easily and affordably, if you turned out to be wrong.
- Duplicates of anything.
- Furniture that will not fit and is not irreplaceable. Selling it before a move rather than storing it indefinitely is usually the right call, and the proceeds often fund the build.
- Single-purpose kitchen gadgets.
- Anything broken you have been meaning to fix. In a tiny home this is the most expensive category you own, measured against what the space is worth.
- Clothing that does not fit or has not been worn in a year.
- Media that has a digital equivalent.
Store off-site
The test has three parts, and an item should meet all three: you will demonstrably use it again, replacing it would be expensive or impossible, and it does not fit in the home.
- Seasonal recreation equipment. The clearest case there is. Skis in July, kayaks in January, camping gear between trips. Used every year, expensive to replace, physically impossible to keep in 200 square feet.
- Hobby and workshop equipment you use in concentrated bursts. A woodworker’s tools, a sewing machine and fabric stock, photography or music gear.
- Furniture from a previous home, if the tiny home is a stage rather than a destination. Selling a full furnished household to live tiny for two years and then rebuying it is an expensive way to save on storage.
- Inherited and sentimental items you are not ready to decide about. This is legitimate, with one condition: set an actual review date and put it in the calendar. Storage that defers a decision indefinitely is a subscription to avoidance. Storage that holds something safely for eighteen months while you sort out where you are living is a sensible use of money.
- Business inventory, equipment, and records.
- Archived documents you must retain but will never open.
- Off-season clothing in volume, particularly heavy winter outerwear, if your build has no room for a seasonal rotation.
If you are moving furniture into storage rather than selling it, it is worth reading our guide to storing furniture properly first, because preparation is most of what determines whether it survives the wait.
Choosing a Storage Unit Size for Tiny Home Living
Tiny home dwellers tend to make one of two opposite errors here. Either they rent a unit sized for a whole house, because that is what they moved out of, and pay for years of empty air. Or they refuse a unit entirely on principle and end up cramming a home that was never going to hold it.
The right size follows from the list you built in Section 21, and for most tiny home dwellers it is smaller than expected.
Matching the size to the situation
- 5x5 (25 square feet): roughly a small closet, holding somewhere in the range of 15 to 20 boxes stacked, plus a few items. This handles the classic tiny home overflow: seasonal recreation gear, holiday decorations, off-season clothing, a bike, archived documents, and a few sentimental boxes. For someone who has already downsized properly and is storing only what genuinely will not fit, this is frequently all that is needed. Our 5x5 breakdown covers exactly what fits.
- 5x10 (50 square feet): roughly a walk-in closet. The right size when you have a hobby or a workshop to store alongside the seasonal gear, or a few pieces of furniture you are keeping. This is the most common choice for tiny home dwellers who are storing equipment rather than just boxes. See the 5x10 guide for the dimensions.
- 10x10 (100 square feet): roughly half a one-car garage, and enough for a one- to two-bedroom household’s worth of furniture and boxes. This is the transitional size: right if you are moving into a tiny home from a furnished house and keeping the furniture because the tiny home is a stage. It is oversized for steady-state tiny living. The full 10x10 breakdown has the details.
- Larger than 10x10: worth a hard second look. If you are storing more than a 10x10 while living in 200 square feet, the ratio has gotten strange, and the honest question is whether you have downsized or merely relocated the problem.
If you are unsure, the storage unit size guide walks through each size with visual comparisons.
The tiny-home-specific considerations
- Access frequency is higher than average. Most storage customers visit rarely. Tiny home dwellers rotate seasonally, sometimes quarterly, because the whole system depends on swapping gear in and out. That makes location and access hours matter more than they would otherwise, and it makes packing for retrieval essential rather than optional.
- If your home moves, your unit does not. This is the constraint nobody plans for. A unit near where you are parked now is inconvenient the moment you relocate. If you expect to move, either keep the stored contents to what you can collect in one trip, or plan on moving the unit when you move the house.
- Vehicle and trailer storage is a separate question. If you have a tow vehicle, a trailer, or a second vehicle that needs somewhere to sit while you are parked somewhere that will not take it, that is a different product from a storage unit. See RV and trailer storage.
- Use the vertical space in the unit. The same principle that governs your home governs your unit. Inexpensive freestanding shelving inside a unit can cut the size you need meaningfully and makes seasonal rotation a five-minute job instead of an excavation.
Pack it for rotation, not for maximum density
Because tiny home dwellers actually use their units, packing method matters more here than for a typical customer:
- Leave a center aisle and load along both sides. It costs capacity and returns it many times over in usability.
- Seasonal items at the front, long-term archive at the back. The gear you swap twice a year should never sit behind the boxes you will not open for three years.
- Label on the side facing the aisle, not the top. A label on top is invisible the moment something stacks on it.
- Keep an inventory in a note on your phone, with a photo of each box’s contents. This is the difference between a five-minute trip and an hour of opening boxes.
- Elevate off the floor and cover furniture with breathable fabric rather than plastic sheeting, which traps condensation against the surface.
Our guides on packing a storage unit and organizing your unit go deeper on both.
When temperature-regulated storage is worth it
Temperature-regulated units protect against extreme heat and cold, which matters for a specific list of things tiny home dwellers commonly store:
- Wood furniture, which can crack and warp under large temperature swings.
- Musical instruments, especially wooden and stringed ones.
- Electronics.
- Photographs, documents, books, and artwork.
- Leather goods.
- Anything with adhesives or finishes that soften in high heat, including a surprising amount of modern furniture.
For bikes, plastic bins of holiday decorations, camping gear, and most tools, standard storage is usually fine.
Browse small storage units near you to see what is available in your area.
When You Should Not Rent a Storage Unit
We rent storage units, so treat this section as coming from an interested party. It is still true, and we would rather say it than have someone rent a unit for two years and conclude the whole category was a waste of money.
There are situations where a storage unit is the wrong answer for a tiny home dweller.
You have not actually downsized yet
The most common failure mode. Someone moves into a tiny home, puts everything that did not fit into a unit, and never returns to sort it. Two years on they are paying every month to store the contents of a house they no longer live in, most of which they would not choose to own if they were starting fresh.
If you have not gone through Section 21 honestly, do that first. A unit rented to postpone decisions is a subscription to postponement. A unit rented after you have decided is a tool.
The stored items are worth less than the storage
Run the arithmetic before you sign anything, because almost nobody does. Total the replacement cost of what you plan to store, then compare it to the monthly rent multiplied by how long you honestly expect to need it. Not the optimistic estimate, the honest one, given that people routinely keep units far longer than they planned.
For a box of old kitchenware, some college furniture, and a television from two upgrades ago, that comparison is usually decisive. Sell it, donate it, and buy again later if you turn out to be wrong. You will come out ahead.
A shed would do the job
If you are parked on land you own or have a stable long-term arrangement on, and what you need to store is bikes, tools, garden equipment, and outdoor gear, a shed is a one-time cost rather than a recurring one and it is right outside. Check local permitting rules, but this is often the better answer for weather-tolerant items, and it is the more honest recommendation than pointing you at a unit.
You are storing things you will never retrieve
Some items go into storage and everyone involved quietly knows they are never coming out. Inherited furniture nobody in the family wants. Boxes that have moved three times unopened. The tell is simple: if you cannot list the contents of a box from memory, and you have not opened it in over a year, it is not being stored. It is being avoided at a monthly rate.
Sentimental storage is legitimate, and it appears in Section 21 for that reason. The condition is a real review date, kept.
You could reduce instead, and the reduction is the actual goal
Many people choose tiny living specifically to own less. If that is your reason, renting a unit for the overflow can quietly undo the thing you were trying to do. You have the same possessions, in two places, with a monthly bill attached.
That is not always wrong. Skis you use every winter are not clutter, and neither is a workshop you actually use. But if the honest answer is that the unit exists so you do not have to confront how much you own, the unit is not solving the problem. It is hiding it, for a fee.
Where a unit genuinely is the right call
To be fair to the other side: if you are storing equipment you use every season, tools for work you actually do, furniture for a home you will move into within a couple of years, or business inventory, then off-site storage is doing exactly what it should. It functions as the garage, attic, and basement your tiny home was built without, which is precisely the amenity gap between a tiny home and a conventional house, and a reasonable thing to pay to close.
Frequently Asked Questions About Tiny Home Storage
The highest-return locations, in order: the volume under the staircase to the loft, the floor cavity, the low perimeter band of the loft where there is no headroom, the space beneath built-in bench seating, and the walls. Beyond that, the real answer is that you reduce first. Most tiny homes hold far less than people expect, and no arrangement of clever storage changes the total volume available.
It depends entirely on your trailer and your build. The method is the same for everyone: find the gross vehicle weight rating on the trailer’s certification label, weigh the finished house at a certified public scale, and subtract. What remains, minus a safety margin, is everything you can carry. Also check your axle ratings and the load rating on your tires independently, because your real limit is the lowest of the three.
Sometimes, but not freely, because your home has to stay inside a legal size envelope every time it moves. Federal regulation sets a 102-inch width standard for vehicles on the National Network, and state limits are built around that figure. Many tiny houses are built at or near maximum width and height already, which leaves no room for anything projecting outward. A tongue-mounted box forward of the house, or storage under a removable deck, are usually the workable options. Measure your finished width and height first.
They can be, with two conditions. First, nothing may obstruct the loft’s emergency escape opening or the path to it. In many tiny houses the sleeping loft’s escape route is a roof window positioned close above the mattress, in exactly the zone people fill with storage. Second, keep loft storage light, bedding and off-season clothing rather than books and tools, because weight up high raises the center of gravity and loft floors are not automatically framed for dense loads.
In jurisdictions that have adopted the tiny house appendix to the International Residential Code, lofts have defined requirements covering minimum ceiling heights in the space below, loft guards, access by stairway or ladder, and emergency escape openings. Requirements differ between the 2018 and 2021 editions and adoption is optional, so the appendix your local building department enforces is the one that matters. Check with them before building anything structural.
Most tiny home dwellers use some combination of four places: inside the home, an exterior box or under-deck storage, a shed if they are parked somewhere stable, and an off-site storage unit for seasonal and bulky items. The categories that most reliably need somewhere else are recreation gear, tools, hobby equipment, holiday decorations, and inherited items.
Many people do, and plenty do not. It depends on whether you own things you will genuinely use again, that would be expensive to replace, and that will not fit. Seasonal recreation equipment and workshop tools are the clearest cases. If what you are contemplating storing is things you have not used in a year and cannot describe from memory, the honest answer is usually to reduce instead.
For seasonal gear, holiday decorations, off-season clothing, a bike, and some boxes, a 5x5 is usually enough. Add a hobby or workshop’s worth of equipment and a 5x10 is the common choice. A 10x10 is the size for someone moving into a tiny home from a furnished house and keeping that furniture. If you are considering larger than a 10x10 while living tiny, it is worth revisiting what is going in it.
Less than most people expect. A well-designed 200-square-foot home on wheels typically nets out to roughly a compact closet’s worth of hanging space, the staircase volume, a floor cavity, a loft perimeter band, and kitchen cabinets. That is less total storage than one bedroom plus a closet in a conventional house, and on a trailer, the weight limit usually binds before the volume does.
It is excellent for long, flat, rarely used items and for dense items you want low, and it is poor for anything you need often, because retrieval means clearing the floor and lifting a hatch. The important caveat is that cutting a floor is structural work, the cavity usually contains insulation and often plumbing and wiring, and on a certified unit a floor penetration can affect that certification. Involve your builder rather than improvising.
Design for it rather than managing it afterward. Prefer latching cabinets and drawers to open shelving, use positive-latching hardware rather than magnetic catches, fit drawer slides with locking detents, add raised fiddle rails to any open shelf, use cargo netting across open cubbies, and line everything with non-slip matting. Then run a pre-travel walkthrough every time: clear all surfaces, take down anything hanging, and latch and physically test every door and drawer.
Often, and it is frequently the cheapest storage you can get per cubic foot. Sheds are commonly subject to local permitting and setback requirements, so check with your local authority first, particularly if your tiny home’s own zoning status is unsettled, since a permit application draws attention. A shed suits tools, bikes, and outdoor equipment; it is not a substitute for secure, temperature-regulated space for anything valuable.
Spare propane cylinders, gasoline and fuel, paint and solvents, and anything that gives off vapor all belong outside the living space in ventilated storage, because a tiny home has no garage or basement to absorb them and propane pools at floor level. Do not charge lithium batteries unattended or near a sleeping area. Never store anything damp, anything in soft food packaging, or anything that blocks an exit, a window, an alarm, or a fire extinguisher.
Leave an air gap of about an inch between storage and exterior walls rather than pushing cabinets flat against them, use breathable containers instead of sealed plastic in those locations, do not pack the loft perimeter tight to the roof line, and run the bathroom fan and range hood every time you shower or cook. Then pull storage away from exterior walls twice a year and inspect the surface behind it, because catching a damp corner early is what prevents it becoming a repair.
Built-in storage is a one-time cost and off-site storage is recurring, so over a long enough horizon building wins on price alone. The catch on a home with wheels is that built-in storage consumes payload twice, once for the cabinetry and again for the contents, and payload is finite in a way that money is not. If you are near your weight limit, more built-in storage is not available at any price.
Making a Tiny Home Work Long Term
The tiny homes that work for years rather than months tend to share a few things. The storage was designed alongside the layout rather than added afterward. The owners know their weight and dimension numbers and treat them as real constraints. Nothing blocks the way out. And they made peace early with the fact that some of what they own lives somewhere else.
If you are still in the planning stage, the highest-leverage decisions are the ones that are difficult to reverse later: where the blocking goes in the walls, whether the staircase encloses usable volume, whether the floor cavity is accessible, and where heavy storage sits relative to the axles. Those are cheap now and expensive later.
If you are already living in one, the highest-return projects are usually the loft perimeter band, the staircase volume if it is still hollow, and a proper pre-travel routine if your home moves.
And for the rest (the skis, the tools, the boxes you are not ready to decide about), the goal is a small unit you actually use, close enough to reach easily, packed so that a seasonal swap takes minutes. Not a warehouse for a life you no longer live. If you are unsure whether you need one at all, Section 23 was written for you, and the honest answer is often no.
10 Federal Storage offers month-to-month units in a range of sizes with online rental and no long-term commitment, which suits tiny home living, where circumstances and locations change. For more on making the most of any space, our small apartment storage guide covers room-by-room tactics that transfer well to homes on a permanent foundation, and our storage tips library has the rest.
Find a storage unit near you and see what is available.
About the Author
10 Federal Storage
Our team at 10 Federal Storage has been in the self storage industry for decades. With knowledge gained from multiple universities and in the field, we are well-prepared and excited to assist with your storage needs. When you rent a unit with us, you can feel confident that our seasoned customer service team’s help will make your transition as seamless as possible. Customer satisfaction is our number one priority, and we strive to make your experience exceptional with our automated leasing options, diverse unit sizes, and a strong commitment to sustainability.