

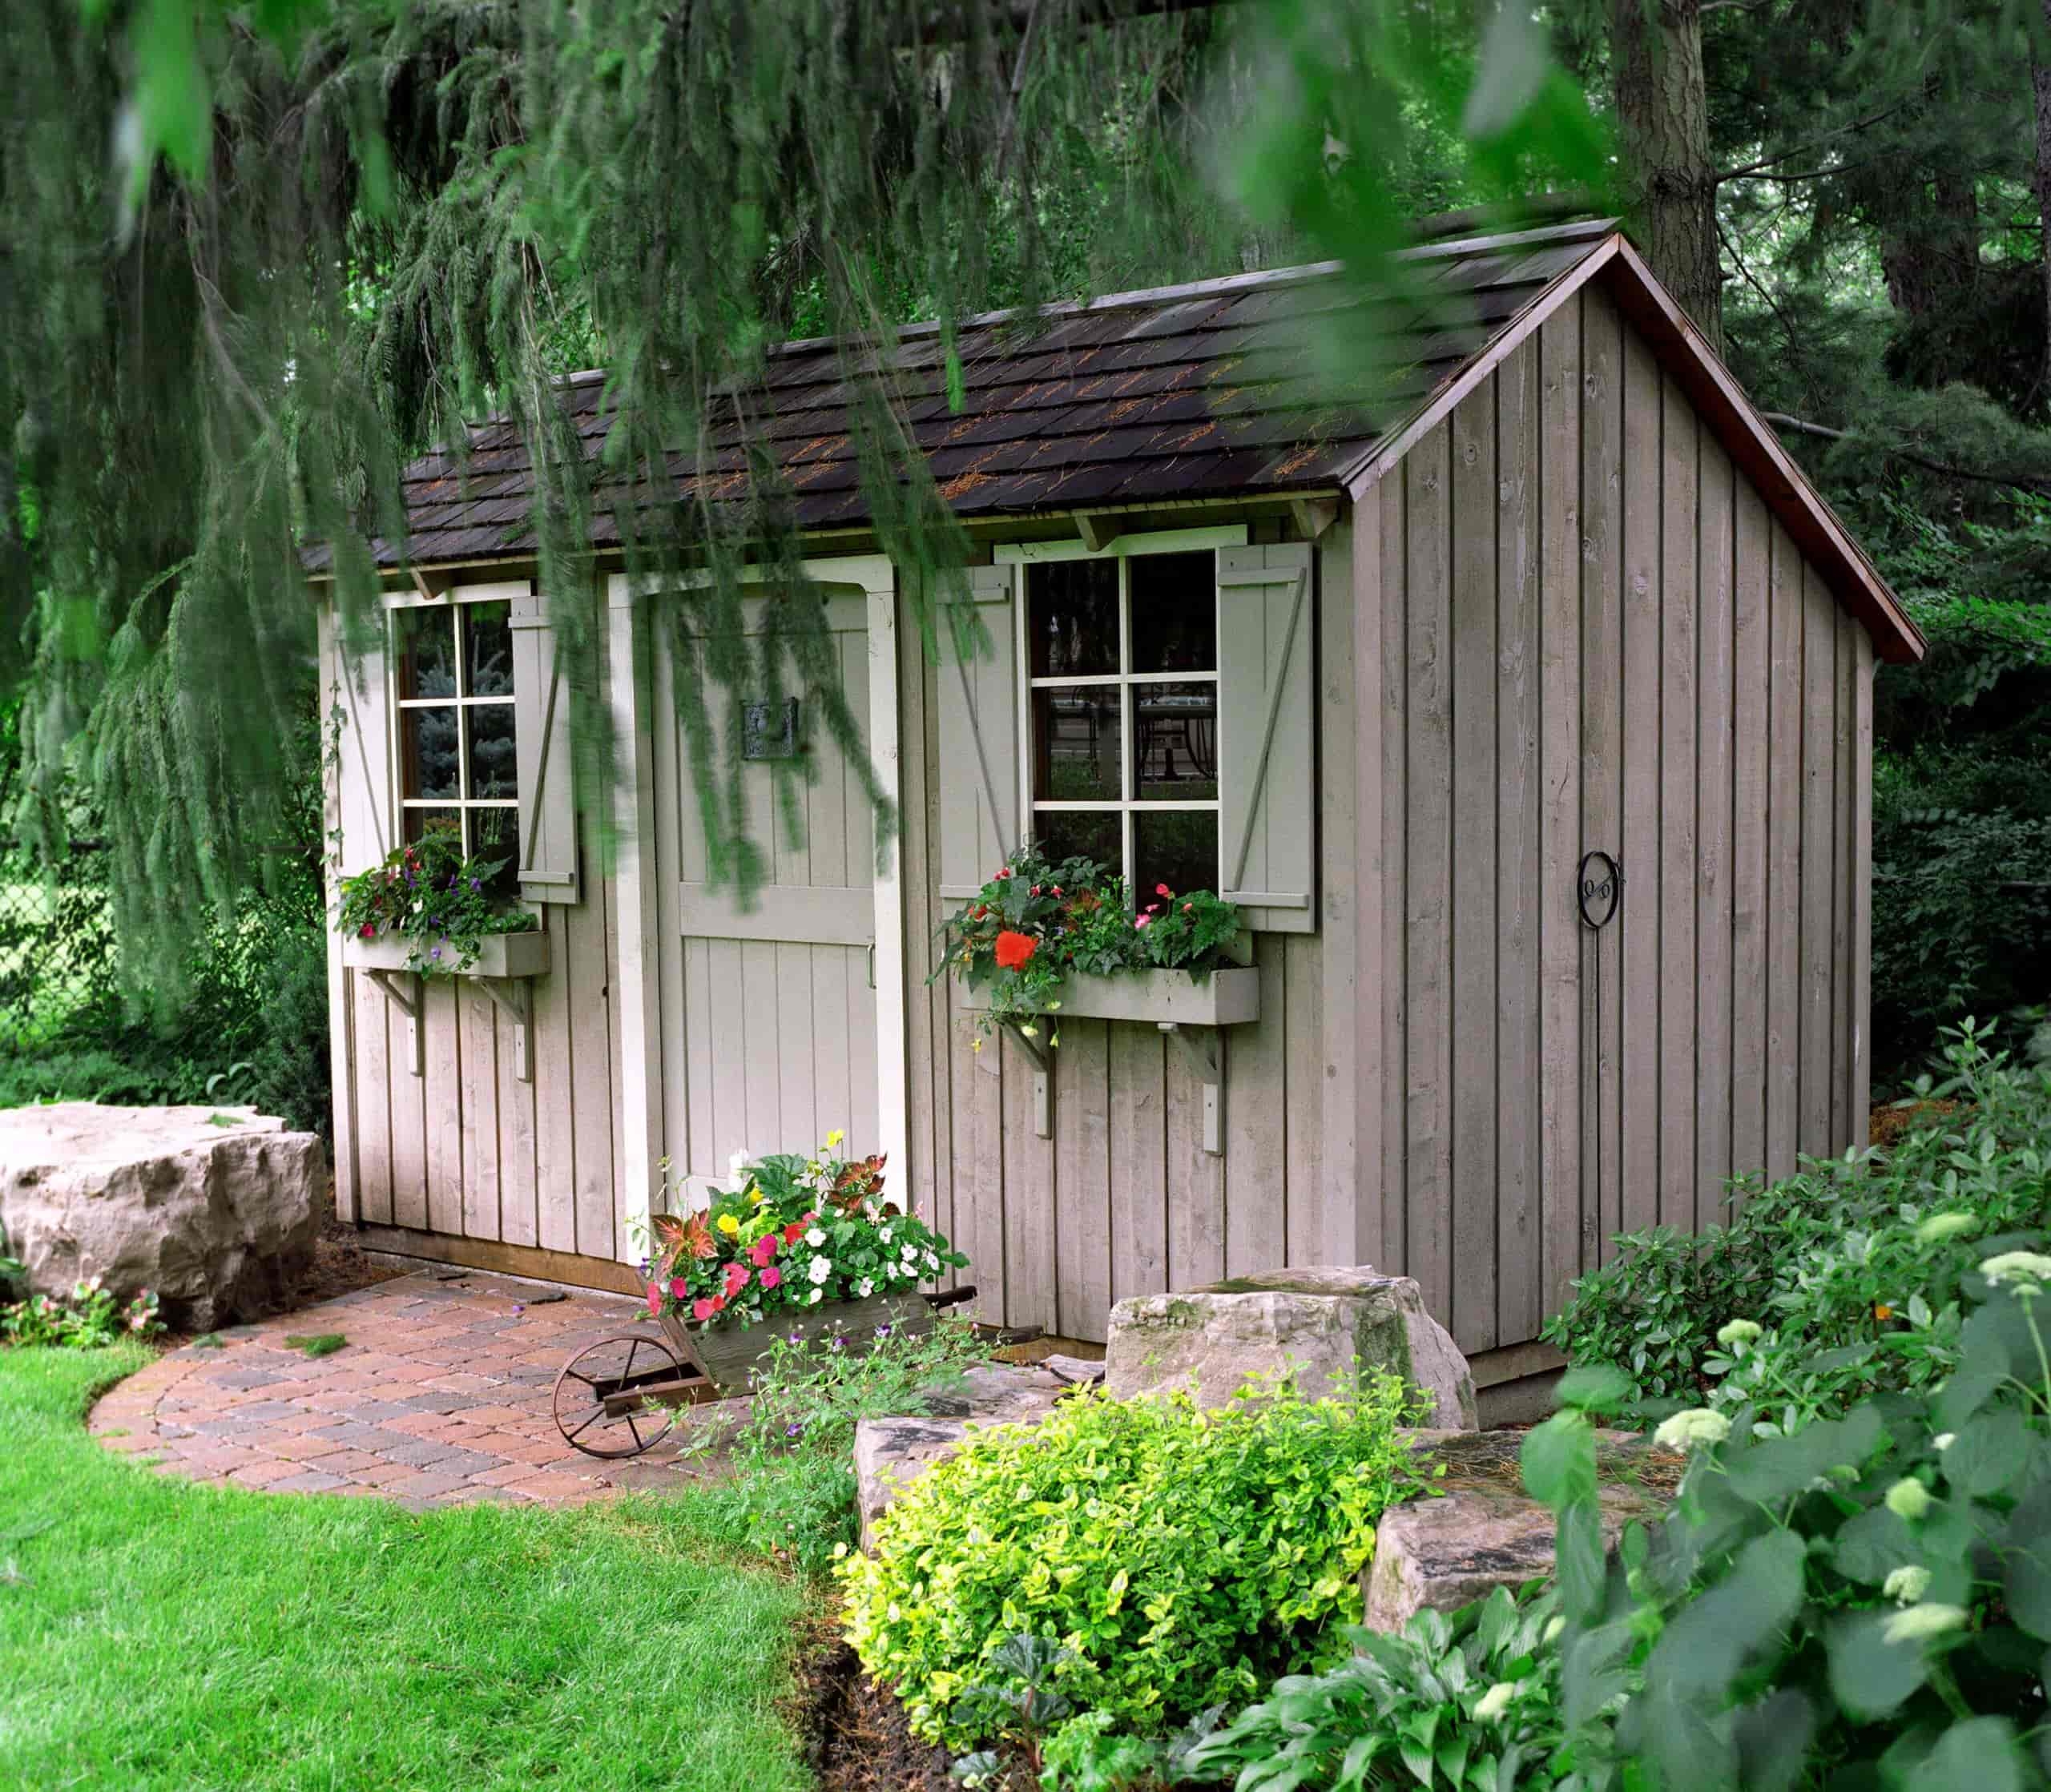
She Shed Ideas: Design, Organization, and the Rules That Decide What Your Shed Can Become
by 10 Federal Storage
Published on October 6, 2026
You have a shed in the backyard, or a flat spot where one could go, and you want it to become a room. A potting studio with a bench under the window. A quiet office forty steps from the kitchen. A sewing room where the machine can stay set up. The photo galleries make it look like a weekend of paint and string lights. What they leave out is the extension cord running across the lawn, the mouse nest behind the lawn mower, the letter from the building department, and the mower itself, now sitting under a tarp because the shed it lived in is a craft studio.
This guide is built from the building outward. Before any decorating, it walks through the rules that decide what a backyard shed is allowed to become: the permit threshold that half the internet gets wrong, what running power to a shed actually requires, why heating is the risky part of the whole project, and how much floor you really have once the walls are finished. Then it covers seven she shed ideas with the floor area and practical requirements each one needs, followed by organization ideas that work in buildings under 150 square feet.
A few things here that the pages currently ranking for this search do not cover. The arithmetic showing that a 10x12 shed loses roughly 15 percent of its floor to finished walls before a single piece of furniture goes in. The trench depths in the National Electrical Code, and why the shallow option can lock you into a shed that will never have heat. The CDC’s protocol for cleaning out an old shed with rodent droppings in it, which is the opposite of what most people do. Why the IRS treats a backyard office differently from a spare bedroom. And why a beautifully finished she shed adds nothing to your home’s listed square footage.
There is also a section near the end on the problem nobody plans for: the shed was storage. Everything it held needs a new home, and some of it (gasoline, pesticides, pool chemicals) belongs neither in a room where you sit nor in a storage unit. That section is followed by one arguing against renting a storage unit in seven specific situations. We run storage facilities. We would still rather you skip the unit than rent one you do not need.
Table of Contents
- What a She Shed Actually Is, and Why the Word Shed Matters to Your Building Department
- Convert the Shed You Have or Start With a New One
- The Permit Question: 120 Square Feet, 200 Square Feet, and Why Sources Disagree
- Zoning, Setbacks, HOAs, and Where the Shed Is Allowed to Sit
- Before You Clear Out an Old Shed: Rodents, Lead Paint, and Whatever Else Is Living in There
- The Real Floor Plan: What a 10x12 Shed Holds Once the Walls Are Finished
- Foundations, Floors, and Anchoring a Building People Will Sit In
- Insulation, Air Sealing, and the Condensation Problem
- Power to the Shed: Circuits, Trenches, and the Extension Cord Question
- Heating and Cooling a Small Detached Room Safely
- Windows, Doors, Skylights, and Lighting
- Idea 1: The Potting Shed and Garden Studio
- Idea 2: The Backyard Office
- Idea 3: The Craft, Sewing, and Art Studio
- Idea 4: The Reading Room and Library Nook
- Idea 5: The Yoga, Fitness, and Meditation Studio
- Idea 6: The Entertaining Shed and Backyard Bar
- Idea 7: The Music and Recording Room
- Why a She Shed Should Not Become a Guest Bedroom
- She Shed Organization Ideas for Under 150 Square Feet
- What Should Not Live in a She Shed Year-Round
- Exterior Design, Color, Landscaping, and Placement
- Insurance, Property Taxes, and What a She Shed Does at Resale
- What a She Shed Costs, and Why Published Numbers Disagree
- The Displacement Problem: Where the Mower, the Gas Can, and the Garden Chemicals Go
- Sizing a Storage Unit for What Your Shed Used to Hold
- When Renting a Storage Unit Is the Wrong Call
- Frequently Asked Questions About She Sheds
- Building a Shed You Will Actually Use
What a She Shed Actually Is, and Why the Word Shed Matters to Your Building Department
A she shed is a backyard outbuilding given over to one person’s retreat, hobby, or work instead of to storage. That is the entire concept. The term spread in the 2010s as a counterpart to the man cave, but the building type is much older: garden studios, writing huts, potting sheds, and backyard painting rooms have existed as long as people have had yards and wanted a door they could close.
For design purposes, the vague definition is fine. For permitting purposes, the word that matters is not “she.” It is “shed.” Building codes do not recognize a category called she shed. They recognize accessory structures and they recognize dwellings, and the permit exemption that lets most people put up a small shed without a building permit was written with a specific use in mind. In the International Residential Code, which most U.S. jurisdictions adopt in some edition, the exemption historically covered one-story detached accessory structures used as tool and storage sheds, playhouses, and similar uses. Section 3 explains how that language has changed and why it matters for a building with a desk, a heater, and a sofa in it.
The practical upshot is that the same 10x12 building can be three different projects depending on what you put inside it. Sorting out which one you are building before you buy anything will save you money and at least one unpleasant phone call:
- The furnish-only shed. You clean it, paint it, add a rug, a chair, shelving, and battery or small solar lighting. No new wiring, no plumbing, no heat. For many people this is the whole project, and in most places it involves no permit beyond whatever the shed itself required.
- The powered studio. You run a permanent electrical circuit from the house for lights, outlets, a fan, and a laptop. This almost always requires an electrical permit, even when the shed itself was exempt from a building permit, and it brings a trench across your yard with it.
- The year-round room. Insulation, interior finish, and a heating and cooling source so the room is usable in January and August. This is where the project starts to resemble finishing a small room, and where your building department may start asking whether the structure is still being used as a shed.
- The plumbed building. A sink, a wet bar, a toilet, or a potting sink with a drain. Plumbing permits, supply lines that have to be protected from freezing, and a drain that has to go somewhere legal. This is the tier that changes the budget most.
Each step up that list adds cost, permits, and inspection, and each step also adds genuine usefulness. The mistake is not choosing a higher tier. It is drifting into one without meaning to, which is how a weekend paint project becomes a six-month build with an electrician, an inspector, and a yard that looks like a pipeline went through it. If you are weighing a room inside the house instead, our guide to man cave ideas and the constraints that decide what fits walks through the basement, garage, and spare-room versions of the same decision.
Convert the Shed You Have or Start With a New One
Most she sheds begin with an existing storage shed, because it is already there and already paid for. That is a sensible starting point, provided the shed is actually worth converting. An hour of inspection answers the question, and it is much better to learn the answer before you spend money on the interior.
Evaluating the shed you already have
- The floor. Walk every square foot and feel for soft spots, sagging between joists, or bounce. Look underneath if you can: the skids or joists closest to the ground are where rot starts. A floor that is fine for a mower is not necessarily fine for a desk chair rolling back and forth eight hours a day.
- The roof. Look up from inside on a bright day for pinholes of light, and after a heavy rain for staining on the underside of the roof deck. Check the age of the shingles. Reroofing a finished shed later means working around a finished interior.
- The walls. Many prefab sheds use a single layer of engineered siding that serves as both sheathing and exterior finish. Look for swelling, delamination, or soft edges near the bottom where splashback hits. Push on the walls: a shed that racks when you lean on a corner has a structural problem, not a cosmetic one.
- Height. Measure the sidewall height and the height at the center. Prefab sheds are commonly sold with sidewalls from about 4 feet on low-profile styles up to 8 feet on taller models, with a gable roof adding height in the middle. A shed you have to stoop in will never feel like a room, no matter how it is decorated.
- The door. Measure the opening. A narrow shed door limits the furniture you can bring in, and replacing it with something wider means changing the framing above it.
- The material. Wood-framed sheds convert well. Metal and resin sheds are hard to insulate and finish, hard to fasten shelving to, and metal sheds in particular drip condensation from the underside of the roof. They make fine storage and poor rooms.
- The location. Note the distance to the house (it decides the length of any power trench), how the ground drains around the shed after rain, how much sun it gets in the afternoon, and whether any trees overhang the roof.
If the floor, roof, and walls are sound and the building is wood-framed and tall enough to stand in comfortably, convert it. If two or more of those fail, price a new building before you price repairs. A new shell is often less expensive than rebuilding the floor, reroofing, and replacing siding on an old one, and you get to choose the dimensions.
If you are buying new
The options run from flat-packed kits you assemble, to sheds delivered pre-built on a truck, to custom builds framed on site. Delivered sheds need a clear path for the truck or trailer and a level pad waiting for them, so check gate widths, overhead lines, and septic areas along the delivery route before you order.
Whatever the route, order the building for the room you want, not for storage. The upgrades that matter most, in rough order of value: taller sidewalls, more and larger windows, a wider or double door, no loft (lofts eat headroom), framing spaced so interior paneling and shelving have something to fasten to, and a floor built with pressure-treated joists. Adding a window or raising a wall after delivery is several times more expensive than choosing it on the order form.
The Permit Question: 120 Square Feet, 200 Square Feet, and Why Sources Disagree
Search for whether a shed needs a permit and you will find two numbers stated with equal confidence. Some guides say the model code exempts sheds up to 120 square feet. Others say 200. Both numbers are real, they come from different codes and different editions, and the one that applies to you is whichever one your city or county adopted, possibly amended. Here is how the disagreement arose, because understanding it tells you exactly what to ask.
Where the two numbers come from
The International Residential Code covers one- and two-family dwellings and the structures accessory to them. Its section R105.2 lists work that is exempt from a building permit. In older editions, the first item on that list exempted one-story detached accessory structures used as tool and storage sheds, playhouses, and similar uses, with a floor area limit of 120 square feet. During the 2007–2008 code development cycle, the International Code Council approved raising that limit to 200 square feet, and the 2009 and later editions of the IRC carry the higher number. The committee’s stated reasoning was that people need room to store their possessions.
The 2021 edition went a step further and removed the use language entirely. It now exempts, other than storm shelters, one-story detached accessory structures with a floor area not exceeding 200 square feet, without the reference to tool sheds and playhouses.
The 120-square-foot figure did not disappear, though. The International Building Code, which governs commercial construction, still uses 120 square feet in its parallel exemption. Some state and regional codes built on that model use it too; the building code administered by the Texas Windstorm Insurance Association for the Texas coast, for example, lists 120 square feet for tool and storage sheds. And many local jurisdictions that adopt the IRC amend the residential threshold downward, with figures such as 100, 120, and 144 square feet appearing in local codes. So a guide that says “the code exempts sheds under 120 square feet” is describing an older IRC edition, the commercial code, or a local amendment, and a guide that says 200 is describing the current model residential code. Neither tells you what applies on your street.
What the exemption does and does not do
Three points about the exemption are consistent across every edition we reviewed, and they matter more than the square footage:
- It exempts you from the permit, not from the code. The IRC states plainly that an exemption from permit requirements does not authorize work that violates the code or other local laws. When the ICC committee raised the limit to 200 square feet, it noted that the change simply exempts the structure from needing a building permit and does not exempt it from meeting the requirements of the code.
- It does not cover electrical, mechanical, or plumbing work. The proponents of the 200-square-foot change were explicit that any shed, regardless of size, provided with an electrical, mechanical, or plumbing system would still require permits and inspections for that work. Running power to a shed is permitted work almost everywhere, even when the shed is exempt.
- It does not exempt you from zoning. Setbacks, lot coverage, height limits, and homeowners association rules apply regardless of whether a building permit is required. Section 4 covers those.
The use question
Here is the part that is genuinely unsettled. In jurisdictions still using an edition with the “tool and storage sheds, playhouses and similar uses” wording, a reasonable building official could conclude that an insulated, heated studio with a desk and a sofa is not a use similar to a tool shed, and that the exemption therefore does not apply. In jurisdictions on the 2021 wording, the use language is gone, but local amendments frequently restore something like it, and the question of whether a structure is being used for occupancy rather than storage still shapes how officials read the project. We have not found a consistent national answer, and we do not think one exists. Enforcement and interpretation vary from office to office.
That is not a reason to avoid the project. It is a reason to ask before you build rather than after. A five-minute call to your local building department, with these four questions, settles it:
- What code edition and local amendments apply, and what is the size threshold for a shed without a building permit?
- Does that exemption apply if I plan to use the shed as a studio or office, with power and heat?
- What permits does running electricity to it require, and do you require a building permit for the shed before you will issue an electrical permit? In some jurisdictions an electrician cannot pull an electrical permit for a structure that has no permit of its own.
- Are there foundation, anchoring, or height requirements even for exempt sheds?
We are deliberately not going to tell you what your threshold is. It is set locally, it changes when your jurisdiction adopts a new code edition, and a specific number printed here would be wrong somewhere today and out of date everywhere eventually. The call is free, and the answer is the only one that counts.
Zoning, Setbacks, HOAs, and Where the Shed Is Allowed to Sit
Building codes govern how a structure is built. Zoning governs where it may stand and how big it may be, and it is administered by a different office with a different set of rules. A shed can be exempt from a building permit and still be illegal where you put it. The zoning questions to answer before you choose a spot:
- Setbacks. Minimum distances from side and rear property lines, and sometimes from the house itself. Accessory structures often get smaller setbacks than houses, but the numbers vary widely by district and by the size or height of the shed. Know where your property line actually is: a survey or plat is more reliable than the fence, which is frequently not on the line.
- Easements. Utility and drainage easements are commonly reserved along rear and side lot lines, and building over one can mean the utility has the right to remove what you built. Your plat or title documents show recorded easements.
- Maximum size and height for accessory structures. Separate from the building-permit threshold, many zoning codes cap the footprint or height of accessory buildings, sometimes as a fixed number and sometimes as a percentage of the house or the rear yard.
- Lot coverage. A cap on the share of the lot covered by structures and, in some places, by paving. The house, garage, driveway, patio, and a new shed can add up faster than people expect.
- Location on the lot. Many districts limit accessory structures to the rear yard, or prohibit them in front of the house or on the street side of a corner lot.
- Number of accessory structures. Some towns limit how many you may have, or require a permit for a second shed even when each one is under the size exemption. This matters later, in Section 25, if you plan to add a small utility shed for the equipment the she shed displaces.
- Flood zones. If your lot is in a mapped flood hazard area, accessory structures carry their own requirements. Ask your community’s floodplain administrator before building.
- Septic fields and wells. Do not build over a drain field, and keep clear of any setback your health department requires from a well or septic system.
Then there is the homeowners association, if you have one. Covenants can restrict shed size, height, materials, color, and visibility from the street, and many require architectural review approval before anything is built. In most of the country an HOA restriction is enforceable even when the city would allow the same shed, so read your covenants and get written approval if they require it. It is much easier to pick a paint color the committee likes than to repaint.
The right order is zoning first, then the building department, then the purchase. A phone call to the planning or zoning office, with your address, the shed dimensions, and the spot you have in mind, typically answers the first set of questions in minutes. Most of the she shed regrets we hear about involve a shed that was bought and delivered before anyone asked.
Before You Clear Out an Old Shed: Rodents, Lead Paint, and Whatever Else Is Living in There
An old storage shed is a sheltered, rarely disturbed, food-adjacent building, which makes it one of the most reliable rodent habitats on a residential property. Before you drag everything out onto the lawn, there is a right way to go about the first hour, and it is close to the opposite of what most people do by instinct.
The CDC protocol for rodent droppings
The instinct is to grab a broom or a shop vacuum. Do not. The Centers for Disease Control and Prevention is explicit that sweeping or vacuuming rodent urine, droppings, or nesting material can put tiny virus-containing droplets into the air, and that breathing contaminated air is the main way these diseases spread to people. Deer mice, common in sheds and outbuildings across much of the country, are a carrier of hantavirus. The CDC’s cleanup sequence:
- Air it out first. For a shed, cabin, barn, or other closed outbuilding, open all doors and windows for at least 30 minutes before you start, and leave the area while it ventilates.
- Put on rubber or plastic gloves.
- Spray, do not disturb. Spray droppings, urine, and nesting material with a bleach solution or an EPA-registered disinfectant until very wet, and let it soak for 5 minutes or as long as the disinfectant label directs. The CDC’s current bleach recipe is 1.5 cups of household bleach per gallon of water, roughly one part bleach to nine parts water. Some older CDC handouts still circulating give a one-to-ten ratio; the current page is the one to follow. Mix it fresh.
- Wipe up with paper towels and throw them in a covered garbage can.
- Then mop or sponge the area with disinfectant. Only after the wet cleanup is it reasonable to treat the floor like any other dirty floor.
The CDC also notes that heavy infestations call for additional precautions beyond this household protocol. If the shed is badly infested, or you are unsure, that is a job for a pest professional rather than a Saturday morning.
Lead paint on older sheds
Sheds on older properties were frequently painted with whatever was left over from painting the house, and before 1978 that could have been lead-based paint. The EPA advises that homes built before 1978 may contain lead-based paint and that the risk comes mainly from the dust generated when painted surfaces are sanded, scraped, or cut. If your shed is old enough, or you cannot tell how old the paint is, treat it the way the EPA recommends treating any pre-1978 surface: have it tested before you sand or scrape, and if you cannot determine its age, assume lead is present and use lead-safe work practices. The EPA’s Renovation, Repair, and Painting rule generally applies to contractors rather than to homeowners working on their own property, but the dust does not care who is holding the sander, and the EPA recommends that do-it-yourselfers avoid the same high-dust practices the rule prohibits for professionals.
The rest of the inventory
- Stinging insects and spiders. Wear gloves and long sleeves, and look before reaching into dark corners, under shelves, and into stacked pots. Wasp nests under the eaves and in the door frame are common in sheds that sit closed for weeks.
- Old chemicals. Pesticides, herbicides, pool chemicals, and solvents with faded labels. The EPA’s guidance is that if you cannot identify what is in a container or how old it is, you should follow safe disposal procedures rather than keep it. Most counties run household hazardous waste collection for exactly this.
- Old fuel. Gasoline that has sat for a season or more degrades and is its own disposal question. Our guide to storing gasoline safely covers containers, stabilizer, and where fuel should and should not be kept.
- Unknown building materials. If an older shed has cement-board siding or roofing of uncertain age, have it identified before you cut, drill, or break it.
None of this is a reason to abandon the project. It is a reason to spend the first hour of it differently, and to find out what is in the shed before you decide what the shed will become.
The Real Floor Plan: What a 10x12 Shed Holds Once the Walls Are Finished
Sheds are sold by their exterior dimensions. A 10x12 shed is 10 feet by 12 feet measured on the outside, and that is the number on the listing, the invoice, and the permit application. It is not the room you will be sitting in. Once you frame out the interior, insulate, and put a finished surface on the walls, every wall takes a bite out of the floor, and in a small building the bites add up fast.
The wall-thickness arithmetic
A typical wood-framed shed wall is a 2x4 stud, which is 3.5 inches deep, plus exterior siding or sheathing, plus whatever interior finish you add: paneling, plywood, or drywall. Call it roughly 4.5 to 5 inches for a finished, insulated wall, and more if you add rigid foam on the inside. Two walls per direction means each interior dimension shrinks by about 9 to 10 inches. Using 5 inches per wall, here is what the common sizes actually give you:
- 8x10 shed (80 square feet listed): about 7 feet 2 inches by 9 feet 2 inches finished, roughly 66 square feet. About 18 percent of the listed floor is gone.
- 10x12 shed (120 square feet listed): about 9 feet 2 inches by 11 feet 2 inches finished, roughly 102 square feet. About 15 percent gone.
- 10x16 shed (160 square feet listed): about 9 feet 2 inches by 15 feet 2 inches finished, roughly 139 square feet. About 13 percent gone.
- 12x16 shed (192 square feet listed): about 11 feet 2 inches by 15 feet 2 inches finished, roughly 169 square feet. About 12 percent gone.
- 12x20 shed (240 square feet listed): about 11 feet 2 inches by 19 feet 2 inches finished, roughly 214 square feet. About 11 percent gone, and over the permit exemption threshold almost everywhere.
The pattern is the useful part: the smaller the shed, the larger the share of it you lose. An 8x10 gives up nearly a fifth of its floor to walls. That is the single best argument for buying one size larger than you think you need, if zoning and the permit threshold allow it.
Then subtract the things that are not furniture
From the finished floor, take out the space nothing can occupy:
- The door swing. A 36-inch door swinging into the room sweeps about 7 square feet that must stay clear. An outswing door gives that back, which is one reason many shed doors open outward.
- A walking path. Plan on a clear path roughly 36 inches wide from the door to wherever you sit or work. In a 10x12, that path alone is often 15 to 20 square feet.
- Equipment clearances. A space heater needs a 3-foot clear zone around it for fire safety (Section 10). A mini-split indoor unit needs clear air in front of it. A window you intend to open needs its sill clear.
What the furniture actually needs
Working footprints, including the clearance you need to use each piece. These are typical dimensions; measure your own furniture before you commit.
- Desk and chair: a 48-by-24-inch desk plus about 36 inches behind it to pull the chair out, roughly 4 feet by 5 feet, or 20 square feet.
- Reading chair and side table: an armchair around 32 by 34 inches, a small side table, and room for your legs, roughly 15 to 18 square feet.
- Loveseat: commonly around 58 by 34 inches, plus about 18 inches in front of it before a coffee table or the walking path.
- Potting bench: about 48 by 24 inches, plus 30 inches of standing room in front.
- Craft or cutting table: a 60-by-30-inch table is common, and quilters who want to walk all four sides need roughly 3 feet of clearance around it, which a 10x12 cannot give.
- Yoga or stretching: a mat is roughly 2 feet by 6 feet, but using it with arms extended takes a clear rectangle closer to 6 by 8 feet.
- Shelving: 12-inch-deep shelves along a wall cost only 1 square foot per running foot of wall, which is why vertical storage is the whole game in a small shed (Section 20).
A worked example: the 10x12 office with a reading corner
Start with roughly 102 finished square feet. Take out about 9 square feet at the entry for the door and a place to stand. Put a desk and chair under the window on the far wall: 20 square feet. Put an armchair and side table in one corner: about 17. Run a 12-inch-deep shelf wall along one long side, 8 feet of it: 8 square feet. Keep a 3-foot path from the door to the desk: another 15 to 18, partly overlapping the entry. That leaves roughly 30 square feet of scattered floor for a rug, a plant, and a rolling cart. It works, and it is comfortable.
Now try adding a twin daybed so the room can double as a lounge. A twin mattress is about 39 by 75 inches, around 20 square feet, plus room to get onto it. There is no longer space for both the daybed and the reading chair, and the path narrows. The lesson generalizes: a 10x12 she shed supports one primary activity and one secondary one. A 12x16 supports two primary activities, or one generously. Trying to fit three uses into 100 square feet produces a room that does none of them well.
Height is part of the floor plan
Measure the sidewall height and the center height before you plan anything overhead. An adult’s overhead reach is typically about a quarter more than their standing height, which puts a person who is 5 feet 6 inches tall near 6 feet 10 inches with arms raised, and a 6-foot person near 7 feet 6 inches. That matters for yoga, for hanging plants, and for any pendant light over a walking path. Lofts in barn-style sheds are useful for storage and often leave too little headroom underneath to stand upright, so plan the room so the loft sits over something low, like a bench or a desk.
Foundations, Floors, and Anchoring a Building People Will Sit In
A storage shed can sit on almost anything level, because a lawn mower does not mind a slightly soft corner or a floor that flexes. A room is less forgiving. You will notice a bouncy floor every time you walk to the door, a sagging corner will eventually rack the door frame so it sticks, and water pooling under the building will rot it from the bottom up. The foundation decisions are unglamorous and they determine how long everything above them lasts.
Common foundation types for sheds
- Skids on a gravel pad. The standard for prefab sheds. The shed sits on pressure-treated timbers resting on a compacted, level gravel base that extends beyond the footprint. Gravel drains, lets air move under the floor, and is easy to level. For a she shed, this is usually the right answer as long as the pad is properly built rather than dumped.
- Concrete blocks or piers. Common for sheds on uneven ground. They raise the building for airflow, but they need to rest on a firm, compacted base, and a block sitting directly on topsoil will settle.
- A concrete slab. Durable and solid, with no airflow underneath. In many jurisdictions a permanent slab can change how the building is treated for permitting or assessment, so ask before you pour. A slab also makes the floor the coldest surface in the room unless it is insulated.
- Frost-depth footings. Standard for houses, unusual for sheds, and typically not required for an exempt accessory structure. If your local rules or your ambitions push you toward footings, you are designing something closer to a small building than a shed, and the budget will reflect that.
Getting the floor right
Keep wood off soil. Skids and any framing close to the ground should be pressure-treated lumber rated for ground contact. Leave a gap under the floor for air to move, which is a large part of why skid-and-gravel sheds last. If you are insulating the floor, fill the joist bays from below and close them with a rodent barrier such as hardware cloth, because an insulated floor cavity with a gap in it is a mouse condominium.
Test the floor for stiffness before you finish it. If it bounces between joists, add blocking or a second layer of subfloor now, while that is still easy. A floor that is fine for storage often is not fine for a desk chair, a sewing machine table, or someone doing yoga.
Drainage and anchoring
Grade the ground so water moves away from the shed on every side, not toward it. If the shed has gutters, send the downspouts somewhere useful rather than next to the pad, and make sure the shed roof is not dumping water toward your house or your neighbor’s yard.
In hurricane-exposed and high-wind regions, which include coastal parts of North and South Carolina, Georgia, and Texas, many jurisdictions require sheds to be anchored even when they are exempt from a building permit. Anchors screwed or driven into the ground and strapped to the frame are the typical approach, and prefab manufacturers usually offer a kit rated for their building. Ask your building department what applies. A shed full of furniture, equipment, and glass is worth anchoring regardless of whether anyone requires it.
Insulation, Air Sealing, and the Condensation Problem
An uninsulated shed is not a room. It is a box that follows the outdoor temperature, and in direct sun it runs hotter than the air outside because the roof and walls absorb heat and have nowhere to shed it. In winter in the northern markets, an uninsulated shed is simply cold, and no space heater sized for a safe circuit will change that for long. If you want to use the room outside of pleasant spring and fall afternoons, insulation is not optional, and it has to happen before the interior finish goes on.
Where the insulation goes
- Walls. Batts or mineral wool in the stud bays, or rigid foam board. Mineral wool resists moisture and pests better than fiberglass and fits snugly between studs.
- Roof. In a vented roof, insulation goes between the rafters with baffles that keep an air channel open from the eaves to the ridge vent. In an unvented roof, closed-cell spray foam applied to the underside of the roof deck is the usual approach and is typically a professional job.
- Floor. Between the joists, closed from below with a rodent barrier, as Section 7 describes. A cold floor makes the whole room feel cold even when the air is warm.
- The door and windows. A hollow shed door with daylight around its edges will undo much of the insulation in the walls. Weatherstrip it, add a door sweep, and consider replacing a flimsy door entirely.
In a building this small, air sealing matters as much as insulation value. Gaps at the sill, around the door and window frames, at the ridge, and where wiring enters leak far more heat than their size suggests. Caulk and foam the gaps before the interior finish goes up.
Condensation: why sheds drip
Warm indoor air carries water vapor: from your breath, from watering plants, from a kettle, from a wet umbrella. When that warm air meets a cold surface, the vapor condenses into water. In a shed the cold surfaces are everywhere: an uninsulated metal roof, single-pane windows, the back of thin siding on a cold night. Metal roofs are the classic case, and people are regularly surprised to find water dripping from the ceiling of a shed with no roof leak at all.
The fixes are the same ones that make the room comfortable: insulate the roof so its underside stays warm, keep interior air from reaching cold surfaces inside the wall and roof cavities, and ventilate. Which side of the wall assembly should carry a vapor retarder depends on your climate: the right answer in Wisconsin is not the right answer on the Gulf Coast, and a vapor barrier installed on the wrong side can trap water in the wall. Ask your local building department or a reputable insulation supplier what works for your climate zone rather than copying a video filmed somewhere else.
Ventilation is the other half. Operable windows on opposite walls, a small exhaust fan, or roof vents at the soffit and ridge let water vapor leave the building. A potting shed, where you are watering plants and wetting soil, needs more ventilation than an office does. So does any shed where you run a kettle, dry wet gear, or keep a large collection of potted plants.
Power to the Shed: Circuits, Trenches, and the Extension Cord Question
Electricity is the upgrade that turns a shed into a usable room, and it is the one most she shed guides dispose of in a sentence. It deserves more, because the decisions you make before the trench is dug decide what the shed can ever become. To be clear about scope: what follows is planning arithmetic to help you have an informed conversation with a licensed electrician and to understand the quote you receive. It is not installation guidance. Running power to a detached building is permitted, inspected work in nearly every jurisdiction, including where the shed itself needed no permit.
The four levels of power
- No wiring. Battery-powered and rechargeable lighting. No permit, no trench, and genuinely enough for a potting shed or a daytime reading room.
- A small solar kit. A panel, a charge controller, and a battery for lights, phone charging, and a fan. Small kits are simple; larger systems with inverters and batteries are electrical installations with their own permitting and safety requirements.
- A single 120-volt branch circuit from the house. The common she shed setup: lights, a few outlets, a laptop, a fan, and small appliances.
- A 240-volt feeder to a small subpanel in the shed. Several circuits, enough for a mini-split heat pump, a heater, a kiln, or a refrigerator alongside everything else.
The circuit arithmetic
Watts equal volts times amps, so a 120-volt, 20-amp circuit carries 2,400 watts at its maximum. You cannot plan to the maximum. The electrical code treats a load running three hours or more as continuous and limits it to 80 percent of the circuit rating, which leaves about 1,920 usable watts on a 20-amp circuit and about 1,440 on a 15-amp circuit.
Now put a typical 1,500-watt space heater on that 20-amp circuit. It alone uses about 78 percent of the continuous capacity, leaving roughly 420 watts for everything else. LED lighting, a laptop, and a phone charger fit in that margin. An electric kettle, a hair dryer, a sewing iron, or a second heater does not, and the breaker will tell you so. The practical conclusion: if you plan to heat the shed electrically, a single small circuit is the wrong design. Plan either for a feeder with more capacity or for a heat pump, which moves heat far more efficiently than a resistance heater.
The trench, and why depth locks in your options
Underground wiring has minimum burial depths set by Table 300.5 of the National Electrical Code, measured from the top of the cable or conduit to finished grade. In a typical residential yard, the commonly cited minimums are:
- 24 inches for direct-burial cable such as UF cable.
- 18 inches for listed nonmetallic conduit such as PVC.
- 6 inches for rigid metal conduit.
- 12 inches for a residential branch circuit of 120 volts or less, protected by a GFCI and rated 20 amps or less.
That last row is the popular one, because a 12-inch trench is far less work than a 24-inch one. It is also the row that quietly limits the shed forever. It only applies to a single small 120-volt GFCI-protected circuit. The moment you want a 240-volt feeder for a heat pump or a subpanel, the shallow trench no longer qualifies and you are digging again. If there is any chance the shed will become a year-round room, ask your electrician about burying conduit sized for a future feeder now, at the deeper depth, even if you start with one circuit. The trench is the expensive, disruptive part. The conduit is cheap.
Before anyone digs, call 811, the national call-before-you-dig number. Utilities will mark buried lines at no charge, and most states require you to wait a set number of days for marking before excavating. Also expect the electrician to size the conductors for the length of the run: on a long trench out to the back of a deep lot, voltage drop is a real design consideration and can call for heavier wire than the load alone suggests.
Two code items that show up in the quote
- GFCI protection. Ground-fault protection is required for outdoor receptacles, and current code editions also require it for receptacles in accessory buildings used for storage or work areas. Many electricians protect the whole shed circuit as a matter of course.
- A disconnect at the shed. Current code generally requires a means to shut off power at or near a detached building served by a branch circuit or feeder, so you can de-energize the shed without walking back to the house panel. A feeder to a subpanel also brings grounding requirements at the building itself.
The extension cord question
Plenty of she sheds run on an orange cord across the lawn. It works until it does not. The electrical code does not permit flexible cords to substitute for the fixed wiring of a structure, extension cords are rated for temporary use, and a cord across a yard gets stepped on, run over by the mower, chewed, and left out in the rain. NFPA and the Consumer Product Safety Commission both advise plugging space heaters directly into a wall outlet rather than into an extension cord, because the cord can overheat. A cord from the house to a heater in the shed is exactly the arrangement those warnings describe. Use a cord for a one-afternoon project if you must, and treat it as a reason to schedule the electrician.
Internet
Wi-Fi from the house rarely reaches a shed reliably. The options are a mesh network node or an outdoor-rated access point aimed at the shed, or a hardwired data cable. If you are trenching for power anyway, a data cable can run in the same trench in its own conduit, since code requires separation between power and communications wiring. Pulling cable while the trench is open costs a fraction of what a second trench would.
Heating and Cooling a Small Detached Room Safely
Heat is where a she shed project carries its real risk. The room is small, it is often built of wood, it is frequently filled with fabric, paper, and craft supplies, it is usually out of sight of the house, and the tempting solution is a portable heater. That combination deserves more thought than a paint color.
What the fire data says about portable heaters
According to the National Fire Protection Association, fire departments responded to an estimated average of about 37,000 home fires involving heating equipment per year in 2020–2024. Space heaters and heating stoves accounted for about 30 percent of those fires, but for about 73 percent of the deaths and about 70 percent of the injuries. NFPA’s figures shift somewhat from one reporting period to the next, and earlier reports put the space heater share of deaths even higher, but every edition tells the same story: the portable heater is a small share of heating fires and most of the harm. The leading circumstance is a heater placed too close to something that can burn. NFPA’s standing advice is to keep anything that can burn at least 3 feet away from heating equipment.
In a 10x12 room, a 3-foot clear circle around a heater is a meaningful piece of floor, and it has to stay clear of the sofa, the curtains, the fabric bins, and the dog bed. If you use an electric space heater at all:
- Choose one with automatic tip-over and overheat shutoff and a listing mark from a recognized testing laboratory.
- Plug it directly into a wall outlet, never into an extension cord or a power strip, and give it the circuit capacity Section 9 describes.
- Turn it off when you leave the shed. A heater running in an empty outbuilding no one can see from the kitchen window is the scenario to avoid entirely.
- Install a smoke alarm in the shed, and test it on the same schedule as the ones in the house.
Fuel-burning heaters and wood stoves
Portable propane and kerosene heaters that vent into the room produce carbon monoxide, and a small, well-sealed, insulated shed is exactly the kind of space where that becomes dangerous quickly. We would not use an unvented fuel-burning heater in a closed she shed. If any fuel-burning appliance is present, a carbon monoxide alarm is not optional.
Some she shed galleries suggest a small wood-burning stove for atmosphere. A wood stove in a shed is a real mechanical installation: a listed appliance, the manufacturer’s required clearances to combustible walls, a noncombustible hearth, a properly installed chimney, a permit in most jurisdictions, and a call to your insurer, who will want to know about it. Done properly it can work. Done as a weekend decorating project in a wood building full of textiles, it is a genuine hazard.
The option that fits most she sheds: a ductless mini-split
A ductless mini-split heat pump is an outdoor unit connected by a small refrigerant line set to an indoor unit on the wall. It heats and cools, it has no open flame and no exposed hot element, and it moves heat rather than generating it from resistance, which makes it far more efficient than a space heater. ENERGY STAR specifically lists outbuildings such as sheds, barns, and garages among the applications where mini-splits make sense because extending ductwork is difficult. The Department of Energy notes that the outdoor unit can generally sit up to 50 feet from the indoor unit, and some single-zone models run on a 115/120-volt circuit, though many need 240 volts.
One caution specific to sheds: the heating and cooling load of a well-insulated 100-square-foot room is small, and the smallest available units can be larger than the room needs. An oversized unit cycles on and off rapidly and handles comfort poorly. Ask the installer to size the system from an actual load calculation rather than from the square footage alone. And note the prerequisite: a mini-split in an uninsulated, leaky shed will run constantly and still struggle, which is why Section 8 comes first.
Summer is often the harder problem
In Texas, Georgia, the Carolinas, and much of the South, the she shed that gets abandoned is usually abandoned in July, not January. A small building in afternoon sun can become uncomfortable within an hour. The measures that help, in rough order of cost: shade from trees or an awning on the west side, a light-colored roof, roof ventilation, insulation, cross-ventilation through windows on opposite walls, a ceiling or wall fan, and finally active cooling from a window unit or a mini-split. A window air conditioner needs its own circuit capacity and a window sized for it, so plan it with the electrical work rather than after.
Windows, Doors, Skylights, and Lighting
Natural light is what separates a she shed that feels like a room from one that feels like a closet, and it is the most photographed feature in every gallery. It also involves more structure than the photos suggest, because every opening in a small framed building is a hole in a wall that is holding the building up.
Windows and orientation
Think about what the light is for. North-facing windows give the steadiest, most even light through the day, which is why painters and anyone doing color work have long preferred them. East-facing windows bring morning sun, pleasant for a potting bench or a coffee-and-journal routine. West-facing windows bring hot afternoon sun that fades fabric and books and overheats small rooms in the South. South-facing glass gathers welcome winter sun and needs shading in summer. Two windows on opposite walls give you cross-ventilation, which matters more in a shed than almost anywhere in a house.
Glass in and near doors deserves safety glazing. Residential codes treat glazing in doors and in certain locations near them as hazardous locations that require tempered or laminated glass, because that is where people fall into or push against glass. Even if your exempt shed is never inspected, tempered glass in French doors and in a window beside the door is the right choice in a building where you may be carrying pots, trays, or a cup of coffee.
French doors, wider openings, and walls
Swapping a narrow shed door for double or French doors is one of the most satisfying upgrades, and it is a framing job: a wider opening needs a properly sized header to carry the roof load across it. On some prefab sheds, the wall is designed around a specific door width, so ask the manufacturer or a carpenter before cutting.
One suggestion that circulates in she shed galleries is removing a wall entirely to open the shed to the garden. On a framed shed, the walls are the structure. Sheathed walls are what keep the building from racking sideways in wind and what carry the roof. Taking one out is a structural change that needs a replacement for what that wall was doing, such as posts, a beam, and bracing, and in a wind-exposed location it needs more thought than that. A wall of large windows or a pair of wide doors gets most of the effect without asking the building to stand on three legs.
Skylights
A skylight floods a small room with light, and it is also a penetration in the roof, the most common place for a small building to leak. Use a unit designed for the roof type with a proper flashing kit, and consider that a skylight on a sunny roof adds substantial heat in summer. A small skylight on the north slope, or a tubular daylighting device, gives light with less heat.
Artificial light, and a word about candles
Layer the lighting as you would in any room: general light from a ceiling fixture or a couple of wall sconces, task light where you work, and accent light for atmosphere. LED fixtures keep the load on your shed circuit trivial. If you hang a chandelier or pendant, place it over a table or a seating area rather than over the walking path, because low sidewalls leave little room between a fixture and a forehead. String lights should be rated for the location where you use them and hung with clips, never stapled through the cord.
Candles appear in nearly every she shed photo, and they belong on the list of things to think twice about in a small wooden building full of textiles. NFPA data shows U.S. fire departments responding to an annual average of roughly 5,900 home structure fires where candles were the heat source, and more than half of candle fires start when something that can burn, such as furniture, bedding, curtains, or decorations, is too close to the flame. NFPA recommends keeping candles at least 12 inches from anything that can burn and never leaving one unattended. In a she shed, where you are likely to walk back to the house and forget, battery-powered flameless candles give the same look with none of the risk.
Idea 1: The Potting Shed and Garden Studio
Best for: gardeners who start seeds, repot, and want a place to work with soil that is not the kitchen counter. Works in 8x10 and up.
The potting shed is the she shed idea with the longest history and the most practical logic, because it keeps working near where the work happens. It is also the idea that puts the most water, soil, and chemistry into a small wooden building, which shapes nearly every design choice.
- The bench. The potting bench is the heart of the room. Most people find a working height somewhere around 34 to 38 inches comfortable for standing work, roughly kitchen-counter height, with the exact number depending on your height. A bench under a window gives you light to work by; a bench with a lower shelf holds bagged soil and pots off the floor.
- Water. A plumbed utility sink is the upgrade everyone wants and the one that brings a plumbing permit, a supply line that must be protected from freezing or drained for winter in the northern markets, and a drain that has to go somewhere legal. Many gardeners are better served by a hose bib or rain barrel just outside the door and a plastic tub on the bench.
- Floors that tolerate water. Soil and water will end up on the floor. Sheet vinyl, rubber matting, or sealed flooring survives it; bare plywood and carpet do not.
- Grow lights and heat mats. Seed starting under lights is one of the best reasons to power a potting shed. Grow lights and seedling heat mats are modest loads on a single circuit, but they run for many hours a day, so count them as continuous load in the Section 9 arithmetic.
- Ventilation. Wet soil, watered plants, and a closed door put a lot of water vapor into a small space. Plan for the ventilation described in Section 8, or the room will sweat.
The chemical conflict
Here is the design problem specific to garden sheds. The EPA’s guidance for storing pesticides is to keep them out of reach of children and pets, in their original labeled containers, in a locked cabinet in a well-ventilated utility area or garden shed, and never in cabinets with or near food. A traditional garden shed meets that description. A garden studio with a tea station, a snack basket, a small refrigerator, and a reading chair does not, because it has become a place where you eat and spend time.
The fix is separation. Pesticides, herbicides, and concentrated fertilizers go into a locked, ventilated cabinet that is not in the room where you sit and eat, ideally in a small separate utility structure or an exterior lockable cabinet. Section 25 covers where that cabinet and the rest of the shed’s former contents can go.
Greenhouse hybrids
Replacing part of the roof or a wall with clear polycarbonate turns a potting shed into a greenhouse shed, which is wonderful for plants and demanding for everything else. Far more glazing means far more solar heat in summer and far more heat loss in winter, and furniture, books, and electronics do not enjoy either. If the building is primarily for plants, go ahead. If it is primarily for you, keep the glazing to generous windows and let the plants sit near them.
Idea 2: The Backyard Office
Best for: people who work from home and need a door, a commute measured in steps, and a line between work and the rest of the house. Works well in 10x12; comfortable in 12x16.
The backyard office is the most practical she shed idea for a large number of households, and it is the one where the building details matter most, because you will spend hundreds of hours a year in it. A few things determine whether it works:
- Year-round comfort. An office has to be usable on the coldest and hottest workdays, which means insulation and a real heating and cooling source (Sections 8 and 10). An office you can only use in May and October is a hobby room.
- A reliable connection. Video calls over a marginal Wi-Fi signal are miserable. Plan the network with the power, per Section 9.
- Video call lighting. Face a window or put a soft light in front of you, not behind you. A window behind the desk turns you into a silhouette on every call.
- Sound. Rain on an uninsulated metal roof is loud enough to end a meeting. Insulation helps, and so does a rug.
- The desk. A desk around 30 inches deep gives room for a monitor at a comfortable distance plus a keyboard. Standard 24-inch desks push the screen close. Section 6 shows how the desk and chair fit in a 10x12.
- Security. A shed is easier to break into than a house, and a laptop and monitor visible through the window is an invitation. A solid door, a real lock, and window coverings help, and so does bringing the laptop in at night.
The tax question, stated carefully
People often ask whether a backyard office is deductible. The IRS rules for business use of the home include a specific provision for separate structures. IRS Publication 587 states that you can deduct expenses for a separate free-standing structure, such as a studio, workshop, garage, or barn, if you use it exclusively and regularly for your business, and that such a structure does not have to be your principal place of business or a place where you meet clients. That is a more forgiving test than the one that applies to a room inside the house.
The word doing the work is exclusively. A she shed that is an office on weekdays and a craft room on weekends, or where the family watches movies on Friday nights, is not used exclusively for business. A hobby is not a business for this purpose. And employees who work from home for an employer should read the publication’s current eligibility rules carefully before assuming any deduction applies, because the treatment of employee expenses has changed with recent tax legislation. We are not tax advisors, the rules and the forms change, and this is exactly the kind of question to bring to a tax professional with Publication 587 open in front of both of you.
Zoning and insurance for a business shed
If clients will visit, check your local home occupation rules, which can limit client visits, signage, parking, and employees. And tell your insurance agent. As Section 23 explains, standard homeowners policies commonly treat a detached structure used for business very differently from one used for storage or personal use.
Idea 3: The Craft, Sewing, and Art Studio
Best for: quilters, sewists, painters, paper crafters, and anyone whose supplies have outgrown the house. Needs 10x12 at minimum; 12x16 is far more comfortable for a large cutting table.
The craft studio is the she shed idea people most often mean, and the one where the gap between the photo and the working room is widest. A craft room lives or dies on three things: surfaces, light, and storage. Our guide to craft room ideas and layouts for serious crafters covers the room-inside-the-house version in depth; here is what changes when the room is a shed.
- Build around the primary craft. A quilter needs a large cutting surface and a pressing station. A painter needs an easel near good light and a surface for palettes. A paper crafter needs a large flat table with storage above and below it. Section 6 showed that a 10x12 supports one primary activity; choose which one before you buy furniture.
- Surface height. A cutting table at or slightly above counter height saves your back during long sessions at a rotary cutter. Many crafters raise a standard table on bed risers or buy a counter-height work table.
- Light for color work. North light through a window, plus task lighting with a high color rendering index, so the thread you choose in the shed matches the fabric when you see it in daylight.
- Power. A sewing machine is a modest load. An iron is not: most household irons draw more than 1,000 watts, which on a single 20-amp circuit collides with a space heater immediately. Plan the circuits around the iron.
- Ventilation. Spray adhesives, fixatives, resin, solvent-based paints, and soldering all need an exhaust path to the outdoors, not just an open door.
- Kilns. A pottery or glass kiln needs a dedicated circuit, often 240-volt, the manufacturer’s required clearances from walls, a noncombustible surface underneath, ventilation, and in many places a permit and an insurer who knows about it. It is a legitimate she shed use and one to plan with an electrician from the start.
The supply problem
Here is the craft-studio trap. The reason many people build a she shed is that the supplies no longer fit in the house, and the natural response is to move all of them into the shed. But a shed that is not heated and cooled year-round is a harsh place for a lot of craft supplies. Acrylic and latex paints can be ruined by freezing. Adhesives, glues, and resins carry storage temperature limits on their labels. Fabric, yarn, and batting attract mice and moths in an outbuilding. Paper curls and yellows with heat. Section 21 lists what should not stay in a she shed year-round, and the practical answer for most crafters is a working set of supplies in the studio with the deep stash kept somewhere with stable temperatures.
Idea 4: The Reading Room and Library Nook
Best for: readers who want a quiet room with a door, a view, and nothing to do but read. Works beautifully in an 8x10.
The reading room is the simplest she shed to build and one of the most satisfying to use, because it asks almost nothing of the building: a good chair, good light, a small table, a window, and quiet. It is also the idea most likely to go wrong in one specific way, which is moving the book collection into it.
The Library of Congress advises against storing objects of value in poorly insulated or uninsulated areas such as basements, attics, and garages, because of the temperature extremes and the higher risk of leaks and floods, and it recommends a cool, stable environment for books. An uninsulated shed is harsher than any of those three. A shed that is fully insulated and conditioned year-round is a different story, but a room you heat only when you are sitting in it still swings through wide temperature ranges when you are not. So:
- Keep a working shelf, not the library. A shelf of paperbacks you are reading or about to read, rotated from the house, gives the room its character without putting anything irreplaceable at risk.
- Keep inherited, signed, rare, or sentimental books in the house. The same goes for photo albums and family papers.
- Keep books off exterior walls and out of direct sun. Sunlight fades spines quickly, and the back of a bookcase against a cold exterior wall is where condensation shows up first.
For the room itself: one excellent chair beats two adequate ones. A reading lamp with warm light, in the 2700K to 3000K range, reads as residential and comfortable. A window seat with a lift-up lid gives you a place to sit and a place to store blankets. A small side table within reach holds the tea. And the smallest she sheds make the best reading rooms, because an 8x10 with one window and one chair feels deliberate rather than empty.
Idea 5: The Yoga, Fitness, and Meditation Studio
Best for: a daily practice that deserves a quiet room with no laundry in sight. Needs 10x12 for yoga with room to move; a 12x16 for fitness equipment.
A shed studio for yoga, stretching, meditation, or light fitness is an excellent use of a backyard building, because the room’s isolation is the point. The design questions are physical:
- Clear floor area. A mat is about 2 by 6 feet, but a practice with arms and legs extended needs a clear rectangle closer to 6 by 8 feet, with nothing to kick or knock over. In a 10x12, that is roughly half the finished floor.
- Overhead clearance. Section 6 covered overhead reach: roughly a quarter more than your standing height. Raised-arm poses, overhead stretches, and anything involving a jump need that height across the whole practice area, not just at the ridge. Low sidewalls on a gable shed can rule out overhead movement near the walls.
- The floor. Level and stiff, with a surface that is comfortable and grippy: cork, rubber, or a quality foam or rubber mat system over a solid subfloor. A bouncy shed floor is distracting in balance poses and unpleasant under weights.
- Weights and floors. Dumbbells and kettlebells are fine. A loaded barbell dropped on a shed floor framed on skids is a way to discover how strong the floor is. If heavy lifting is the plan, the building needs a floor designed for it or a slab.
- Air. Exercise heats a small closed room quickly. Cross-ventilation and a ceiling or wall fan make more difference here than in any other she shed use, and they are cheaper than oversizing the cooling.
- Mirrors. A wall mirror helps with form and makes a small room feel larger. Fasten it securely to framing, not just to thin paneling, especially in a building that shifts slightly with the seasons.
For meditation, the requirements shrink to quiet, comfort, and light: a cushion or low chair, a rug, soft light on a dimmer, and a window that looks at something green. The sound of rain on the roof becomes a feature. That is the rare she shed idea where less building is genuinely better.
Idea 6: The Entertaining Shed and Backyard Bar
Best for: households that host outside often and want a base for it. A 10x12 seats four to six people comfortably; the patio outside is what makes it a party.
The entertaining shed is the she shed turned outward: a bar, a serving window, a place to sit, and a patio that does most of the work. The key decision, as with any home bar, is whether it has plumbing.
- The dry bar. A counter, a beverage refrigerator, glassware storage, good lighting, and seating. No supply line, no drain, and a much simpler permit picture. It covers most of what a backyard bar is actually used for.
- The wet bar. A sink adds a supply line, a drain, a plumbing permit, and a winter problem: a supply line to an outbuilding in the northern markets has to be protected from freezing or drained every fall. Ask yourself how often you will use a sink 60 feet from the kitchen sink before paying for one.
- The refrigerator circuit. A beverage refrigerator runs around the clock and has a startup surge. It belongs on a circuit that is not also feeding a space heater and a blender.
- The serving window. A pass-through window with a counter on both sides is the signature feature of a bar shed. It is a wall opening, so it needs a properly sized header and a weather-tight way to close it.
- The patio. A 10x12 holds a small bar and a few stools. The patio outside holds the party. A level surface, some low lighting, and seating outside the door extend the room far more cheaply than a bigger building.
Two safety notes that are easy to miss. First, an entertaining shed is a place where people eat and drink, so the garden chemicals, fuel, and pool supplies that lived in it have to go somewhere else, for the reasons Section 12 laid out. Second, keep grills well away from the shed walls and eaves. A wooden shed is combustible siding with a roof on it, and a grill tucked beside the door for convenience is one of the more common ways an outbuilding fire starts.
Idea 7: The Music and Recording Room
Best for: musicians who need to practice without negotiating with the household. Size depends on the instrument; a drum kit wants at least a 10x12.
A detached shed is one of the best places on a residential property for loud music, for a simple reason: distance and an air gap do work that construction assemblies inside a house struggle to match. A drum kit in a basement is heard in every room upstairs. The same kit in a shed 40 feet away is a muffled thump in the kitchen. Our man cave ideas guide explains the difference between acoustic treatment and sound isolation in detail; the short version applies here too.
- Treatment is not isolation. Foam panels and rugs improve how the room sounds inside. They do almost nothing to stop sound from leaving. Isolation comes from mass, airtightness, and decoupling, built into the walls and roof.
- Seal the gaps first. Sound follows air. A shed door with daylight around it and a gable vent above it leak more sound than the walls ever will.
- Add mass. A second layer of drywall on the interior, with a damping compound between layers, is the most cost-effective upgrade for a shed that will host drums or amplifiers.
- Mind the neighbors. The house is protected by distance, but the shed may be closer to your neighbor’s bedroom window than to your own. Local noise ordinances apply to accessory buildings too, and a rehearsal schedule that respects evenings keeps the peace.
- Recording is a different goal. For recording rather than rehearsal, the priority is keeping sound out: HVAC noise, rain on the roof, traffic, and birds. A quiet mini-split, an insulated roof, and a solid door matter more than panels.
One caution about the instruments themselves: guitars, violins, pianos, and wooden instruments generally do not tolerate large temperature swings well, and brass and electronics dislike freezing and condensation. A music room that is heated and cooled only when you are in it can be a hard place to leave instruments between sessions. Keep the valuable ones in the house and bring them out to play, or condition the shed year-round.
Why a She Shed Should Not Become a Guest Bedroom
You will see guest houses and daybed sleepover sheds in plenty of she shed galleries, sometimes with a note to check local rules first. That understates the issue. A shed is permitted, if it was permitted at all, on the understanding that nobody lives in it. That is why it was allowed without a frost-depth foundation, without insulation to energy code, without an emergency escape opening, without a heating system, and often without any inspection.
Sleeping in a structure is precisely the use that the requirements for dwellings exist to protect: an escape opening someone can climb out of, smoke and carbon monoxide alarms, safe heat, and electrical work that has been inspected. Using a shed as a bedroom changes its use, and the requirements follow the use, not the name on the door. It can also create problems with your homeowners insurance and at resale, when a buyer’s inspector and lender ask what the building is.
There is a real difference between a nap on a daybed on a Sunday afternoon and a guest sleeping there for a week, but a daybed invites exactly the second use, and the risk is concentrated at night, when a guest is asleep in a building no one in the house can see. If you want a place for guests to stay in the backyard, what you want is a purpose-built accessory dwelling unit, designed and permitted as a dwelling from the start. Our guide to why a converted shed is not an in-law suite explains what that takes, and our ADU ideas and planning guide covers the detached options. Frequently, a small purpose-built cottage costs about the same as a compliant shed conversion and is a much better building.
She Shed Organization Ideas for Under 150 Square Feet
A she shed is organized under tighter rules than any room in the house. The floor is small, the walls are thin, the building is exposed to dust and pests, and the room usually has to serve at least one activity and hold its supplies at the same time. These are the ideas that hold up in practice, roughly in order of how much they change the room.
Give the walls the job the floor cannot do
- Commit one wall to storage. Floor-to-ceiling shelving or cabinetry along one long wall, 12 inches deep, costs about 1 square foot of floor per running foot of wall. Eight feet of shelving takes 8 square feet of floor and can hold what would otherwise cover 40.
- Use a French cleat system. A French cleat wall is a series of beveled strips fastened across the studs, onto which shelves, bins, tool holders, and hooks hang and can be rearranged in seconds. For a studio whose needs change with the project or the season, it beats fixed shelving.
- Pegboard and slatwall where you work. Above the potting bench or craft table, keep the tools you reach for every session visible and within arm’s length.
- Fasten into framing. Many prefab sheds use engineered siding as both sheathing and exterior finish, with no separate layer of plywood behind it. Loaded shelves need to be screwed into studs or into horizontal blocking added between them before the interior finish goes on. Plan the blocking while the walls are open; it costs almost nothing then.
Hide storage inside the furniture
- A window seat with a lift lid is seating, a reading spot, and a blanket chest in one footprint.
- Storage ottomans and benches double as extra seating when friends come out.
- A rolling cart holds the current project and rolls out of the way when the room becomes a lounge.
- A fold-down wall table gives a craft or potting surface that disappears when you need floor space for a mat.
Choose closed storage over open in an outbuilding
Open shelving looks lovely in photos and collects dust, pollen, and the occasional mouse in a real shed. Lidded, clear, labeled bins keep supplies clean, make contents visible, and stop pests from nesting in fabric or paper. Size the bins to the shelf depth before you buy them: 12-inch-deep shelves suit shoebox-sized bins, and standard storage totes need shelves 18 to 24 inches deep.
Move the dirty things outside
Garden tools are the classic she shed clutter, and they are also the items that bring the most dirt in with them. A wall-mounted rack under a deep eave, a small lean-to against the back wall, or a slim vertical tool shed beside the she shed keeps rakes, shovels, and hoses at hand without dragging soil across the floor. It also solves part of the displacement problem Section 25 covers.
Zone the room and keep a path
- Zone by activity. Work zone, sitting zone, storage wall. Define them with a rug and lighting rather than by adding furniture.
- Keep a 36-inch path from the door to the far end of the room, as Section 6 laid out. The moment the path fills with a box, the room starts to feel like storage again.
- Make a landing spot by the door. A boot tray, a hook for a coat or apron, and a small shelf for keys and a phone stop the entry from becoming the dumping ground.
Rotate instead of accumulating
The most effective organization idea for a small shed is not a product. It is keeping only the working set in the room: this season’s seeds and pots, this quarter’s fabric, the books you are reading now. Everything else lives somewhere with more space and steadier temperatures, and it rotates in when you need it. A she shed that tries to be both the studio and the archive ends up being neither.
What Should Not Live in a She Shed Year-Round
Even a well-built she shed is usually unoccupied most of the week, and unless it is heated and cooled around the clock, it spends that time drifting toward outdoor temperatures. In direct summer sun, a closed shed can climb well above the air temperature outside. In a northern winter, it spends nights below freezing. Plenty of things tolerate that. These generally do not:
- Latex and acrylic paints. Freezing ruins latex paint, and it cannot be fully restored afterward. Our guide to storing paint so it stays usable covers the temperature limits and how to store leftovers.
- Candles and wax. Summer heat in a closed shed can soften, warp, and fuse candles, and wax crafting supplies behave the same way.
- Adhesives, glues, resins, and caulk. Most carry storage temperature limits on the label, and both freezing and heat shorten their life.
- Aerosol cans. Labels warn against storage in high heat because pressure rises with temperature. A shed in the sun is exactly the environment the warning describes.
- Lithium-ion batteries. Tool batteries, e-bike batteries, and power banks degrade faster in heat, and manufacturers specify storage temperature ranges. Keep them within the manufacturer’s range, and charge them in the house rather than in a hot shed.
- Electronics. Laptops, printers, speakers, and sewing machines with electronic controls do not enjoy freezing nights or baking afternoons. Bringing a cold device into a warm room also invites condensation inside it.
- Books, photographs, and documents. As Section 15 noted, the Library of Congress advises against keeping objects of value in poorly insulated spaces like attics, basements, and garages, and a shed is less insulated than any of them.
- Fabric, yarn, and batting. Outbuildings attract mice and moths, and textiles are nesting material. Sealed bins help. A long-term stash in a shed is still a risk.
- Musical instruments. Wooden instruments in particular respond badly to large temperature swings.
- Food, snacks, and pet food. Anything edible left in a shed is an invitation to rodents. Keep it sealed, and keep the quantity small.
- Fuel and propane. Gasoline cans and propane cylinders do not belong inside a room people occupy, and never near a heater. They belong in a ventilated outdoor location away from ignition sources, as our guide to storing gasoline safely explains.
The pattern across that list is the same: a she shed is a good place to use things and a poor place to keep them long term. The practical fix is a working quantity in the shed and the reserve somewhere with stable temperatures. Where that somewhere is, for the items that do not fit back in the house, is the subject of Section 25.
Exterior Design, Color, Landscaping, and Placement
The exterior is where most she shed guides spend their time, and it matters: it is what you see from the kitchen window every day. The decisions below are the ones that affect how the building performs, not just how it looks.
Color and finish
- Color affects temperature. Dark siding and dark roofing absorb more solar heat. In the South and the Southwest, a light roof and light or mid-tone walls keep the interior noticeably cooler, and a bold color is better used on the door, the trim, and the shutters.
- Use exterior-rated products. Exterior paint and stain over a proper primer, applied to clean, dry wood. Interior finishes, including ordinary interior varnish, break down in sun and weather. If you want a clear finish on a wooden door, use a product formulated for exterior exposure.
- Test old paint before you sand it. As Section 5 explained, an older shed may carry lead-based paint, and sanding is how it becomes a hazard.
Landscaping that helps the building
- Window boxes are the signature she shed detail. Use liners with drainage, and mount the boxes on brackets that hold them slightly off the siding so watering does not keep the wall wet.
- A path of stepping stones, pavers, or gravel keeps mud off the floor. Low-voltage path lighting makes the walk back to the house in the dark pleasant and safe, and it can often share the trench with the shed’s power in its own conduit.
- Privacy plantings screen the shed from neighbors and the street. Keep shrubs a couple of feet off the walls so air can move and you can reach the siding for maintenance.
- Keep beds and mulch away from the base of a wood shed, where they hold water against the lowest boards.
Wildfire-prone areas
In the wildfire-exposed parts of Colorado, Texas, and elsewhere, a wooden outbuilding is part of the fire picture for the house. The National Fire Protection Association’s Firewise USA guidance treats the area within 5 feet of the home as a noncombustible zone and recommends removing vegetation next to storage sheds and other outbuildings in the zone between 5 and 30 feet from the house. Building guidance based on that work recommends locating outbuildings at least 30 feet from the home or treating them as part of the home for fire protection. That can pull against zoning setbacks, which tend to push sheds toward the rear lot line, so work out both before choosing a spot.
Placement
- Distance to the house decides the length, and cost, of the power trench.
- Sun decides the light and the heat: morning sun is welcome, afternoon sun on the west wall is the summer problem.
- Drainage matters more than the view. Put the shed on the high ground, not in the low spot where water collects after a storm.
- Trees give shade and drop limbs, leaves, and roots. Keep large overhanging branches off the roof.
- The view from inside matters as much as the view of the shed. Stand where the chair will be and look out before you commit.
And then the finishing touches the galleries love: a painted door, a sign above it, a wreath, a doormat, a bench outside. They are cheap, reversible, and entirely yours. Put the personality there, and in the furniture, rather than in anything permanent, for reasons Section 23 explains.
Insurance, Property Taxes, and What a She Shed Does at Resale
This section is deliberately general. Insurance policies, property tax assessment, and appraisal practice all vary by company, state, and county, and the specifics change. Treat what follows as the questions to ask, not as the answers you will get.
Insurance
A standard homeowners policy typically covers detached structures under a separate part of the policy, commonly called other structures coverage. According to the International Risk Management Institute, the standard limit for other structures is 10 percent of the dwelling limit, and that 10 percent applies to all the other structures on the property combined, not to each one separately. A detached garage, a fence, a pergola, and your she shed may all be sharing it. The limit can generally be increased by endorsement.
Three things are worth raising with your agent before you finish the building:
- The rebuild cost has changed. An insulated, wired, finished, and conditioned she shed costs considerably more to rebuild than the storage shed it used to be. If the other-structures limit was sized for an empty garden shed, it may no longer be enough.
- The contents are covered differently. What is inside the shed generally falls under your personal property coverage rather than the other-structures coverage, subject to that coverage’s terms and limits.
- Business use changes the picture. Standard homeowners policy forms commonly exclude or restrict coverage for other structures used for business, and cap business property at a low sublimit. If the she shed is a business office or studio, ask about a home business endorsement or a separate policy. Also tell the agent about any wood stove or fuel-burning heater.
Property taxes
Adding a structure can increase your property’s assessed value, and some assessors treat a shed on a permanent foundation with utilities differently from a portable one on skids. How this works depends entirely on your state and county, and we are not able to tell you what the effect would be for your property. Your county assessor’s office can explain how your jurisdiction handles it, and a tax professional licensed in your state can advise on your situation.
Resale
A finished she shed does not add to your home’s listed square footage. The Fannie Mae Selling Guide, which governs appraisals for a large share of U.S. mortgages, requires appraisers to follow the ANSI standard for measuring living area, and directs that detached structures with finished areas be reported on a separate line in the appraisal’s comparison grid rather than in the home’s gross living area. The shed can still add value as a site improvement, and a well-built, permitted, powered outbuilding is a genuine selling point in many markets. It just does not count as another 100 square feet of house.
Two practical consequences. First, permits matter at sale: unpermitted electrical work in an outbuilding is the kind of thing a buyer’s inspector flags and a lender asks about. Second, the most personal parts of a she shed, such as the color scheme, the sign, and the themed decor, are exactly what the next owner may want to change. Keep the permanent layer, meaning the structure, insulation, wiring, and flooring, well built and neutral, and put the personality in the layer you can take with you.
What a She Shed Costs, and Why Published Numbers Disagree
Search for she shed costs and you will find ranges that barely overlap. HomeAdvisor puts prefab sheds at roughly $10 to $40 per square foot and custom builds at roughly $30 to $160. Angi cites $15 to $150 per square foot for storage sheds including installation. A roundup of cost sites by one real estate publisher lists another major cost-data site at $50 to $200 per square foot. One home-improvement publication puts a she shed specifically at $5,000 to $15,000. These are not rounding differences, and picking one of them tells you very little about your project.
The numbers disagree because they describe different things:
- Shell versus room. Most per-square-foot figures describe a shed as a storage building. A she shed adds insulation, interior finish, electrical, heating and cooling, flooring, and upgraded windows and doors, none of which a storage-shed average captures.
- Prefab versus custom. A delivered prefab shell and a site-built custom structure of the same size can differ several-fold.
- What is excluded. Site preparation, the gravel pad or foundation, delivery, permits, the power trench, and the electrician are frequently quoted separately from the building.
- Distance. The length of the trench from the house to the shed can move the electrical cost more than anything inside the shed.
- Region. Labor costs vary enormously, and a national average describes no particular place.
- Furniture. Almost no published figure includes the furniture, lighting, rugs, and decor, which for a small room can be a meaningful share of the total.
What you can plan with is the order of the cost layers. The shell and the pad are the predictable part. The trench, the electrical work, and heating and cooling are the parts that surprise people, so price those first, before you choose finishes. The most effective ways to control cost are the ones decided early: keep the building within the permit exemption if that is realistic for your use, place it reasonably close to the house, choose a prefab model with the height, windows, and door you want rather than modifying one later, and get at least three itemized quotes on the same written scope. Hold some of the budget in reserve, because an old shed will reveal something when you open its walls.
The Displacement Problem: Where the Mower, the Gas Can, and the Garden Chemicals Go
Here is the part of a she shed conversion that no gallery shows. The shed was storage. For most households it is the place where everything that does not belong in the house or the garage ends up: the push mower, the string trimmer, the leaf blower, the gas can, hoses, rakes, shovels, the wheelbarrow, bags of potting soil and fertilizer, weed killer, pool chemicals, bikes, patio cushions, the kids’ outdoor toys, a few cans of house paint, and a stack of lumber that might be useful someday. On conversion day, all of it comes out. None of it goes back.
This is a permanent displacement, not a temporary one. When a kitchen remodel finishes, the dishes go back in the cabinets. When a storage shed becomes a studio, the space that held the mower is now under a reading chair, and the mower still exists. Households that do not plan for this end up with the mower under a tarp beside the new studio, the garage slowly filling with garden equipment, and the she shed quietly becoming storage again within a year.
Sort the contents into three streams
Stream one: stays at home, in a spot built for it. Some of what the shed held has to remain on the property, and some of it should not go into a room where you sit or into a storage unit.
- Gasoline and propane. Keep them outdoors in a ventilated location away from ignition sources, never inside the she shed, and never near a heater. Enclosed self-storage units are not an option for fuel; our guide to storing gasoline safely covers containers, locations, and stabilizer.
- Pesticides, herbicides, fertilizers, and pool chemicals. The EPA recommends a locked cabinet in a well-ventilated utility area, out of reach of children and pets and away from food. That points to a lockable exterior cabinet or a small separate utility structure, not a corner of the studio. Self-storage facilities generally prohibit hazardous materials of this kind as well, so ask before you pack anything chemical.
- In-season tools you use every week. The mower in mowing season, the hose, the rake, the pruners. These need to be steps away, which argues for an exterior wall rack under an eave, a lean-to on the back of the she shed, or a slim vertical tool shed nearby. Check Section 4 first: some towns require approval for a second accessory structure.
Stream two: seasonal and occasional, and it can leave the property. The snow blower in summer and the mower in winter, once drained. Patio furniture and cushions in the off-season. Holiday decorations. Bikes and camping gear used a few times a year. The kids’ pool toys and sleds. These are the items that fill a garage when a shed disappears, and they are the items for which off-site storage genuinely makes sense.
Stream three: discard, donate, or dispose. Dried paint, fuel and chemicals of unknown age (county household hazardous waste programs take these), broken tools, cracked pots, and the lumber that has been “useful someday” for a decade. The conversion is the one moment you will handle every item in the shed. Deal with this stream then.
The overflow that was waiting for the shed
There is a second displacement that catches people. Many she sheds are built because the house ran out of room: the craft supplies, the fabric stash, the books, the photo boxes. Converting the shed does not only displace the garden equipment. It also removes the place the house’s overflow was going to go, at the same moment Section 21 is telling you that much of that overflow should not live in the shed year-round.
Where 10 Federal Storage Fits
For stream two, and for the temperature-sensitive overflow from the house, a storage unit does honest work. 10 Federal Storage operates facilities across 14 states, and the setup suits a project like this:
- Rent online in a few minutes, with no office visit, the week before you empty the shed.
- Month-to-month terms, so a unit that holds the snow blower and patio set through a season does not commit you to a year.
- 24/7 access, for the Saturday in April when you want the patio furniture back.
- Outdoor power equipment is welcome once drained. Mowers, trimmers, blowers, and pressure washers can go into a unit with the fuel removed. The fuel itself cannot.
Sizing a Storage Unit for What Your Shed Used to Hold
Sizing storage for a shed clear-out is different from sizing it for a move, because you are storing equipment and seasonal gear rather than a household. The fastest reliable method is to measure the footprint of the large items, add the bins, and then add roughly a third for an aisle if you will need to reach things mid-season.
A worked example
A typical 10x12 garden shed in a northern market, being converted to a studio. Stream-two contents only, with rough footprints; measure your own items, because models vary:
- Push mower, drained, handle folded: about 7 square feet.
- Two-stage snow blower: about 11 square feet.
- Patio dining set, chairs stacked, table on end: about 12 square feet.
- Bagged patio cushions, stacked: about 6 square feet.
- Two bicycles, staggered: about 10 square feet.
- Twelve medium storage totes, stacked four high: about 9 square feet.
- Wagon and outdoor toys: about 6 square feet.
That totals about 61 square feet of footprint. Add a third for an aisle and you are near 81 square feet, which fits comfortably in a 10x10 with room to reach everything. Remove the snow blower, as a household in Georgia or Texas would, and the total drops near 67 square feet with the aisle, which is a tight 5x10 or a comfortable 10x10. Skip the aisle, pack it solid, and plan to visit only twice a year, and a 5x10 can hold it.
Quick guidance by what is coming out
- A 5x5 unit holds holiday decorations, bagged cushions, a few totes, and a drained trimmer and blower. Good when the shed was mostly seasonal overflow. Browse small units.
- A 5x10 or 10x10 unit covers the contents of a typical 8x10 or 10x12 garden shed plus patio furniture: a push mower, bikes, a small patio set, and bins. The 10x10 is the common answer when you want an aisle. Browse medium units.
- A 10x15 or 10x20 drive-up unit is the range to look at if a riding mower or lawn tractor is part of the picture, alongside everything else. Confirm the door width against the mower deck before you drive over. Browse large units.
If you would rather work from a list than from estimates, the storage size calculator sizes a unit from an item inventory, and the storage unit size guide shows what fits in each footprint.
Which kind of unit
Be honest about what you are storing. Most of what comes out of a garden shed was already living in an unconditioned building: mowers, tools, bikes, patio furniture, and plastic bins. A standard drive-up unit suits it and costs less. The items that benefit from a climate-controlled unit are the ones Section 21 flagged, usually coming from the house rather than the shed: craft supplies, fabric and yarn, books, photographs, documents, electronics, and instruments. Our climate-controlled units are temperature-regulated, which protects those belongings from the heat and freezing swings that make a shed a poor place to keep them.
One more thing that lowers the bill: rotate. Keep the mower at home in mowing season and send it to the unit in winter, when the snow blower comes home, or the reverse in the South, where the off-season is the patio furniture. A unit that holds only what is out of season can often be a size smaller than one that holds everything at once.
When Renting a Storage Unit Is the Wrong Call
We rent storage for a living, and we would still rather tell you when not to. Here are seven situations where a unit is the wrong answer for a she shed project.
You are keeping the old shed. If the she shed is a new building and the old storage shed stays put, nothing is being displaced. The mower keeps its home, and the project has no storage problem to solve. Skip the unit.
The items are ones you use every week. The mower in July, the hose, the rake, the pruners, and the watering cans need to be at home, not across town. A storage unit makes sense for things you reach for a few times a season. For weekly tools, the answer is an exterior wall rack, a lean-to, or a small tool shed on your own property.
The items are hazardous. Gasoline, propane cylinders, pesticides, herbicides, and pool chemicals are exactly the things that do not belong in a room where you sit, and flammable liquids like gasoline cannot be stored in our units. Self-storage facilities generally prohibit hazardous materials of this kind, and even where a product is not explicitly banned, a closed storage unit is not the ventilated, locked, cool location the EPA and product labels call for. These need a proper outdoor cabinet at home or safe disposal. A unit is simply the wrong tool.
The contents are not worth the rent. Add up what a unit would cost over the time you would keep it and compare it with what is actually in the boxes. If the answer is a year of rent to keep rusted tools, cracked pots, dried paint, and a broken wheelbarrow, the conversion has just handed you a reason to haul them away. Disposal and donation are permanently cheaper than storage.
A small second structure costs less and your town allows it. A slim vertical tool shed, a lean-to, or a lockable outdoor storage box can often cost less than a year of rent on a small unit and keeps the equipment steps from where you use it. Check Section 4 first, because some towns require approval for a second accessory structure. If yours allows it, this is frequently the better answer for garden equipment.
You have space that genuinely works. An empty garage bay, a basement corner for the patio cushions, or a relative’s unused barn is cheaper than a unit. The test is whether the space is really available for as long as you need it and whether it protects what you put there. If it does, use it. The unit is for people who have honestly run out of room at home, and plenty of people have not.
The project is not scheduled yet. Renting a unit while you are still collecting quotes, waiting on the zoning office, or deciding whether to build at all means paying for storage during a planning phase that can run longer than expected. Rent when you know the week you will empty the shed. Because rental happens online in a few minutes and terms are month-to-month, there is no advantage to renting early.
One related judgment call. A unit kept after the project ends is either solving the permanent displacement Section 25 describes, which is a legitimate long-term use, or it is postponing a decision. Both happen. If a year goes by and you have not opened the door, that is information worth acting on rather than a bill worth continuing to pay.
Frequently Asked Questions About She Sheds
It depends on the shed’s size, what you put in it, and your local code. Many jurisdictions exempt small one-story sheds from a building permit, but the exemption does not cover electrical, mechanical, or plumbing work, so running power to a shed almost always needs an electrical permit. Zoning setbacks and HOA rules apply either way. Some building departments also question whether a heated, furnished studio still qualifies for an exemption written for storage sheds. Call your local building department with your dimensions and planned use before you buy.
There is no single national number. The current model International Residential Code exempts one-story detached accessory structures up to 200 square feet, a limit raised from 120 square feet beginning with the 2009 edition. The International Building Code and some state and local codes still use 120 square feet, and many local jurisdictions amend the threshold lower. The number that applies to you is whatever your city or county has adopted, which your building department can tell you in one phone call.
For a short, temporary task, perhaps. As a permanent power supply, no. The electrical code does not permit flexible cords to substitute for the fixed wiring of a structure, extension cords are rated for temporary use, and a cord across a yard is exposed to mowers, foot traffic, and weather. Fire safety guidance also says space heaters should plug directly into a wall outlet, never into an extension cord. A permanent circuit installed by a licensed electrician, with a permit, is the safe way to power a shed.
Under Table 300.5 of the National Electrical Code, commonly cited minimum cover depths in a residential yard are 24 inches for direct-burial cable, 18 inches for listed PVC conduit, 6 inches for rigid metal conduit, and 12 inches for a residential 120-volt branch circuit rated 20 amps or less with GFCI protection. Depth is measured from the top of the cable or conduit to finished grade. Local amendments and site conditions can change the requirement, so confirm with your electrician and building department, and call 811 before anyone digs.
For most she sheds, a ductless mini-split heat pump installed in an insulated building is the safest and most efficient option, because it has no flame or exposed heating element and it also cools in summer. If you use an electric space heater, choose one with tip-over and overheat shutoff, plug it directly into a wall outlet on a circuit with enough capacity, keep anything that can burn at least 3 feet away, and turn it off when you leave. Avoid unvented propane or kerosene heaters in a closed shed.
Not safely or legally as a regular bedroom in most cases. A shed is permitted as an accessory structure on the basis that no one lives in it, so it typically lacks the emergency escape opening, alarms, heating, insulation, and inspected electrical work that sleeping spaces require. Using it as a bedroom changes its use and can raise insurance and resale problems. If you want a backyard guest space, a purpose-built accessory dwelling unit designed and permitted for sleeping is the right path.
Published figures vary widely because they measure different things. Cost sites cite ranges from roughly $10 to $40 per square foot for prefab storage sheds to $30 to $160 or more for custom builds, and one home-improvement publication puts a finished she shed at about $5,000 to $15,000. A she shed adds insulation, interior finish, electrical work, heating and cooling, and furniture to the cost of the building itself. The power trench and climate equipment usually cause the biggest surprises, so price those first and get itemized quotes.
It depends on the activity, and finished walls cost more floor than people expect. A 10x12 shed has roughly 102 square feet of usable floor once the walls are insulated and finished, which comfortably supports one primary activity and one secondary one, such as an office with a reading chair. An 8x10 suits a single use like a reading room. A 12x16 supports two primary activities or a large craft table. Check your local permit threshold before choosing the larger sizes.
It can add some value as a site improvement, particularly if it is well built, permitted, and powered, but it does not add to the home’s listed square footage. Under Fannie Mae appraisal guidelines, detached structures with finished areas are reported separately from the home’s gross living area. How much value a buyer places on a finished outbuilding varies by market. Keeping the permanent features neutral and the personal decor removable tends to appeal to more buyers.
A standard homeowners policy typically covers detached structures under other structures coverage, commonly set at 10 percent of the dwelling limit and shared among all detached structures on the property. The contents are generally covered under personal property coverage instead. Policies commonly restrict coverage for structures used for business, so a she shed office may need an endorsement or separate policy. Coverage varies by insurer and policy, so ask your agent, especially after adding wiring, finishes, or a heat source.
Possibly, if it qualifies under IRS rules, which are specific. IRS Publication 587 says expenses for a separate free-standing structure may be deductible if the structure is used exclusively and regularly for your business, and that it does not have to be your principal place of business. A shed also used for hobbies or family time generally fails the exclusive-use test, and employees face different rules. This is general information, not tax advice; review Publication 587 with a tax professional for your situation.
Seal gaps around the door, sill, and utility entries, add a door sweep, close insulated floor cavities with hardware cloth, and keep food, pet food, and birdseed in sealed containers or out of the shed entirely. Store fabric, paper, and batting in lidded bins, since rodents use them for nesting. If you find droppings, follow CDC guidance: air the shed out for 30 minutes, wear gloves, spray droppings until very wet with a bleach solution or EPA-registered disinfectant, let it soak, and wipe up with paper towels. Never sweep or vacuum droppings.
Usually condensation. Warm indoor air carries water vapor, and when it meets a cold surface, such as the underside of an uninsulated metal roof on a cool night, the vapor turns to water and drips. Insulating the roof so its underside stays warmer, sealing gaps so indoor air cannot reach cold surfaces inside the roof, and ventilating the building are the standard fixes. The right vapor retarder approach depends on your climate, so ask a local insulation professional.
Anything that does not tolerate heat, freezing, or pests, unless the shed is heated and cooled year-round. That list commonly includes latex and acrylic paints, candles, adhesives and resins, aerosol cans, lithium-ion batteries, electronics, books, photographs, documents, fabric and yarn, musical instruments, and food. Gasoline and propane should never be stored inside a room people occupy. A she shed works best holding a working quantity of supplies, with the reserve kept somewhere with stable temperatures.
Use the walls, because the floor is the scarce resource. Dedicate one wall to floor-to-ceiling shelving or a French cleat system, fastened into studs or added blocking. Choose lidded, labeled bins sized to your shelf depth instead of open shelving, use furniture with hidden storage such as a window seat or storage ottoman, move garden tools to an exterior rack, keep a clear 36-inch path from the door, and keep only the current season’s or current project’s supplies in the shed.
In mowing season, keep it at home: in the garage, a small separate tool shed, or a lean-to on the back of the she shed, if your zoning allows a second structure. In the off-season, a drained mower can go into a self-storage unit along with other seasonal equipment, but the gasoline cannot; fuel must be stored outdoors in a ventilated location away from ignition sources. A riding mower generally needs a drive-up unit in the 10x15 to 10x20 range, depending on what else is going with it.
Building a Shed You Will Actually Use
The she sheds that get used every week have one thing in common, and it is not the paint color. The person who built them worked from the building outward: they asked what the shed was allowed to become before deciding what it would become, and they solved the unglamorous problems first.
That means calling the zoning office before buying anything. Asking the building department whether a studio still counts as a shed. Measuring the finished floor rather than the listed one. Cleaning out the old shed the way the CDC recommends. Deciding the electrical load before the trench is dug, and digging it deep enough for the room you may want in five years. Heating the room with something safer than a heater on an extension cord. Keeping the working set of supplies in the shed and the irreplaceable things in the house. And deciding, before conversion day, where the mower, the gas can, and the garden chemicals will live.
Every one of those steps is inexpensive, and together they cost far less than one round of rework. They are the difference between a backyard room you walk out to every morning and a pretty building that quietly fills back up with lawn equipment by next summer.
If your project starts with emptying a shed that has been absorbing a household’s overflow for a decade, the seasonal part of that problem is easy to solve.
Find a 10 Federal Storage location and rent a unit online in a few minutes. Month-to-month terms, 24/7 access, and no office visit, so the unit lasts exactly as long as you need it and not a month longer.
About the Author
10 Federal Storage
Our team at 10 Federal Storage has been in the self storage industry for decades. With knowledge gained from multiple universities and in the field, we are well-prepared and excited to assist with your storage needs. When you rent a unit with us, you can feel confident that our seasoned customer service team’s help will make your transition as seamless as possible. Customer satisfaction is our number one priority, and we strive to make your experience exceptional with our automated leasing options, diverse unit sizes, and a strong commitment to sustainability.